Calendar Sharing
Sharing your calendar is a great way to keep your team aligned and make scheduling easier. Whether you want to give a colleague "Read only" access to see when you are busy, or grant an assistant full rights to manage your appointments, you can adjust these settings in just a few clicks.
How to Share Your Calendar
Follow these steps to give other users or groups access to your schedule:
-
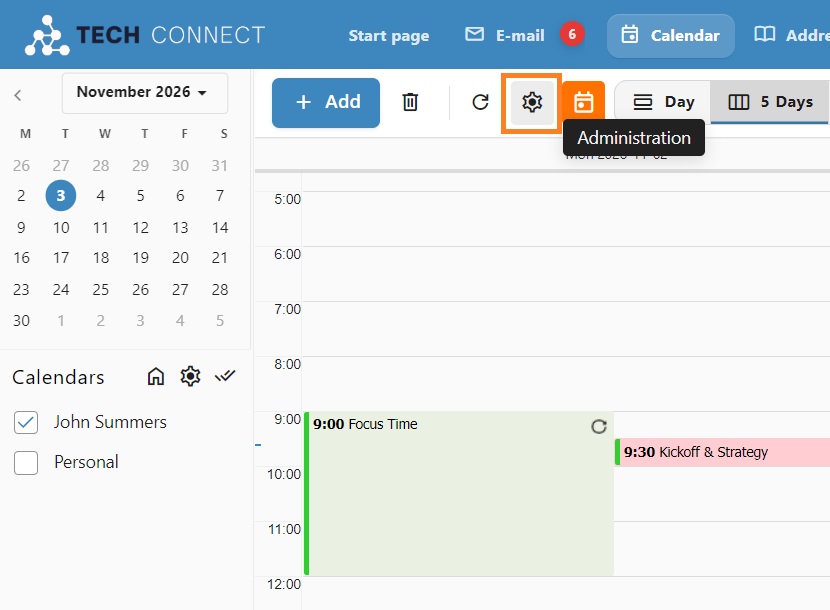
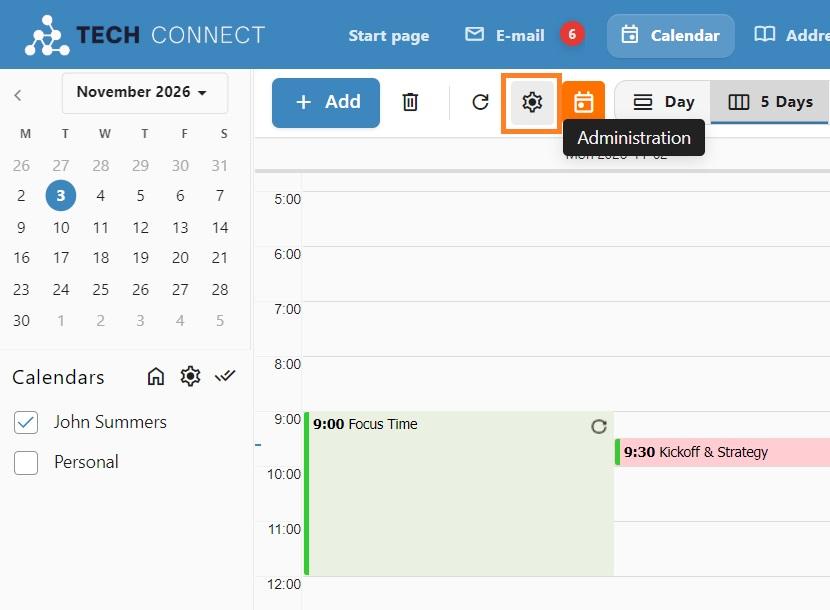
Open Calendar Settings: Navigate to the Calendar page and click the cog wheel icon in the top bar.
-
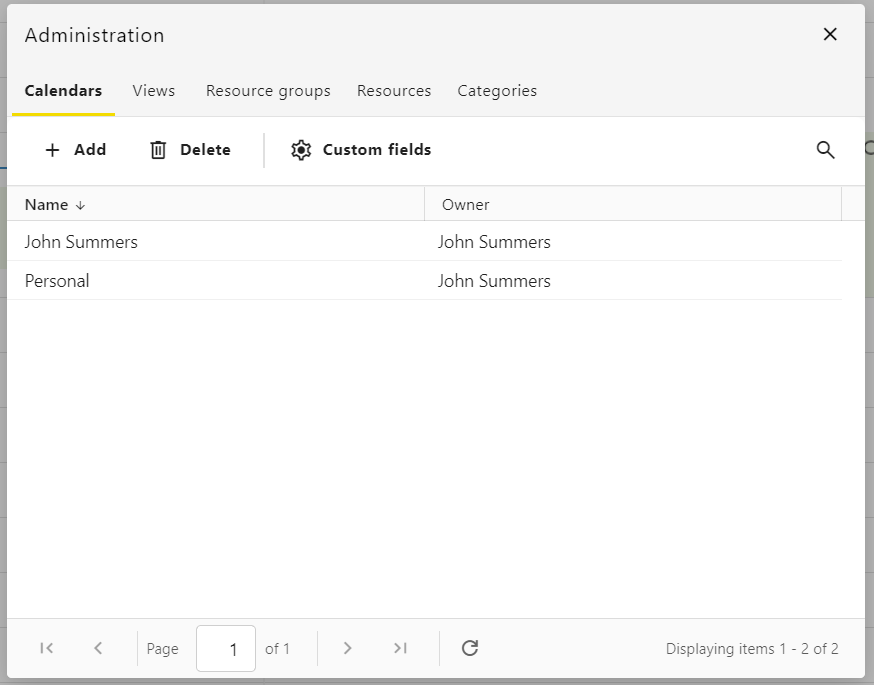
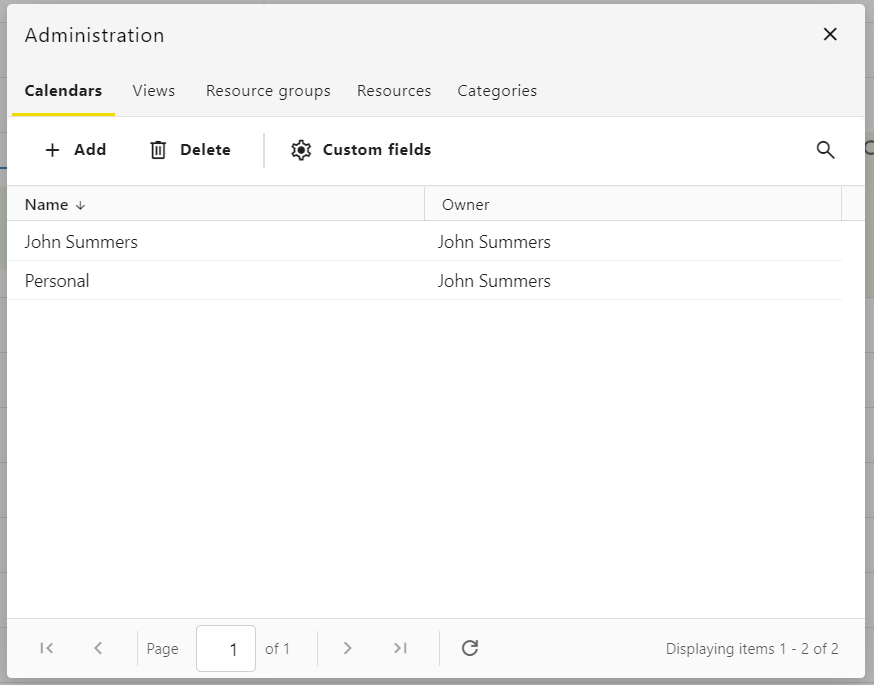
Select a Calendar: In the Calendars Administration pop-up, double click on the specific calendar you want to share.
-
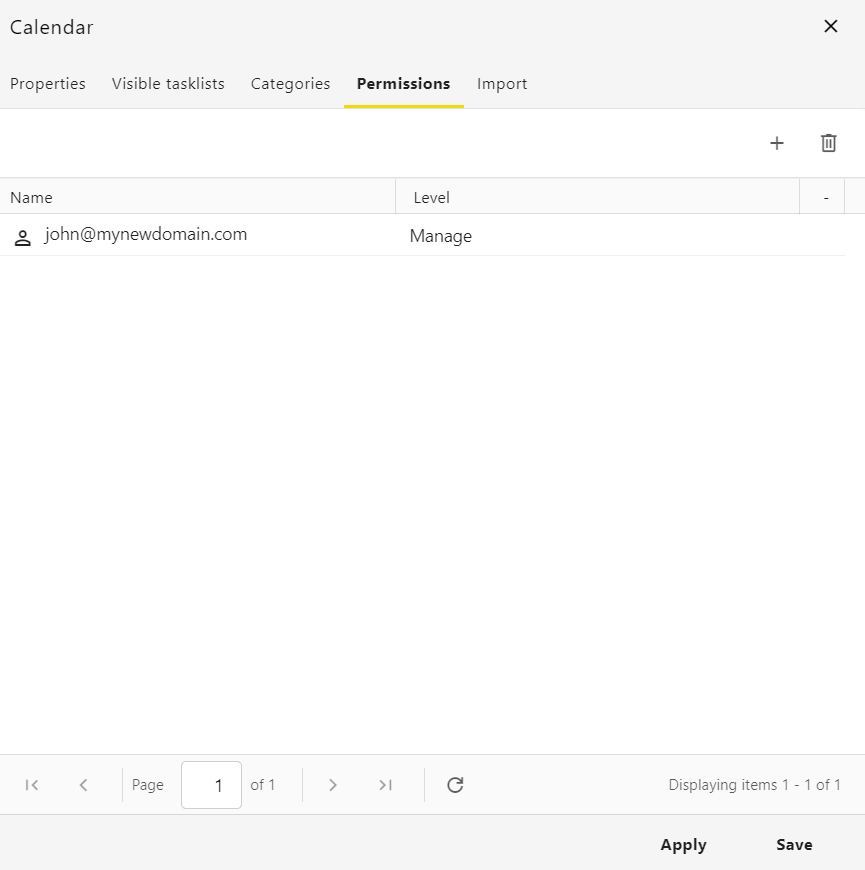
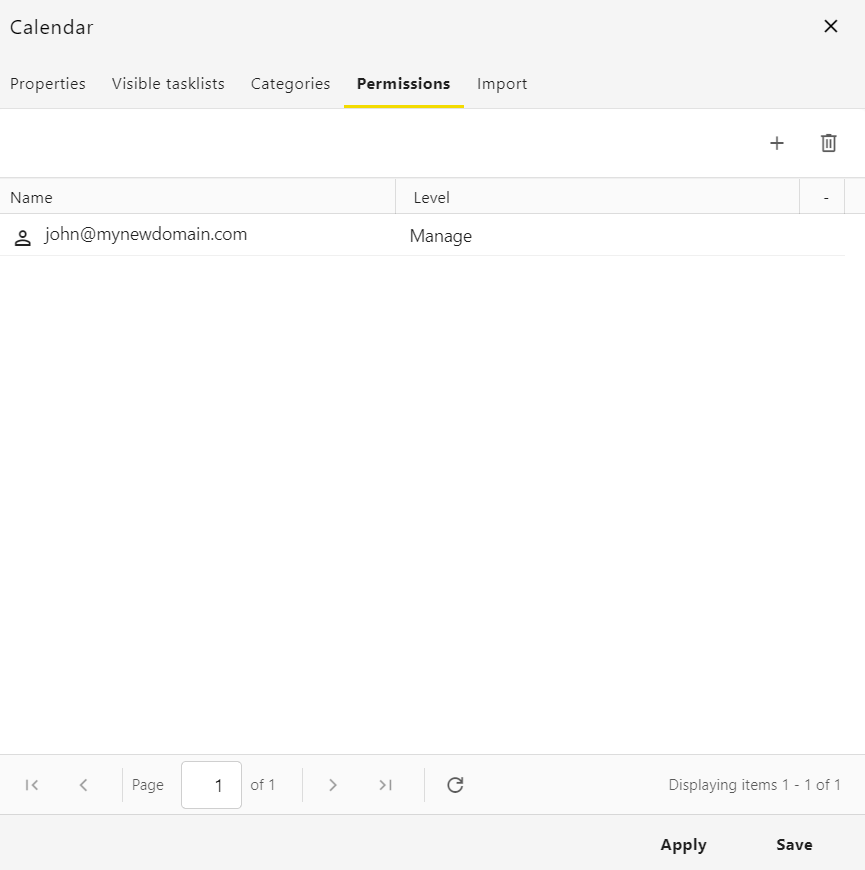
Navigate to Permissions: Click on the Permissions tab.
-
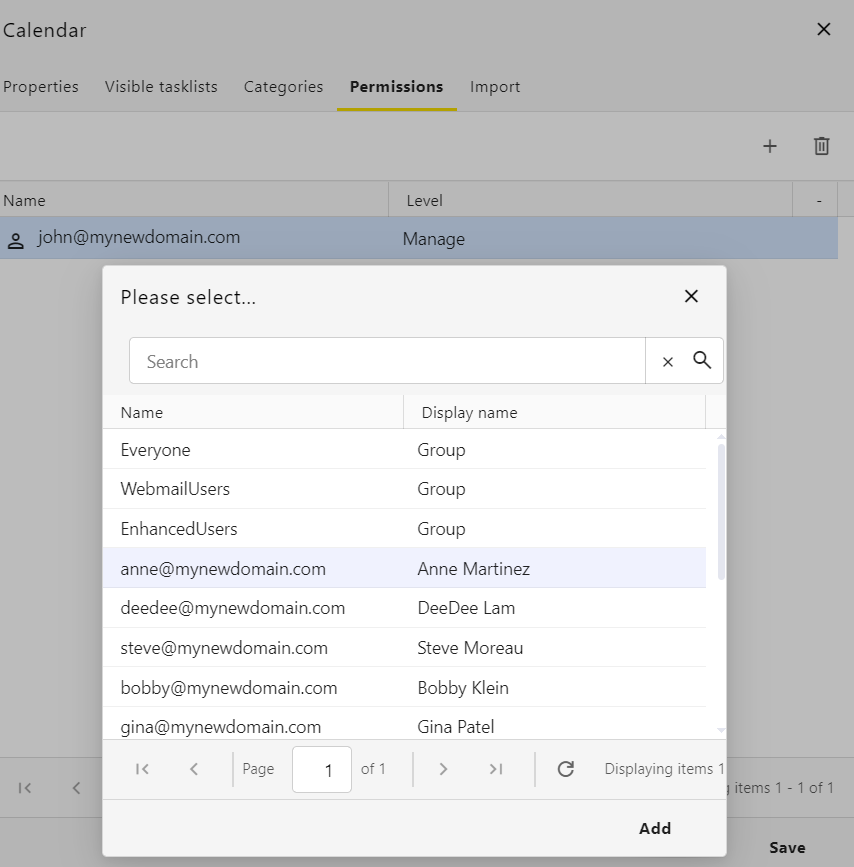
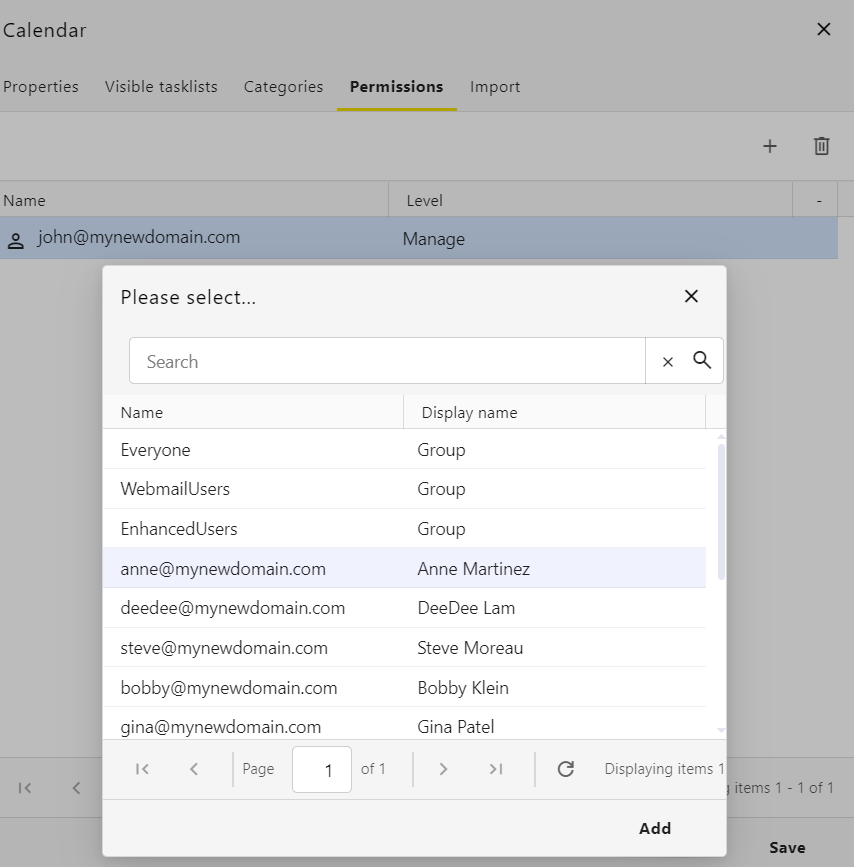
Add a User or Group: Click the plus icon to show the list of people or groups in your domain. Select the users or groups you want to be added and click the Add button.
-
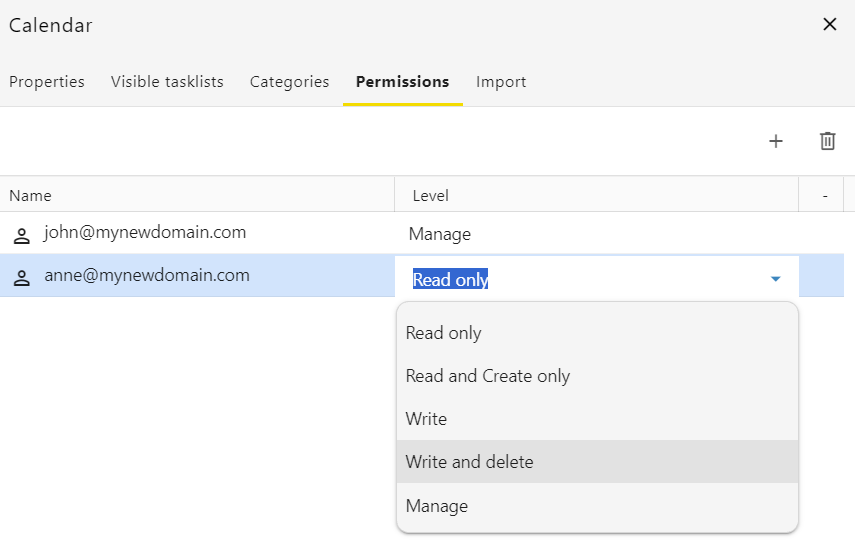
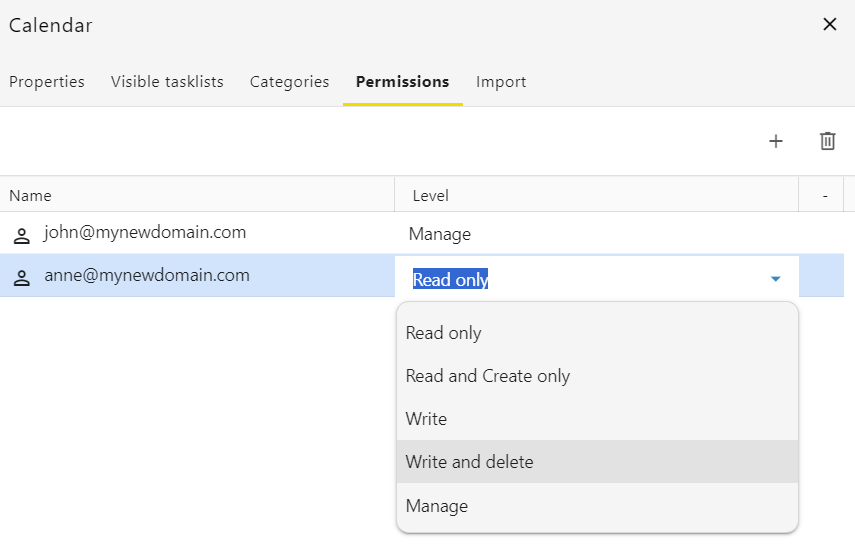
Adjust Access Levels: After selecting a user, their default permission will be "Read only". Double click the permission name ("Read only") to open a drop-down menu and choose the level of access.
-
Save Your Changes: Click Save at the bottom of the window to apply your new settings.