EasyMeet - Online Appointment Scheduling
EasyMeet is an integrated scheduling tool that eliminates the back and forth of finding the perfect meeting time. By sharing a public link, you allow clients and partners to view your availability and book appointments directly into your calendar.
You can set your working hours, create event types, share a public booking link, and view bookings from the Webmail.
Note: This feature is available exclusively for Enhanced accounts.
Before you start
Log in to the Webmail before following these steps. If you need help, see How to log in to the Webmail.
Getting Started
To begin using EasyMeet, log in to your Webmail and look for the EasyMeet tab in the top navigation bar. If you are using it for the first time, you will see an enablement screen. Click Enable EasyMeet to activate the feature for your mailbox.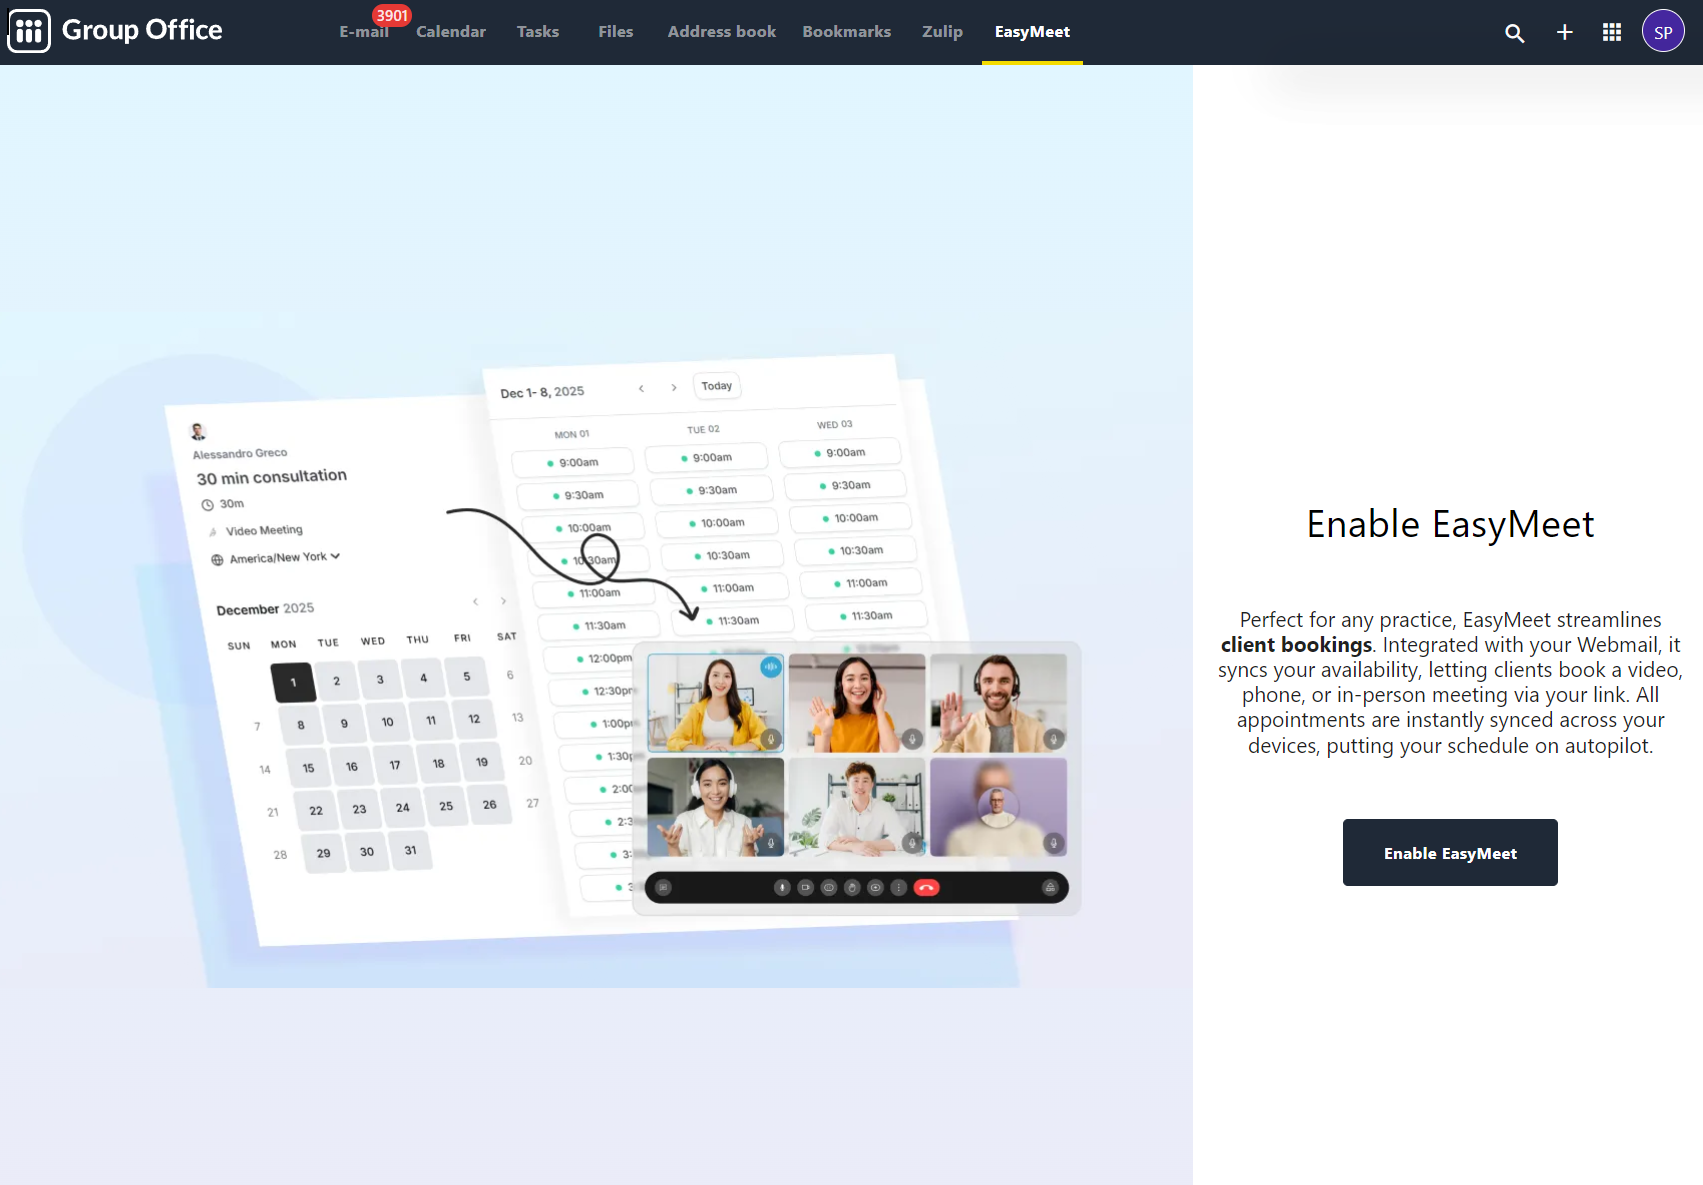
Configuring Your Availability
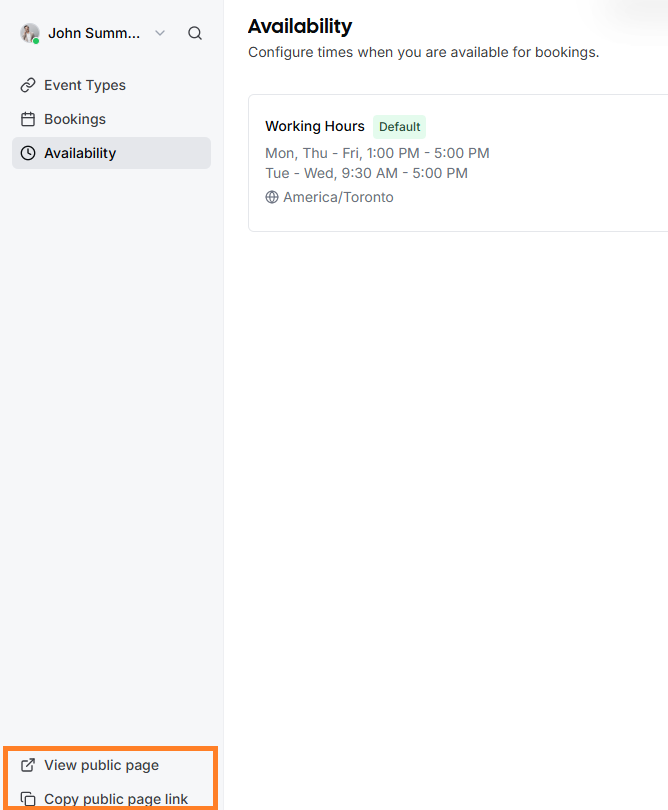
Your availability determines when guests can book time with you. You can manage this under the Availability section in the left sidebar.
Setting Working Hours
-
Select the Availability tab.
-
Toggle the days of the week you are available.
-
Define your time slots for each day (e.g., 9:30 AM to 5:00 PM).
-
Select your correct Timezone from the dropdown menu to ensure appointments are synced accurately for both you and your guests.
-
Click Save to apply your schedule.
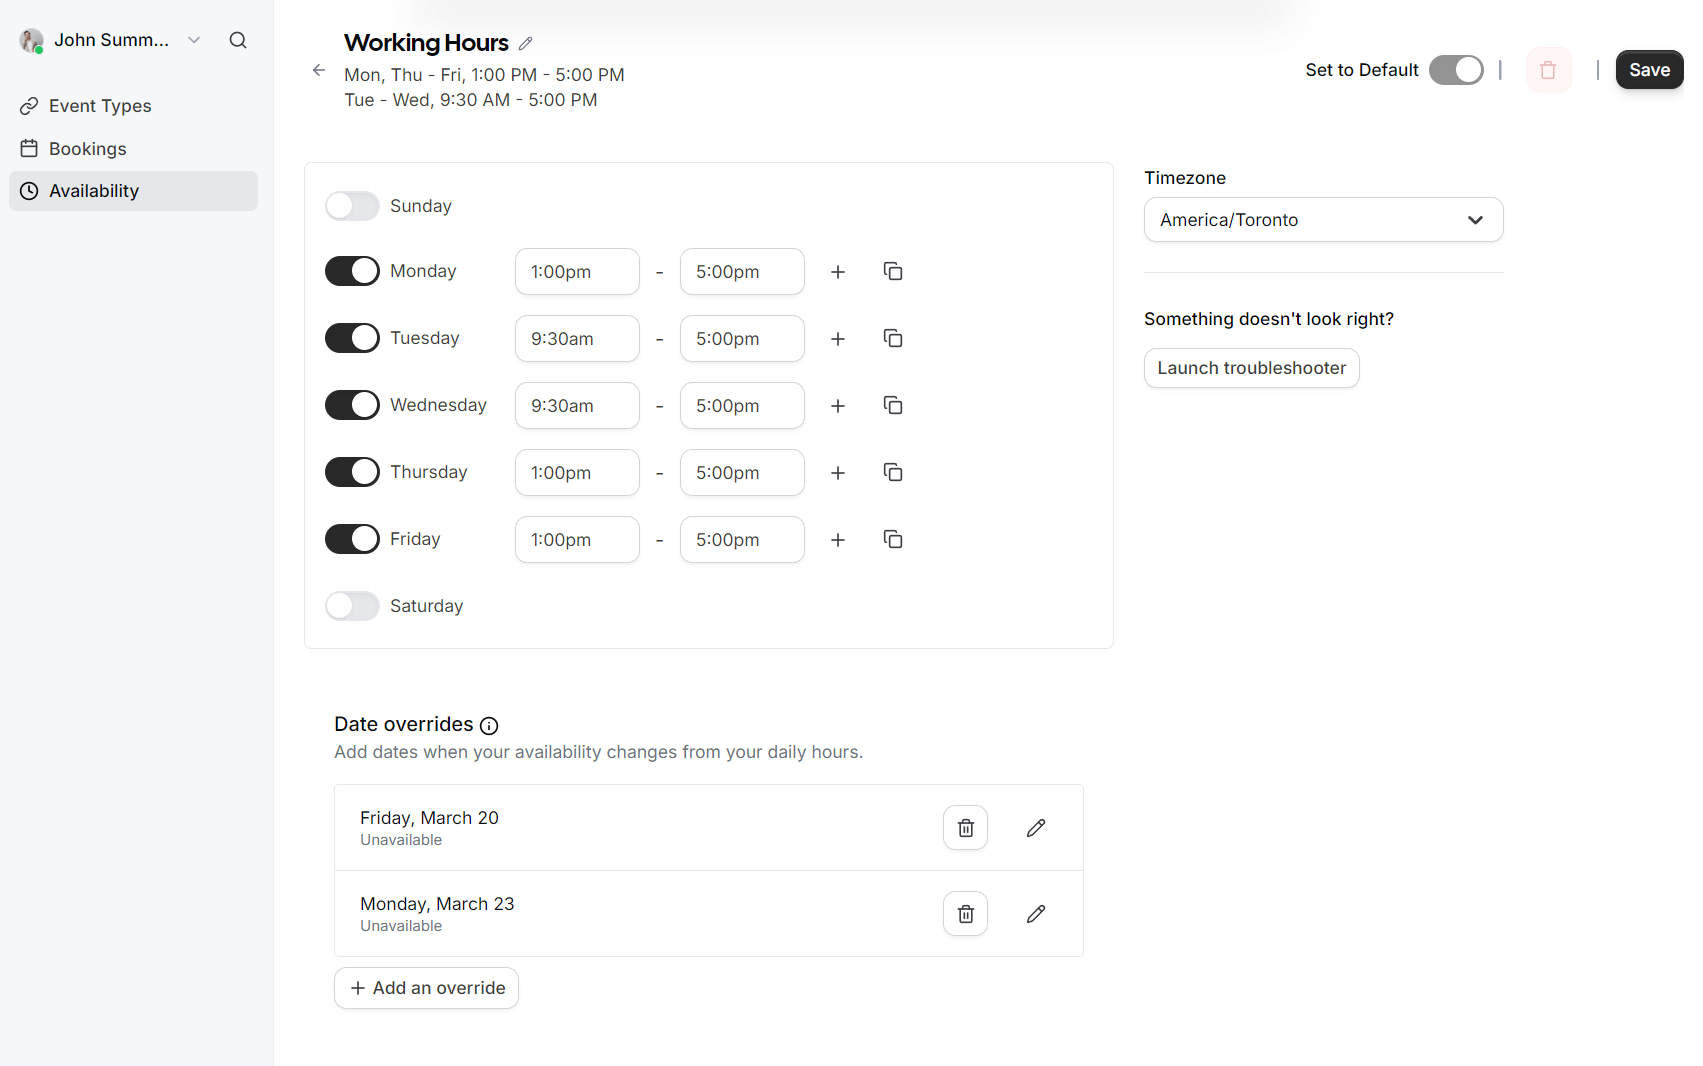

Date Overrides
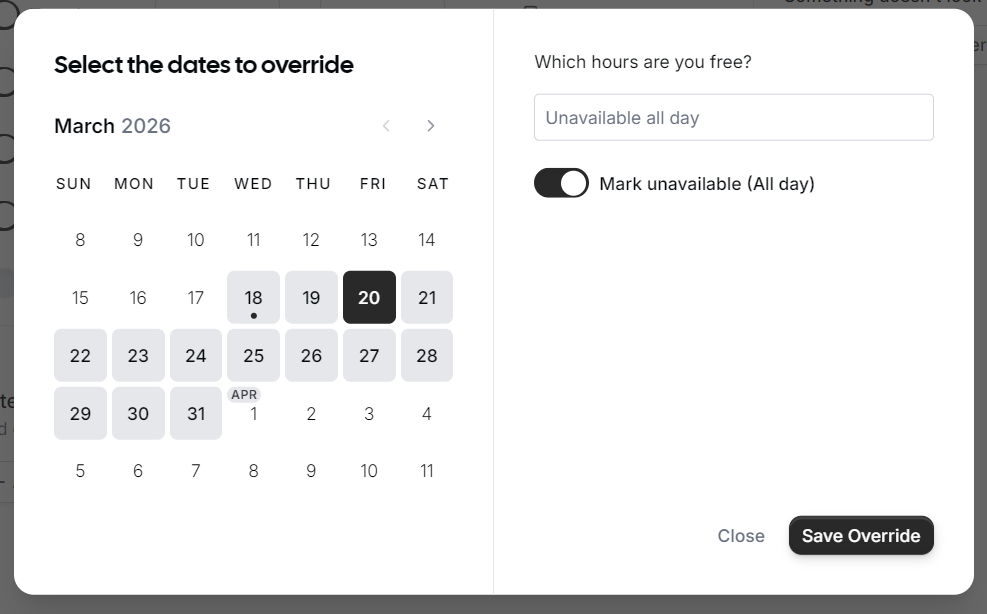
If you have specific days where your schedule differs from your standard working hours (such as holidays or a one-off afternoon off), you can use Date overrides.
-
Click Add an override.
-
Select the specific date on the calendar.

-
Choose to either mark yourself as Unavailable (All day) or set specific custom hours for that date only.
-
Click Save Override.
Managing Event Types
Event Types allow you to define different kinds of meetings, such as a 15-minute "Quick Chat" or a 60-minute "Consultation."
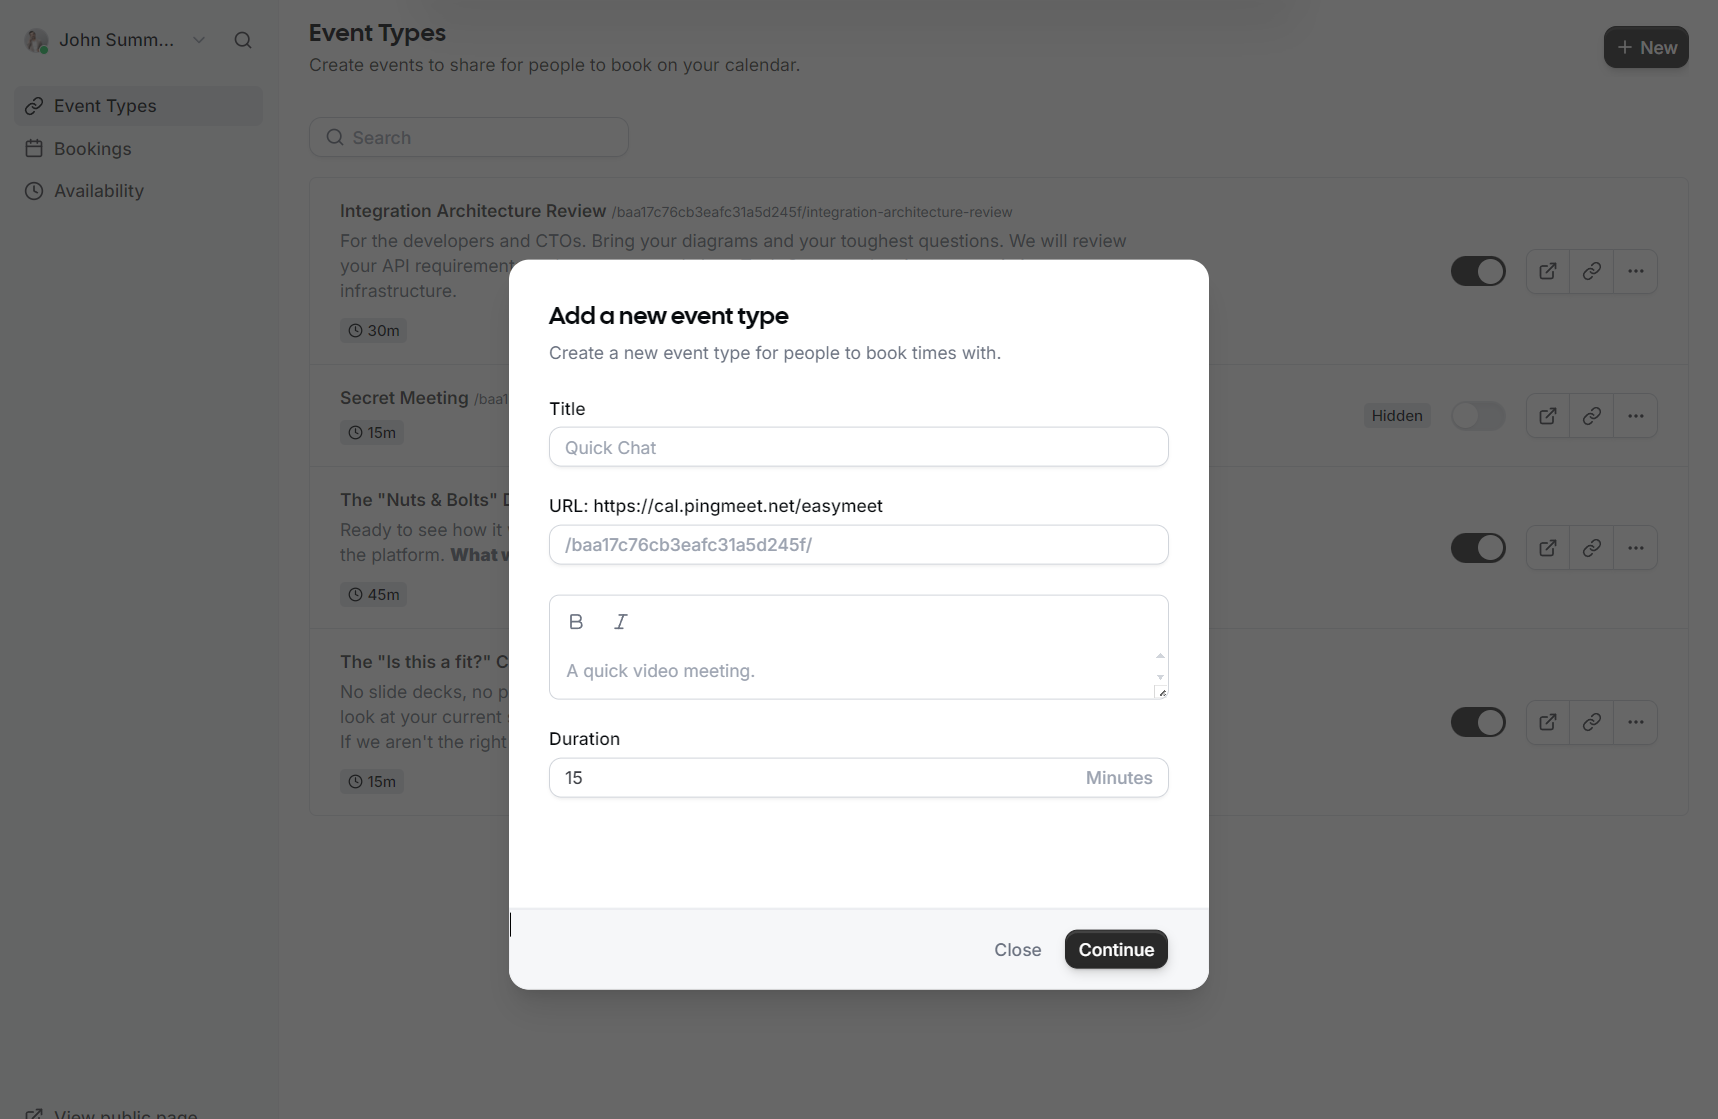
Sharing Your Link
Once your event types are set up, you can share them with the world:
-
Public Page: In the bottom left corner of the EasyMeet interface, click View public page to see what your customers see.
-
Copy Link: Use the Copy public page link to grab your URL and add it to your email signature or share it directly in a chat.
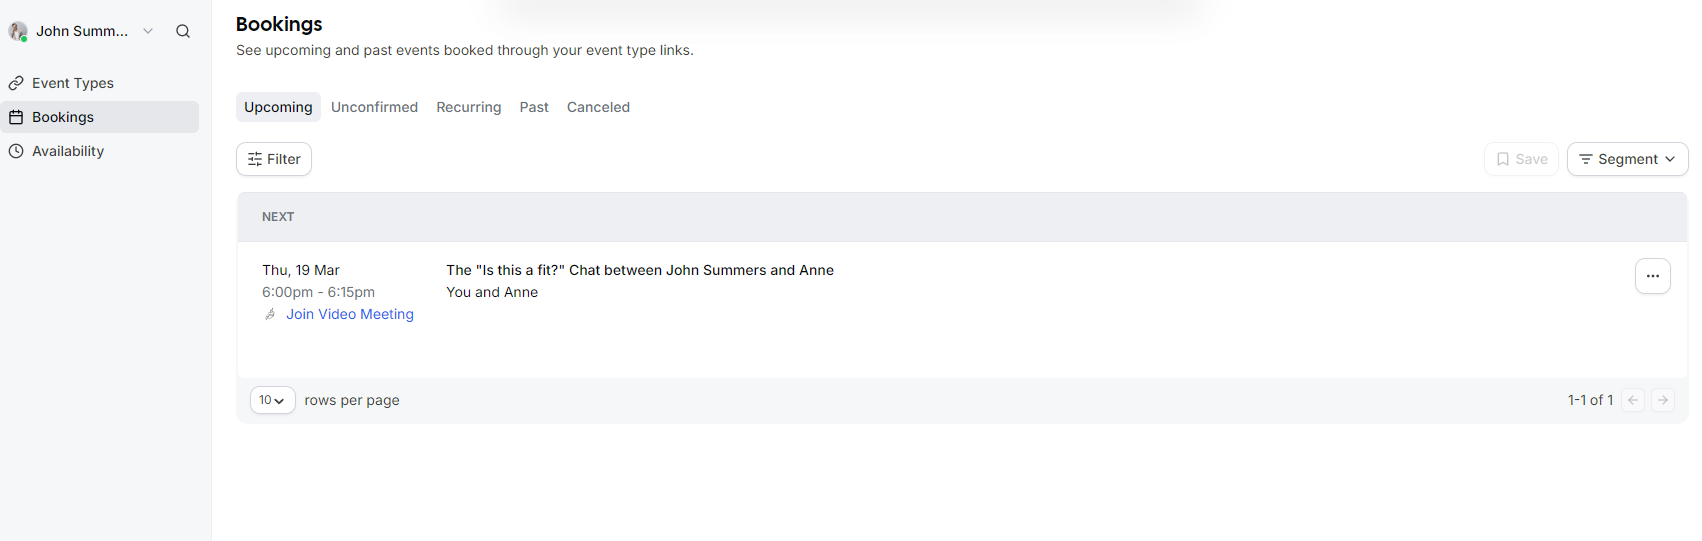
Managing Bookings
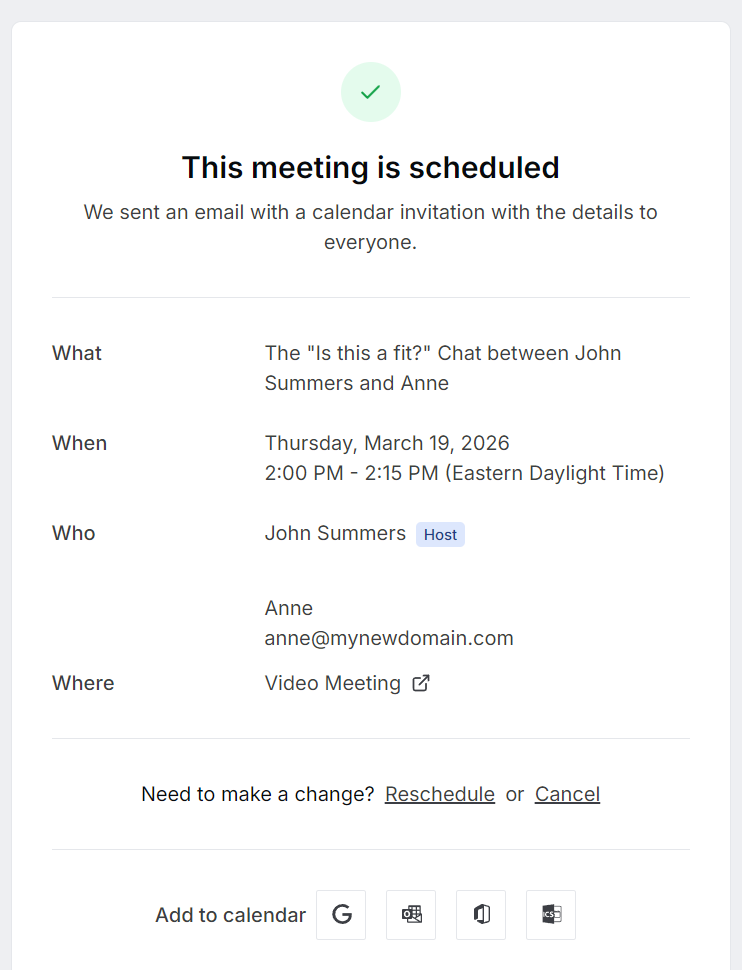
When a guest books a meeting, you will receive an email notification, and the event will automatically appear in your calendar.
-
To view a list of all scheduled meetings, go to the Bookings tab.
-
You can filter between Upcoming, Past, and Canceled events.
-
Each booking includes a direct link to the Video Meeting if applicable.
-
If you need to change a meeting, you can use the Reschedule or Cancel options directly from the booking details.