
Manage Sub-Admins
A Sub-Admin is a specialized account that allows you to delegate administrative tasks while maintaining high security for your primary credentials. You can define granular access levels—ranging from view-only to full delete permissions—across different sections of the Admin Panel, such as Users, Domains, and Logs.
Sub-Admin Scope Limit: Sub-Admins cannot be restricted to manage only specific domains; they have access to the entire account infrastructure. If you require a setup where an administrator is limited to managing only a few specific domains, please contact us about our Super Panel solution.
Common Use Cases
-
API Integration: Avoid using your primary Admin account for automated scripts.
-
WHMCS/HostBill Plugins: Authenticate your billing platform safely using a dedicated Sub-Admin.
-
Team Collaboration: Assign individual accounts to team members to track actions and limit responsibilities.
1. Best Practices to Follow
API Integration
For API authentication, you must use an Admin username and password. To integrate with our JSON API or platforms like WHMCS, we recommend the following security profile:
- Secure Your Main Account: Enable Two-Factor Authentication (2FA) on your primary Admin account for web interface logins.
- Create a Dedicated Sub-Admin: Use a unique Sub-Admin for each integration.
- IP Restriction: Since API / WHMCS Sub-Admins cannot use 2FA, you must secure them by restricting access to the specific IP addresses of your connecting servers.
- optional: create other Sub-Admin for your team members that will use the web interface.
Once you've created your API Sub-Admin, please email our Support Team to enable unlimited email account creation for that Sub-admin. Without this step, the Sub-Admin will be limited by the resources of your current subscription, which will restrict your ability to create accounts for your clients. We'll remove these limits so your API integration can scale properly.
Internal Team Members
Sharing a single Admin account is a security risk. Instead, create a Sub-Admin for each team member:
-
Enable 2FA: Each member should activate their own 2FA for account security.
-
Tiered Permissions: Assign only the level of access required for their specific role (e.g., Support staff may only need "Impersonate" access for troubleshooting).
2. Manage Sub-Admins
Add a Sub-Admin
-
Go to the Admin Panel.
- Log in using your main Admin username and password.
- Click on Sub-Admins in the menu.
- Click on the New button.
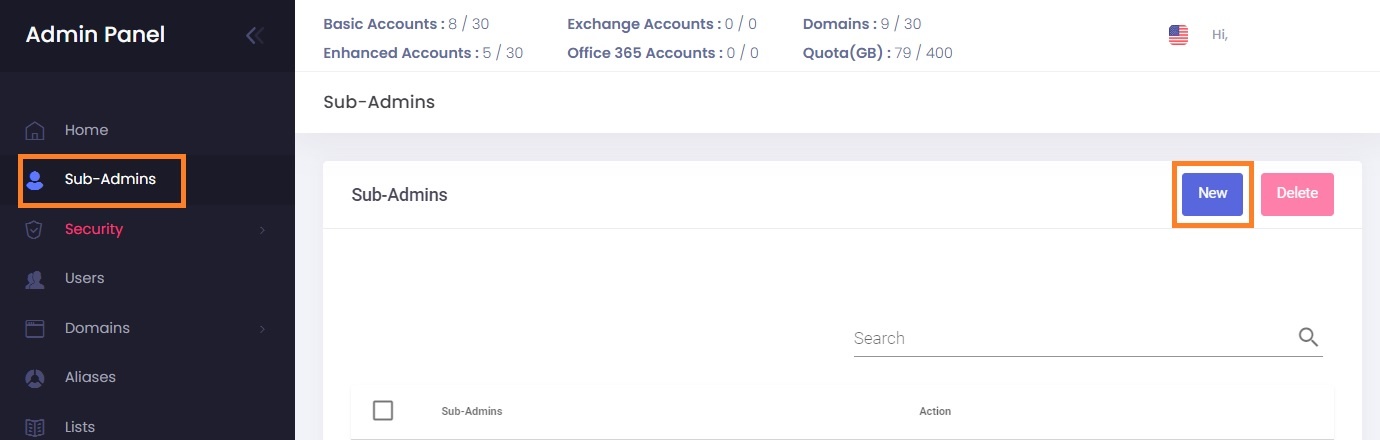
- Fill in the details of your new Sub-Admin:
- Sub-Admin username
- Sub-Admin password
- Sub-Admin e-mail address - will be used for password recovery
- Sub-Admin full name
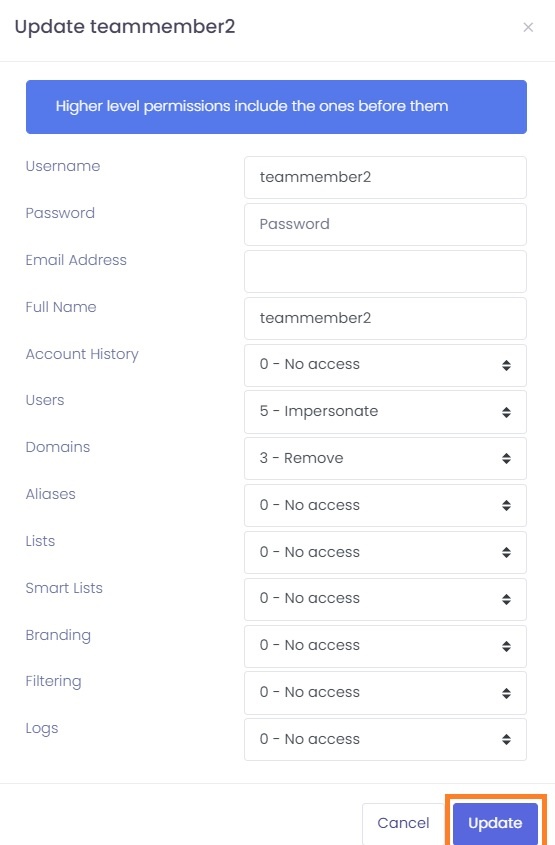
- Select the permissions for each section. Each level of permission is numbered; the higher levels include the ones below it ( level 2 includes level 1, level 3 includes level 1 and 2, etc.):
- Account History: see the actions performed by Admin and Sub-Admins on the Home page
- Users: view/manage/remove/impersonate Users (mailboxes). The highest level is 5 - Impersonate and allows you to "sign in as" the User into Webmail and User Panel.
- Domains: view/manage/remove Domains.
- Aliases: view/manage/remove Aliases.
- Lists: view/manage/remove distribution Lists.
- Smart Lists: view/manage/remove Smart Lists.
- Branding: view/update branding settings for the main Admin account.
- Filtering: view/modify/remove whitelist and blacklist entries for Spam Filtering.
- Logs: view Incoming and Outgoing Logs, Last logins.
- Click on the Add Sub-admin button to save.
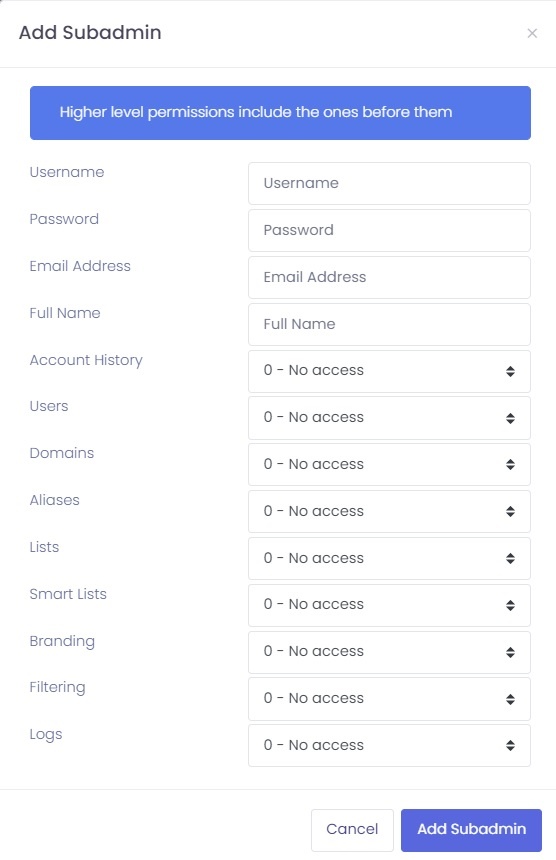
Example:
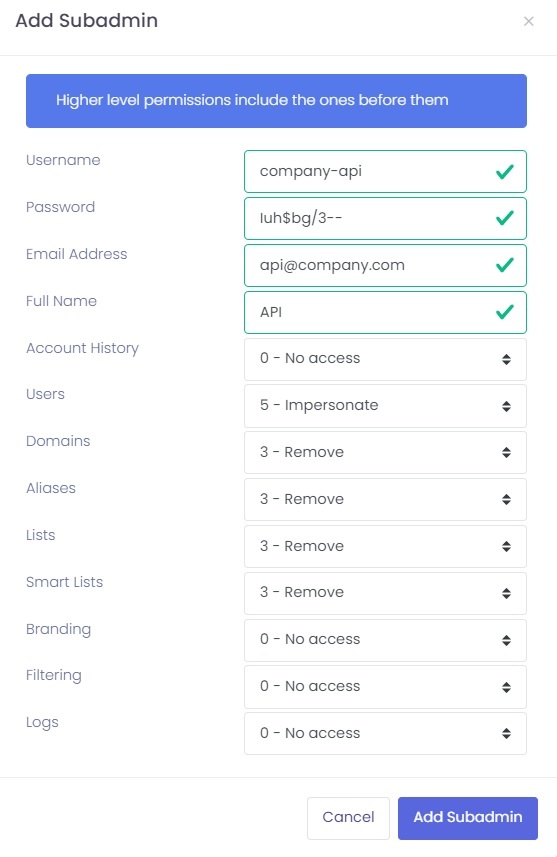
Remove a Sub-Admin
-
Go to the Admin Panel.
- Log in using your main Admin username and password.
- Click on Sub-Admins in the menu.
- Click on the Delete icon next to the Sub-Admin you want to remove.
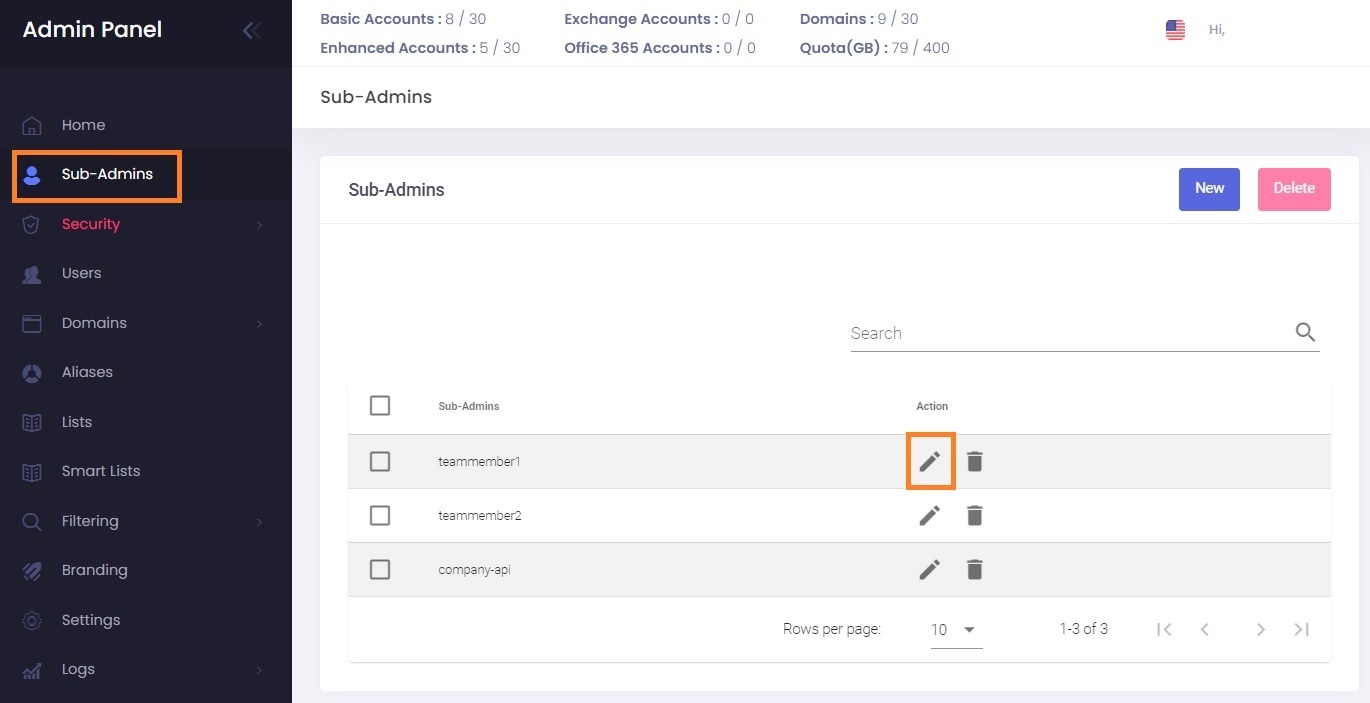
Update a Sub-Admin
You can update all the details and permissions of a Sub-Admin.
-
Go to the Admin Panel.
- Log in using your main Admin username and password.
- Click on Sub-Admins in the menu.
- Click on the Edit (pencil) button next to the Sub-Admin you want to update.
- Update the details. Leave the Password field blank if you want to update permissions but don't want to change the password.
- Click on the Update button to save the changes.
3. Restrict Sub-Admin login access
Log in as the Sub-Admin and follow the instructions for restricting login access.
4. Two-factor authentication for Sub-admins
Log in as the Sub-Admin and follow the instructions for enabling two-factor authentication. Please note you cannot enable two-factor authentication for a Sub-Admin that you use for API or WHMCS authentication - use restricted login access instead.