
Thunderbird - Syncing Contacts and Calendars
Keep your schedule and address book in sync across all your devices using CalDAV and CardDAV protocols. This allows you to manage your data directly within Thunderbird rather than using a web interface.
Note: Please ensure your email account is an Enhanced mailbox, as these mailboxes support advanced synchronization features.
Step 1: Get Your Server URLs
You will need a specific URL for your Calendar and another for your Contacts. You can find these in your webmail:
-
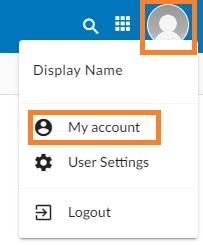
Log into your Webmail.
-
Click on your Profile Picture/Icon in the top corner.
-
Select My Account.
-
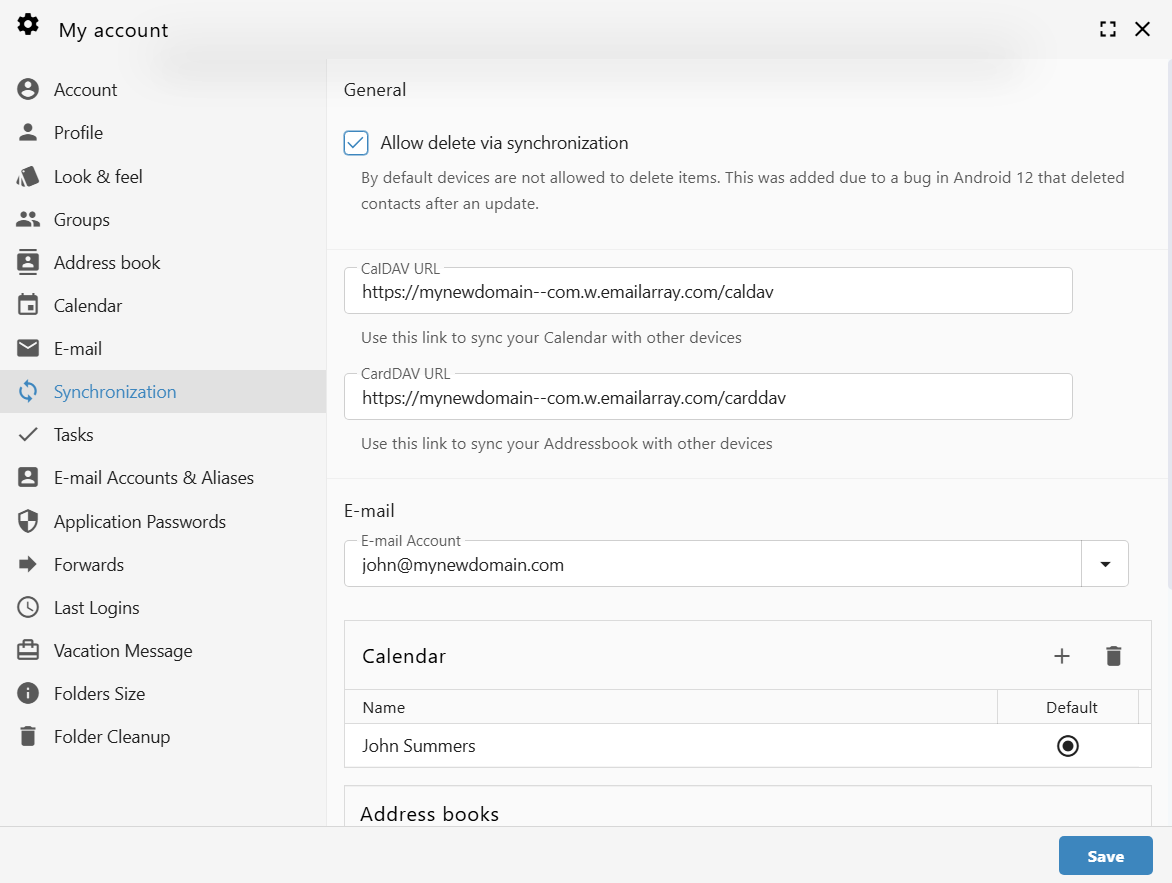
Navigate to the Synchronization tab on the left-hand menu.
-
Copy the unique links found under CalDAV URL and CardDAV URL.


Example URL Formats:
-
CalDAV:
https://yourdomain--com.w.emailarray.com/caldav
Step 2: Set Up Your Calendar (CalDAV)
-
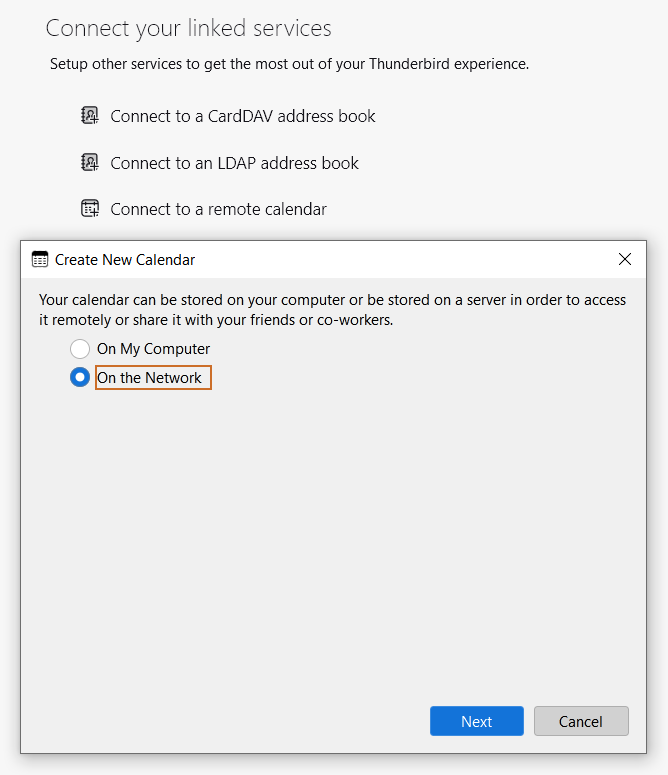
In Thunderbird, locate the Connect your linked services section and click Connect to a remote calendar.
-
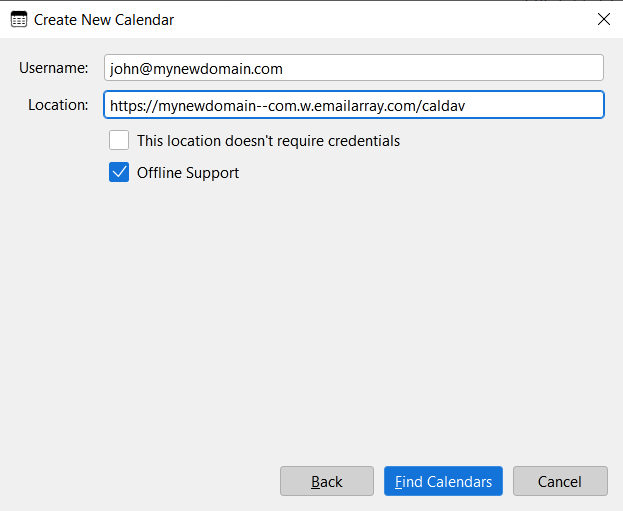
In the "Create New Calendar" window, select On the Network and click Next.

-
Enter Connection Details:
-
Username: Your full email address.
-
Location: Paste your unique CalDAV URL from Step 1.
-
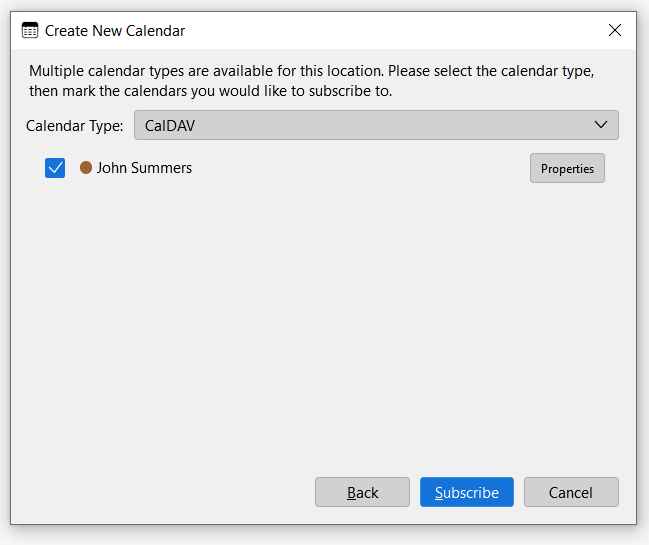
Click Find Calendars.
-
-
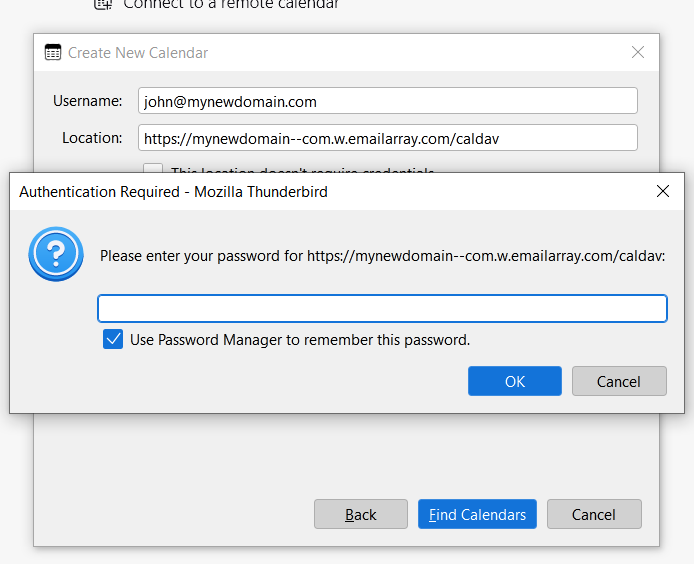
Authentication: A prompt will appear asking for your password. Enter your email password and check Use Password Manager to remember this password.
-
Finalize: Select the calendar(s) you wish to subscribe to and click Subscribe.


Step 3: Set Up Your Contacts (CardDAV)
-
In the Connect your linked services section, click Connect to a CardDAV address book.
-
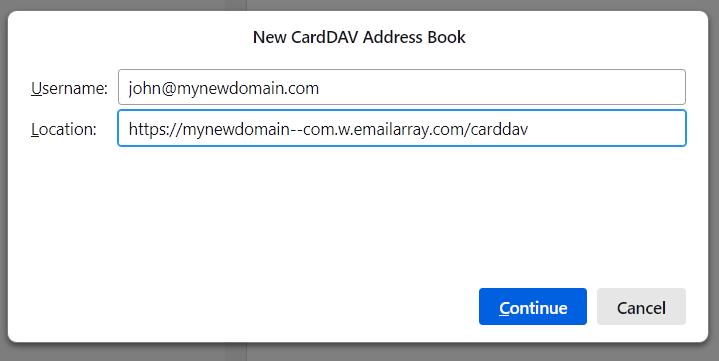
Enter Connection Details:
-
Username: Your full email address.
-
Location: Paste your unique CardDAV URL from Step 1.
-
Click Continue.

-
-
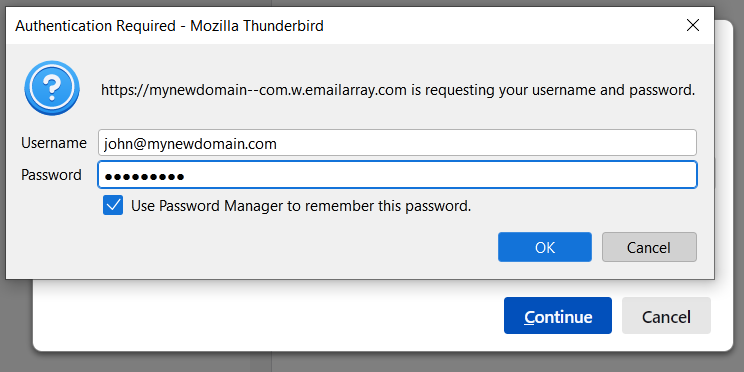
Authentication: When the "Authentication Required" window appears, verify your username and enter your email password. Check the box to remember the password and click OK.
-
Your address book will now synchronize with Thunderbird.

Troubleshooting Tips
Verify Your Plan: Basic mailboxes support email synchronization only. If you cannot see the Synchronization tab in webmail, you may need to upgrade to an Enhanced plan.
Check Your URL: Ensure there are no extra spaces at the beginning or end of the URL when pasting it into Thunderbird.
Direct Sync: Unlike standard IMAP which only syncs email, these steps ensure your Calendar, Contacts, and Tasks stay updated across your computer, phone, and tablet.