
eM Client - Syncing Calendar and Contacts
eM Client is a powerful groupware tool that allows you to manage your professional life in one place. By connecting your Calendar (CalDAV) and Contacts (CardDAV), you can keep your schedule and address book perfectly synchronized between eM Client and your other devices.
Note: Please ensure your email account is an Enhanced mailbox, as these mailboxes support advanced synchronization features.
Step 1: Get Your Server URLs
You will need a specific URL for your Calendar and another for your Contacts. You can find these in your webmail:
-
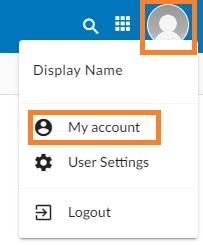
Log into your Webmail.
-
Click on your Profile Picture/Icon in the top corner.
-
Select My Account.
-
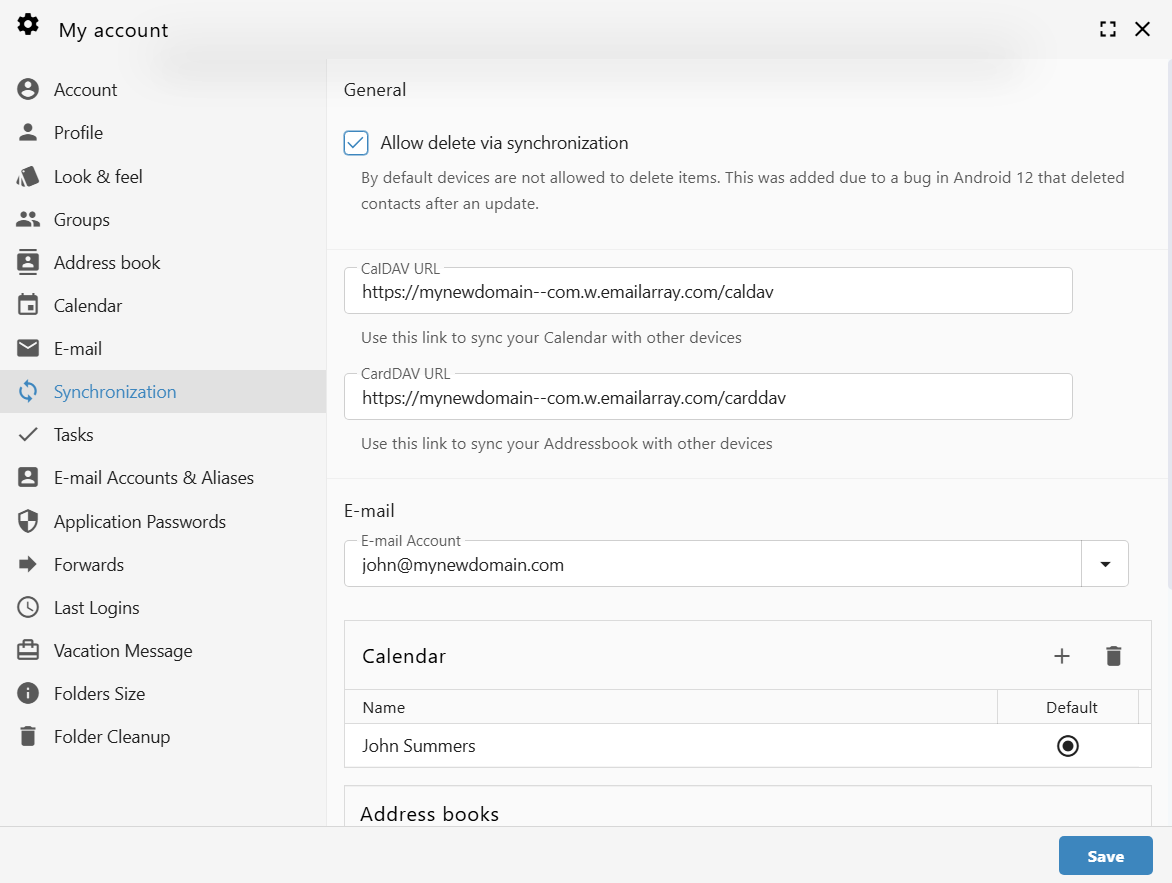
Navigate to the Synchronization tab on the left-hand menu.
-
Copy the unique links found under CalDAV URL and CardDAV URL.


Example URL Formats:
-
CalDAV:
https://yourdomain--com.w.emailarray.com/caldav
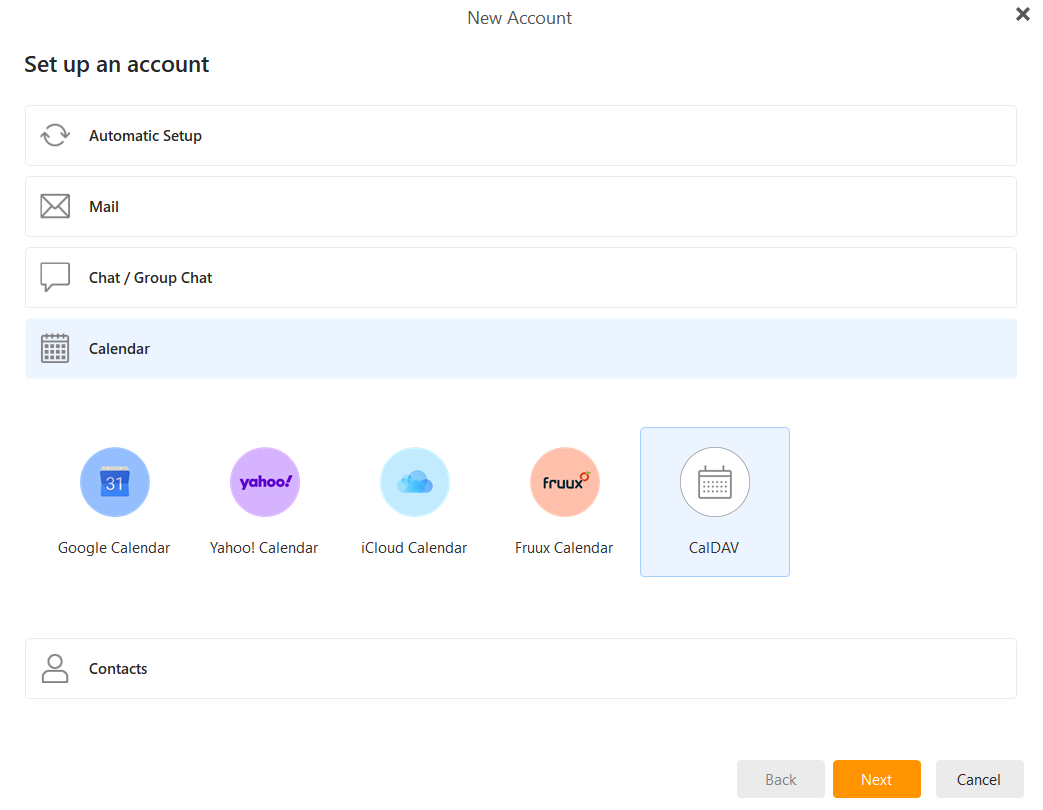
Step 2: Set Up Your Calendar (CalDAV)
-
Open eM Client and go to Menu > Accounts > Add Account.
-
Select the Calendar tab and choose CalDAV. Click Next.

-
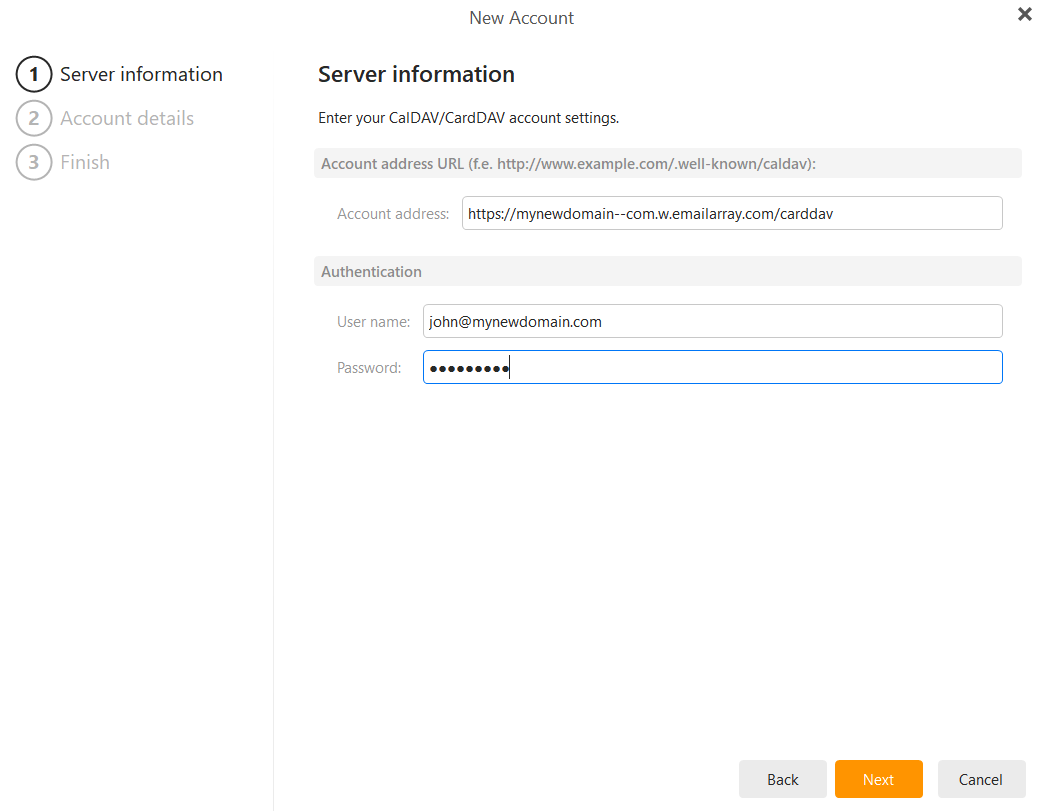
Enter Server Information:
-
Account address: Paste your unique CalDAV URL.
-
User name: Your full email address.
-
Password: Your email account password.
-
Click Next.

-
-
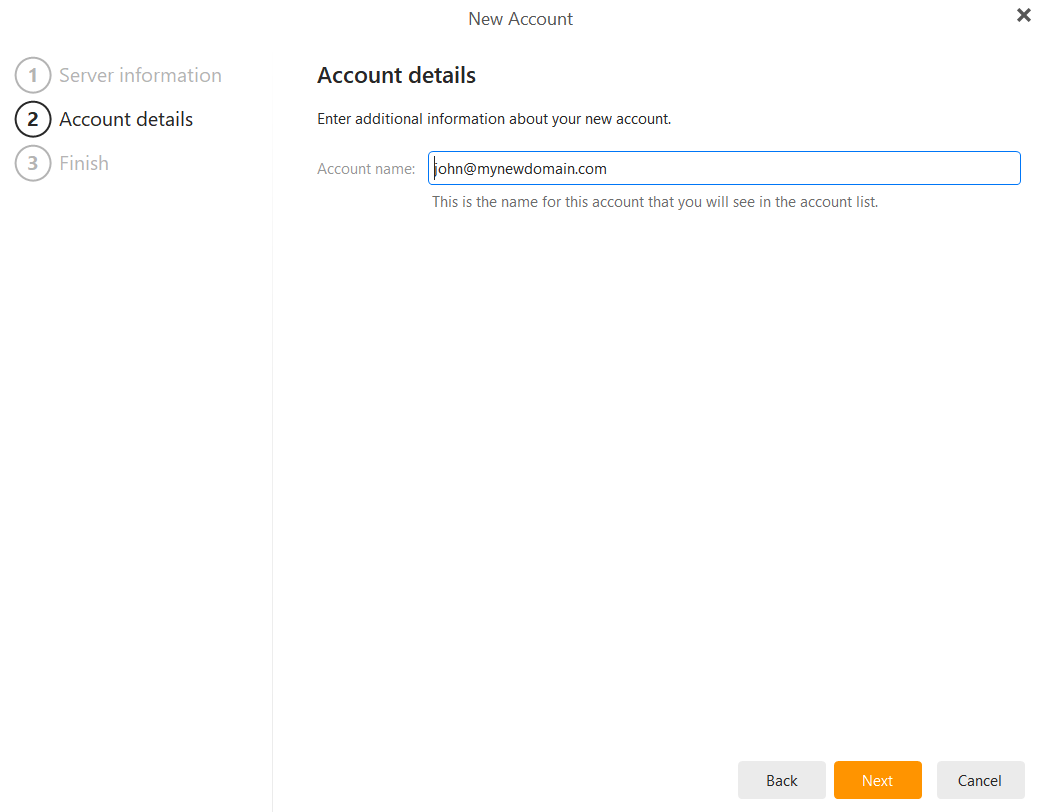
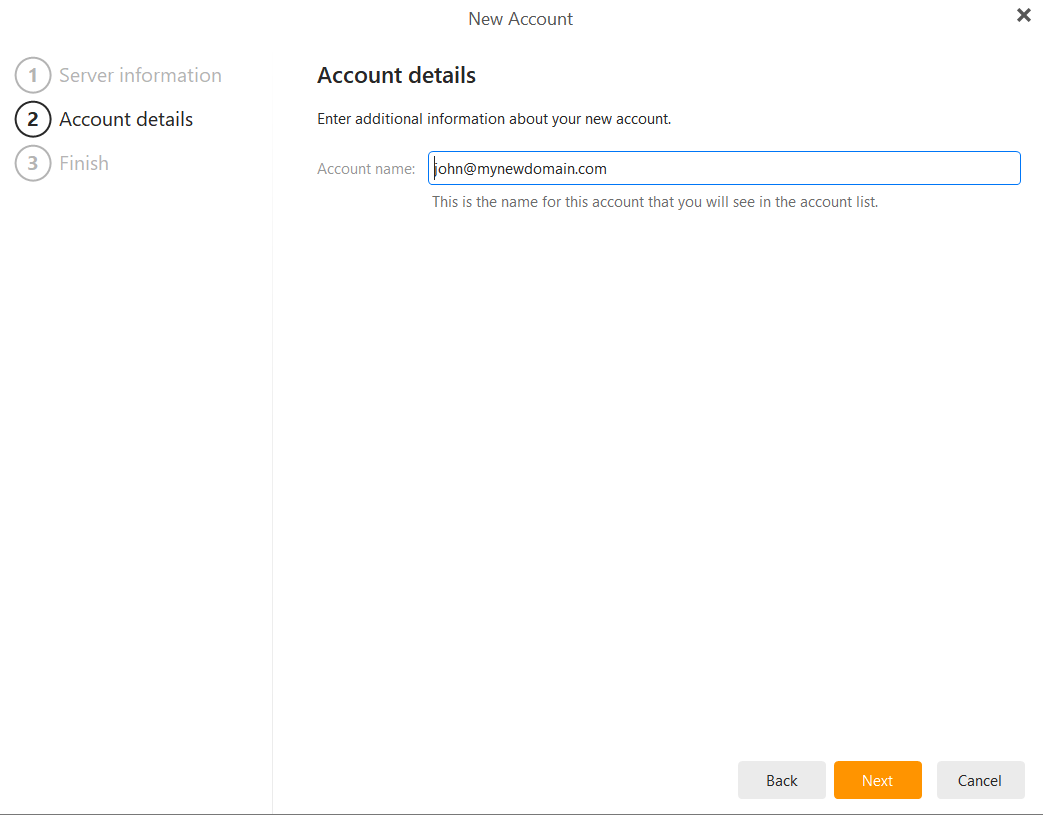
Account Details: Enter an Account name (e.g., "Work Calendar") so you can easily identify it in your list. Click Next.
-
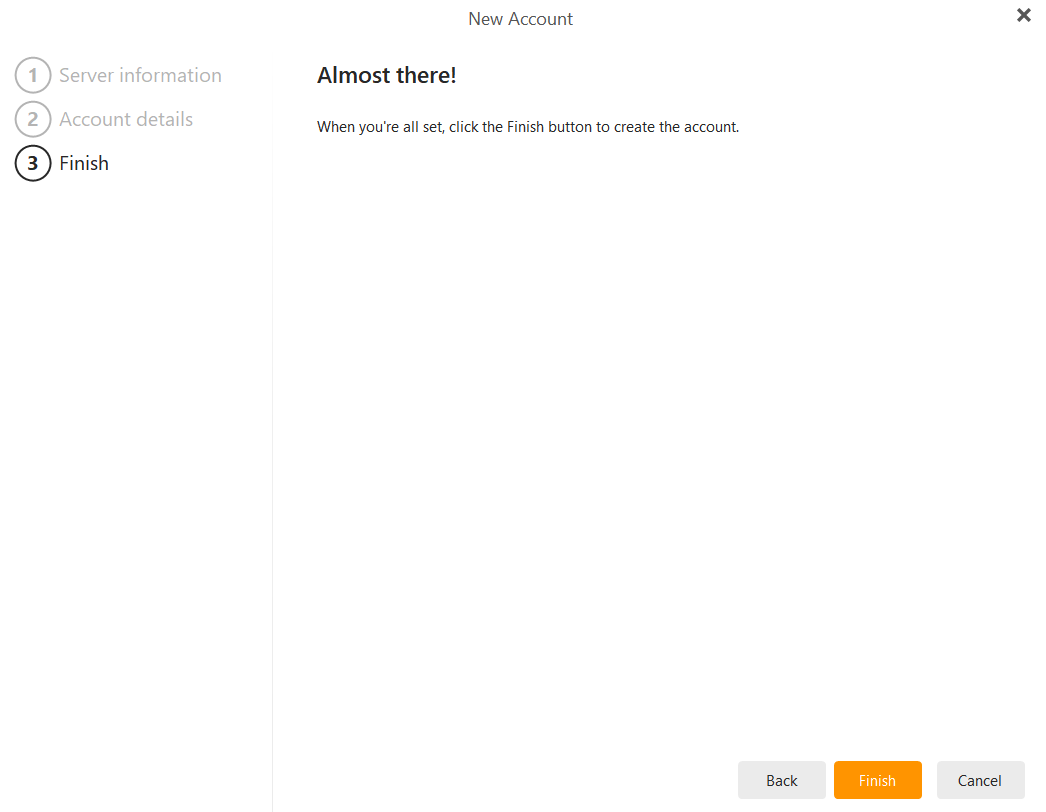
Finalize: Click Finish to complete the setup. Your events will now begin to sync.


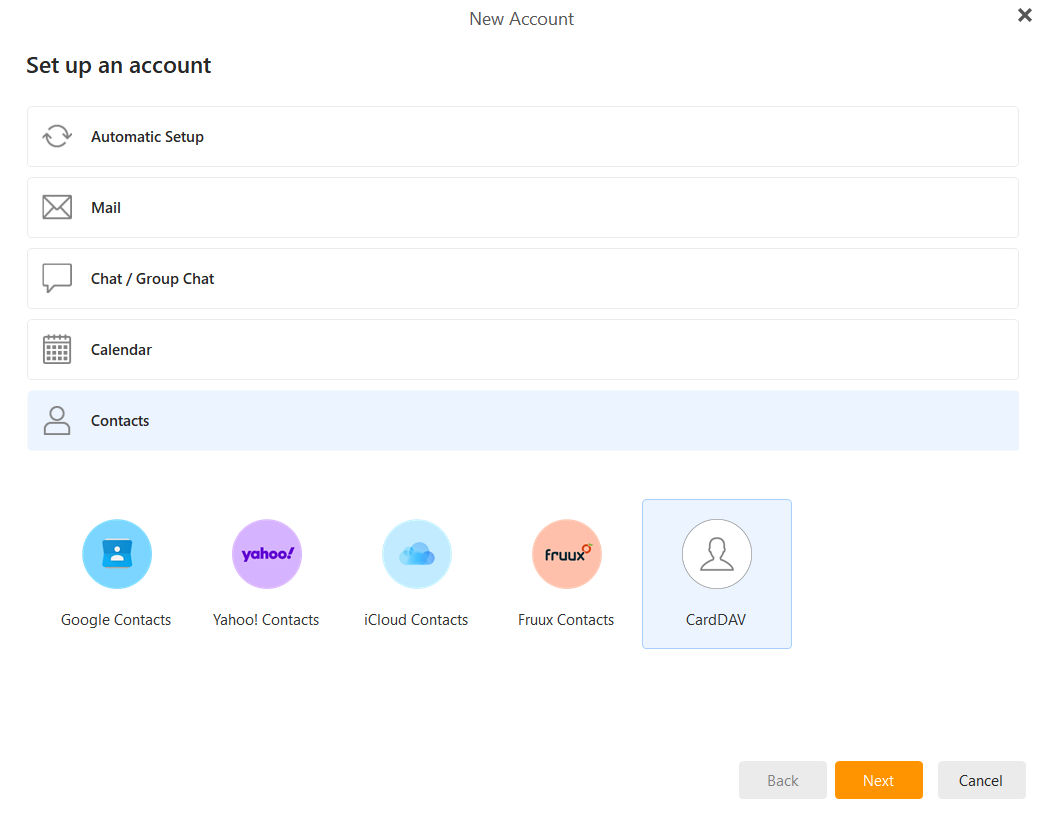
Step 3: Set Up Your Contacts (CardDAV)
-
Go to Menu > Accounts > Add Account.
-
Select the Contacts tab and choose CardDAV. Click Next.

-
Enter Server Information:
-
Account address: Paste your unique CardDAV URL.
-
User name: Your full email address.
-
Password: Your email account password.
-
Click Next.
-
-
Account Details: Enter an Account name (e.g., "Company Contacts") and click Next.

-
Finalize: Click Finish. Your address book is now connected.

Troubleshooting & Tips
-
Authentication Errors: Ensure you are using your full email address as the username.
- Connection Security: eM Client automatically uses secure connections for these protocols.
- Dynamic Storage: Remember that your combined storage (including calendar attachments and contacts) is shared across your mailbox.