**Note:** Please ensure your email account is an **Enhanced** mailbox, as these mailboxes support advanced synchronization features.
### Step 1: Get Your Server URLs You will need a specific URL for your Calendar and another for your Contacts. You can find these in your webmail: 1. Log into your **Webmail**. 2. Click on your **Profile Picture/Icon** in the top corner. 3. Select **My Account**. [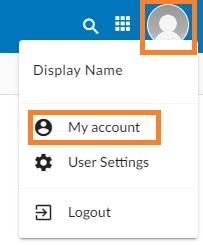](https://wikidev.emailarray.com/uploads/images/gallery/2024-08/etxwebmail-how-to-access-advanced-settings-for-your-email-account.jpg) 4. Navigate to the **Synchronization** tab on the left-hand menu. 5. Copy the unique links found under **CalDAV URL** and **CardDAV URL**. [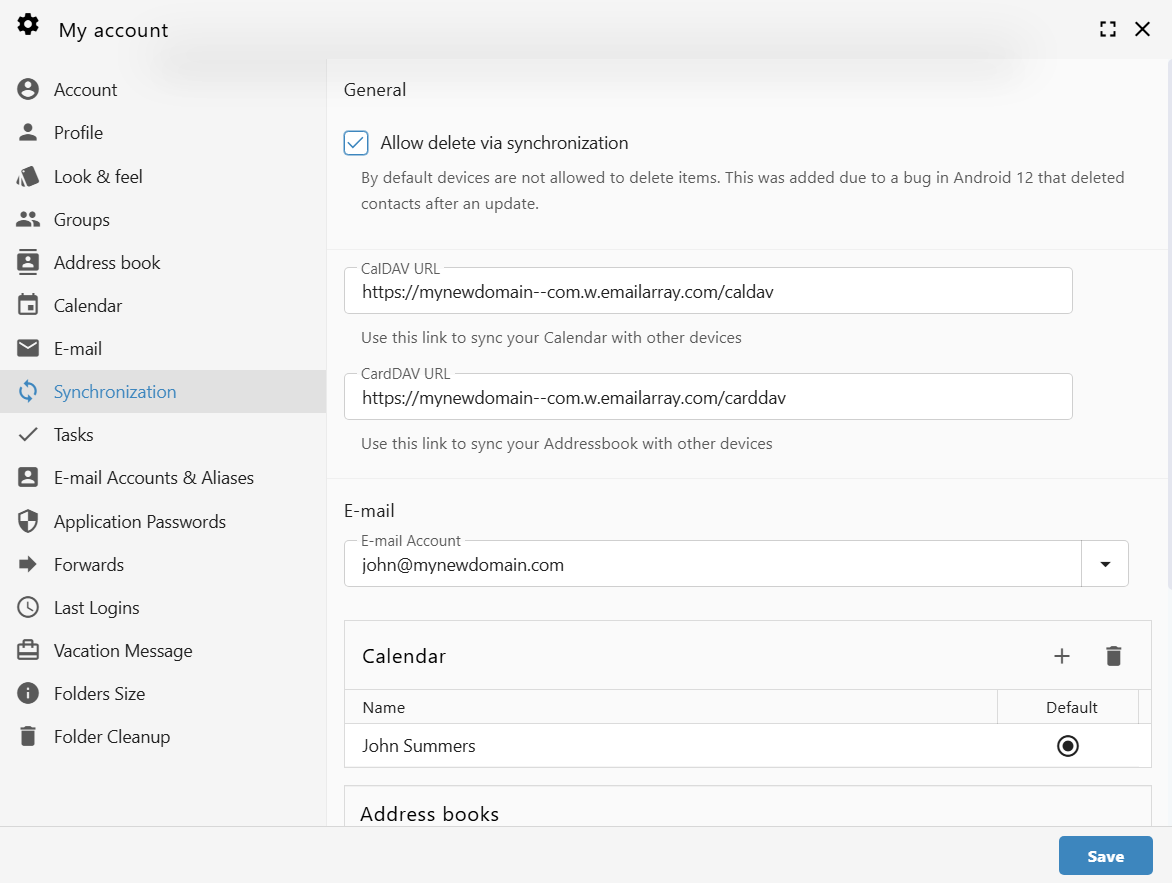](https://wikidev.emailarray.com/uploads/images/gallery/2026-01/webmail-synchronization-tab-available-for-enhanced-mailboxes-only.png) **Example URL Formats:** - **CalDAV:** `https://yourdomain--com.w.emailarray.com/caldav` - **CardDAV:** `https://yourdomain--com.w.emailarray.com/carddav` ### Step 2: Set Up Your Calendar (CalDAV) 1. In Thunderbird, locate the **Connect your linked services** section and click **Connect to a remote calendar**. 2. In the "Create New Calendar" window, select **On the Network** and click **Next**. [](https://wikidev.emailarray.com/uploads/images/gallery/2026-01/thunderbird-connect-to-a-remote-calendar.PNG) 3. **Enter Connection Details:** - **Username:** Your full email address. - **Location:** Paste your unique **CalDAV URL** from Step 1. - Click **Find Calendars**. [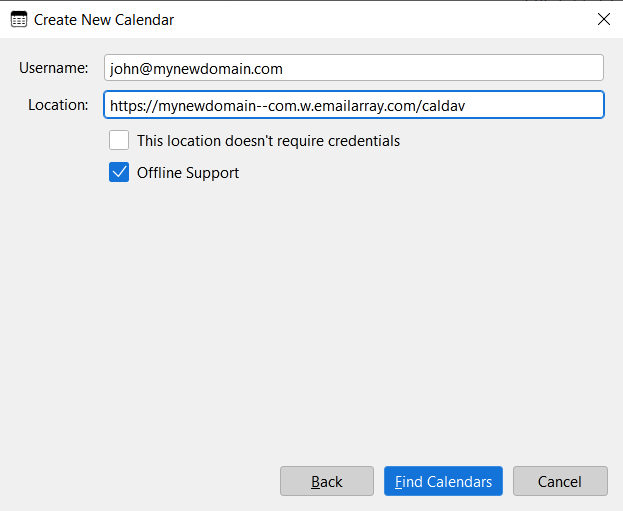](https://wikidev.emailarray.com/uploads/images/gallery/2026-01/thunderbird-connect-to-a-remote-calendar-step-1.PNG) 4. **Authentication:** A prompt will appear asking for your password. Enter your email password and check **Use Password Manager to remember this password**. [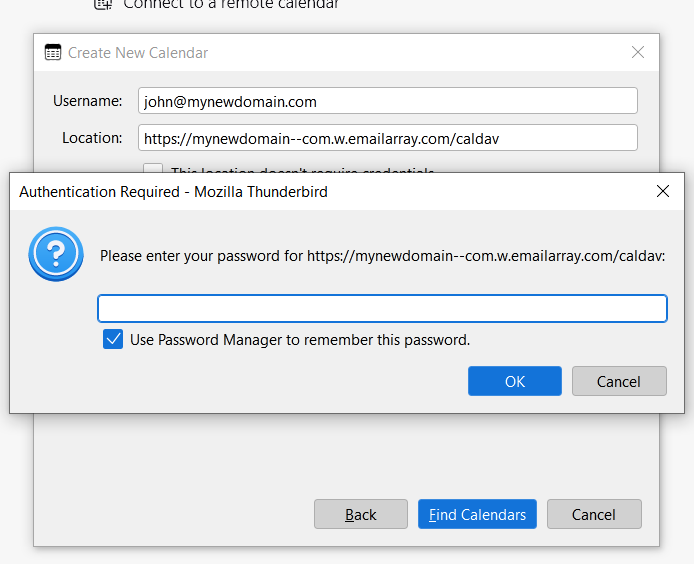](https://wikidev.emailarray.com/uploads/images/gallery/2026-01/thunderbird-connect-to-a-remote-calendar-step-2.PNG) 5. **Finalize:** Select the calendar(s) you wish to subscribe to and click **Subscribe**. [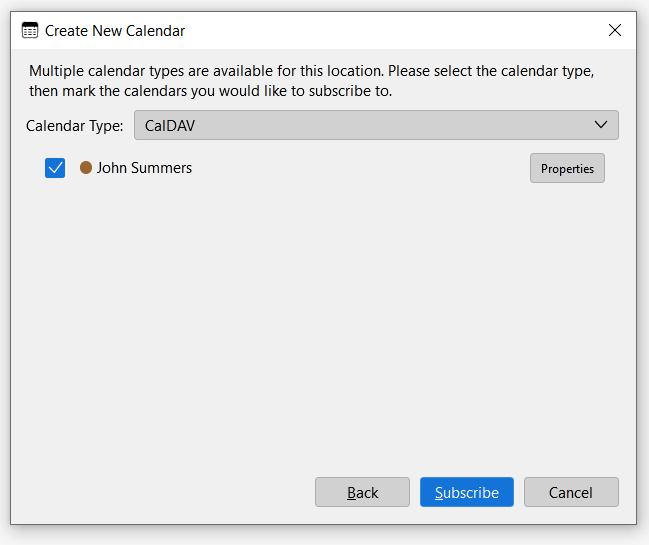](https://wikidev.emailarray.com/uploads/images/gallery/2026-01/thunderbird-connect-to-a-remote-calendar-step-3.PNG) ### ### Step 3: Set Up Your Contacts (CardDAV) 1. In the **Connect your linked services** section, click **Connect to a CardDAV address book**. 2. **Enter Connection Details:** - **Username:** Your full email address. - **Location:** Paste your unique **CardDAV URL** from Step 1. - Click **Continue**. [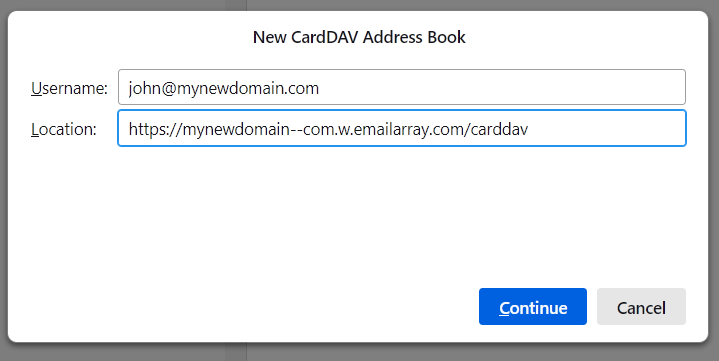](https://wikidev.emailarray.com/uploads/images/gallery/2026-01/thunderbird-connect-to-a-carddav-address-book-step-1.PNG) 3. **Authentication:** When the "Authentication Required" window appears, verify your username and enter your email password. Check the box to remember the password and click **OK**. [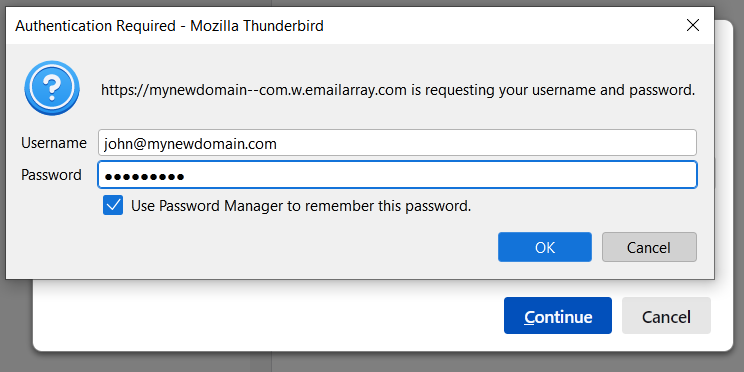](https://wikidev.emailarray.com/uploads/images/gallery/2026-01/thunderbird-connect-to-a-carddav-address-book-step-2.PNG) 4. Your address book will now synchronize with Thunderbird. #### Troubleshooting Tips **Verify Your Plan**: Basic mailboxes support email synchronization only. If you cannot see the Synchronization tab in webmail, you may need to upgrade to an Enhanced plan. **Check Your URL**: Ensure there are no extra spaces at the beginning or end of the URL when pasting it into Thunderbird. **Direct Sync**: Unlike standard IMAP which only syncs email, these steps ensure your Calendar, Contacts, and Tasks stay updated across your computer, phone, and tablet.