
Setup Email on Outlook (IMAP)
Find the step-by-step tutorial for your specific version of Outlook below. If you aren't sure which version you have, you can usually find this info under the Help menu or the About section within the app.
Large Mailboxes: Depending on your internet speed and the size of your mailbox (we support up to 200GB per account), the initial synchronization can take anywhere from a few hours to a few days to fully build your local data file.
Enhanced mailbox? Connect a CardDAV address book or a remote calendar (CalDAV) to keep your contacts and schedule in sync in Outlook.
Use the following settings or follow the Outlook 365 or Outlook 2013/2010 instructions below.
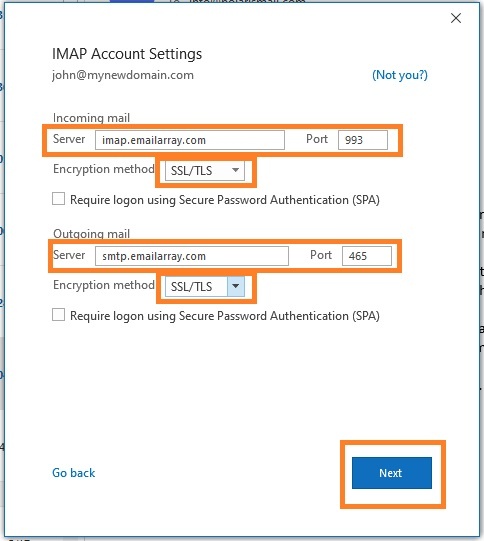
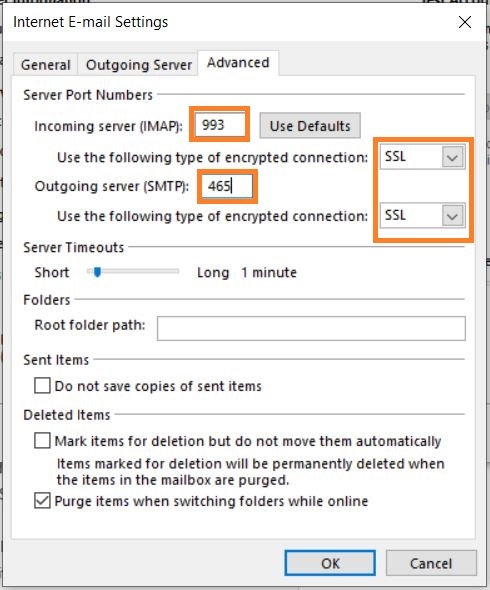
| Service | Server Address | Port (SSL/TLS) |
| Incoming (IMAP) | imap.emailarray.com | 993 |
| Outgoing (SMTP) | smtp.emailarray.com | 465 |
We recommend using IMAP with SSL/TLS to ensure your data remains private and your folders stay synchronized across all devices.
The New Outlook for Windows
Microsoft has recently introduced a "New Outlook" for Windows. Based on our testing and official Microsoft documentation, this version handles IMAP accounts differently than previous versions.
What you need to know
- Forced Cloud Sync: Unlike "Classic" Outlook, the "New Outlook" requires all IMAP accounts to sync through the Microsoft Cloud.
- Data Privacy: This means your emails, even though hosted securely with us, will be stored on Microsoft’s servers to enable this sync.
- Setup Failures: Because Microsoft forces this intermediary sync, many IMAP setups fail during the "Syncing to Microsoft" phase, even if your credentials and server settings are 100% correct.
Our Recommendation: Use "Classic" Outlook
To maintain a direct, private connection between your device and our servers, and to avoid setup errors, we recommend staying with Classic Outlook.
-
Open Outlook.
-
Locate the "Try the new Outlook" toggle in the upper-right corner.
-
Switch the toggle Off.
-
Restart Outlook and follow the Outlook 365 or Outlook 2013/2010 instructions below.
For a deeper dive into why Microsoft implemented this change, you can read the full discussion on the Microsoft Community page.
Outlook 365
Unfortunately, this version of Outlook doesn't support Autodiscover for IMAP accounts anymore.
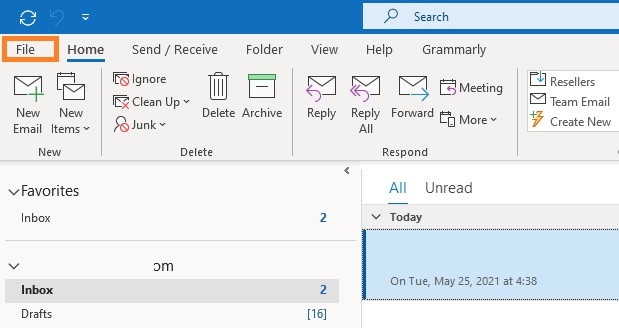
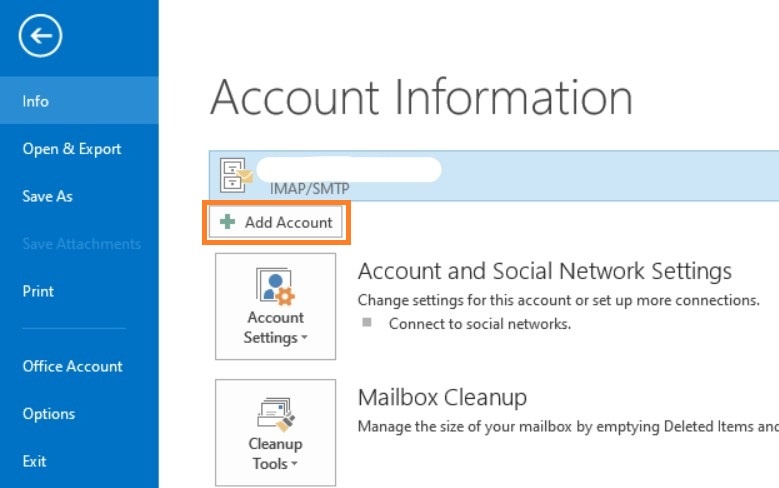
- Click on the File menu
- Click on + Add Account
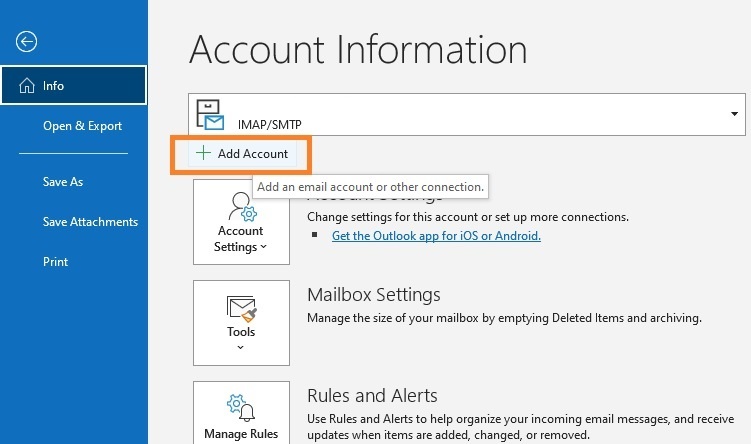
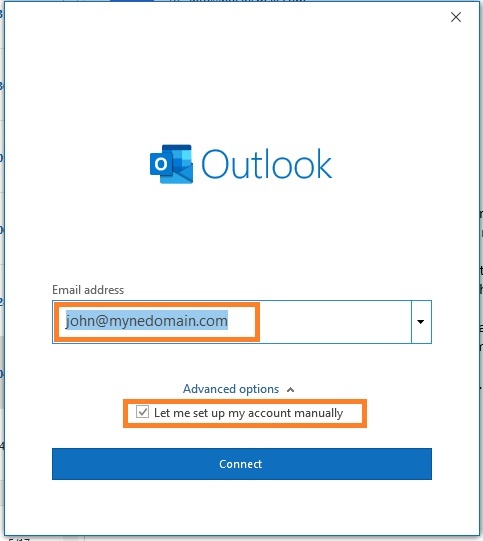
- Fill in your full email address and select the option Let me set up my account manually.
- Click on Next.
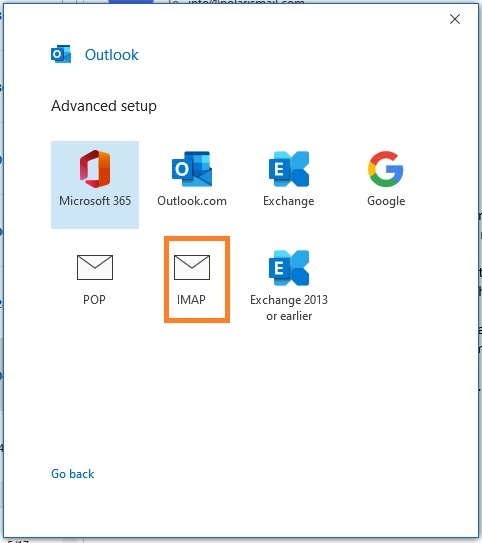
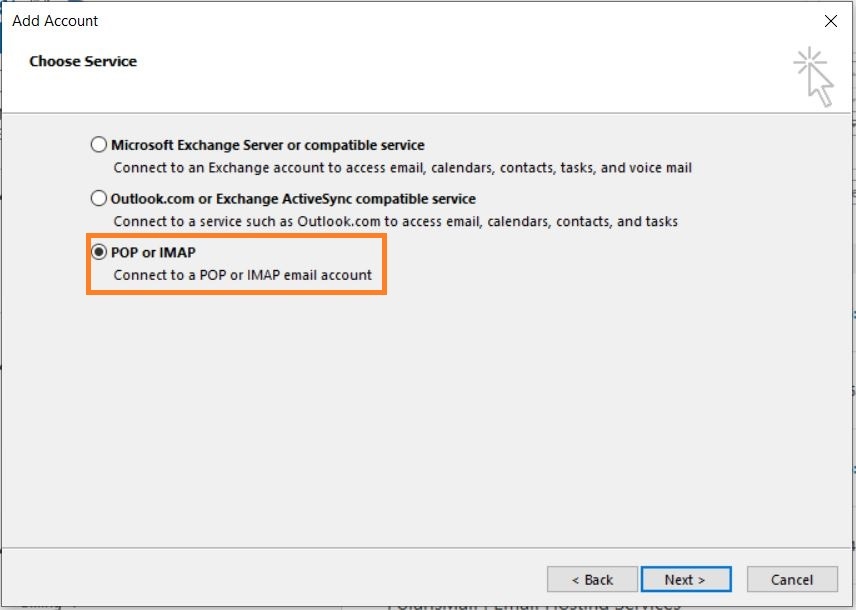
- Select IMAP from the list of account types.
- Fill in server information from the Server & Ports page
- Click on Next
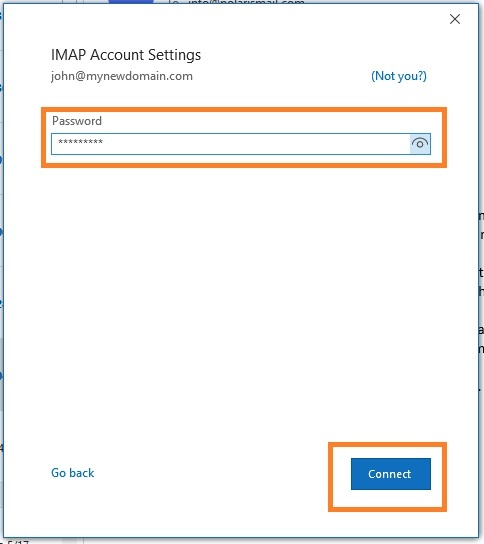
- Fill in your existing password for your email address and click on Connect
- The setup is completed. The message Account successfully added will show and Outlook will begin synchronizing the account.
Depending on the size of your mailbox and your Internet speed, Outlook might take from a few hours to a few days to synchronize the mailbox and build the local PST file.
Outlook 2013/2010:
- Click on the File menu
- Click on + Add Account
- Select POP or IMAP
- Option 1: this version of Outlook supports Autodiscover for IMAP accounts if you have setup Autodicover in your DNS.
- Type in your full name, e-mail address, and password and click on Next
- Click on Allow when asked about autodiscover.xml
- Click on Finish
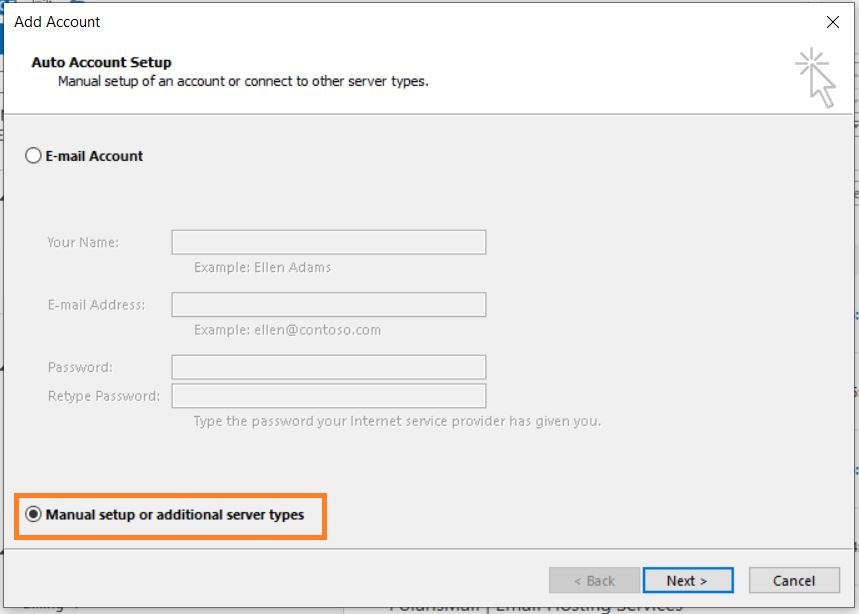
- Option 2: If you don't have Autodicover
- select Manual setup and click on Next.
-
- Type in your full name, e-mail address, and password
- Fill in server information from the Server & Ports page

-
- Click on More Settings.
- Select My outgoing server (SMTP) requires authentication and Use same settings as my incoming mail server.

-
- Click on the Advanced tab
- Verify the ports are correct and SSL is selected.
-
- Click on OK. Click on Next to finish the setup.
Depending on the size of your mailbox and your Internet speed, Outlook might take from a few hours to a few days to synchronize the mailbox and build the local PST file.