
Creating a New Outlook Profile
When you switch email providers, it’s tempting to take the shortcut: simply going into your existing account settings and swapping out the IMAP server addresses. While this is technically faster, it’s a strategy that often leads to significant technical headaches.
The Risk of the "Quick Change"
Modifying the server records on an existing account frequently leads to .PST or .OST file corruption. Because Outlook is trying to map a new server structure onto an old data file, you might encounter missing emails, broken search functionality, or a complete "Send/Receive" failure.
In fact, Microsoft officially recommends against modifying existing account settings when moving to a new service. To ensure your data stays intact and your software remains stable, the best practice is to create a New Outlook Profile.
Step 1: Accessing the Mail Setup
Before opening Outlook, we need to go through the Windows Control Panel to manage your profiles.
-
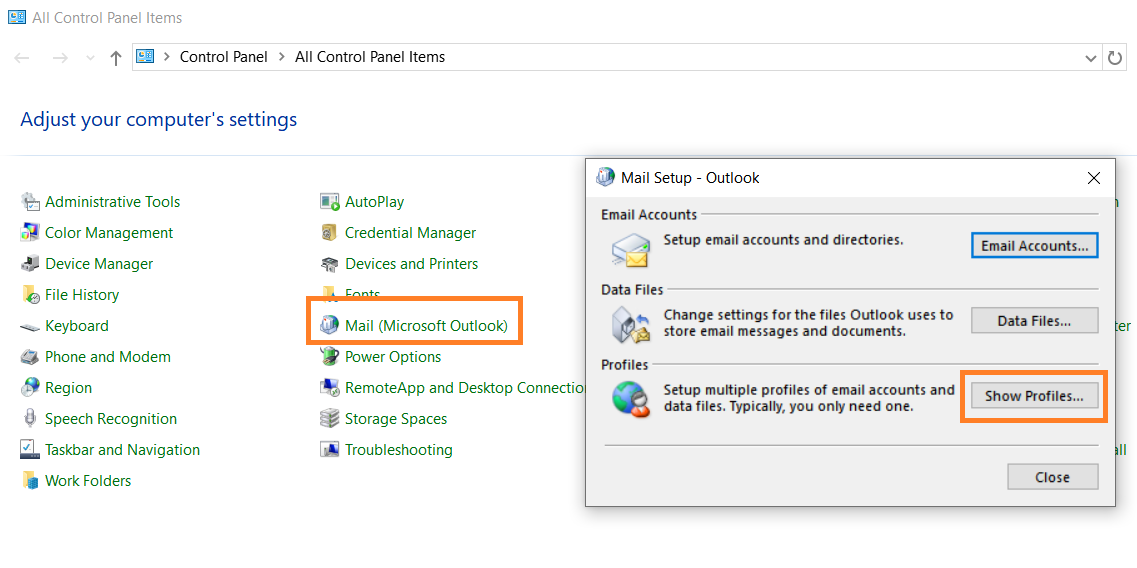
Open the Control Panel on your Windows machine.
-
Search for and click on Mail (Microsoft Outlook).
-
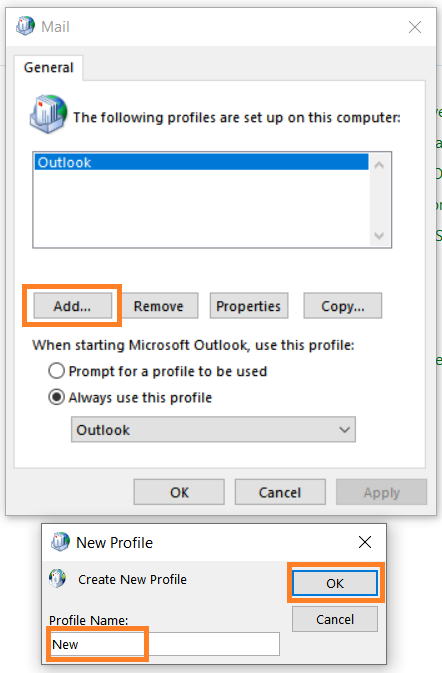
In the window that appears, click the Show Profiles... button.
-
Click Add..., give your new profile a name (e.g., "Work Fresh"), and click OK.


Step 2: Adding Your Email Account
Once you’ve named your profile, Outlook will ask you how you want to connect your email. You have two main paths: Automatic and Manual.
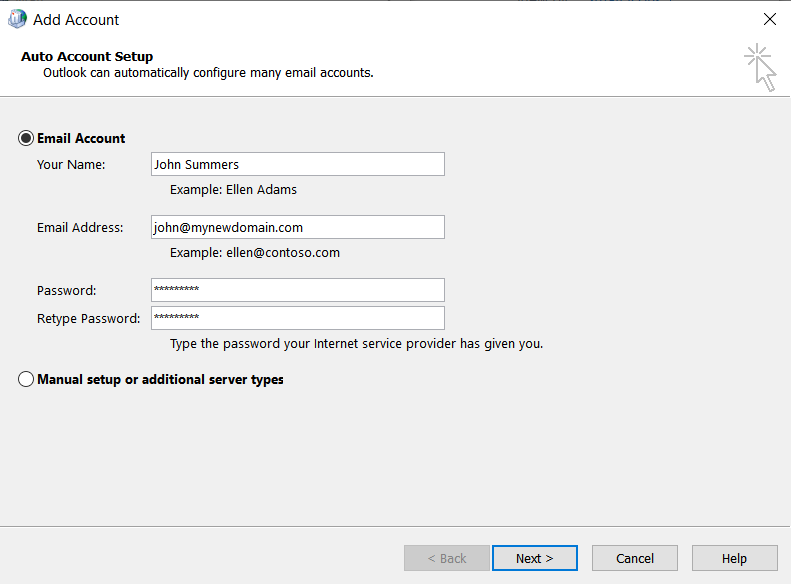
Option A: Automatic Setup (Recommended)
This is the fastest method if you have set the Autodiscover DNS record. Outlook will try to "autodiscover" your server settings for you.
-
Enter your Name, Email Address, and Password.
-
Click Next.
-
Outlook will cycle through its configuration steps. Once you see three green checkmarks, you're all set!

Option B: Manual Setup (IMAP)
If the automatic setup fails, or if you have specific server requirements from your provider, use the Manual path.
-
Select Manual setup or additional server types and click Next.
-
Choose POP or IMAP.
-
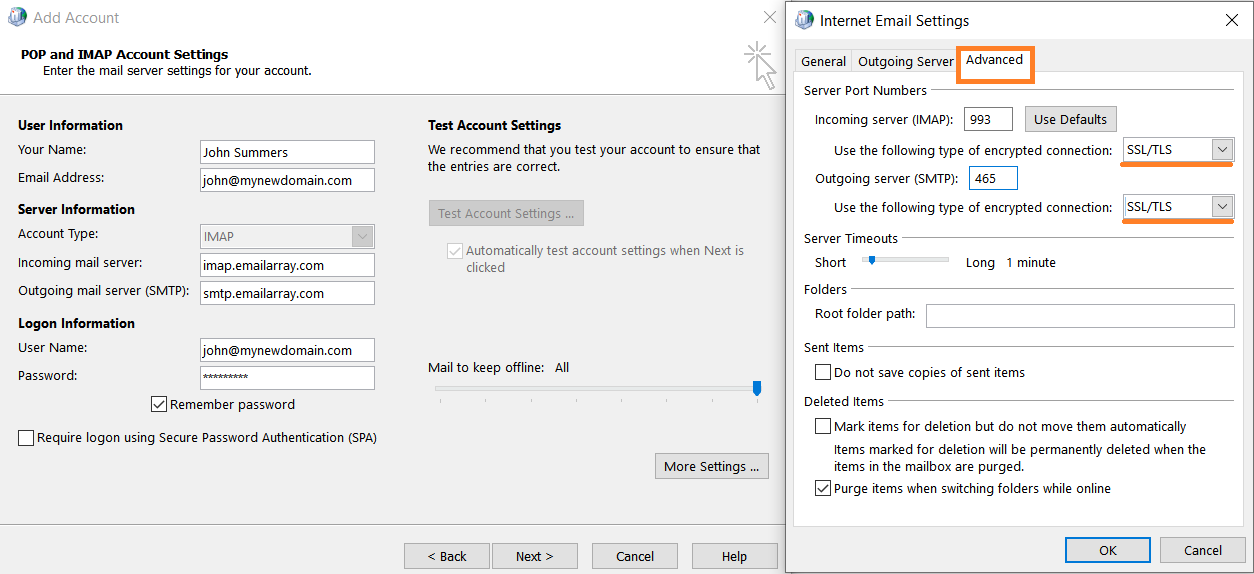
Enter your Server Information:
-
Account Type: IMAP
-
Incoming mail server: (Provided by your host)
-
Outgoing mail server (SMTP): (Provided by your host)
-
-
More Settings (Crucial Step): * Click the More Settings button.
-
Under the Outgoing Server tab, check the box: "My outgoing server (SMTP) requires authentication."
-
Under the Advanced tab, ensure you are using the correct port numbers (usually 993 for IMAP and 465 or 587 for SMTP) and select SSL/TLS for the encrypted connection.
-
-
Click OK, then Next to test the settings.


Step 3: Launching Your New Profile
Now that the profile is created, you need to tell Outlook to use it.
-
Back in the Mail window (where you clicked "Show Profiles"), look at the bottom section.
-
Select "Prompt for a profile to be used" if you want to choose between your old and new profile every time you open Outlook.
-
Alternatively, select "Always use this profile" and choose your new one from the dropdown to make it the default.
-
Click Apply and open Outlook.
Enjoy your clean, fresh inbox!