
Webmail - Send as Alias
When you have one or more Aliases for your email address, you might want to be able to send from one of the Aliases. This is possible by adding the Alias to your Webmail.
Step-by-step guide
You must create the Alias before adding it to the Webmail.
After you log in to your Webmail,
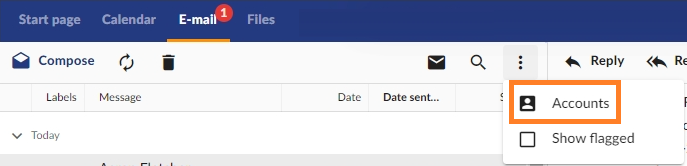
- Go to the E-mail tab.
- Click on the three dots button on the right of the email panel and then click on Accounts.
- Double click the email account that has the Alias.
- Click on the Aliases button.
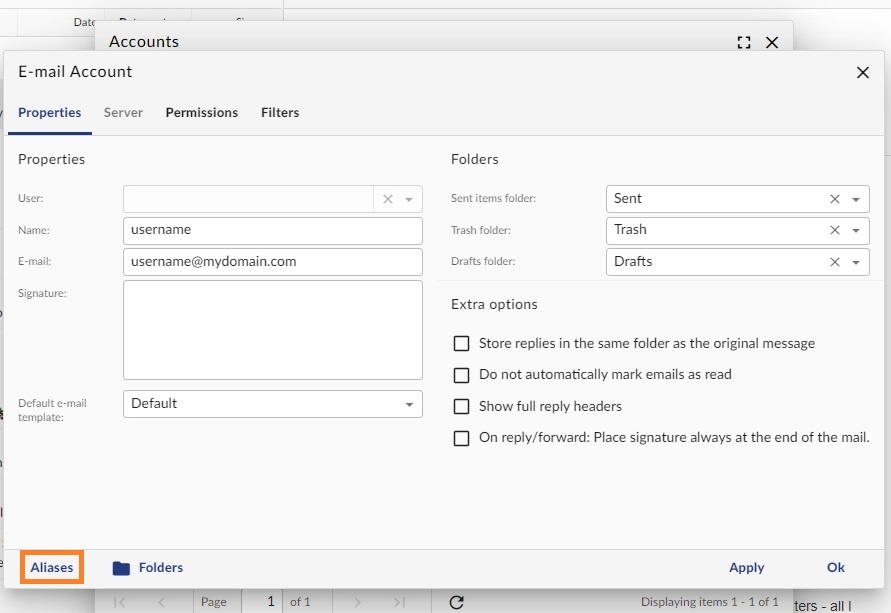
- Fill in the Alias information:
- Name: the name you want to appear in your "From" field
- Email: your full Alias address
- Signature: is optional

- Click on the Save button.