
Webmail - Files and Folder Sharing
Sharing Folders
The Webmail allows you to share folders with other members of your organization, enabling seamless collaboration.
How to Share a Folder
Follow these steps to activate sharing for a specific folder within your Webmail:
-
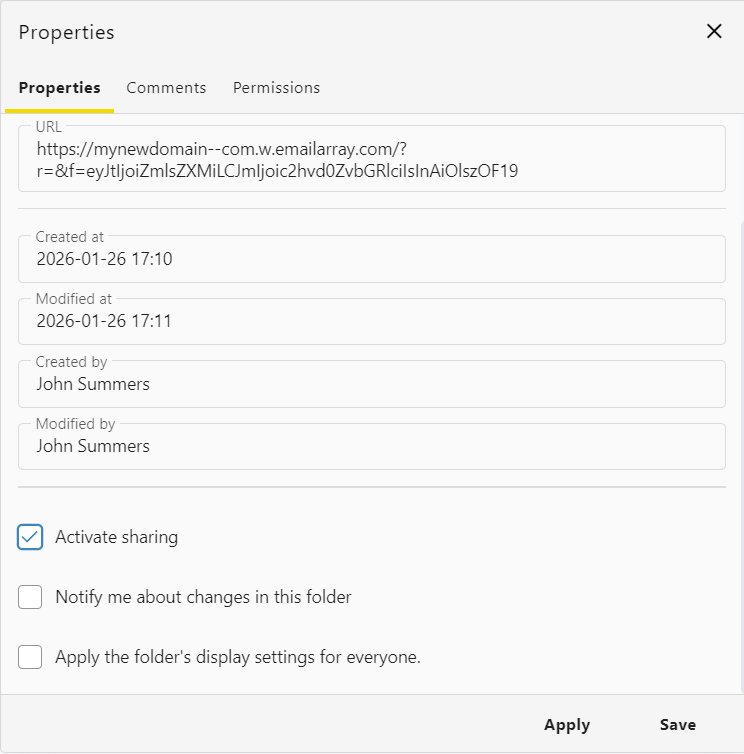
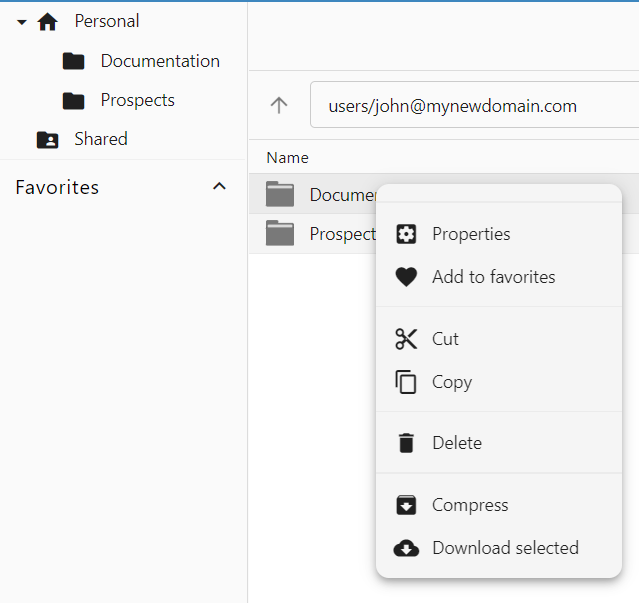
Select the Folder: In the Webmail files section, right-click on the folder you wish to share and select Properties.

-
Activate Sharing: In the Properties tab, check the box labeled Activate sharing. This enables the sharing functionality for that specific directory.
-
Configure Notifications (Optional): You may also choose to:
-
Notify me about changes in this folder: Receive alerts when others modify files.
-
Apply the folder's display settings for everyone: Standardize the view for all collaborators.
-
-
Save Changes: Click Apply or Save.

Managing Permissions
Once sharing is active, you can define exactly who has access and what level of control they have.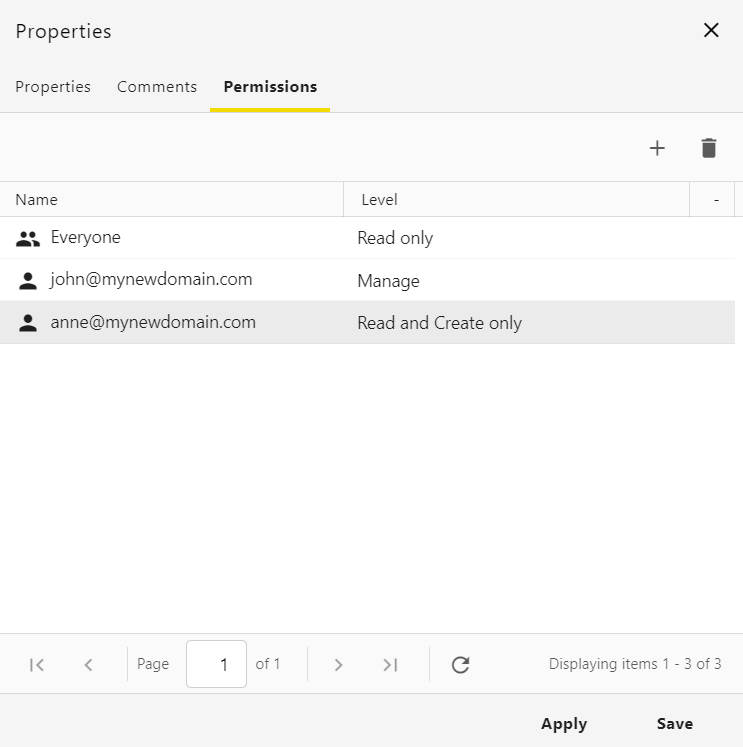
Accessing Shared Content
When a folder is shared with you, it will appear under the Shared section in your file navigation sidebar. This allows teams to maintain a central repository for shared documents, images, and project files.
Sharing Files
Creating a Secure Download Link
To generate a link that allows others to download a specific file:

-
Locate your file: Navigate to the files section in your Webmail.
-
Open the menu: Right-click on the file you wish to share.
-
Generate the link: Select Create download link from the menu.
-
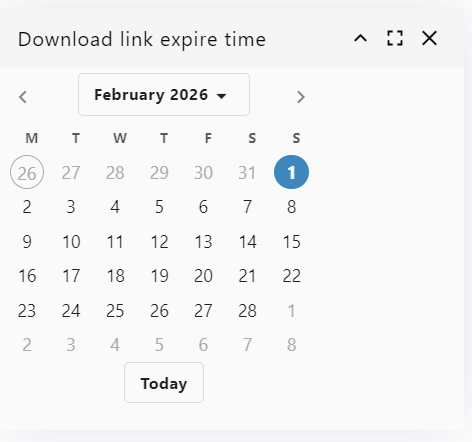
Set an expiration date: A calendar will appear. Choose the date when you want the link to expire and stop working.
-
Distribute the link: Once generated, you can copy this link and send it via email or chat.
Viewing File Details and Active Links
You can review file information and manage active sharing links at any time:
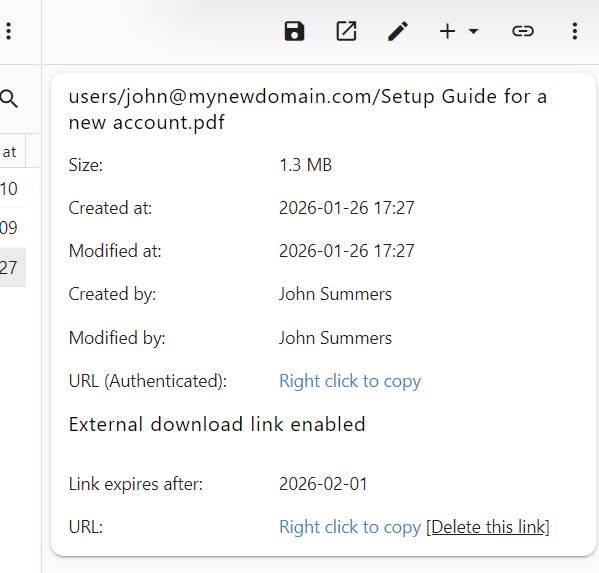
-
View Details: Click once on a file to open the details pane. Here you can see the file size, creation date, and who last modified it.
-
Copy Authenticated URL: You can right-click to copy the internal URL for users who already have access to your file system.
-
Manage External Links: If a download link is active, you will see the status "External download link enabled."
-
Expiration Status: View exactly when the link is set to expire.
-
Delete Link: If you need to stop sharing before the expiration date, click [Delete this link] to deactivate it immediately.
-
Additional Sharing Options
When you right-click a file, you also have access to:
-
Email download link: Automatically compose a new email containing the secure link.
-
Email files: Attach the file directly to a new email message.