
Adding New Customers: How to Create an Admin Account
Managing your growth is simple. When you bring a new customer on board, you’ll start by creating an Admin account for them in the Super Panel. This gives them (or you) the power to manage their specific domains and mailboxes.
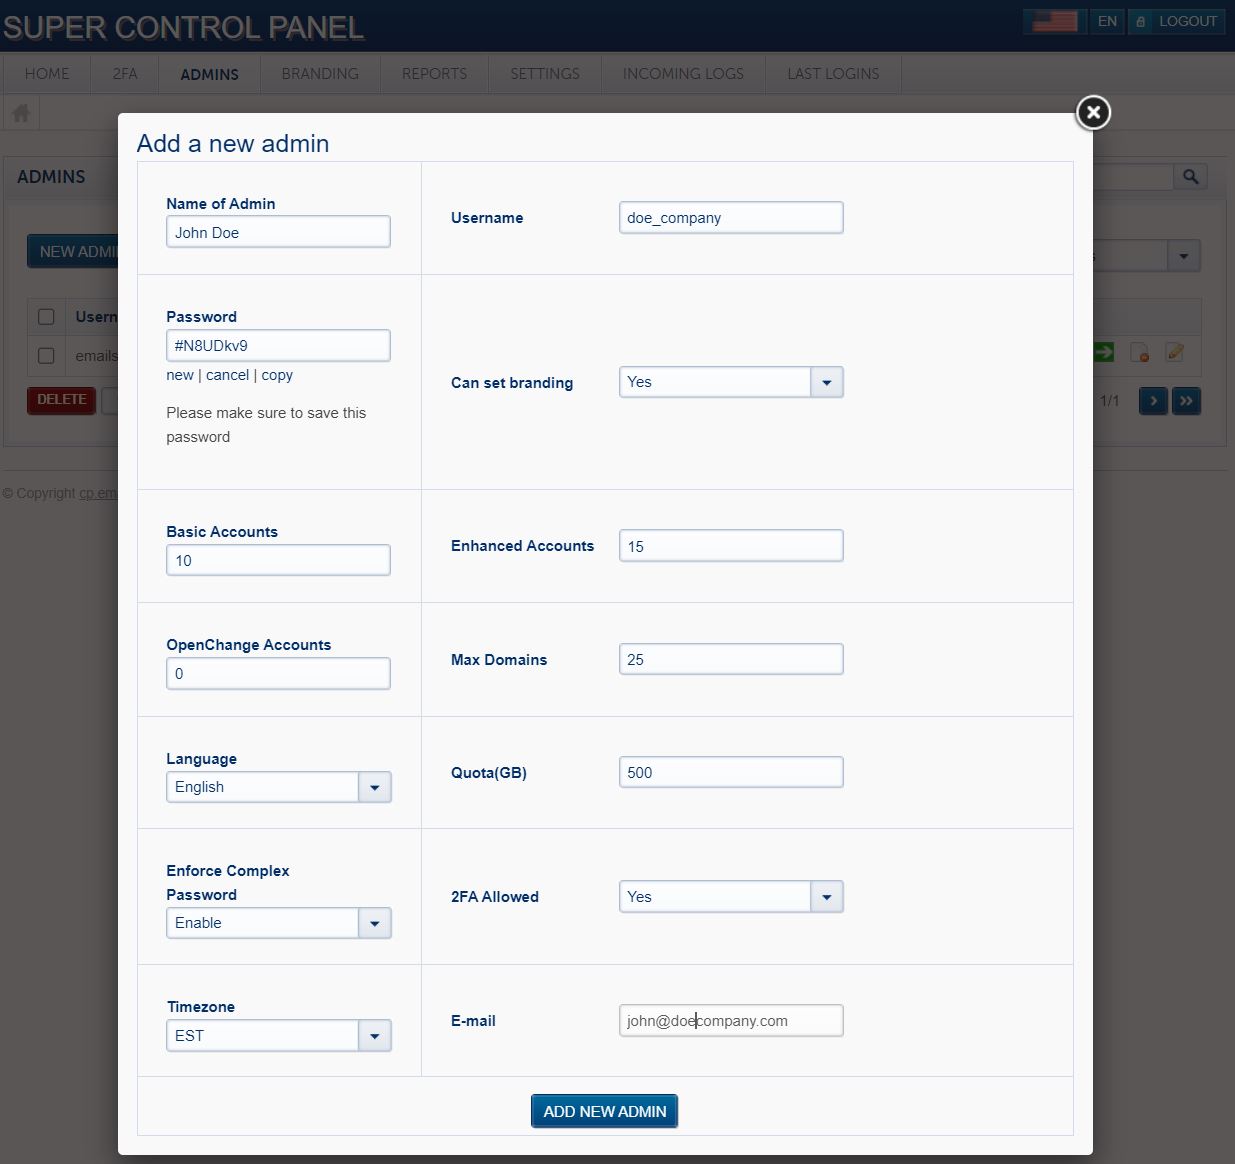
Step 1: Create the Admin Account
First, log into your Super Panel and navigate to the ADMINS tab.
- Open the Setup Form: Click on New Admin.
- Basic Information: Enter the administrator's name, choose a unique username, and set a secure password.
- Set Resource Quotas: You must enter a value for every field (use "0" if a feature isn't needed):
- Mailbox Quotas: Define how many Basic or Enhanced they can create.
- Max Domains: Set the limit for how many domains this admin can manage. Tip: A standard rule of thumb is one domain per purchased mailbox.
- Quota (GB): Assign the total storage allowance for this customer. You have the flexibility to divide your total storage space however you like among your clients.

- Finalize: Choose the default language and timezone for the admin, then click Add New Admin.
Step 2: Choose Your Onboarding Path
Once the account is created, you have two ways to handle the mailbox setup:
Option A: The Hands-Off Approach (Customer-Led)
Provide your customer with their new Admin login credentials. They can then log in and create their own mailboxes at their convenience.
Option B: The White-Glove Approach (Reseller-Led)
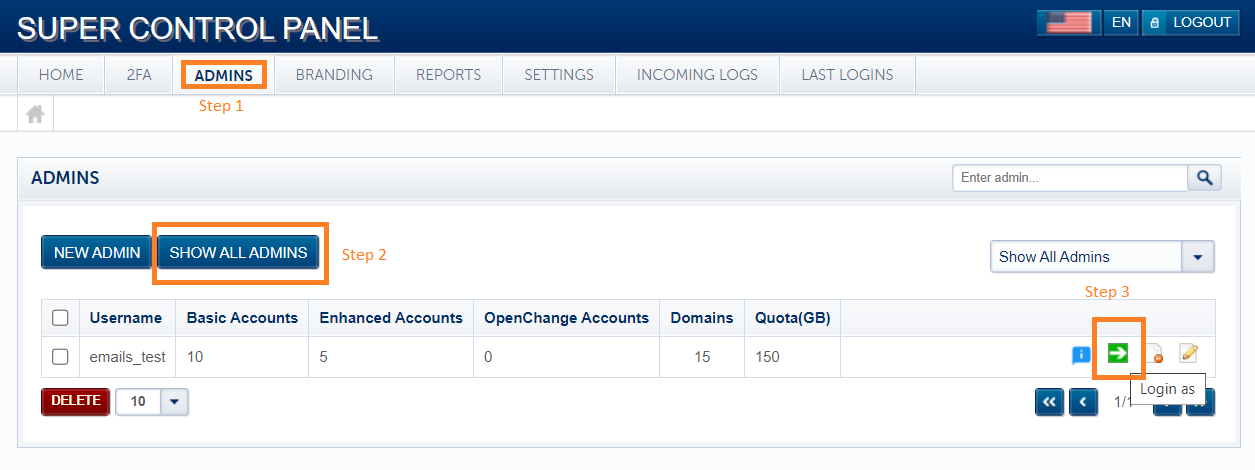
If you prefer to set everything up for your client, you can do so without needing their specific password:
- Go to the ADMINS tab and click Show All Admins.
- Locate your customer in the list.
- Click the "Login as" icon (the green arrow) to instantly access their dashboard and create mailboxes on their behalf.

Need help creating the actual mailboxes? We’ve made it super simple. Follow our Step-by-Step Mailbox Creation Guide to get your customer's team up and running in minutes.