# Adding New Customers: How to Create an Admin Account
Managing your growth is simple. When you bring a new customer on board, you’ll start by creating an **Admin account** for them in the Super Panel. This gives them (or you) the power to manage their specific domains and mailboxes.
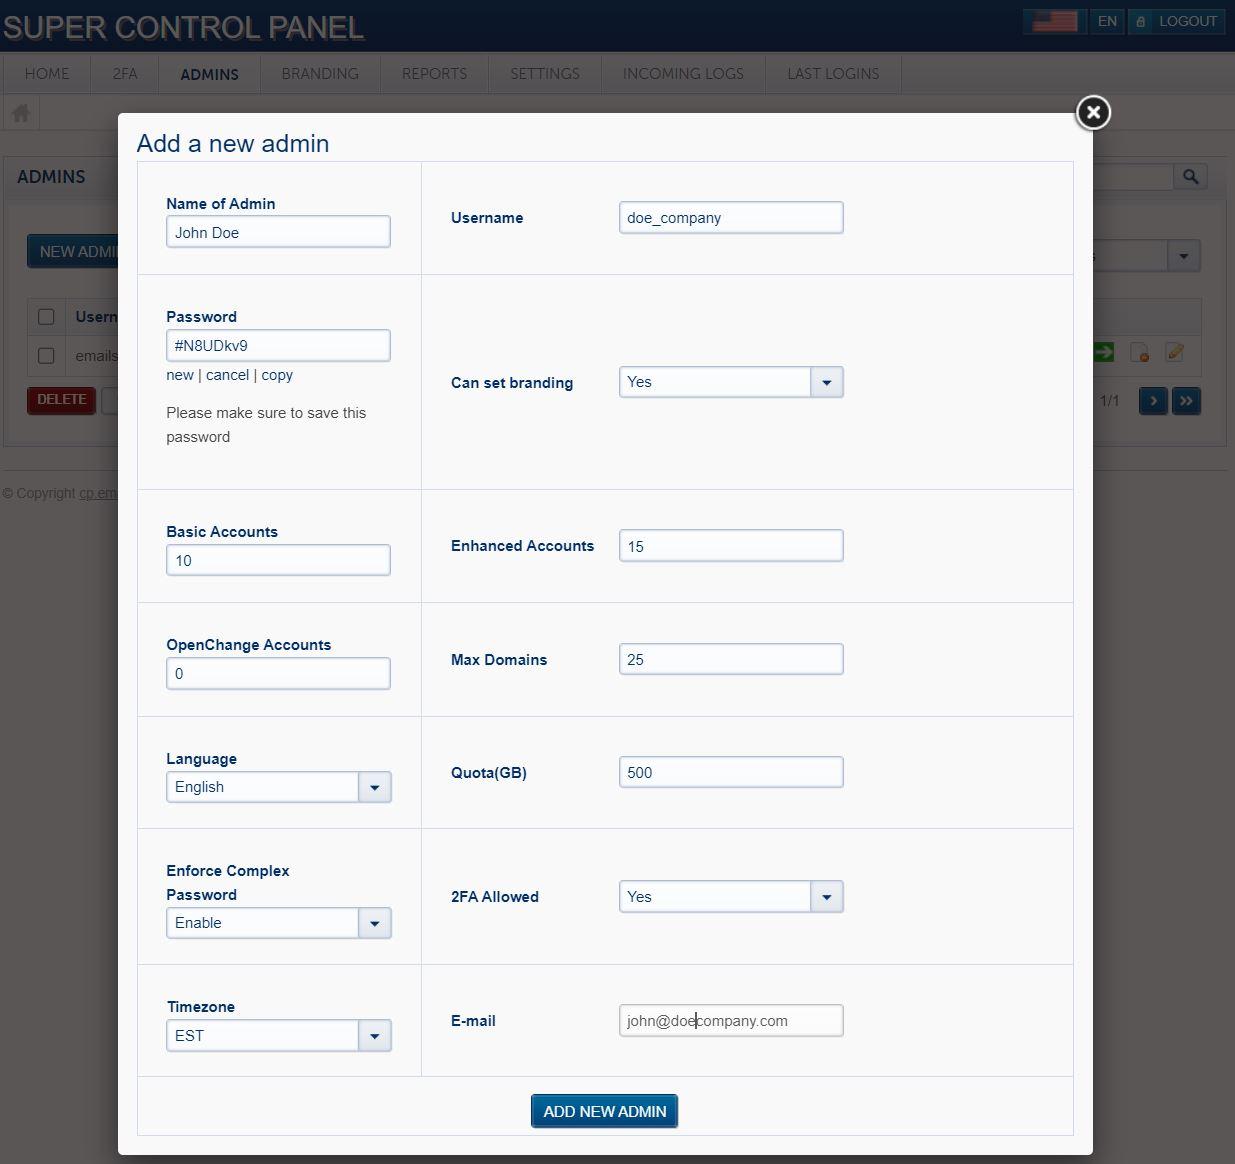
### Step 1: Create the Admin Account
First, log into your [Super Panel](https://cp.emailarray.com/super) and navigate to the ADMINS tab.
1. Open the Setup Form: Click on New Admin.
2. Basic Information: Enter the administrator's name, choose a unique username, and set a secure password.
3. Set Resource Quotas: You must enter a value for every field (use "0" if a feature isn't needed):
- **Mailbox Quotas**: Define how many **Basic or** **Enhanced** they can create.
- **Max Domains**: Set the limit for how many domains this admin can manage. *Tip: A standard rule of thumb is one domain per purchased mailbox.*
- **Quota (GB)**: Assign the total storage allowance for this customer. You have the flexibility to divide your total storage space however you like among your clients.
[](https://wikidev.emailarray.com/uploads/images/gallery/2026-01/example-setup-for-a-new-admin.JPG)
4. Finalize: Choose the default **language** and **timezone** for the admin, then click **Add New Admin**.
### Step 2: Choose Your Onboarding Path
Once the account is created, you have two ways to handle the mailbox setup:
#### Option A: The Hands-Off Approach (Customer-Led)
Provide your customer with their new Admin login credentials. They can then log in and create their own mailboxes at their convenience.
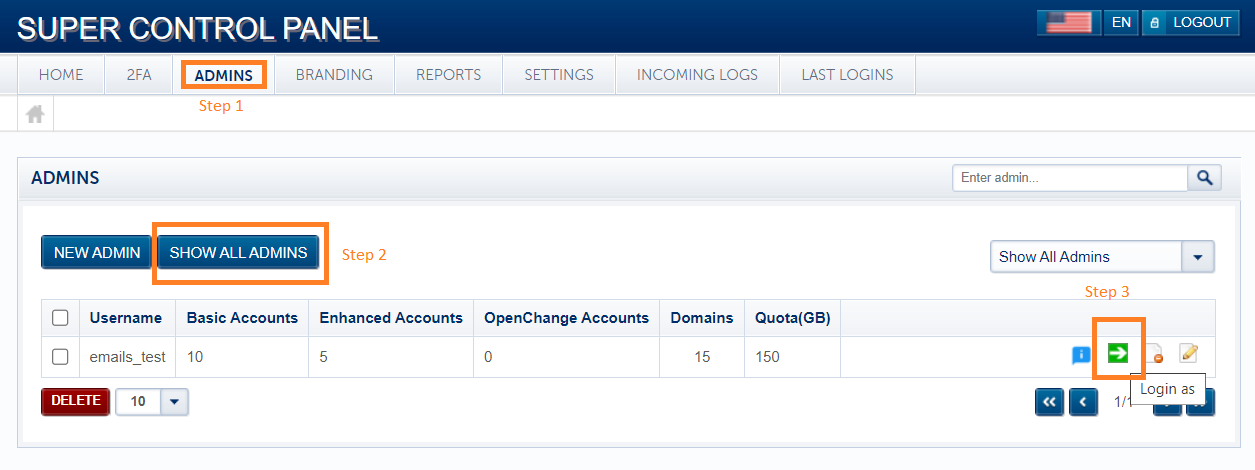
#### Option B: The White-Glove Approach (Reseller-Led)
If you prefer to set everything up for your client, you can do so without needing their specific password:
- Go to the ADMINS tab and click Show All Admins.
- Locate your customer in the list.
- Click the "Login as" icon (the green arrow) to instantly access their dashboard and create mailboxes on their behalf.
[](https://wikidev.emailarray.com/uploads/images/gallery/2026-01/login-as-an-admin-from-your-super-panel.PNG)
Need help creating the actual mailboxes? We’ve made it super simple. Follow our [Step-by-Step Mailbox Creation Guide](https://wikidev.emailarray.com/books/1-configure-a-new-e-mail-address-getting-started) to get your customer's team up and running in minutes.