
Manage Domains
Domains are managed from the Admin Panel. Here you can add or remove domains, set up a catchall, or define a domain-level time zone or footer.
1. Adding a New Domain
This guide will walk you through the process of adding a new domain to your account via the Admin Panel.
1.1. Steps to Add a Domain
-
Navigate to the Admin Panel.
- Log in using your Admin username and password.
- Verify that you have a sufficient domain quota available. This information is visible in the top menu bar of the Admin Panel.
- In the side menu, click on Domains.
- Click on the New button, located in the upper right corner of the Domains section.
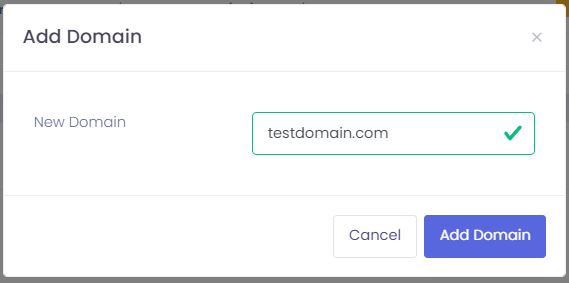
- In the New Domain field, enter the full domain you wish to add (e.g.,
testdomain.com). - Click on Add domain to create the domain.
You won't be able to add any mailboxes (Users) until you verify the domain ownership.
Unverified domains will be removed after 4824 hours.
Tip: Managing Local Delivery
By default, our system routes emails locally between domains hosted on our servers, even if your MX records still point to your old provider. To avoid delivery errors during your transition, set Local Delivery to No. You can change this back to Yes once all your users are added and your MX records are officially pointed to us.
1.2. Verify Domain Ownership
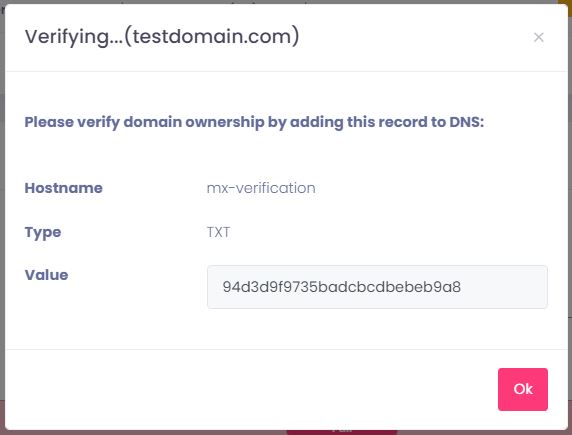
After addingyou youradd a domain, you must verify yourthat ownership.you Thisown it. Domain ownership is doneverified by adding a specific TXT record to yourthe domain’s DNS settings at your domain registrar or DNS provider.
Onceverification record uses the hostname `mx-verification`. This name is only used for domain ownership verification. It does not change your MX records, does not affect your current email routing, and does not affect email deliverability under your current setup.
Important: unverified domains are removed after 24 hours.
If themx-verificationTXT record is not found within 24 hours after the domain is added, the domain is automatically deleted from the Admin Panel. If this happens, add the domain again and repeat the verification steps.Get the verification TXT record
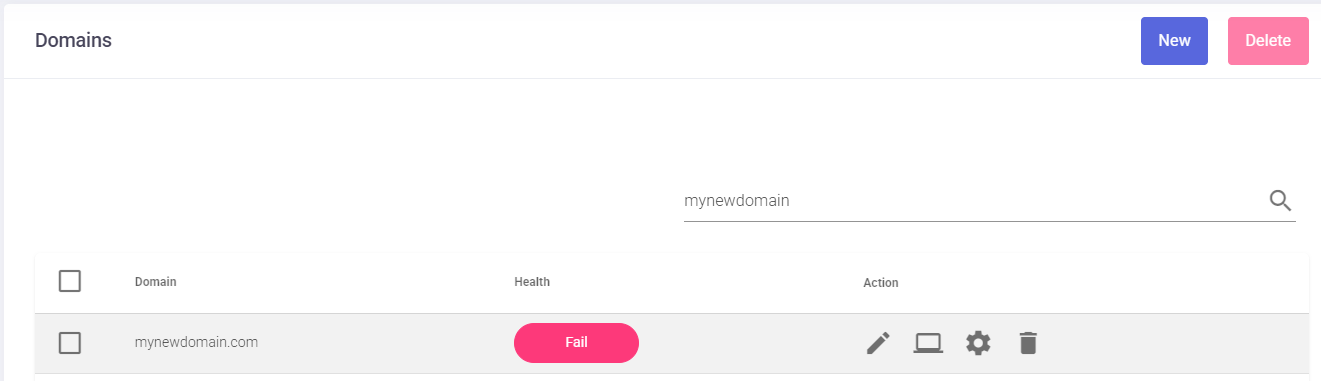
After the domain is added, it
will appearappears in the domain list with a Fail healthstatusstatus.indicatingThisitmeans the domain still needsverification, with a checkmark optiontoVerifybe
The
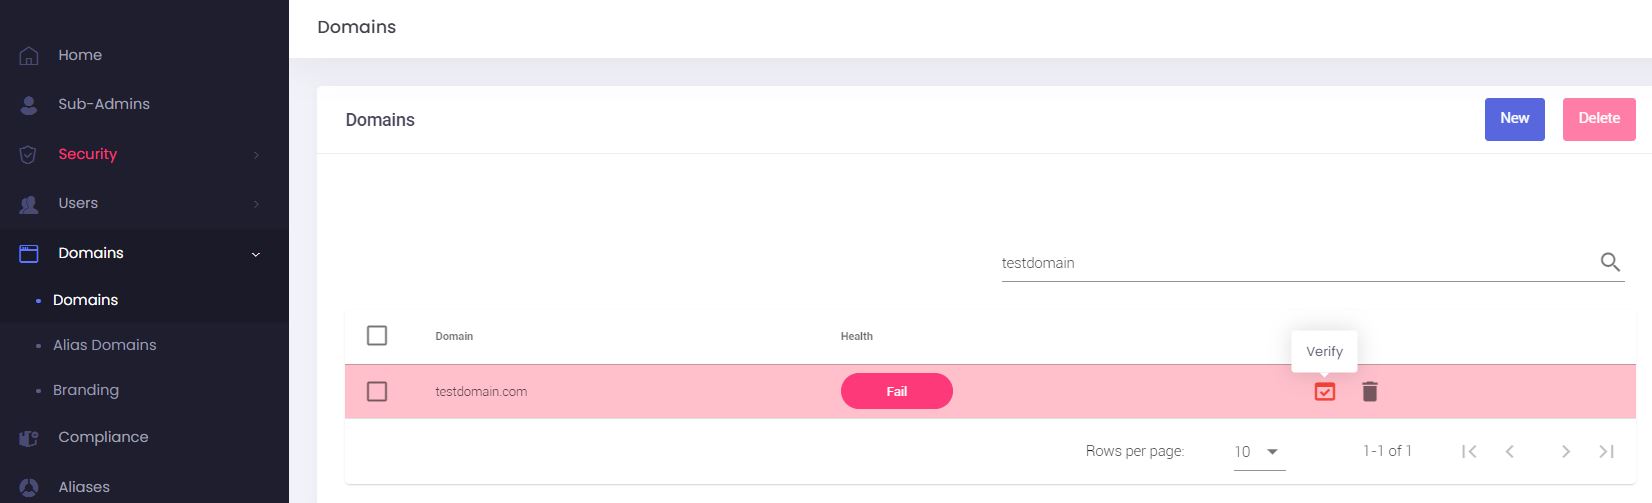
To retrieve the necessary TXT record for verification, locateLocate the newly added domain in the domain list.- Click
onthe Verifybuttonbutton,(representedshownbyas a red checkmarkicon)icon. A pop-up window will appear, displaying theHostname,Type, and the uniqueValuerequired forCopy the DNSrecord.record details from the pop-up window. The pop-up shows the required values:Hostname:Hostname:mx-verificationType:Type:TXTValue:Value:copyCopy the uniquestringvaluefromshown in your pop-upwindowwindow.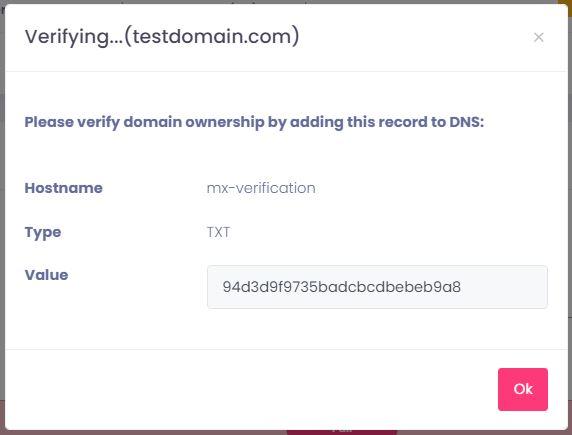
GoLog in to your domainregistrar'sregistrar or DNSprovider'sprovider.- Open
paneltheandDNSaddsettings for the domain. - Add a new TXT record
withusing theprovidedhostnameHostnameandValue.value shown in the verification pop-up. WhenSave the DNS record.- The domain no longer
appearappears in red in the domainlistlist. - The red Verify checkmark no longer appears.
- The domain ownership Status changes from Unverified to Enabled.
- The domain Health status may still show as Fail. This is expected until the recommended DNS records, such as MX and
theSPF,redareVerifyaddedcheckmarkandwill not show anymore:detected. - In the
DomainsAdminlist,Panel,yougocan click onto theHealthDomainsstatuslist. - Click
"Fail"the domain’s health status, such asshownFail,into open theexample) option to see theDomaindomain healthstatus. - The Domain health pop-up
will showshows the status ofvariousimportantessentialDNSrecords.records and related checks, including:(See image below, which displays statuses forMX records, Webmail record, Webmail SSL, Autodiscover record, Autodiscover SSL, Autoconfig record, Autoconfig SSL and SPFRecord).Record A domain Status
isof Disabledif themeans domain ownershipwashas notverifiedbeen verified. A status of/Enabledif themeans domainwasownership has been verified.-
Recommended DNS records
When you are ready, follow the DNS Configuration guide to set up the following records correctly:
- MX records - These direct incoming emails for your domain to the correct mail servers. They are crucial for receiving emails.
- SPF record - This is a TXT record that lists authorized mail servers permitted to send emails on behalf of your domain, helping to prevent email spoofing and improve deliverability.
- Webmail record (optional) - This is typically a CNAME record that allows you to access your webmail interface via a custom URL (e.g.,
webmail.yourdomain.com). - Autodiscover / Autoconfig records (optional) - These records simplify the process of configuring email clients (like Outlook / Thunderbird or mobile email apps) by allowing them to automatically discover server settings.
Webmail SSLAutodiscover andAutodiscover /AutoconfigSSLSSL::Aftertoconfiguring these records, you can usecheck the updated SSL status.Update the domain health status
The
RefreshDomain healthorpop-up includes two actions: Verify again and Refresh.Verify again
Click Verify again
buttonto queue a new DNS check for the domain. The result is not shown instantly. Wait up to 60 seconds, then click Refresh to display the updated health status.Use Verify again after you add, remove, or change DNS records for the domain.
Refresh
Click Refresh to reload the current domain health status shown in the
"Domainpop-up.health"Refreshsectiondoestonotupdatestart a new DNS check. It only updates thestatus.status -
Navigate to the Admin Panel.
- Log in using your Admin username and password.
- Click on Domains in the menu.
- Click on the delete icon next to the domain you wish to remove
- An alert pop up will appear, showing the domain that will be deleted. Click on Delete to confirm.
-
Go to the Admin Panel.
- Log in using your Admin username and password.
- Click on Domains in the menu.
- Click on the edit icon next to the domain you wish to edit
- You can edit the following information:
- Domain-level Timezone. Set regional defaults for the entire domain.
- Domain-level Home Country. Helps with detecting unusual logins.
- Catchall. Manage mail sent to non-existent addresses.
- Enable / disable Local Delivery. This can be useful in these cases:
- By default, our system routes emails locally between domains hosted on our servers, even if your MX records still point to your old provider. To avoid delivery errors during your transition, set Local Delivery to No. You can change this back to Yes once all your users are added and your MX records are officially pointed to us.
- You want to forward your emails to another email address but you don't want to keep a local copy - set Local Delivery to No.
- Enable / disable Audit domain. Monitor domain-wide mail activity (click here for details).
-
Go to the Admin Panel.
- Log in using your Admin username and password.
- Click on Domains in the menu.
- Click on the edit icon next to the domain you wish to edit
- In the Domain Catchall field, you can choose from the following:
- No catchall: this disables the catchall feature
- Accept & Delete: the catchall will automatically delete all the messages received
- Username: the catchall will forward all received messages to the selected Username (mailbox)
- Navigate to the Admin Panel.
- Go to Compliance in the side menu.
-
Select the audit sub-domain from the dropdown.
-
Click New to add a rule.
-
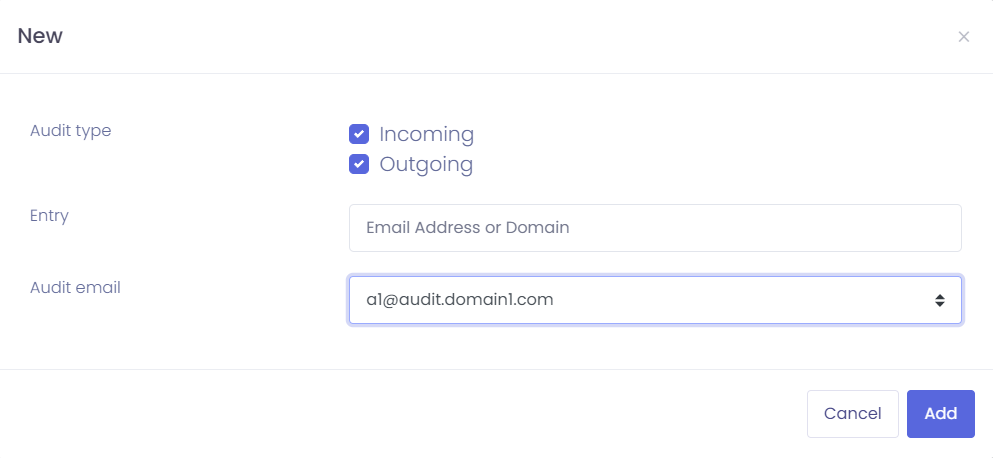
Set your preferences in the New window:

-
Audit type: Check Incoming to capture mail sent to your domain, and Outgoing for mail sent from your domain.
-
Entry: Specify what to monitor. Enter the full domain to audit all users, or a specific email address for a single user.
-
Audit email: Select the destination Audit Account you created in Step 2.
-
-
Click Add to activate the rule.
-
Go to the Admin Panel.
- Log in using your Admin username and password.
- Click on Domains in the menu.
- Click on the footer icon next to the domain you wish to update
- Fill in the Footer message using the available HTML editor.
- Click on Update to finish.
-
Go to the Admin Panel.
-
Log in using your Admin username and password.
-
Go to Domains > Branding in the Admin Panel sidebar.
-
Select Domain: Choose the specific domain you wish to customize from the drop-down menu.
-
Update Details: Fill in the branding information, including the company name, website link, support email for spam reports, and primary brand color.
-
Upload Logo: Directly upload a logo from your device. For the best display within the Webmail interface, aim for an image that fits or matches the 210px x 35px aspect ratio.
-
Save Changes: Click on Update Settings to apply the branding to that specific domain.
-
Revert Changes: If you wish to remove the domain-specific customization and return to your global settings, click on Reset to Admin Defaults.
Add the TXT record to your DNS
DNS changes can take time to become visible. If the domain is properlynot verified,verified itright willaway, wait a few minutes and check again.
What happens after verification
When the TXT record is found, the domain is verified. After verification:
1.3. Improve Domain Health
Once
After domain ownership is verified, you should configure additionalthe recommended DNS records tofor ensurethe properdomain. These records help email functionalitywork correctly and improve yourthe domain'sdomain overallhealth health.status in the Admin Panel.
If you are planning an email migration tofor this new domain, you may choose to postpone making changes to critical records like MX records until the migration process is complete to avoid any disruption to your current email flow.
Open the domain health status
details.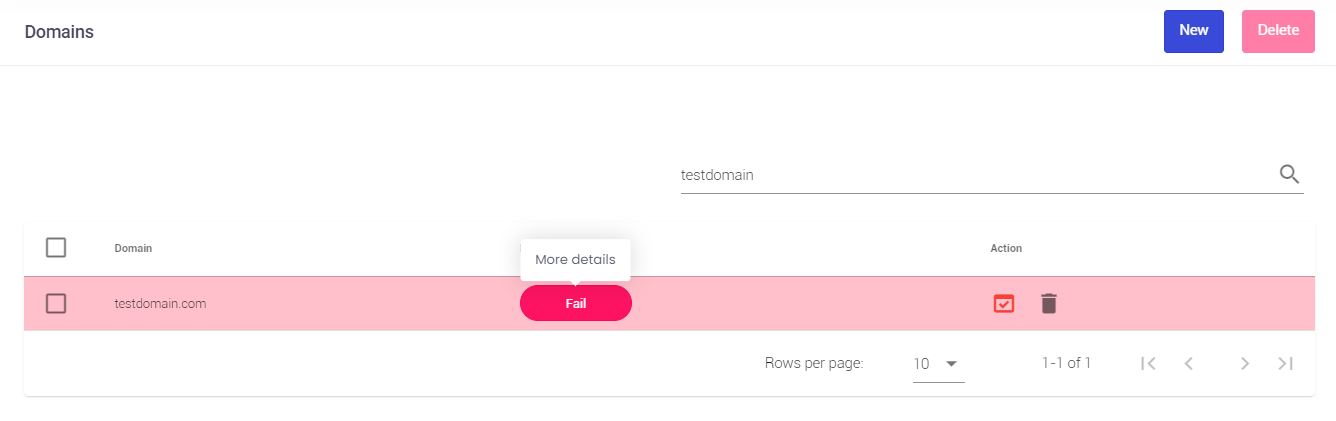

Webmail,
After the correspondingWebmail, WebmailAutodiscover, and Autodiscover /or Autoconfig DNS records are correctlyfound setfor upthe andfirst havetime, propagated.the Pleasematching allowSSL certificate is generated automatically. You do not need to take any extra action.
SSL generation can take up to 30 minutes (orafter sometimes longer, depending onthe DNS propagation)record foris theirfirst statusdetected. toAfter updateabout 30 minutes, click Refresh in the Domain Healthhealth pop-up.up
in the Admin Panel.
Automatic domain health checks
The system checks domain health automatically during the first 3 days after a domain is added.
Automatic checks run:
1. After the domain is added
2. About 4 hours later
3. About 8 hours after that
4. At increasing intervals during the first 3 days
After the first 3 days, automatic checks stop.
If you change DNS records after that time, you must click Verify again to queue a new DNS check. Wait 1 to 2 minutes, then click Refresh to view the updated health status.
2. Remove a Domain
Removing a domain will PERMANENTLY erase all domain data from our servers, including all the users' messages, the aliases, lists, and all preferences.
3. Edit a Domain
You cannot change the name of a domain. The only way to accomplish this is to create the domain with the new name (correct a misspelling, add a hyphen, etc.) and then request a migration from the old domain to the new one by opening a support ticket.
4. Catchall
A Catchall address allows you to capture messages destined for non-existing mailboxes. It can help you salvage important messages that were sent to mistyped addresses. Still, on the other hand, it will surely cause you to receive many Spam emails sent via a dictionary attack, where the sender puts commonly used aliases.
To enable a Catchall:
5. Domain Auditing & Compliance
The Audit Domain feature is an essential administrative tool for compliance, security, and record-keeping. By enabling this, the system captures a "Blind Carbon Copy" (BCC) of emails for oversight without disrupting the user's experience.
Step 1: Enable Auditing for the Domain
Before configuring specific rules, you must first activate the audit capability for the entire domain.
Step 2: Create the Audit Storage Mailbox
Now that auditing is enabled, you need a specialized account to receive and store the intercepted emails.
Step 3: Configure Interception Rules
Finally, define exactly which communications the system should capture and where they should go.
Note: Enabling this feature will capture all incoming and / or outgoing messages for every user on the domain. Ensure your designated audit mailbox has sufficient storage capacity to handle the volume of traffic.
6. Set a Footer (Domain Level)
A domain-level Footer will show up in all the emails that all the users of the domain send.
To add a domain Footer:
7. Setup Branding (Domain Level)
While global branding can be set at the Admin level, you can also override those settings to provide a unique identity for a specific domain.
Steps to Configure Domain Branding: