
Setup e-mail on Outlook
Below, step by step tutorials according toFind the Outlookstep-by-step tutorial for your specific version used,of Outlook below. If you aren't sure which version you have, you can usually checkfind whenthis openinginfo Outlookunder the Help menu or inthe About section within the Helpapp.
Large There'sMailboxes: alsoDepending a websiteon withyour internet speed and the size of your mailbox (we support up to 200GB per account), the initial synchronization can take anywhere from a genericfew Outlookhours setup whichto cana befew useful,days soto youfully canbuild viewyour screenshots.local data file.
Also notice
Use the firstfollowing timesettings you open Outlook since its installation, a window will immediately pop up asking you to set up your email account. Click yes and proceed andor follow ourthe Outlook 365 or Outlook 2013/2010 instructions starting with a section in which you start typing in your account data.
Finally, as per our tests, sent items and trash are automatically saved in IMAP folders, except in older Outlook 2003. Nonetheless, information about this is available for Sent Items and Trash, especially useful if your Outlook is not in English and you want to manually define folders used for these base folders. Notice that our Webmail automatically decodes the English default names (Sent, Trash, Drafts, Spam) so that it shows them in the language in which you accessed Webmail. In some cases, however, it might be required to change folder mappings in Webmail, if Outlook does not do this conversion automatically, besides mapping the localized names in your Outlook.below.
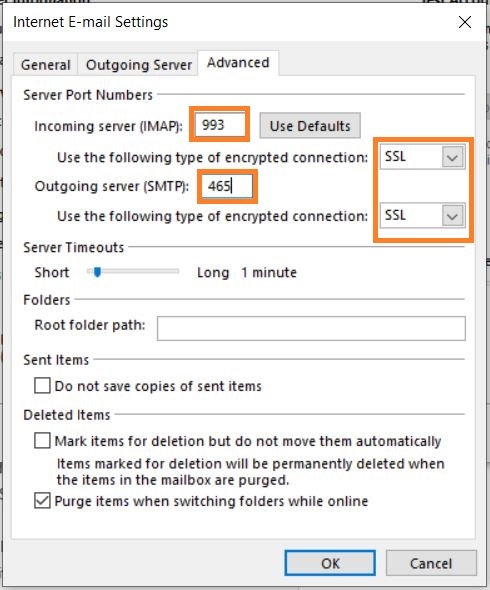
| Service | Server Address | Port (SSL/TLS) |
| Incoming (IMAP) | imap.emailarray.com | 993 |
| Outgoing (SMTP) | smtp.emailarray.com | 465 |
We recommend using IMAP with SSL/TLS to ensure your data remains private and your folders stay synchronized across all devices.
The New Outlook for Windows
Microsoft has recently introduced a "New Outlook" for Windows. Based on our testing and official Microsoft documentation, this version handles IMAP accounts differently than previous versions.
What you need to know
- Forced Cloud Sync: Unlike "Classic" Outlook, the "New Outlook" requires all IMAP accounts to sync through the Microsoft Cloud.
- Data Privacy: This means your emails, even though hosted securely with us, will be stored on Microsoft’s servers to enable this sync.
- Setup Failures: Because Microsoft forces this intermediary sync, many IMAP setups fail during the "Syncing to Microsoft" phase, even if your credentials and server settings are 100% correct.
Our Recommendation: Use "Classic" Outlook
To maintain a direct, private connection between your device and our servers, and to avoid setup errors, we recommend staying with Classic Outlook.
-
Open Outlook.
-
Locate the "Try the new Outlook" toggle in the upper-right corner.
-
Switch the toggle Off.
-
Restart Outlook and follow the Outlook 365 or Outlook 2013/2010 instructions below.
For a deeper dive into why Microsoft implemented this change, you can read the full discussion on the Microsoft Community page.
Outlook 365
Unfortunately, this version of Outlook doesn't support Autodiscover for IMAP accounts anymore.
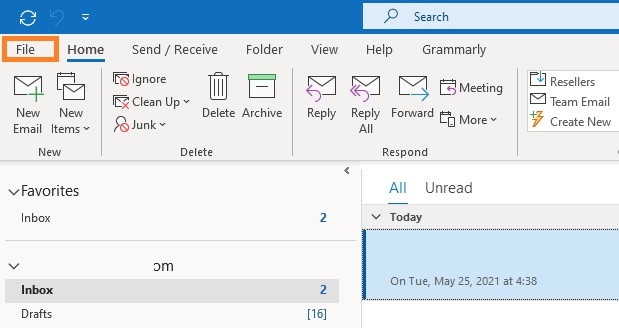
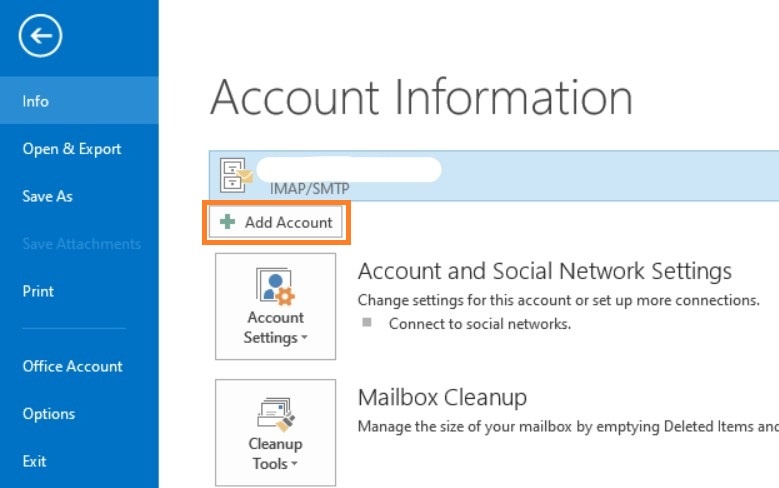
- Click on the File menu
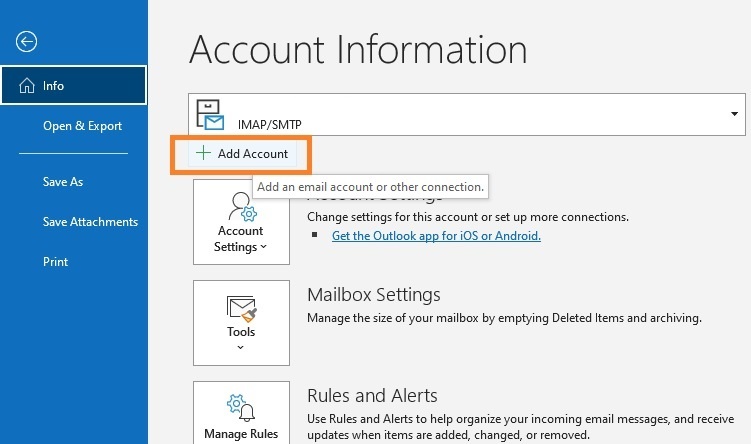
- Click on + Add Account
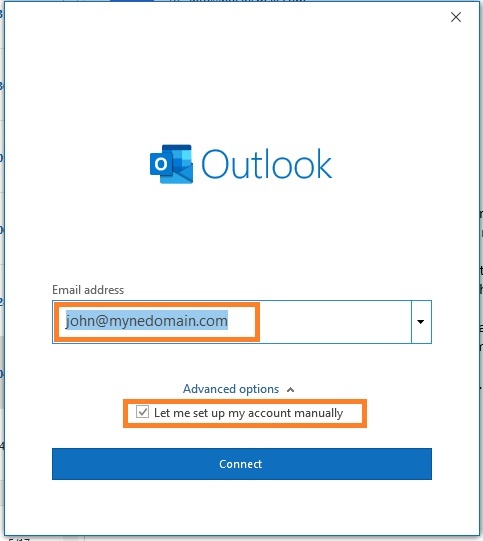
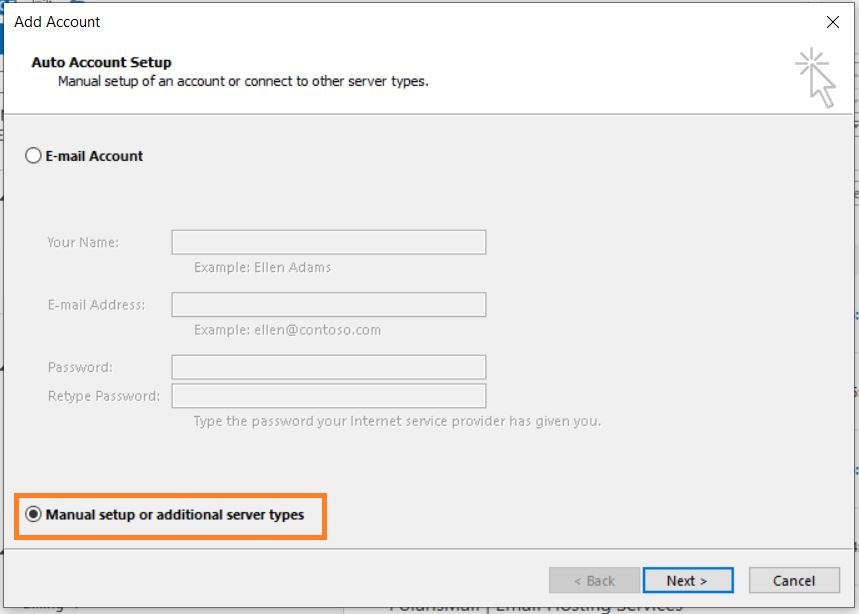
- Fill in your full email address and select the option Let me set up my account manually.
- Click on Next.
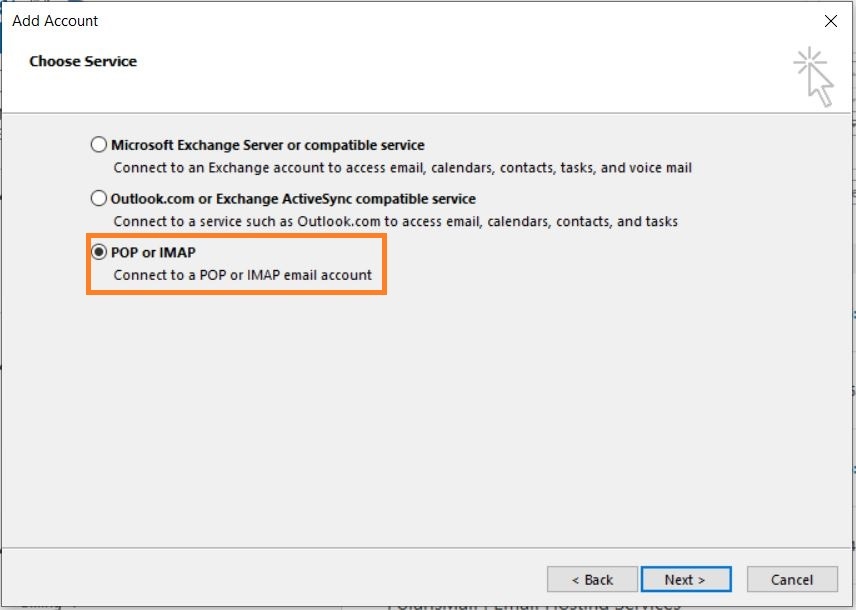
- Select IMAP from the list of account types.
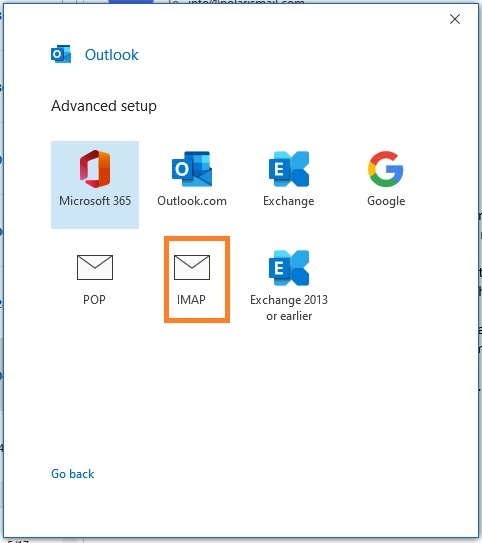
- Fill in server information from the Server & Ports page
- Click on Next
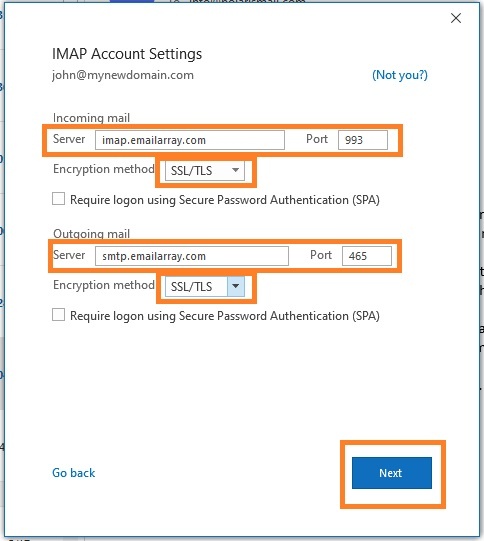
- Fill in your existing password for your email address and click on Connect
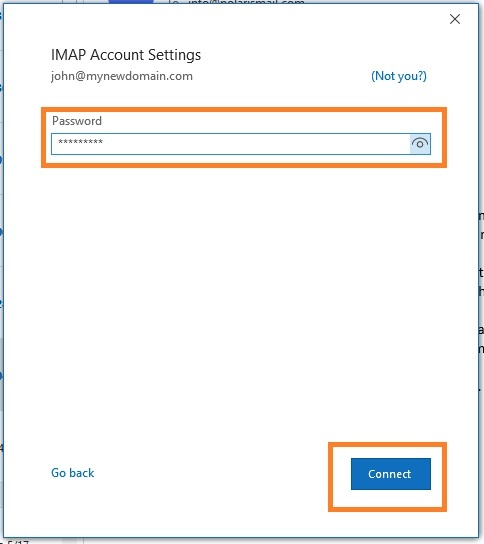
- The setup is completed. The message Account successfully added will show and Outlook will begin synchronizing the account.
Depending on the size of your mailbox and your Internet speed, Outlook might take from a few hours to a few days to synchronize the mailbox and build the local PST file.
Note that Outlook will automatically set up the account as IMAP. If you want to set up the account as POP, you have to set up the account manually. IMAP is recommended, as it´s a protocol made to support several devices accessing one same account, with all folders synced at our server, which also guarantees that our backups will be executed.
Outlook 3652013/2010:
- Click on
thethe File menu - Click
onon + Add Account
FillSelect POP or IMAP
- Option 1: this version of Outlook supports Autodiscover for IMAP accounts if you have setup Autodicover in your
fullemailDNS.address- Type in your full name, e-mail address, and
selectpasswordtheandoptionclick onLet me set up my account manuallyNext. - Click
onon Allow when asked about autodiscover.xml - Click on Finish
- Type in your full name, e-mail address, and
- Option 2: If you don't have Autodicover
- select Manual setup and click on Next.
-
- Type in your full name, e-mail address, and password
- Fill in server information from the Server & Ports page

-
- Click on More Settings.
- Select My outgoing server (SMTP) requires authentication and Use same settings as my incoming mail server.

SelectIMAPfrom- Click on the
listAdvancedoftab - Verify
types.the ports are correct and SSL is selected.
account- Click on the
Fillin server information from theServer & Ports page- Click
onon OK. Click on Next to finish the setup.
Fill in your existingpasswordfor your email address and click onConnect
The setup is completed. The messageAccount successfully addedwill show and Outlook will begin synchronizing the account.
Outlook 2013/2010:
Click on theFile menuClick on+ Add Account
SelectPOP or IMAP
Option 1: this version of Outlook supports Autodiscover for IMAP accounts if you havesetup Autodicover in your DNS.Type in your full name, e-mail address, and password and click onNextClick onAllowwhen asked about autodiscover.xmlClick onFinish
Option 2: If you don't have AutodicoverselectManual setupand click onNext.
Type in your full name, e-mail address, and passwordFill in server information from theServer & Ports page
Click onMore Settings.SelectMy outgoing server (SMTP) requires authenticationandUse same settings as my incoming mail server.
Click on theAdvancedtabVerify the ports are correct and SSL is selected.
Click onOK. Click onNextto finish the setup.