
Webmail - Customization
Personalizing Your Webmail Experience
We believe your inbox should work exactly the way you do. While your administrator can set global defaults (like timezone and date formats) from the Admin Panel -> Settings -> Localization, you have full control over your personal "Look & Feel" directly within the Webmail interface.
 |
 |
Accessing Your Webmail Settings
To begin customizing your experience:
-
Log in to your Webmail account
-
Click the User Icon (Settings) in the top right navigation bar.
-
Select "My account" from the menu.
-
Navigate to the "Look & feel" tab in the left-hand sidebar.
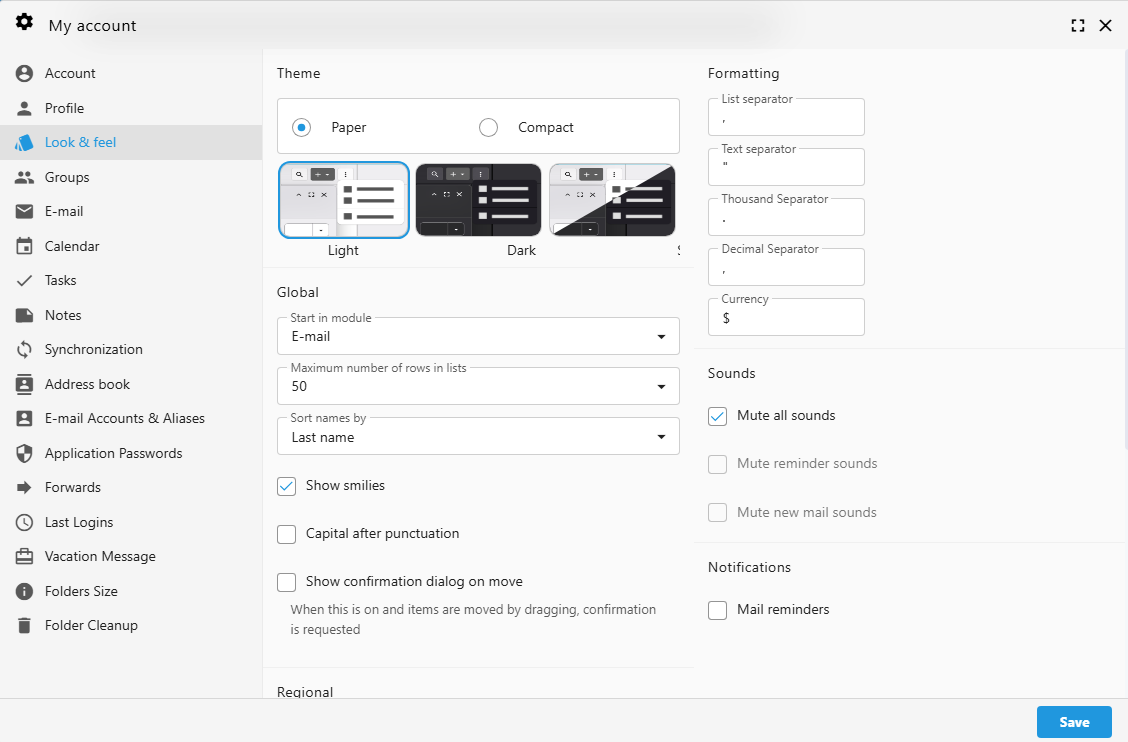
Visual Themes and Layout
Personalize the interface to match your workspace environment.
1. Theme Selection
Choose a visual style that is easiest on your eyes:
-
Paper: A classic, clean look for high readability.
-
Compact: Reduces whitespace to show more information on the screen at once.
-
Mode: Switch between Light, Dark, or System (which follows your device settings).
2. Global Display Options
Fine-tune how you interact with your mail and lists:
-
Start in module: Choose which app opens first (e.g., E-mail, Calendar, or Tasks).
-
Rows in lists: Set the maximum number of items (up to 50) displayed per page.
-
Sort names by: Organize your contacts by First or Last name.
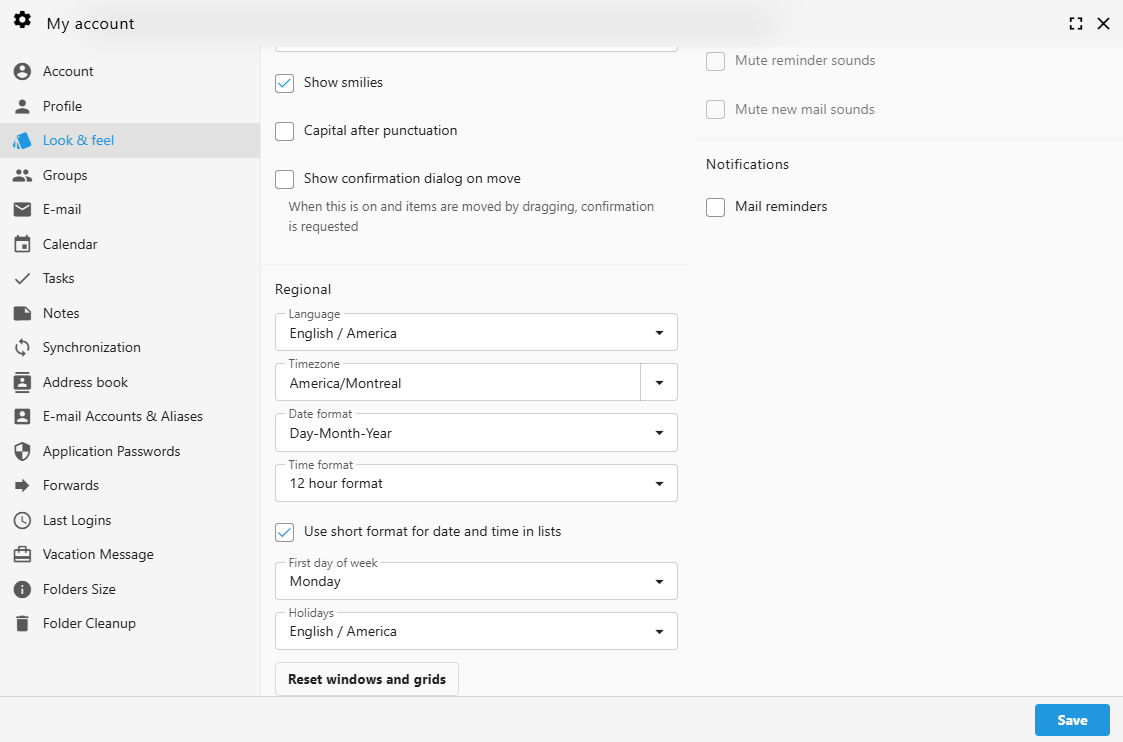
-
Show smilies: Enable or disable the conversion of text emoticons into graphics.
Regional and Localization Settings
While these may be pre-configured by your administrator, you can override them to suit your specific location or preference.
-
Language: Select your preferred interface language (e.g., English / America).
-
Timezone: Ensure your calendar invites and timestamps are accurate (e.g., America/Montreal).
-
Date & Time Format: Choose between Day-Month-Year or Month-Day-Year, and 12-hour or 24-hour clocks.
-
First Day of Week: Set your calendar to start on Sunday, Monday, or any day you prefer.
Pro Tip: If you've moved things around and want to return to the original layout, use the "Reset windows and grids" button at the bottom of the page.
Notifications and Sounds
Manage how your Webmail alerts you to new activity.
-
Mute all sounds: Silence all audio alerts with one click.
-
Individual Toggles: Specifically mute reminder sounds or new mail alerts.
-
Mail Reminders: Enable browser-based notifications to stay updated even when the tab isn't active.
Formatting and Separators
For users dealing with international data or specific spreadsheet needs, you can customize how numbers and lists are displayed:
Other Webmail Personalization
Customizing Your Message List
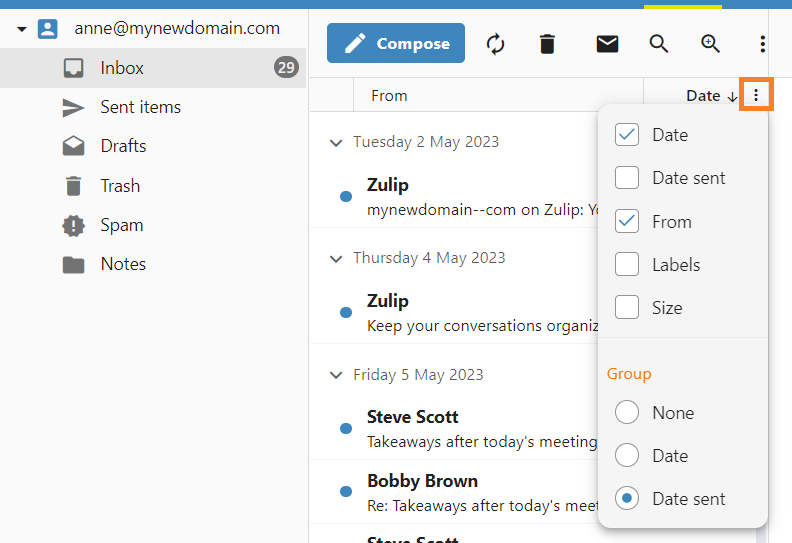
Visible Columns
The message list can be tailored to show only the information that matters most to you. You can add or remove columns to change how much detail is visible at a glance.
-
Open the Options Menu: Click the three vertical dots in the header of your message list, next to Date column.
-
Toggle Information: Check or uncheck the boxes next to the available fields, such as Date, From, Labels, or Size.
-
Instant Update: The list will refresh immediately, showing your selected columns and helping you manage your inbox more efficiently.
Managing How Emails are Grouped
By default, your messages are organized into chronological groups to help you navigate your inbox quickly. You can change this behavior or disable grouping entirely to see a continuous list of emails.
To change your grouping preferences:
- Open the Options Menu: Click the three vertical dots in the header of your message list, next to Date column.
-
Select Your View:
-
None: Select this to remove all separators for a single, continuous list of messages.
-
Date: Groups messages based on the day they were received.
-
Date sent: Groups messages based on when they were officially sent.
-