
Event Setup
This guide details how to configure your Event Types to perfectly match your meeting requirements, from basic setup to advanced booking rules.
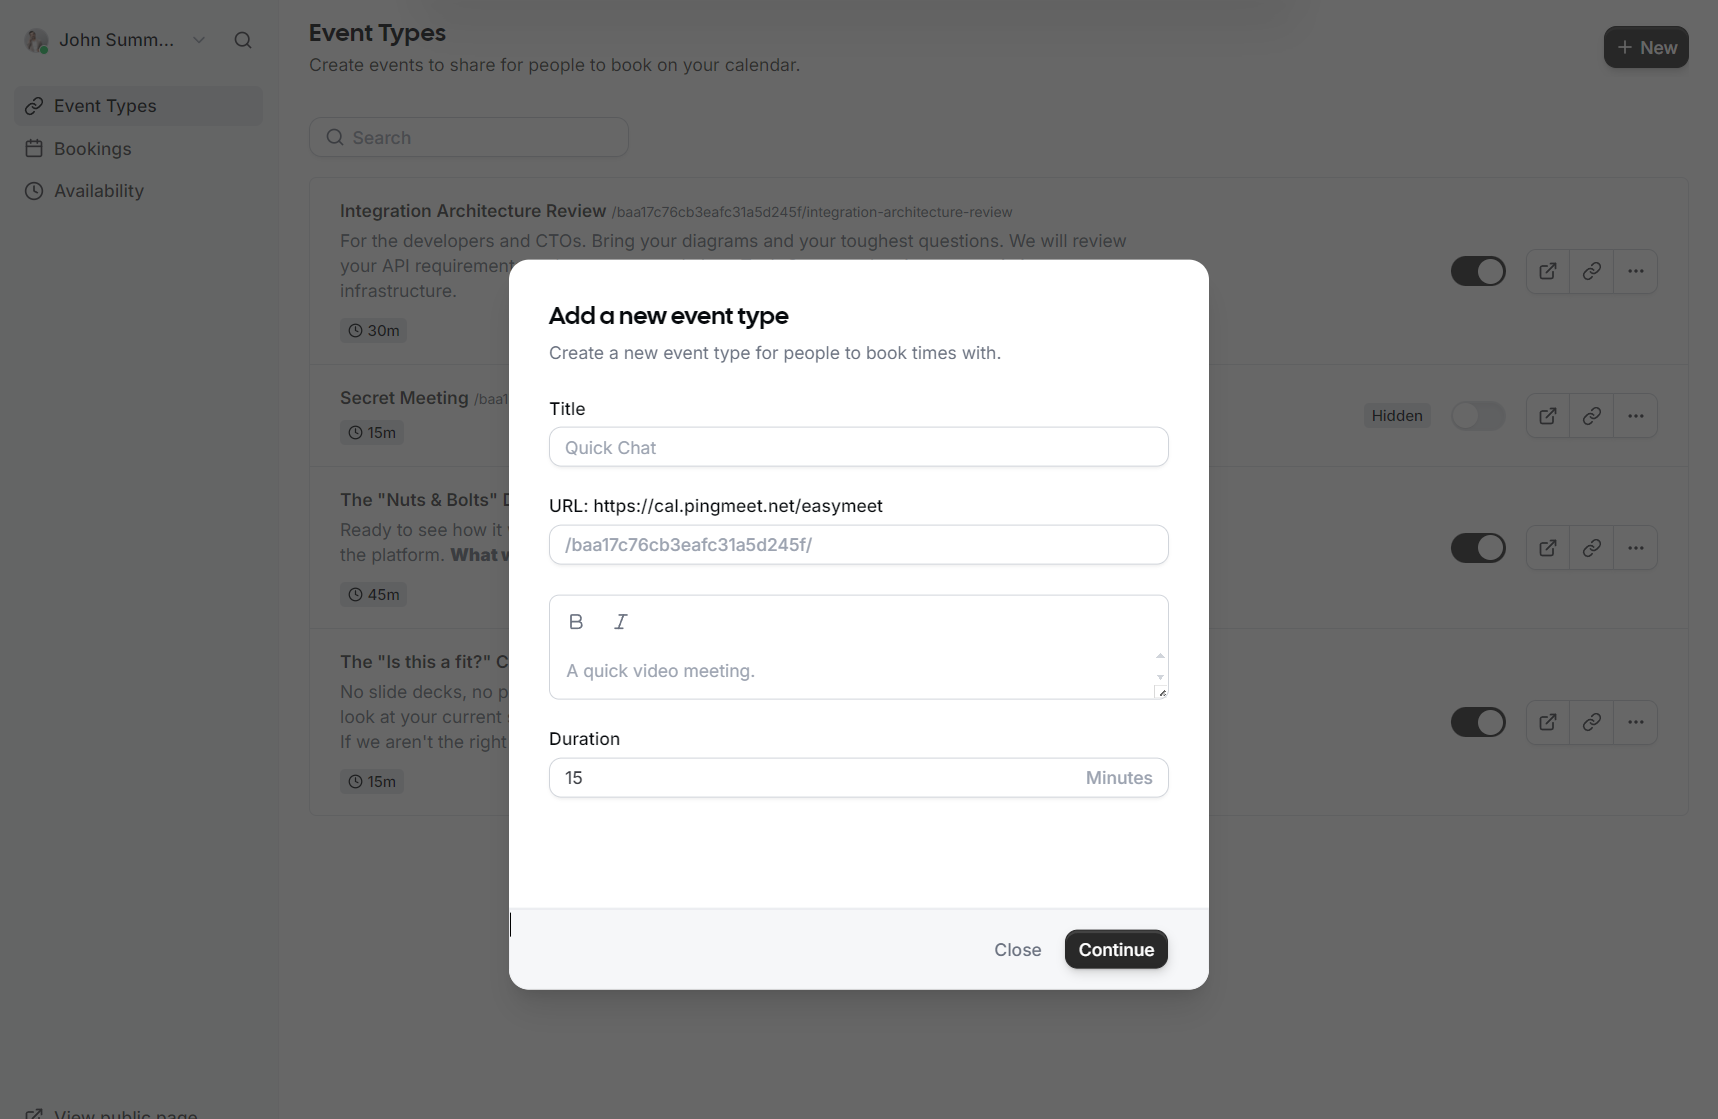
Creating a New Event Type
-
Title: Give your event a clear name, such as "Consultation" or "Quick Chat".
-
URL: Customize the specific link slug guests will use to book this event.
-
Description: Briefly explain what the meeting is for so guests know what to expect.
-
Duration: Select how long the meeting will last in minutes.
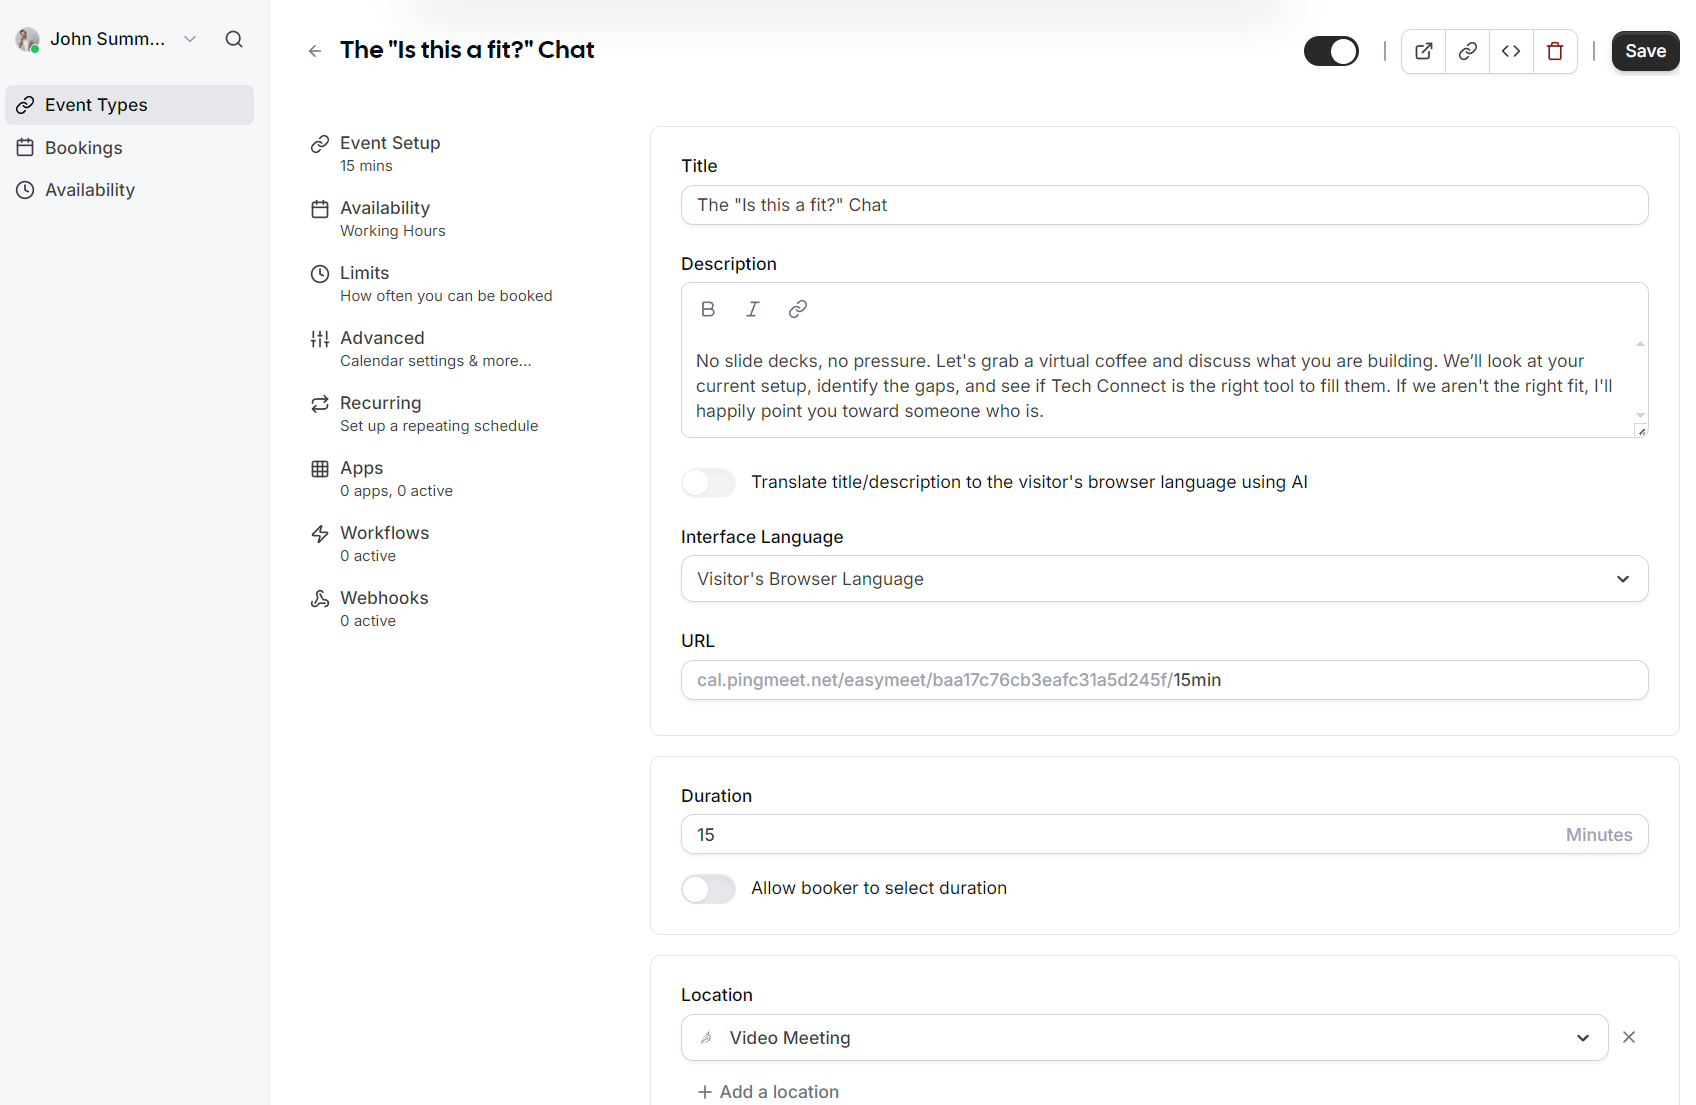
Event Setup
Once the event is created, you can access more granular settings in the Event Setup section:
-
AI Translation: You can toggle an option to automatically translate your title and description to the visitor's browser language using AI.
-
Interface Language: Set the default language for the booking interface or allow it to match the visitor's browser language.
-
Duration Flexibility: In addition to a fixed duration, you can enable an option that allows the booker to select their preferred meeting length.
-
Location: Define where the meeting takes place, such as a Video Meeting.
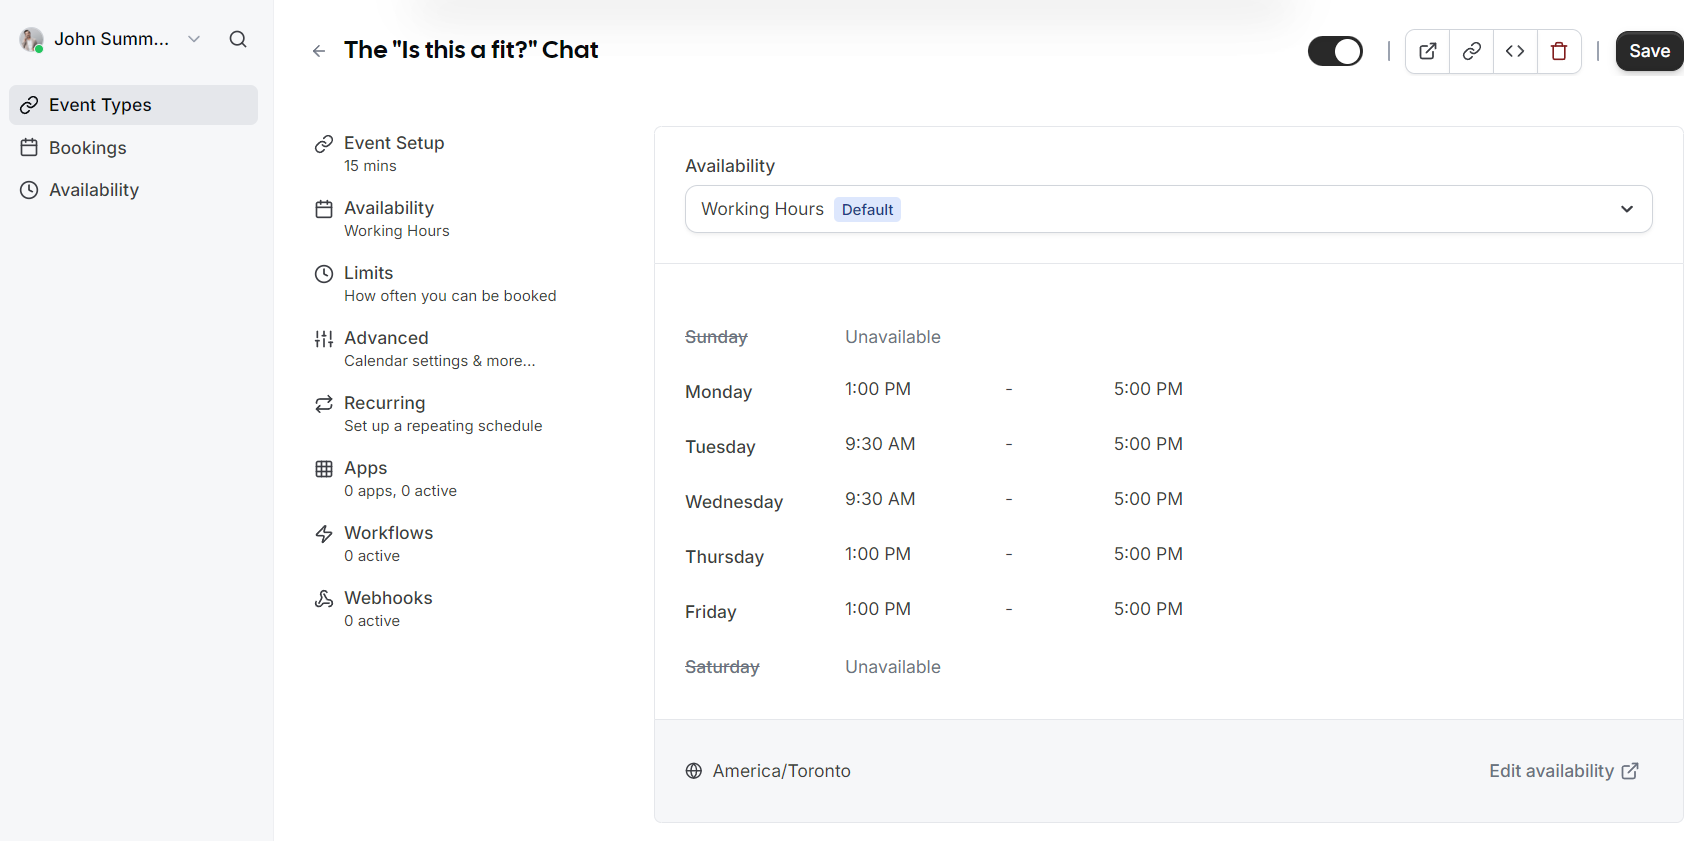
Availability and Limits
You can control exactly when and how often people can book with you through these two sections:
Availability
Assign which schedule this event type should follow. By default, this uses your standard Working Hours, but you can select different schedules if you have created them.
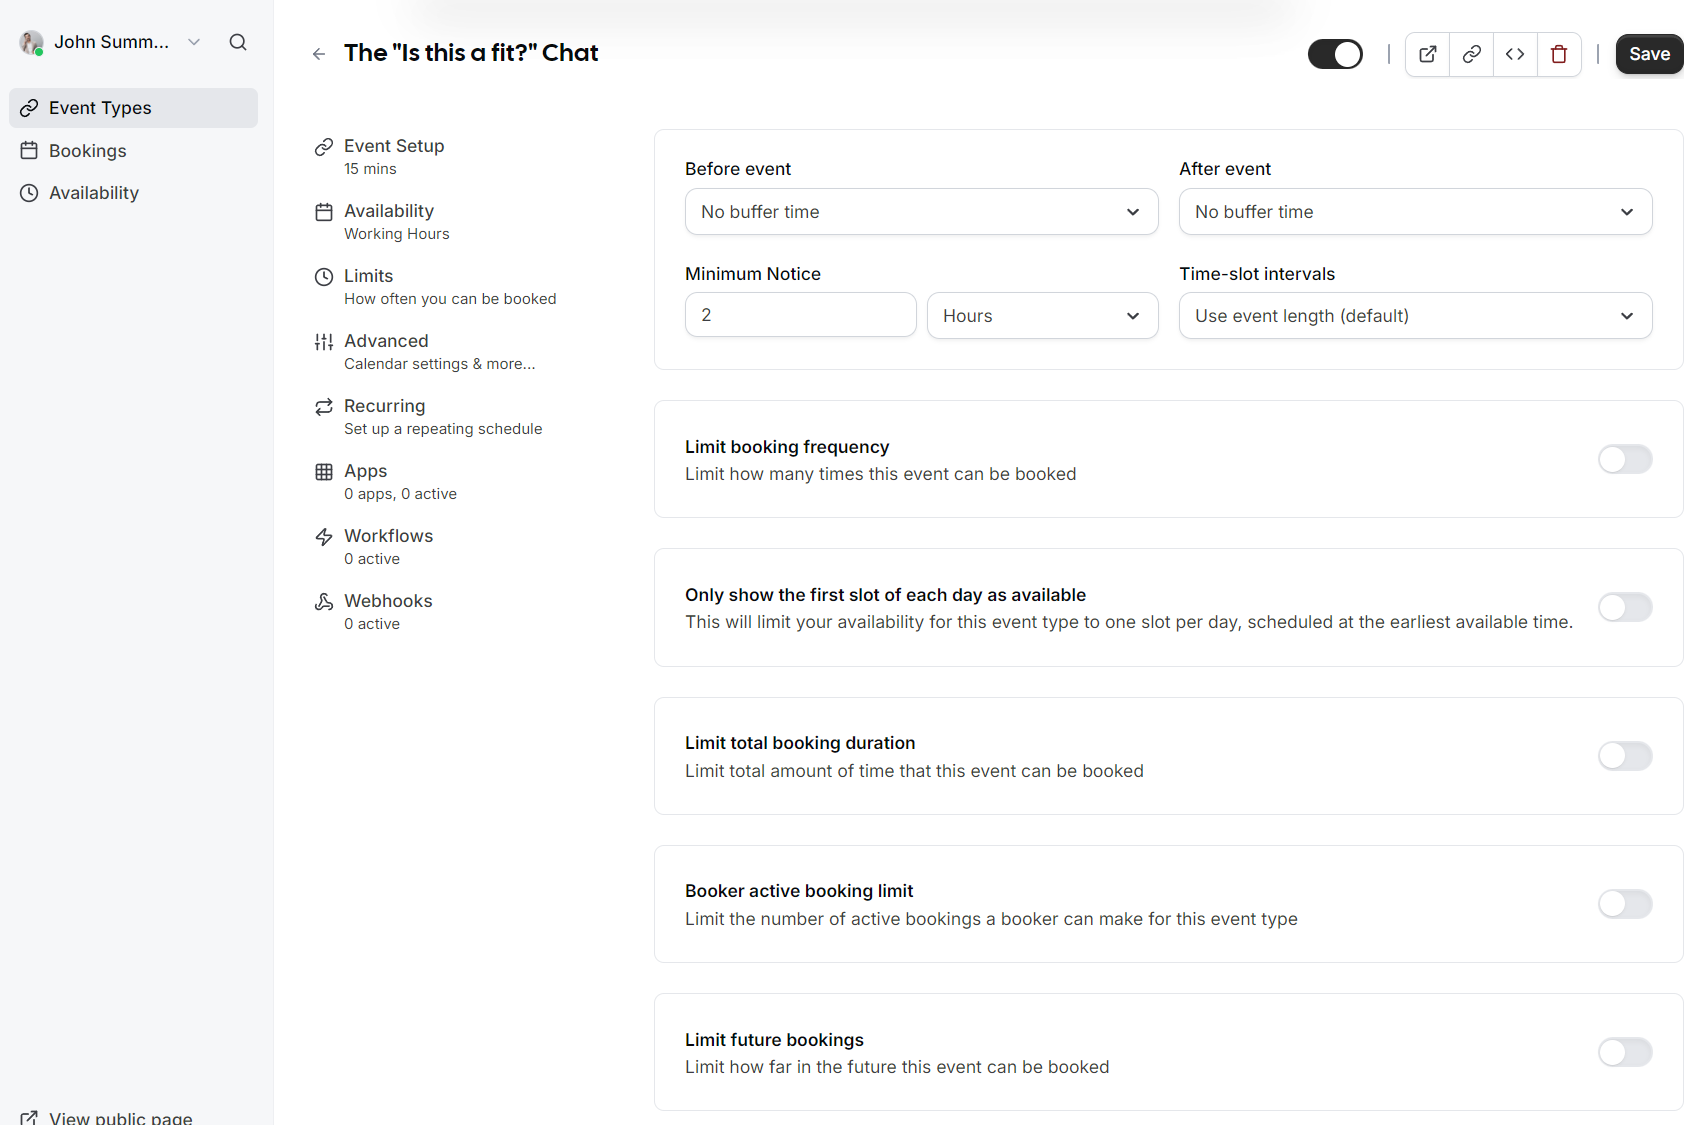
Limits
-
Buffers: Add "No buffer time" or specific intervals before and after events to prevent back to back meetings.
-
Minimum Notice: Prevent last minute surprises by requiring a minimum amount of notice (e.g., 2 hours) before someone can book.
-
Time-slot intervals: Choose how frequently slots are displayed (e.g., every 15 minutes or based on event length).
-
Booking Frequency: Limit how many times this specific event can be booked overall.
-
Future Bookings: Set a limit on how far into the future guests are allowed to schedule a meeting.
Advanced Options
 |
 |
 |
 |
The Advanced tab provides deepgranular customizationcontrol forover your calendar integration, the booking experienceprocess, and administrativehow control:your event appears to guests.
Layout
Calendar and Questions
Syncing
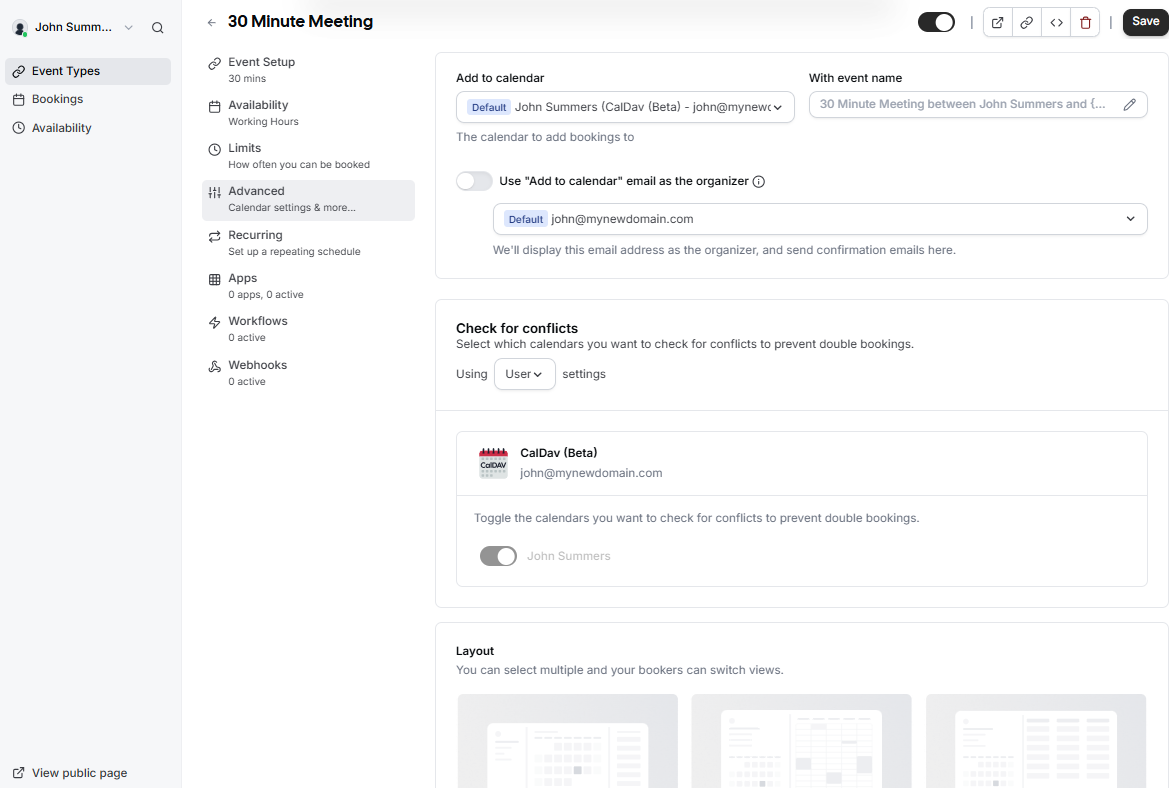
Manage how bookings interact with your existing calendar to prevent double bookings.
-
LayoutAdd to calendar: Select the specific calendar where new bookings should be recorded. -
Event name: Customize the format of the meeting name as it will appear in your calendar.
-
Check for conflicts: Toggle which calendars the system should monitor to prevent overlapping appointments.
-
Organizer identity: Choose
betweenwhether to use the default calendar email as the meeting organizer.
Layout and Booking Questions
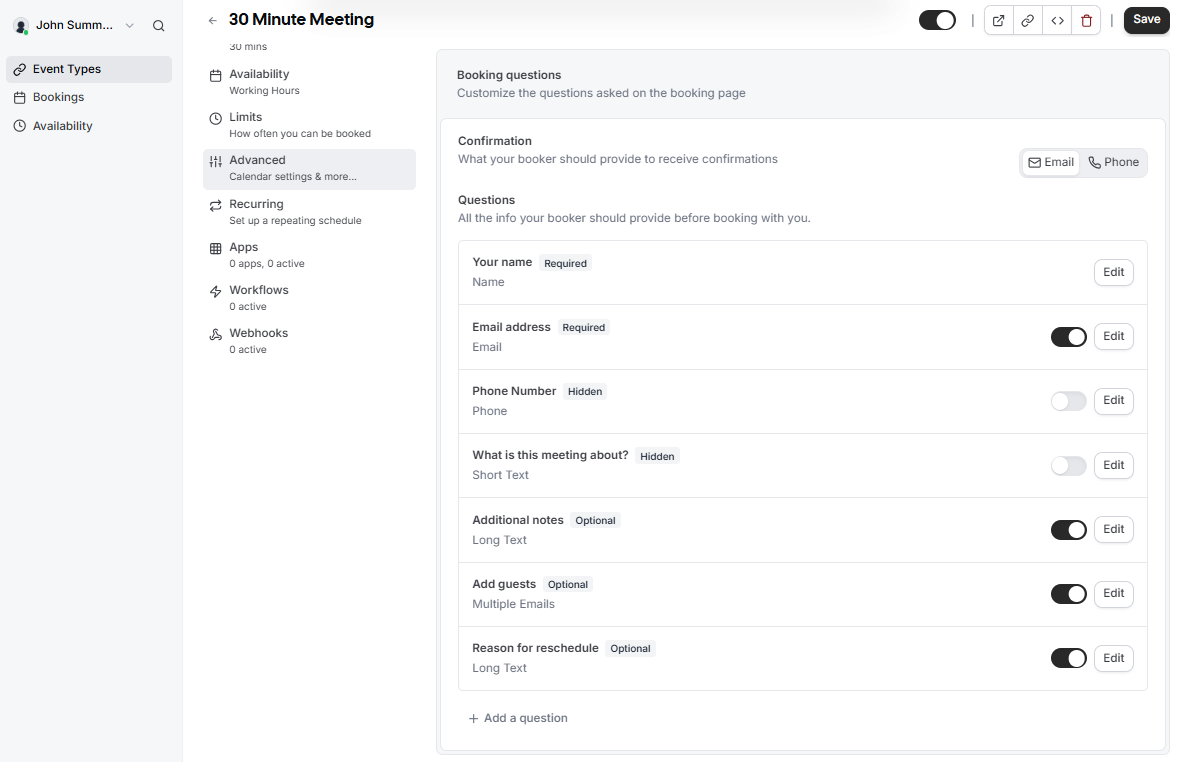
Customize what your guests see and what information they must provide.
-
Display Layout: Enable different views like Month, Weekly, or Column
viewstoforallowyourbookersbookingtopage.switch their preferred view. -
BookingConfirmation Method: Choose whether bookers receive confirmations via Email or Phone. -
Custom Questions:
Customize the information you require from guests.While Name and Email arestandard,required by default, you can add or edit fields for Phone Number, Additional notes, orcustom questions like "Reason forreschedule"reschedule. -
Guest Invitations: Enable the Add guests option to allow bookers to invite additional attendees during the scheduling process.
Booking Rules
and Workflow
Define the logic and restrictions for every appointment.
-
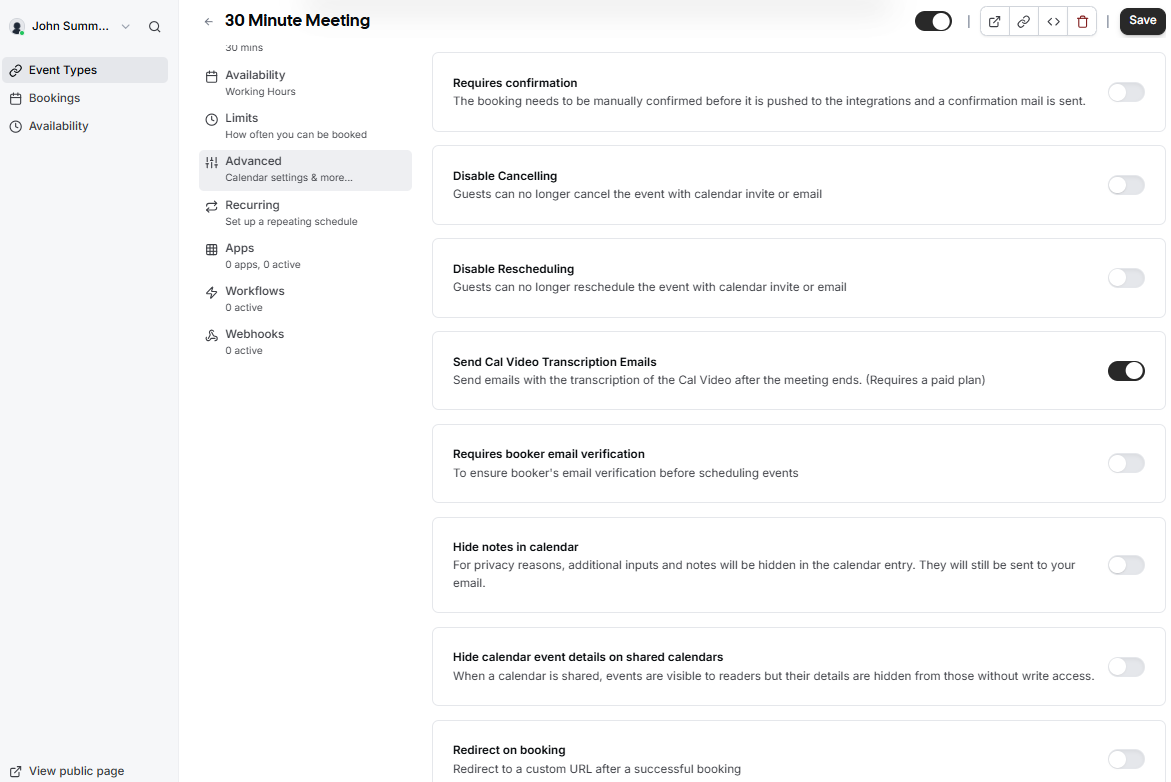
Requires confirmation:
IfEnableenabled,this if youmustwant to manually approveaeach booking before it is finalized and added totheyour calendar. -
Disable
Cancelling/ReschedulingCancel or Reschedule: Prevent guests from changing or cancelling their appointmentsviathrough theconfirmationautomatedemail.links. -
Email Verification: Require bookers to verify their email address before they can successfully
scheduleschedule.an
Privacy and Redirects
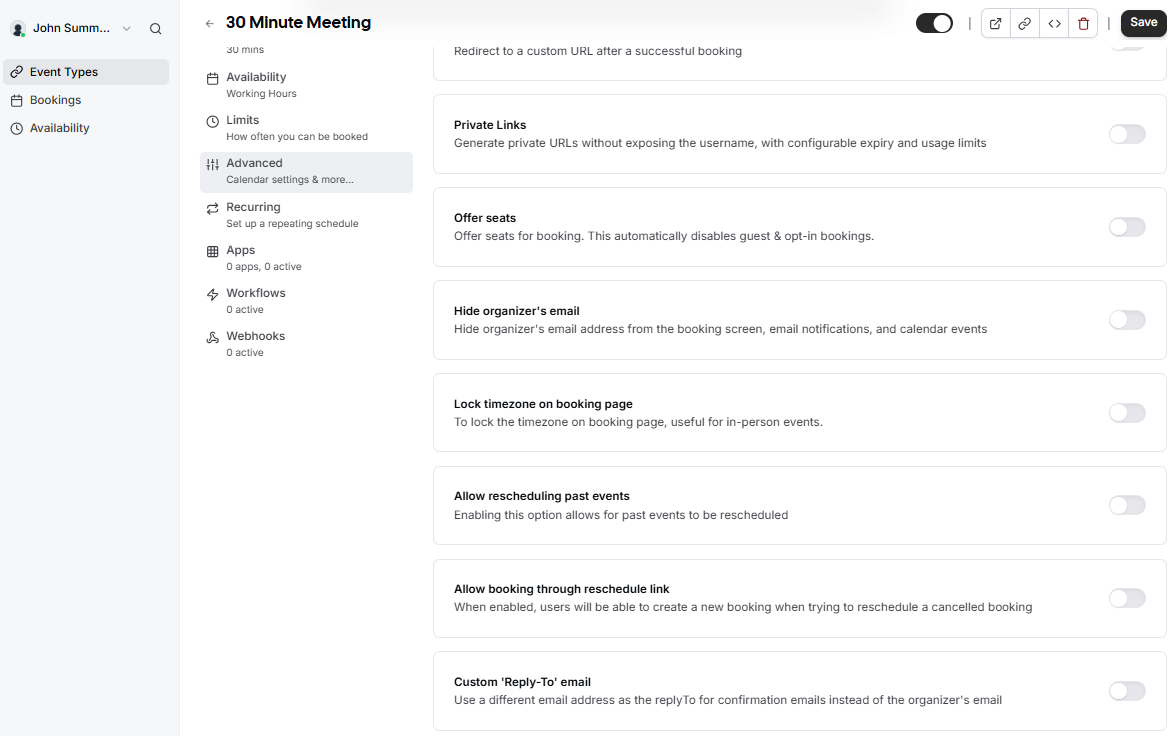
Private Links: Generate unique URLs that do not expose your username and have configurable usage limits.Hide Organizer Email: Keep your email address hidden from the booking screen and notifications.event.-
Redirect on booking: Automatically send guests to a custom URL
(like a thank you page or a questionnaire)after they finishbooking.scheduling. -
Offer seats: Use this for group sessions where multiple guests can book the same time slot.
Privacy and Advanced Customization
Protect your sensitive data and tailor the communication style.
-
Private Links: Generate unique URLs with configurable expiry and usage limits to avoid exposing your main username.
-
Hide Personal Details: You can choose to hide your email address from the booking screen or hide event notes in the calendar entry for privacy reasons.
-
Lock Timezone: Fix the timezone on the booking page, which is particularly helpful for coordinating in-person events.
-
Custom Reply-To: Specify a different email address to receive replies to confirmation emails instead of the default organizer email.
-
Rescheduling Logic: Toggle whether users can reschedule past events or create new bookings through a reschedule link.
Administrative Settings
-
Offer Seats: Enable this for group sessions where multiple guests can book the same time slot.
-
Custom Reply-To: Use a specific email address for confirmation replies instead of the default organizer email.
-
Event Type Color: Assign a color to the event type to help differentiate bookings within your internal dashboard.