
Event Setup
This guide details how to configure your Event Types to perfectly match your meeting requirements, from basic setup to advanced booking rules.
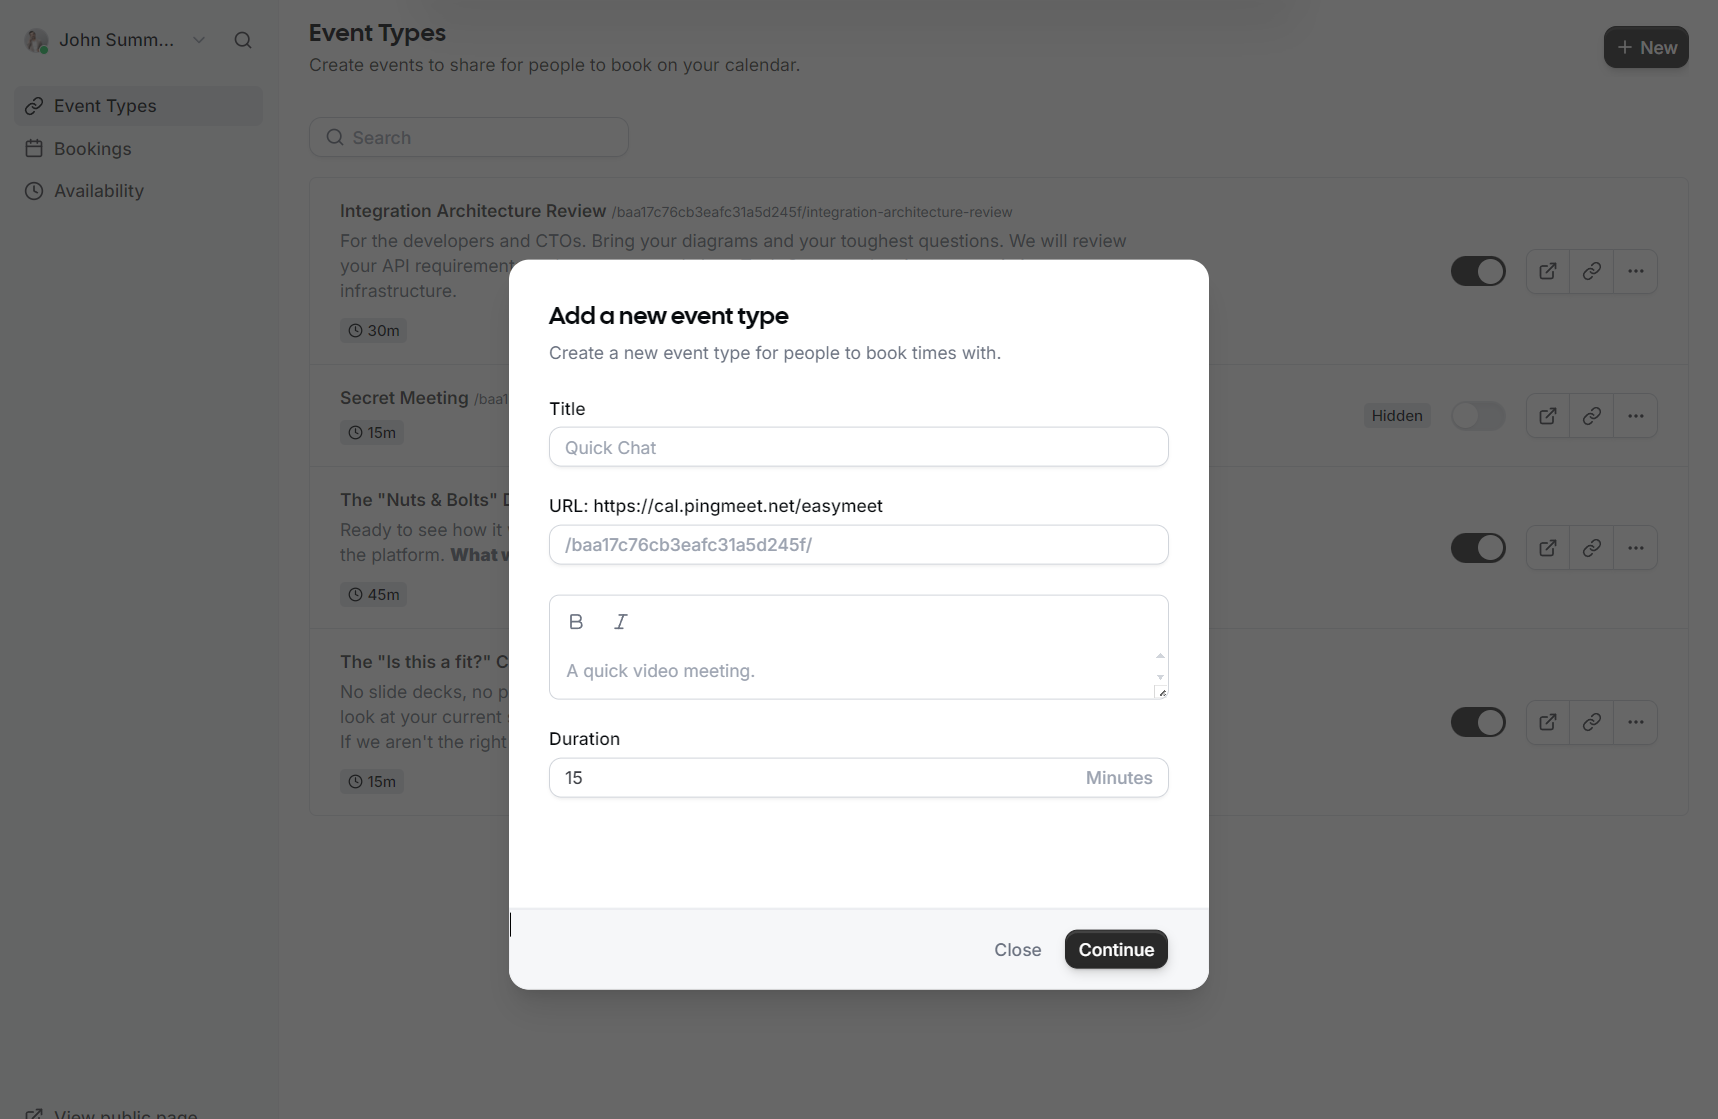
Creating a New Event Type
-
Title: Give your event a clear name, such as "Consultation" or "Quick Chat".
-
URL: Customize the specific link slug guests will use to book this event.
-
Description: Briefly explain what the meeting is for so guests know what to expect.
-
Duration: Select how long the meeting will last in minutes.
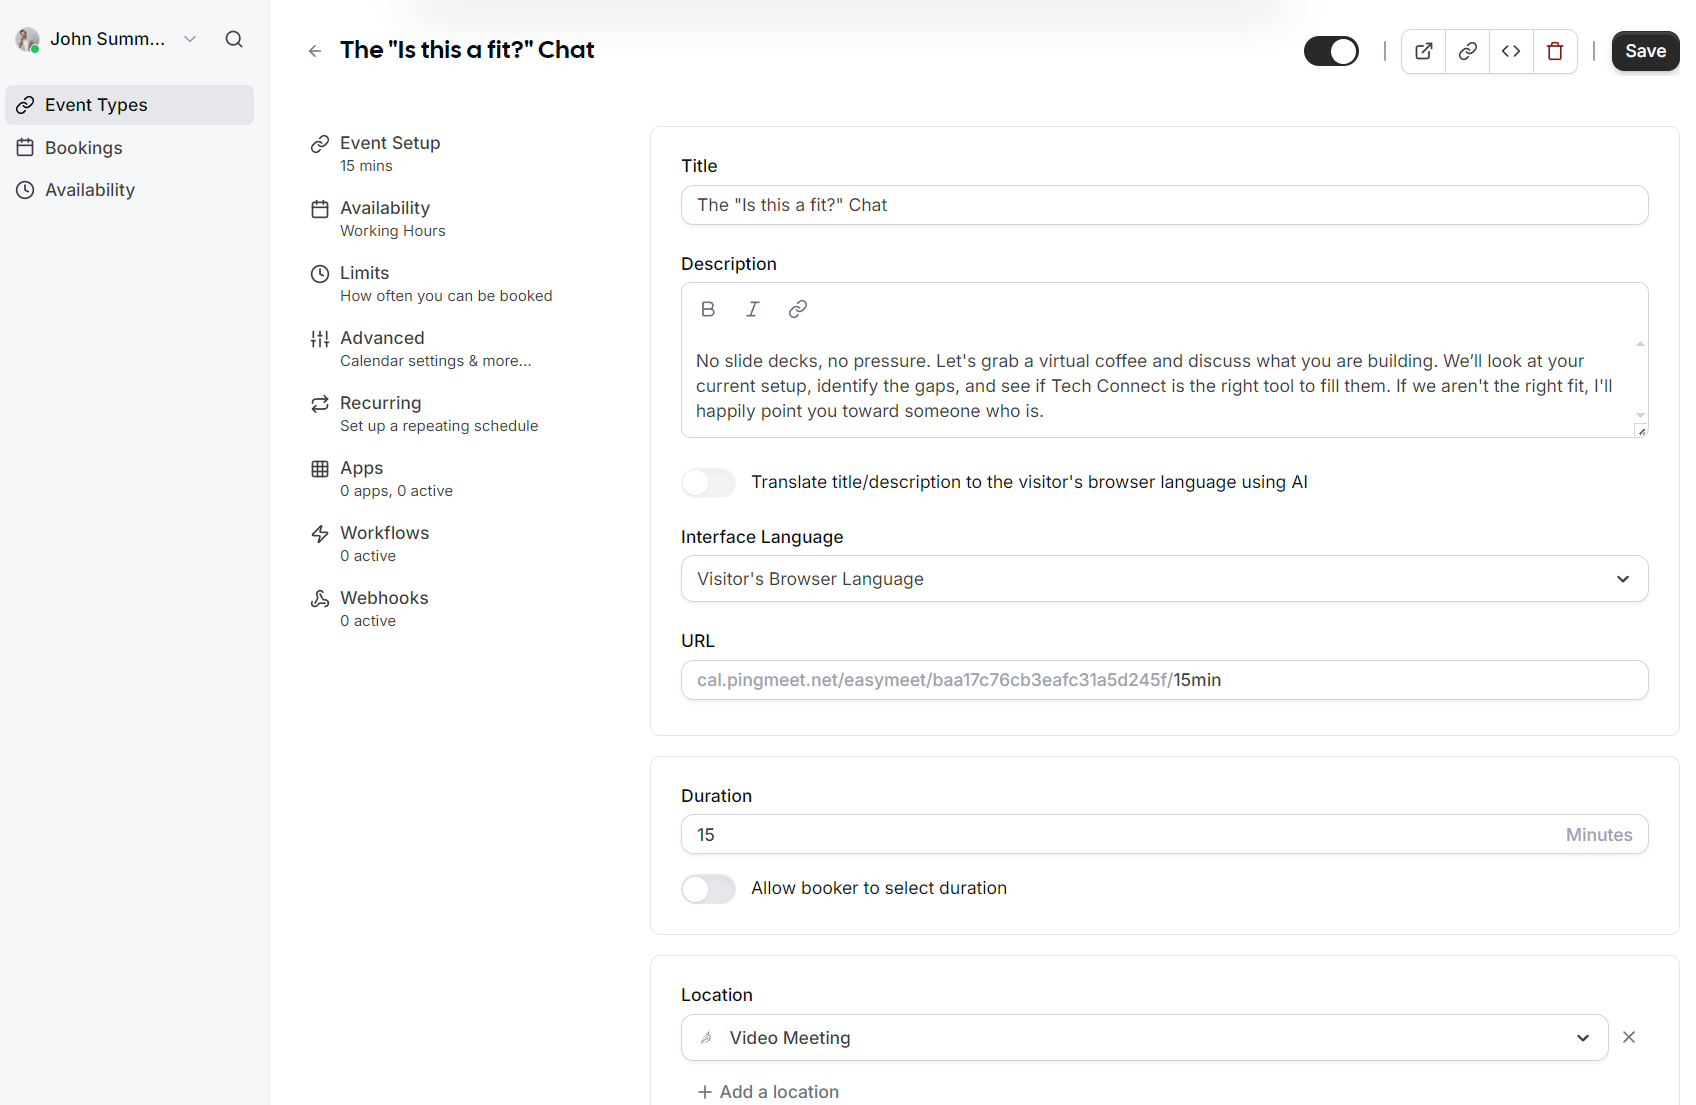
Event Setup
Once the event is created, you can access more granular settings in the Event Setup section:
-
AI Translation: You can toggle an option to automatically translate your title and description to the visitor's browser language using AI.
-
Interface Language: Set the default language for the booking interface or allow it to match the visitor's browser language.
-
Duration Flexibility: In addition to a fixed duration, you can enable an option that allows the booker to select their preferred meeting length.
-
Location: Define where the meeting takes place, such as a Video Meeting.
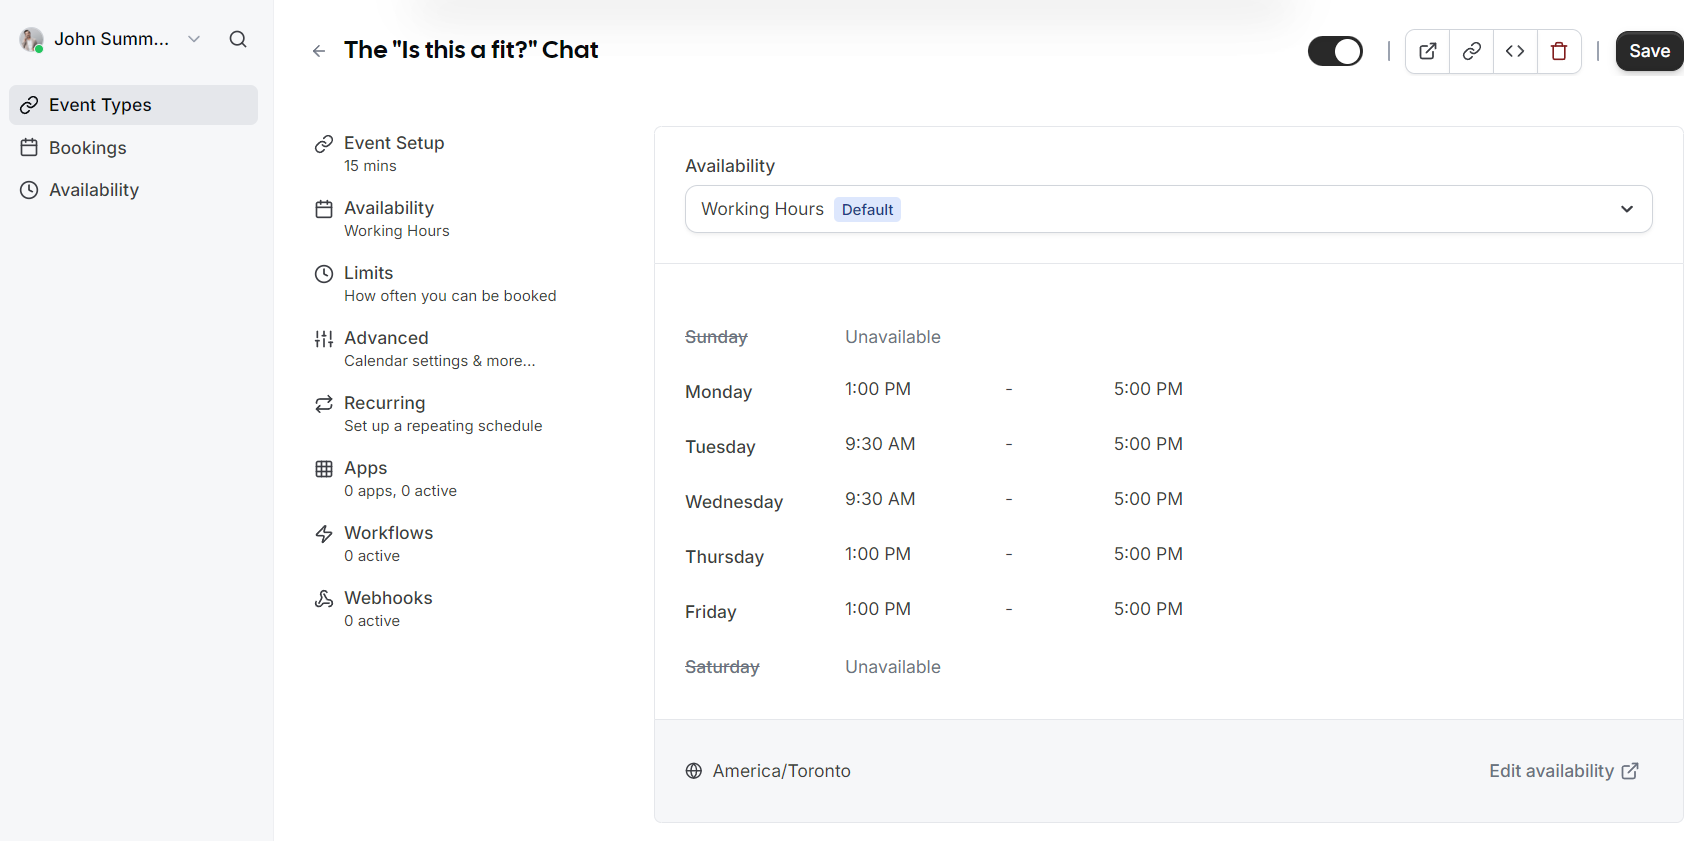
Availability and Limits
You can control exactly when and how often people can book with you through these two sections:
Availability
Assign which schedule this event type should follow. By default, this uses your standard Working Hours, but you can select different schedules if you have created them.
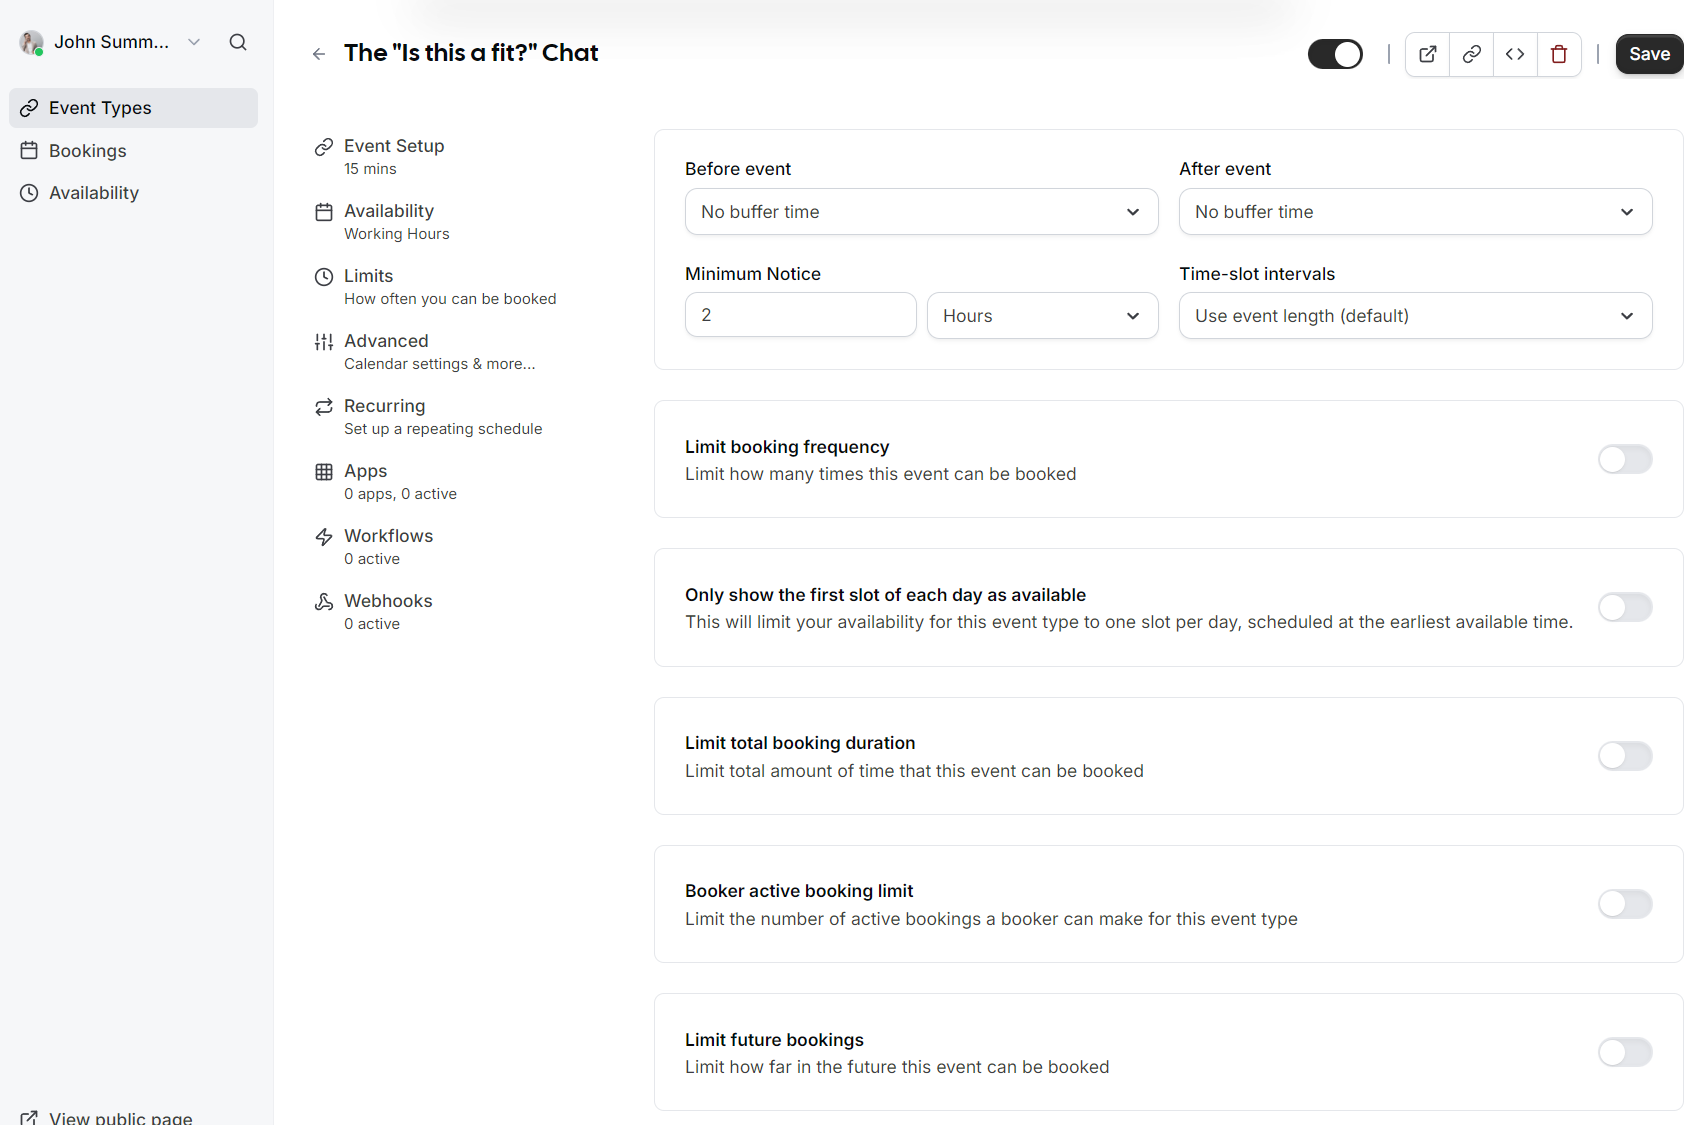
Limits
-
Buffers: Add "No buffer time" or specific intervals before and after events to prevent back to back meetings.
-
Minimum Notice: Prevent last minute surprises by requiring a minimum amount of notice (e.g., 2 hours) before someone can book.
-
Time-slot intervals: Choose how frequently slots are displayed (e.g., every 15 minutes or based on event length).
-
Booking Frequency: Limit how many times this specific event can be booked overall.
-
Future Bookings: Set a limit on how far into the future guests are allowed to schedule a meeting.
Advanced Options
The Advanced tab provides deep customization for the booking experience and administrative control:
Layout and Questions
-
Layout: Choose between Month, Weekly, or Column views for your booking page.
-
Booking Questions: Customize the information you require from guests. While Name and Email are standard, you can add fields for Phone Number, Additional notes, or custom questions like "Reason for reschedule".
Booking Rules
-
Requires confirmation: If enabled, you must manually approve a booking before it is finalized and added to the calendar.
-
Disable Cancelling/Rescheduling: Prevent guests from changing or cancelling their appointments via the confirmation email.
-
Email Verification: Require bookers to verify their email address before they can successfully schedule.
Privacy and Redirects
-
Private Links: Generate unique URLs that do not expose your username and have configurable usage limits.
-
Hide Organizer Email: Keep your email address hidden from the booking screen and notifications.
-
Redirect on booking: Automatically send guests to a custom URL (like a thank you page or a questionnaire) after they finish booking.
Administrative Settings
-
Offer Seats: Enable this for group sessions where multiple guests can book the same time slot.
-
Custom Reply-To: Use a specific email address for confirmation replies instead of the default organizer email.
-
Event Type Color: Assign a color to the event type to help differentiate bookings within your internal dashboard.