MFA - Multi-factor authentication for your mailbox
Multi-factor authentication, or MFA as it's commonly abbreviated, adds an extra step to your basic login procedure. Without 2FA, the password is your single factor of authentication: you enter your username and password, then you're done.
With MFA, you log in to the Webmail by entering your username and password and the six-digit code provided by an app installed on your smartphone.
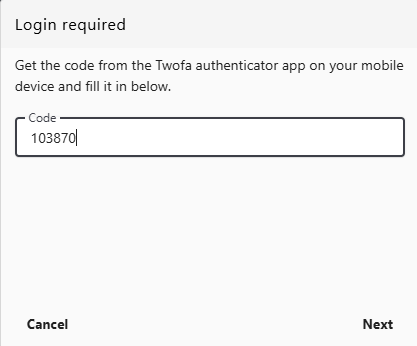
In the Webmail, you will be prompted to enter the MFA code in a new pop-up window.
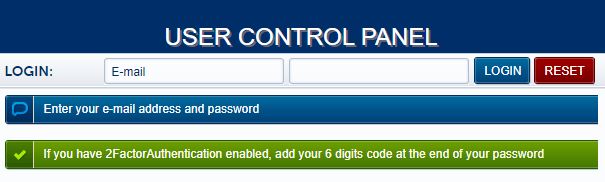
When logging into the User Panel, if you have MFA enabled for your mailbox, you must add at the end of the password the 6-digit code provided by the app on your phone. For example, if your password is T9D3K!px and the 6-digit code is 189 145, you must enter T9D3K!px189145 in the login form of the User Panel.
1. How to enable MFA from the Webmail
- Log into the Webmail using your full e-mail address and your current e-mail password
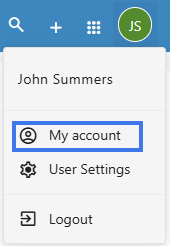
- Click on the User icon from the top right to activate the menu. Then click on My account

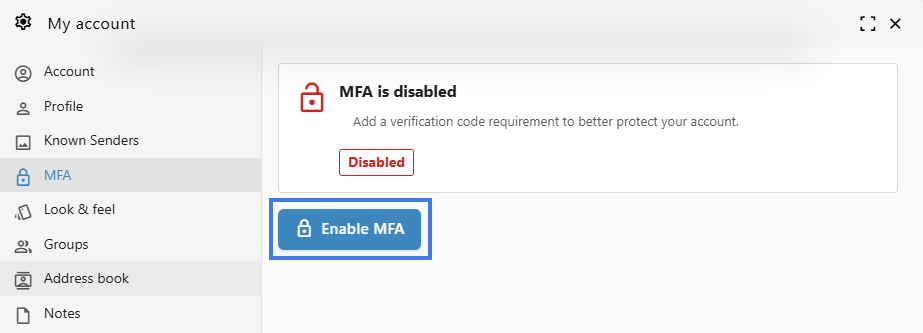
- In the Account tab, reach for the MFA section.
- Click on Enable MFA.

-
Use your authenticator app to scan the QR code, then enter the 6-digit verification code and click Verify & Enable.
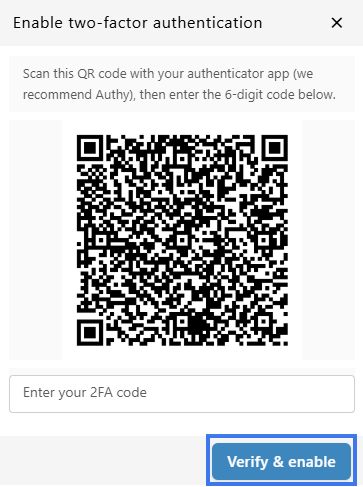
- Click Save.

2. How to enable MFA from the User Panel
First, you need a smartphone with a two-factor authenticator App installed (OTP / M-Step Verification / M-Factor Authentication), such as Authy or Google Authenticator.
To enable MFA for your e-mail address:
- Log in to the User Panel
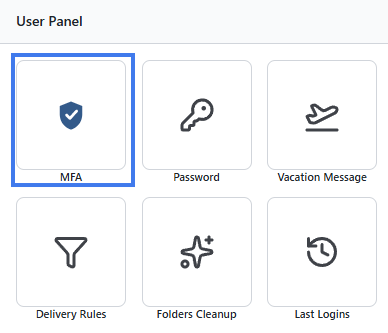
- From the menu, go to MFA
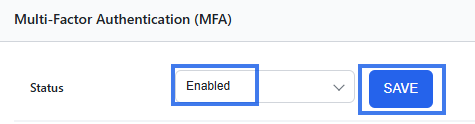
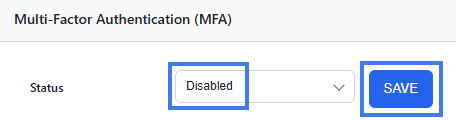
- Update the dropdown Status to Enabled. Click on the Save button.
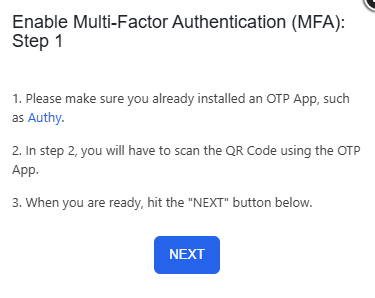
- Recheck the requirements: have a MFA App installed on your phone, such as Authy or Google Authenticator
- When ready, click on the Next button
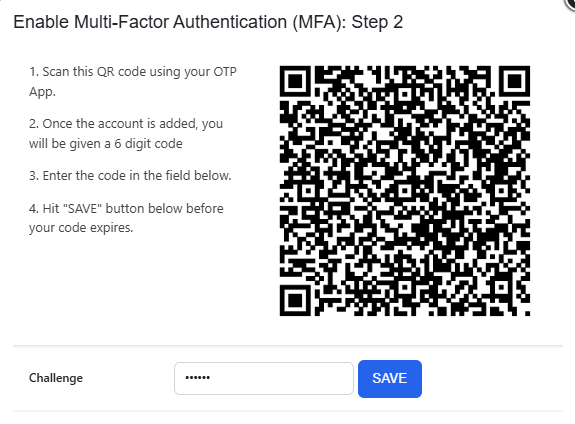
- Scan the QR code with the installed MFA App and fill in the generated six-digit code in the Challenge input field.
- Click on the Save button before your token expires. It is always better to wait for the app to generate a fresh token, so you have enough time before it expires.
- You have enabled MFA, and you will be prompted to fill in the token every time you log in using Webmail.
3. Disable MFA from the Webmail
- Log into the Webmail using your full e-mail address and your current e-mail password
- Click on the User icon from the top right to activate the menu. Then click on My account
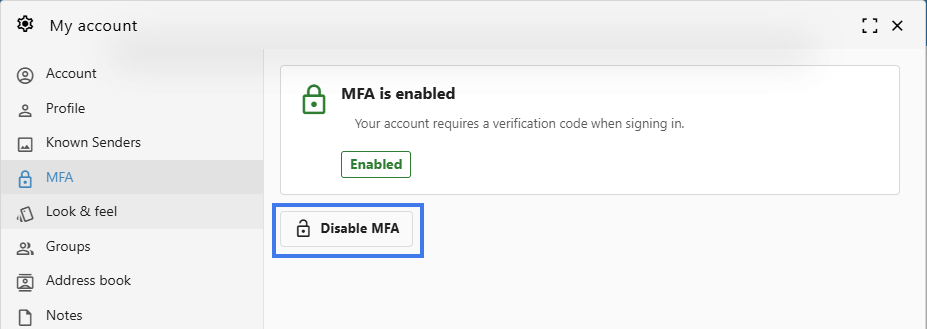
- In the Account tab, reach for the MFA section.
- Click on Disable MFA.

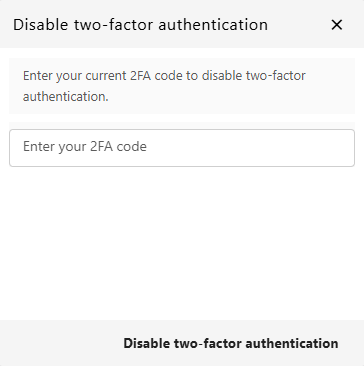
-
Use your authenticator app to generate a 6-digit code, then enter it and click Disable two-factor authentication.

- Click Save.
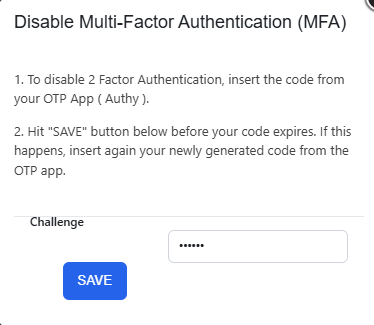
4. Disable 2FA from the User Panel
To disable MFA for your e-mail address:
- Update the dropdown Status to Disabled. Click on the Save button.
- Insert the token from your MFA App (such as Authy or Google Authenticator) in the Challenge input field.
- Click on the Save button before the token expires. It is always better to wait for the app to generate a fresh token, so you have enough time before it expires.
- After you see the confirmation message that the MFA was disabled, you can delete the entry from your MFA app.