
Setup IMAP e-mail on iOS
| If you have an |
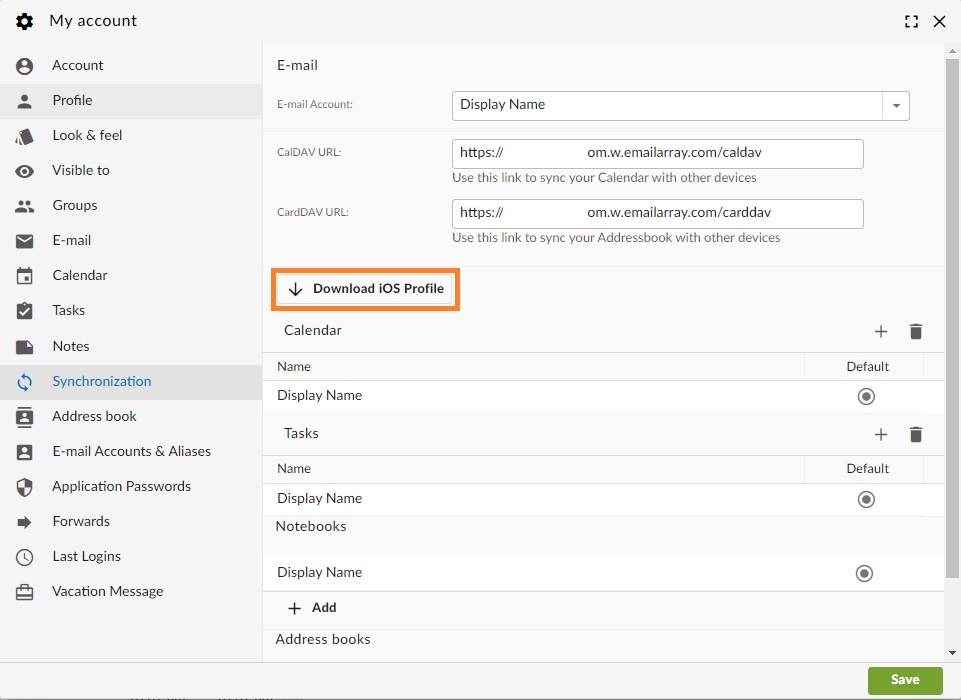
You can log in to the the Webmail and download a profile to automatically setup the e-mail as IMAP. The profile will include calendars and contacts if you have an an Enhanced Enhanced mailbox.
Here's the step by step for setting up an IMAP account on iOS.
- Click
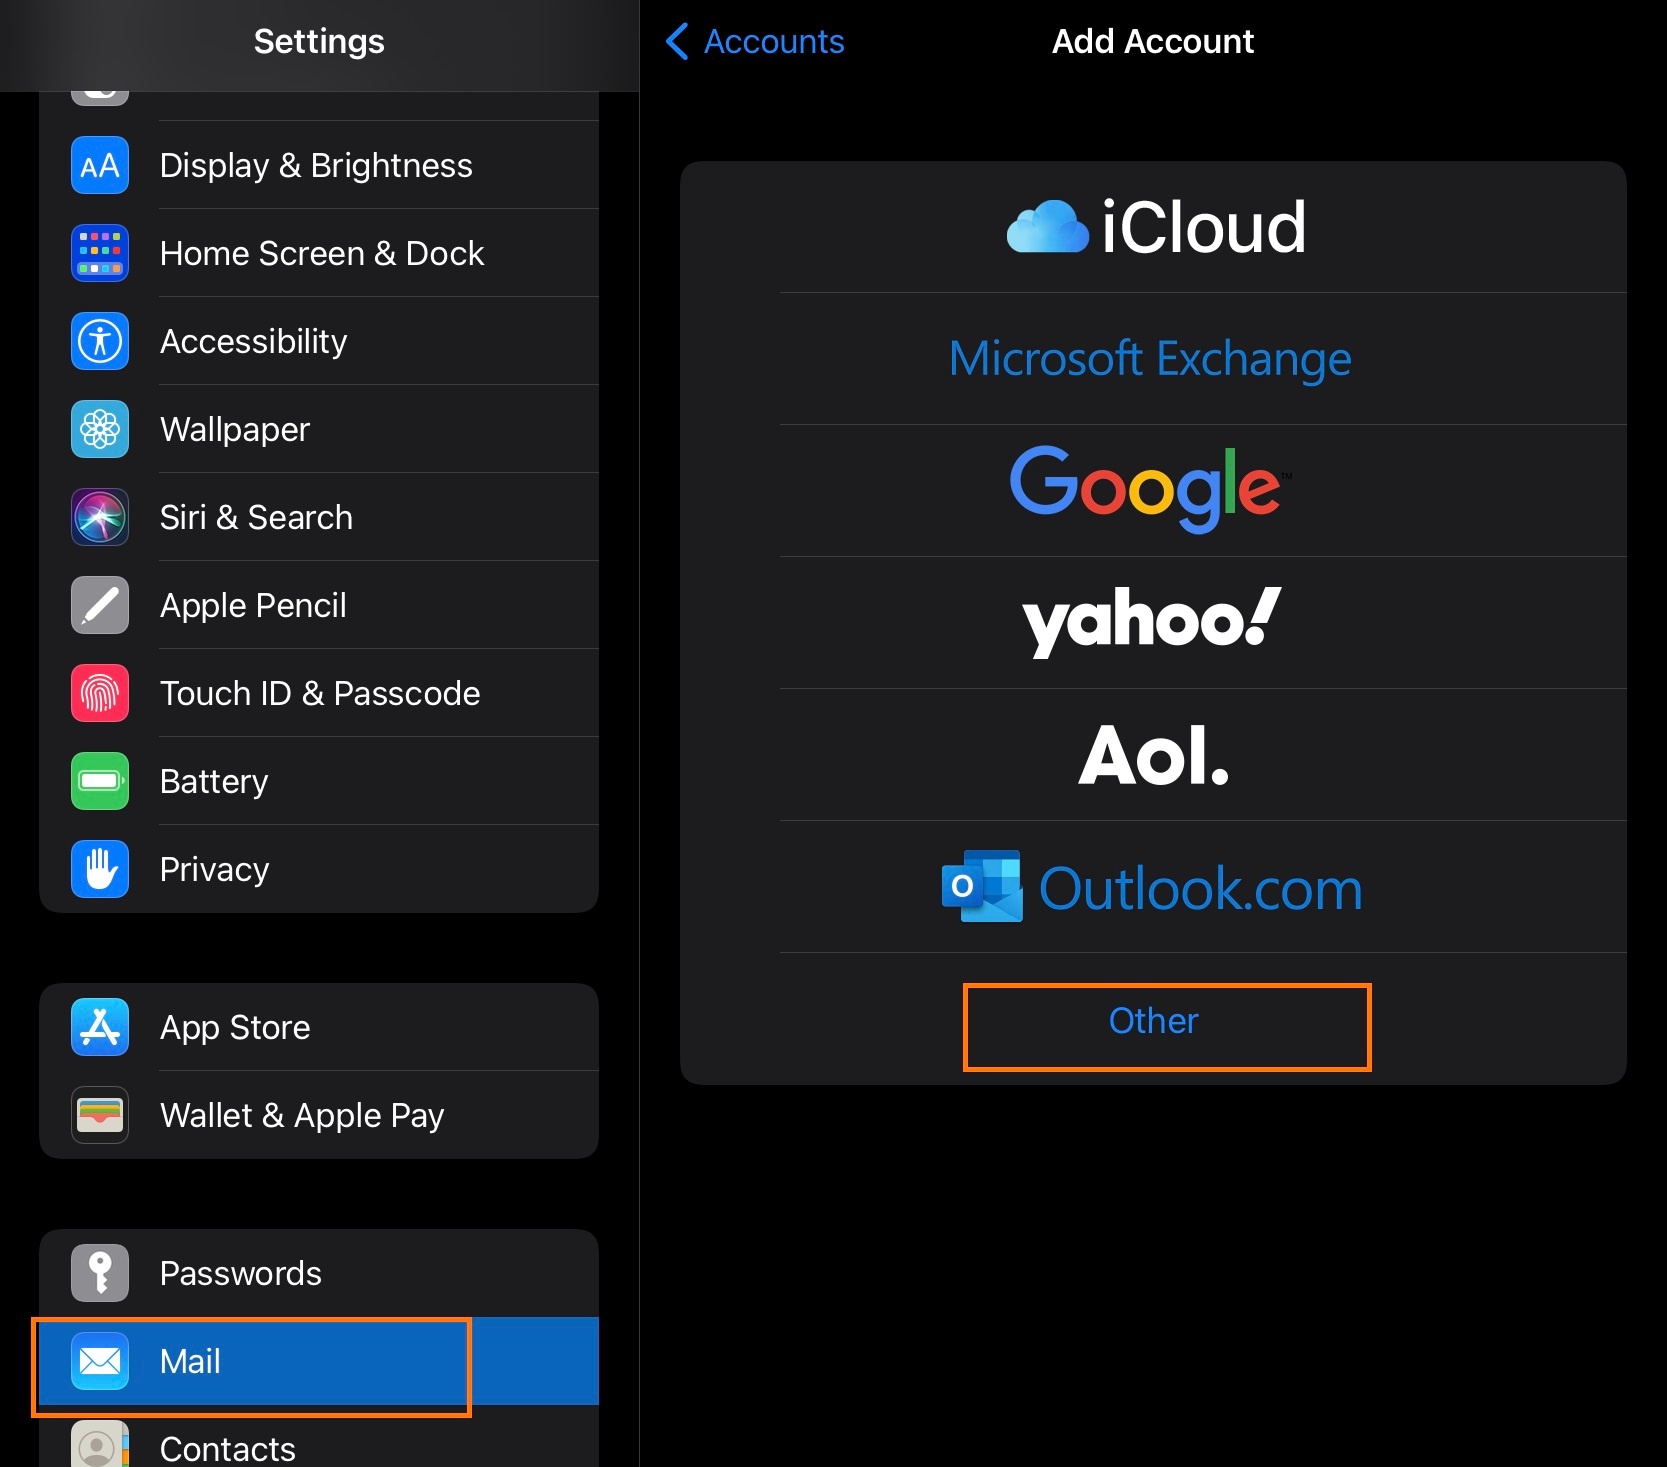
onon Settings - Click
onon Mail, Contacts, Calendars - Click
onon Add Account - Click
onon Other - Click
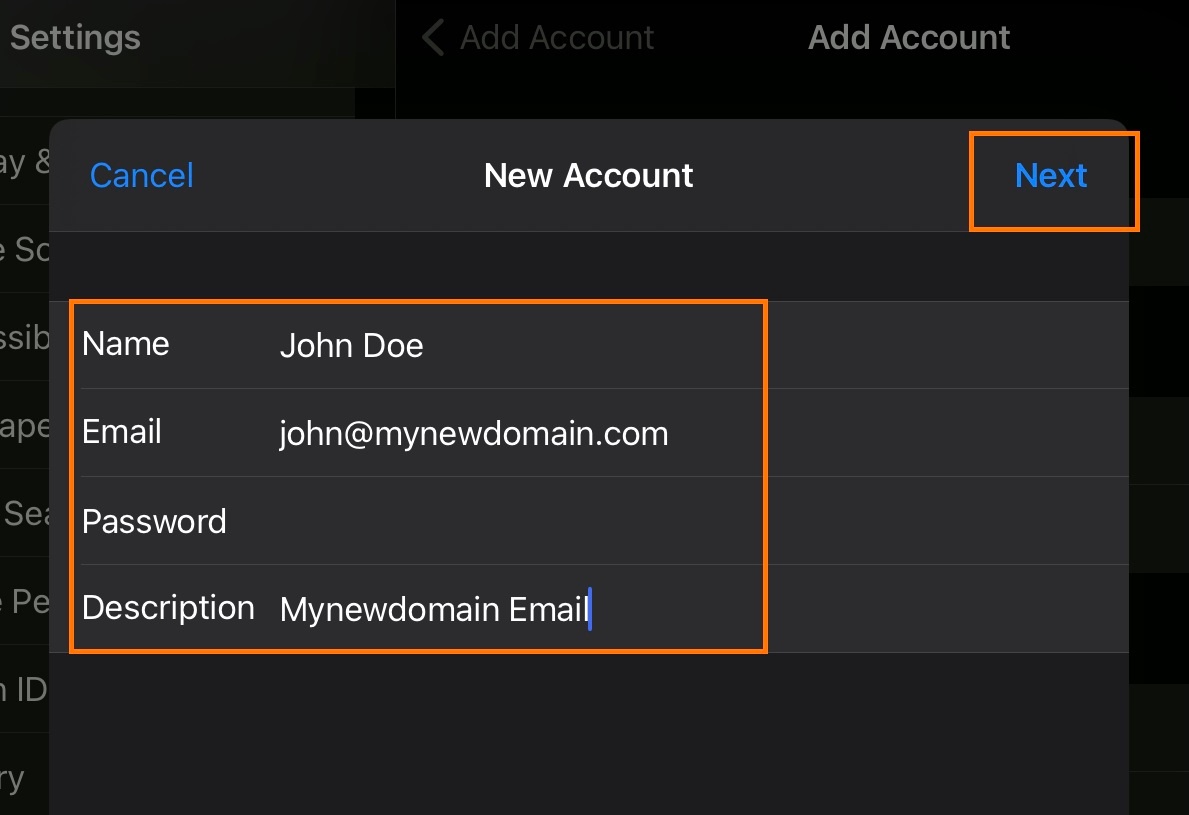
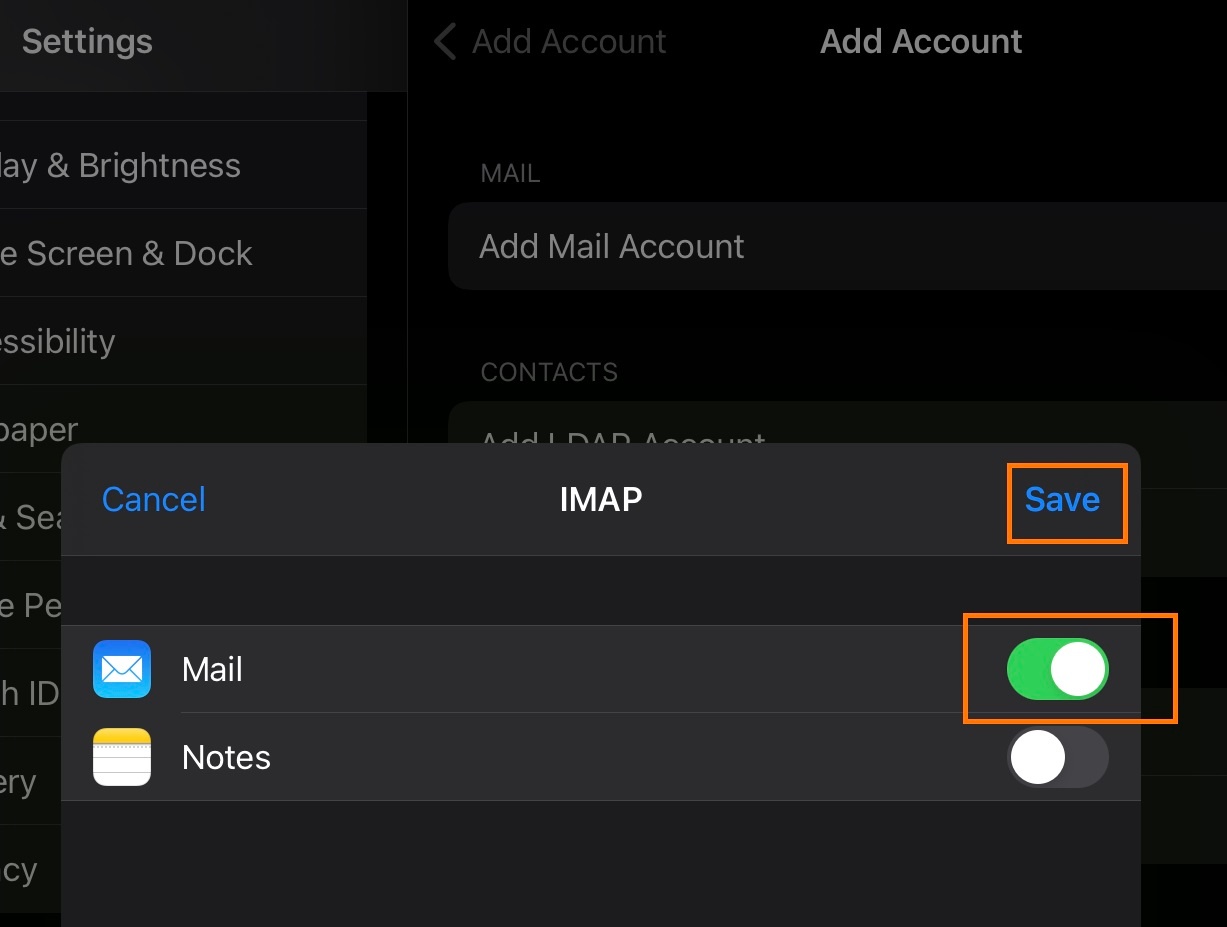
onon Add Mail Account - Inform the following
- Name
- Email - Your full email address
- Password - Your email password
- Description
- Name
- Click
onon Next - IMAP is selected by default
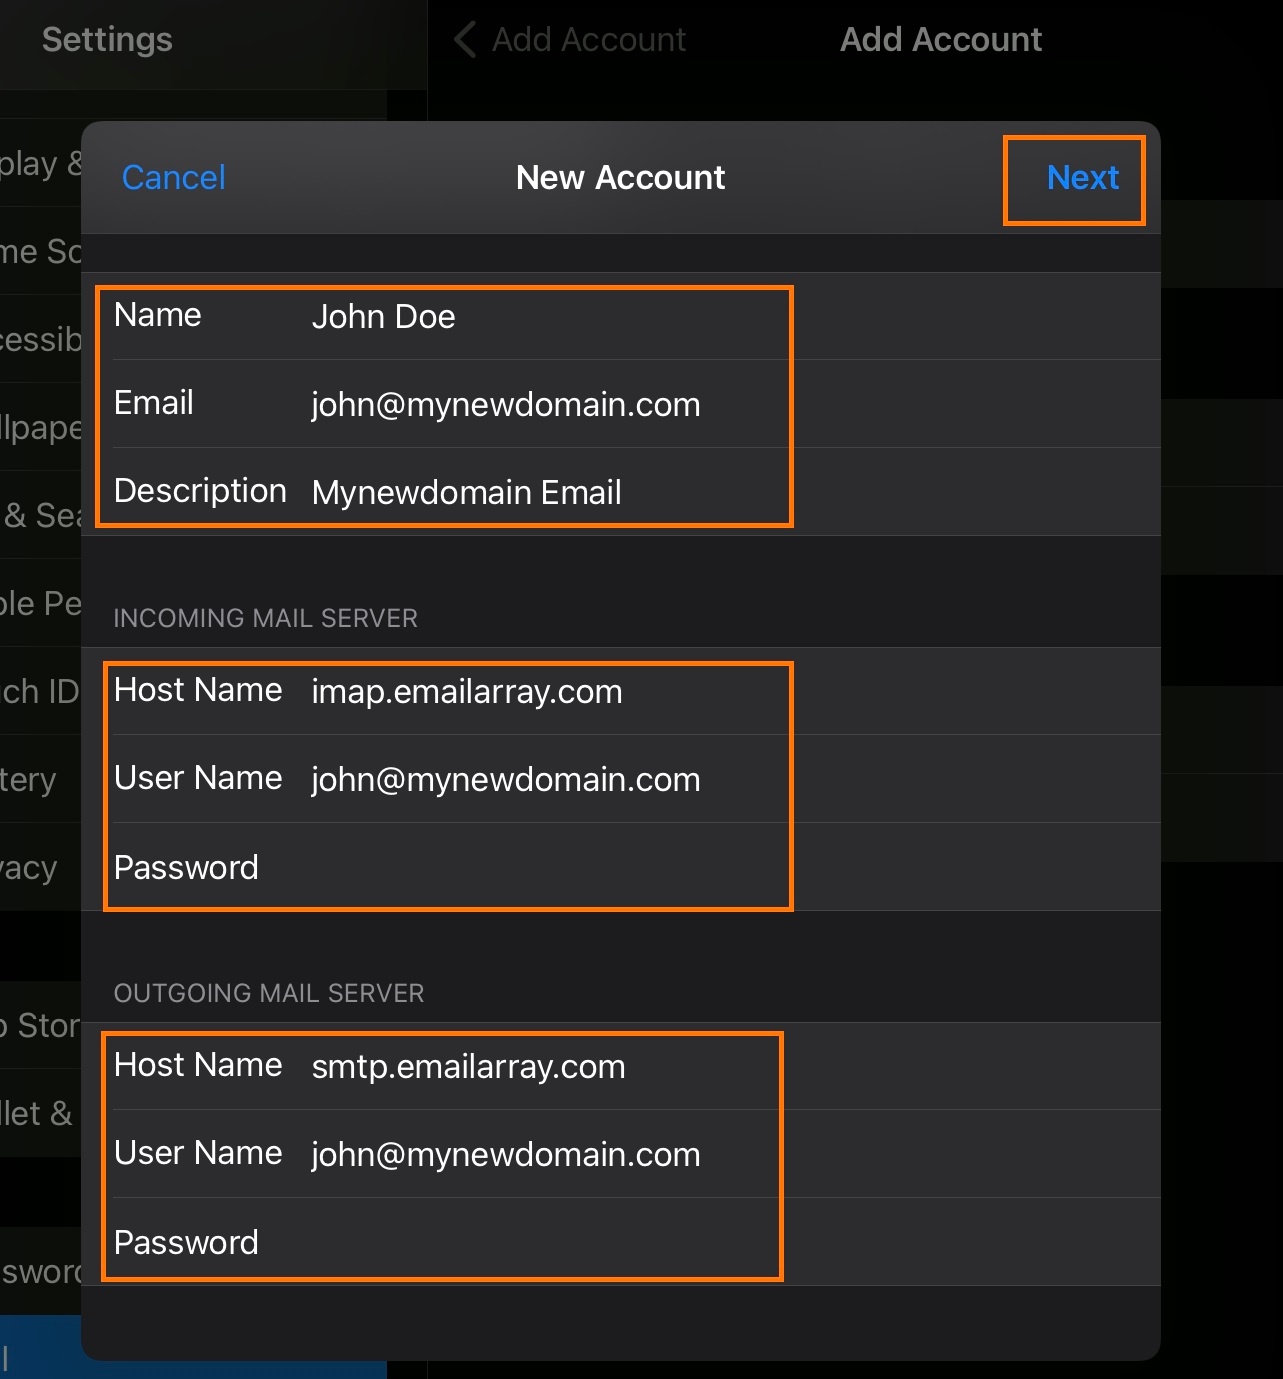
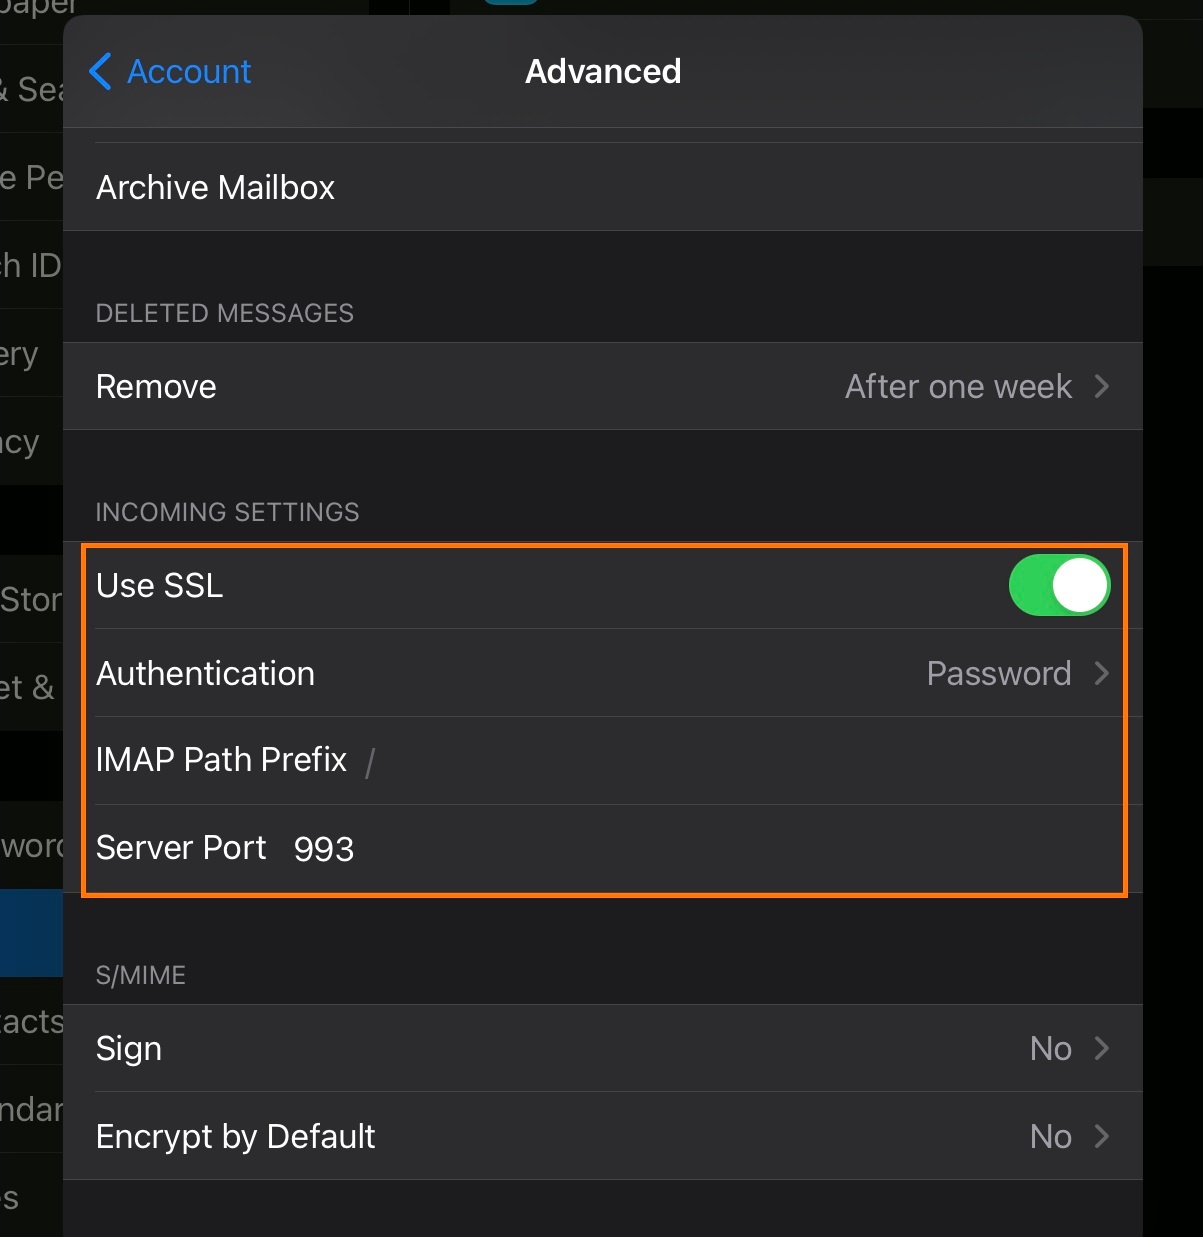
UnderUnder Incoming Mail Server, enter as below:- Host Name
imap.emailarray.com - User Name
- Password
- Host Name
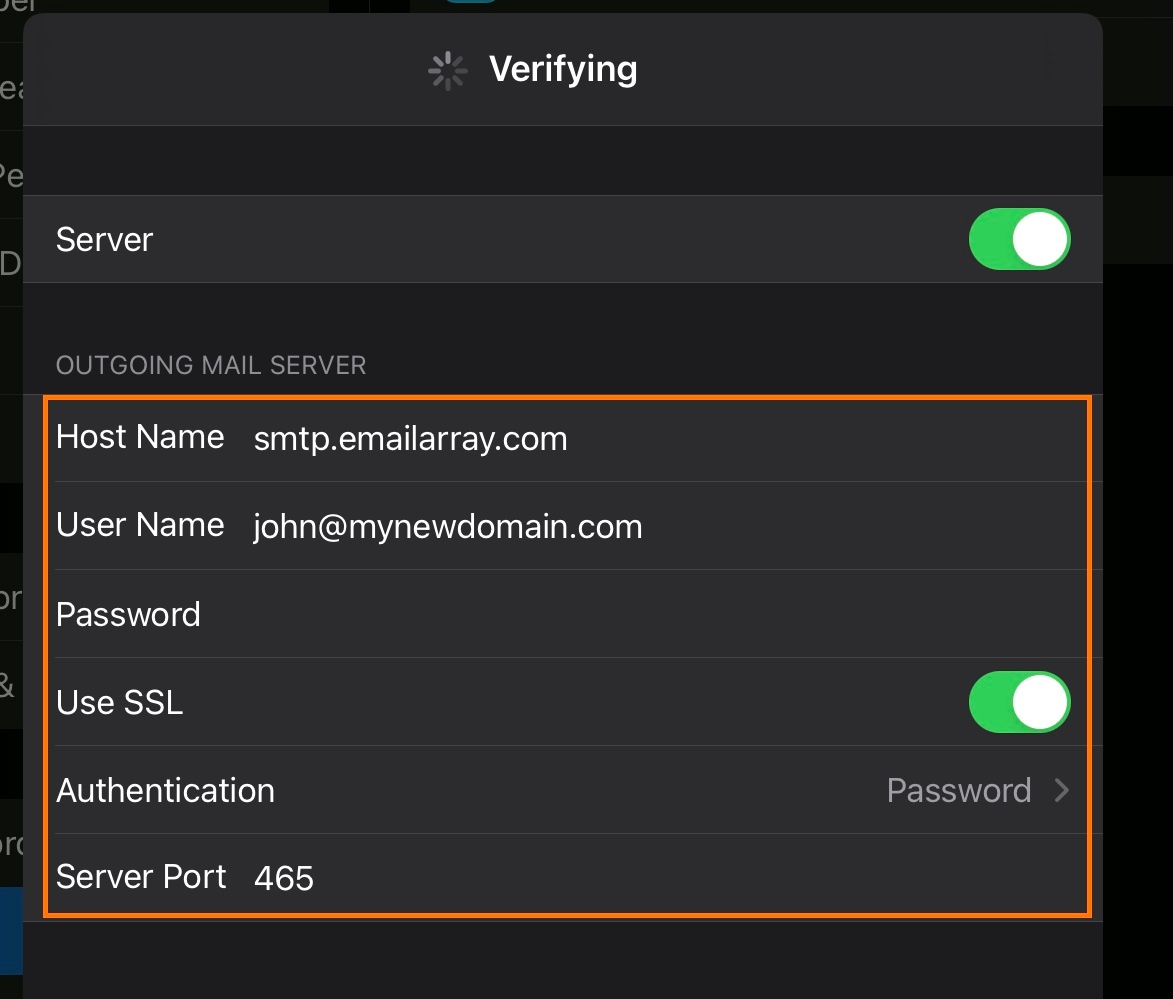
UnderUnder Outgoing Mail Server, enter as below:- Host Name
smtp.emailarray.com - User Name
- Password
- Host Name
- Click
onon Next - Click
onon Save
Note that IMAP is preferred over POP. If you want to set up the account as POP, you have to set it up manually. IMAP is a protocol made to support several devices accessing one same account, with all folders synced at our server, which also guarantees that our backups will be executed.
Example setup for iOS:
 |
 |
 |
 |
 |
 |