
Setup e-mail on Mozilla Thunderbird
| You can ask your sysadmin to setup Autoconfig in your DNS to make the process of setting up Thunderbird much easier. |
Step 1
To open the setup window for a new email account, you have multiple options:
- Click on Tools -> Account Settings -> Account Actions -> Add Mail Account.
- If your menus on the top are hidden, click on the ALT key to show them, or access Account Settings by clicking on the radiator icon, on the top right of the interface, then Options -> Account Setting -> Account Actions -> Add Mail Account.
- Click the menu icon → New → Existing Mail Account.
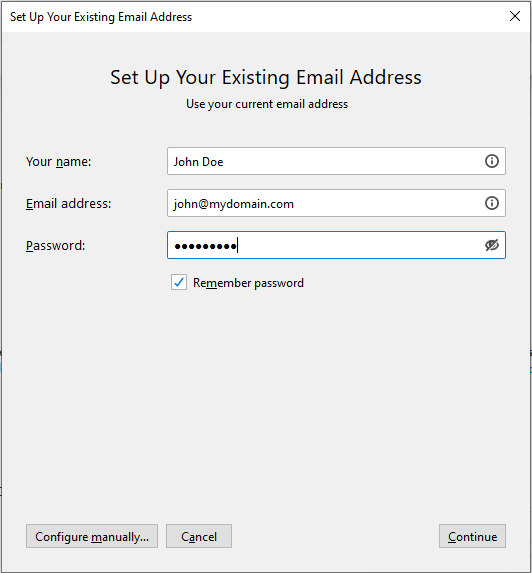
The Set Up Your Existing Email Address window will show.
Step 2
Enter the user's display name, full e-mail address and password:
Step 3
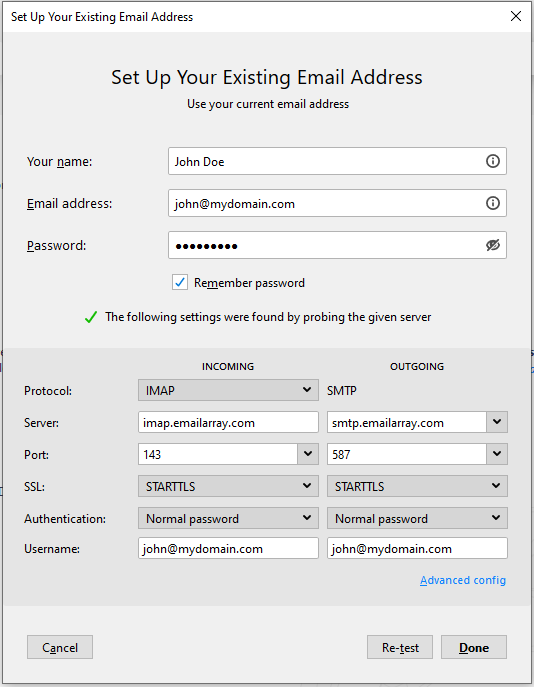
Click on Continue. Thunderbird will automatically find the proper server names if you have set the Autoconfig record in your DNS.
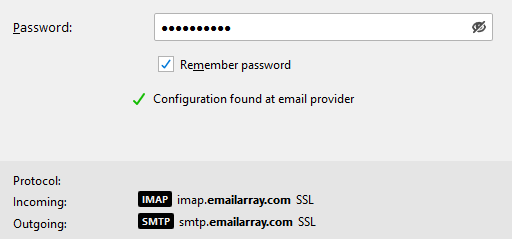
If Thunderbird doesn't automatically find the server names, please use the details from the Server & Ports page.
Step 4
Click on Done to finish the account setup. Wait for Thunderbird to synchronize the data.
| Note that Thunderbird will automatically setup the account as IMAP. If you want to set up the account as POP, you have to setup the account manually. IMAP is recommended, as it´s a protocol made to support several devices accessing one same account, with all folders synced at our server, which also guarantees that our backups will be executed. |