DNS Configuration
DNS Updates
It might take some time to see the changes in your DNS based on your provider and domain settings.
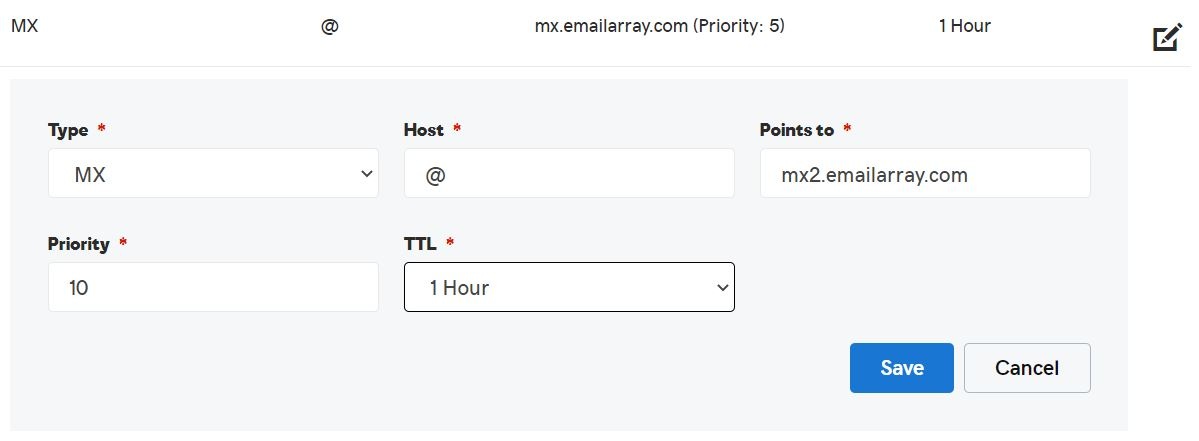
1. MX Records
The first step in configuring your DNS is updating your MX records.
MX records tell the world which server should receive the e-mails sent to your domain and deliver them to the specified e-mail provider, straight to your mailbox. You can usually edit the MX records for your domain from the same Control Panel you use for managing your DNS. You can safely keep your website hosted with another provider and only use our hosting services for the e-mail.
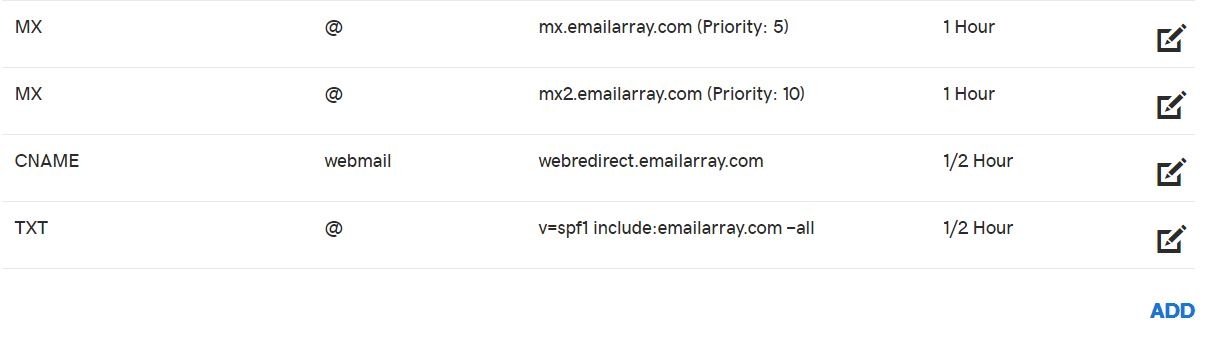
You should first remove all other MX records and then add the following, with the specified preference (the Host value is usually '@'):
|
Points to |
Priority / Preference |
||
|---|---|---|---|
| MX | @ |
mx.emailarray.com |
5 |
| MX | @ |
mx2.emailarray.com |
10 |
Important
It is not recommended to create CNAME records within your domain that point to EmailArray MX records and use that CNAME as your MX records.
Example configuration for MX records in GoDaddy DNS:
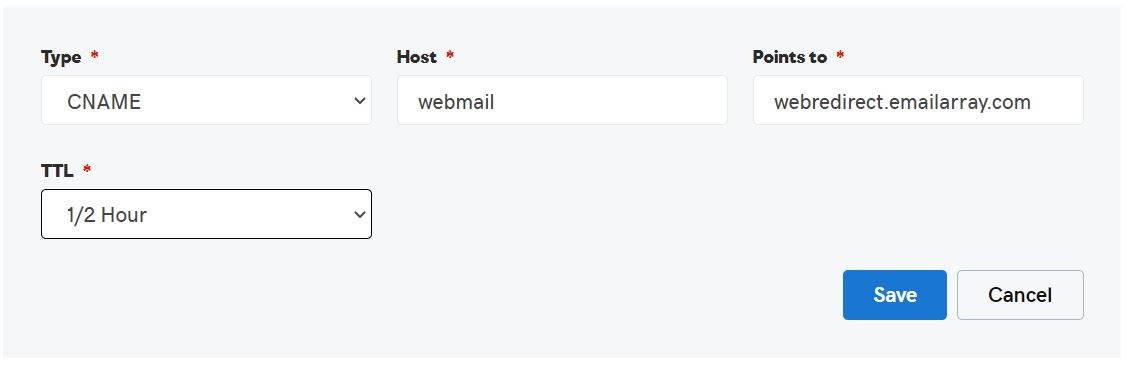
2. Webmail Record
To access your webmail using a custom URL, you must configure CNAME records within your domain for the webmail host.
You must create:
|
HOST |
Points to |
||
|---|---|---|---|
| CNAME |
webmail |
webredirect.emailarray.com |
webmail.yourdomain.com |
Don't forget to replace yourdomain.com com with the actual name of your domain.
Example configuration for Webmail records in GoDaddy DNS:

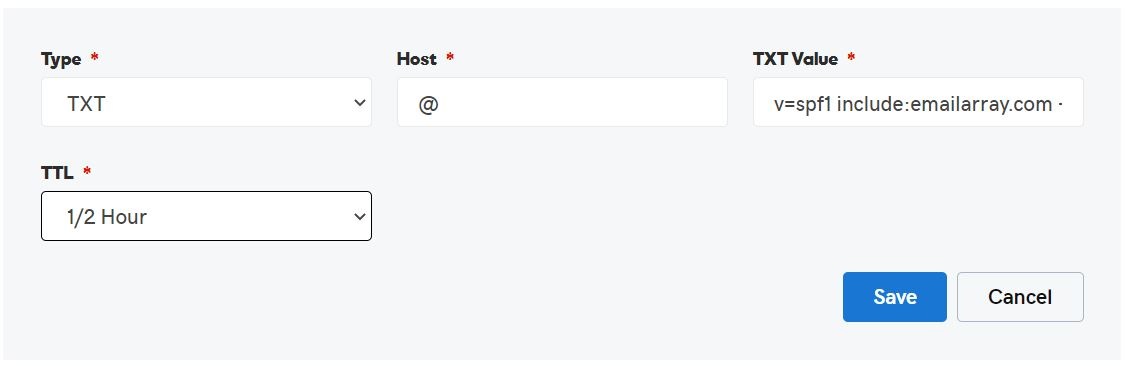
3. SPF Record
The SPF record is necessary, so your e-mail is not marked as Spam. The SPF will help with your e-mail deliverability because it it specifies a list of authorized hosts that can send e-mails on behalf of a domain.
First, check for any existing TXT records with SPF.
If you don't have an existing SPF record, you must add a a TXT record with the following following value value (the host value is usually '@'):
|
HOST |
TXT Value |
|
|---|---|---|
| TXT |
@ |
v=spf1 include:emailarray.com |
If you have an SPF record, you should edit it and insert before the final final -all directive, the following value: include:emailarray.com
Example configuration for SPF TXT records in GoDaddy DNS:
4. DKIM Records
To improve e-mail deliverability, you should enable DKIM for your domain from your your Admin Panel and then add the records to your DNS.
DKIM DKIM is an e-mail authentication method designed to detect forged sender addresses in e-mails, a technique often used in phishing and e-mail spam (Wikipedia).
To enable DKIM for your domain:
-
Go to
thethe Admin Panel. - Log in using your Admin username and password.
- Click
onon Domains - Click on
thethe DKIM icon - In the new window, switch
thethe Enabletoto Yes. This will generate your DKIM record. - Update your DNS to include the generated DKIM record
asas TXT recordthethe Hostthethe Key - Note it might take some time to propagate in the DNS.
5. Autodiscover Records
To simplify the configuration on some desktop & mobile e-mail clients, you should use the Autodiscover web service record to configure these clients automatically. You have to add an *A* record in the DNS for your domain:
|
A record hostname |
Points to |
|---|---|
|
autodiscover.<yourdomain.com> |
69.28.212.195 |
Visit the "Autodiscover" page for more information.
Example of a Setup in GoDaddy: