Setup Calendar and Contacts
- Sync Contacts and Calendars using CalDAV and CardDAV
- Outlook - CalDAV Synchronizer Setup
- Thunderbird - Syncing Contacts and Calendars
- eM Client - Syncing Calendar and Contacts
- ActiveSync / EAS - Syncing Calendars and Contacts
Sync Contacts and Calendars using CalDAV and CardDAV
How to sync your calendar and contacts across all your devices.
With CalDAV and CardDAV, you can keep your schedule and address book perfectly in sync across smartphones, tablets, and desktop applications. These protocols allow you to use your favorite native apps (like the built-in calendar on iOS or Android) rather than being forced to use a specific web interface.
Note: Please ensure your email account is an Enhanced mailbox - which supports mobile synchronization features - before beginning.
Step 1: Get Your Server URLs
You will need a specific URL for your Calendar and another for your Contacts. You can find these directly in your webmail interface:
-
Log into your Webmail.
-
Click on your Profile Picture/Icon in the top corner.
-
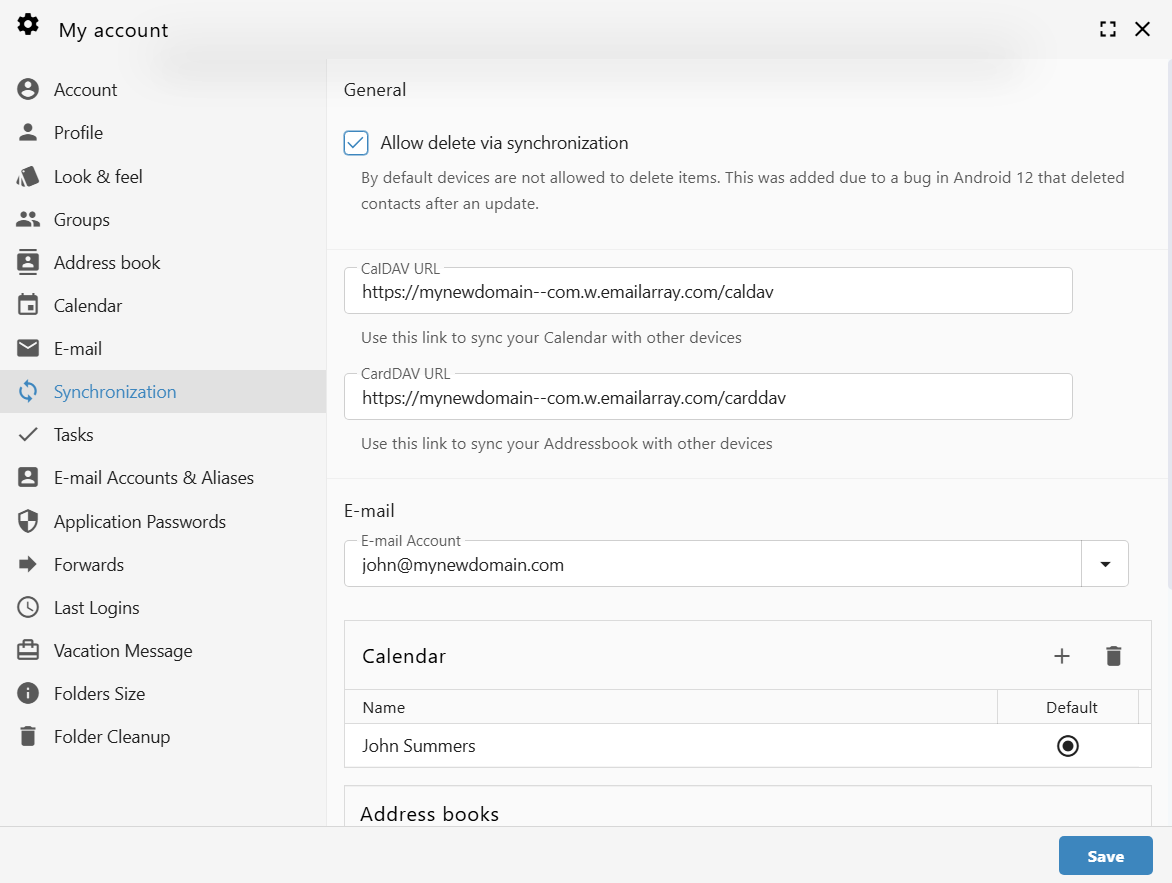
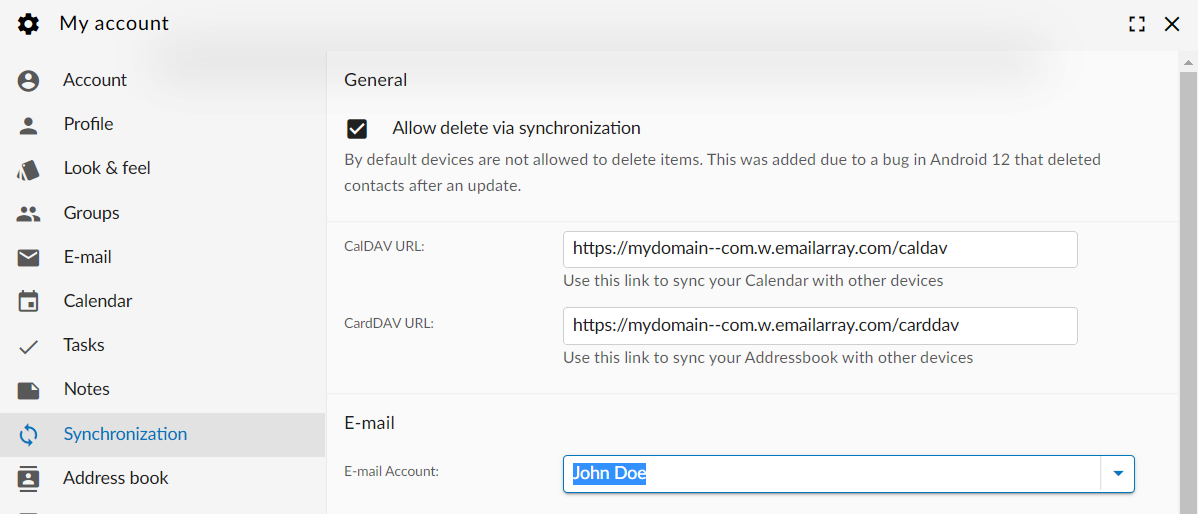
Select My Account.
-
Navigate to the Synchronization tab on the left-hand menu.
-
Copy the unique links found under CalDAV URL and CardDAV URL.

The URLs generally follow this format:
-
CalDAV:
https://yourdomain--com.w.emailarray.com/caldav -
CardDAV:
https://yourdomain--com.w.emailarray.com/carddav
Step 2: Add a New Account to Your Device
The process is similar across most platforms (iOS, Android, macOS, or Thunderbird).
-
Open your device's Settings or your preferred Calendar/Contact app.
-
Find the option to Add Account.
-
Select Other or Advanced Setup (do not select Google, Outlook.com, or iCloud).
-
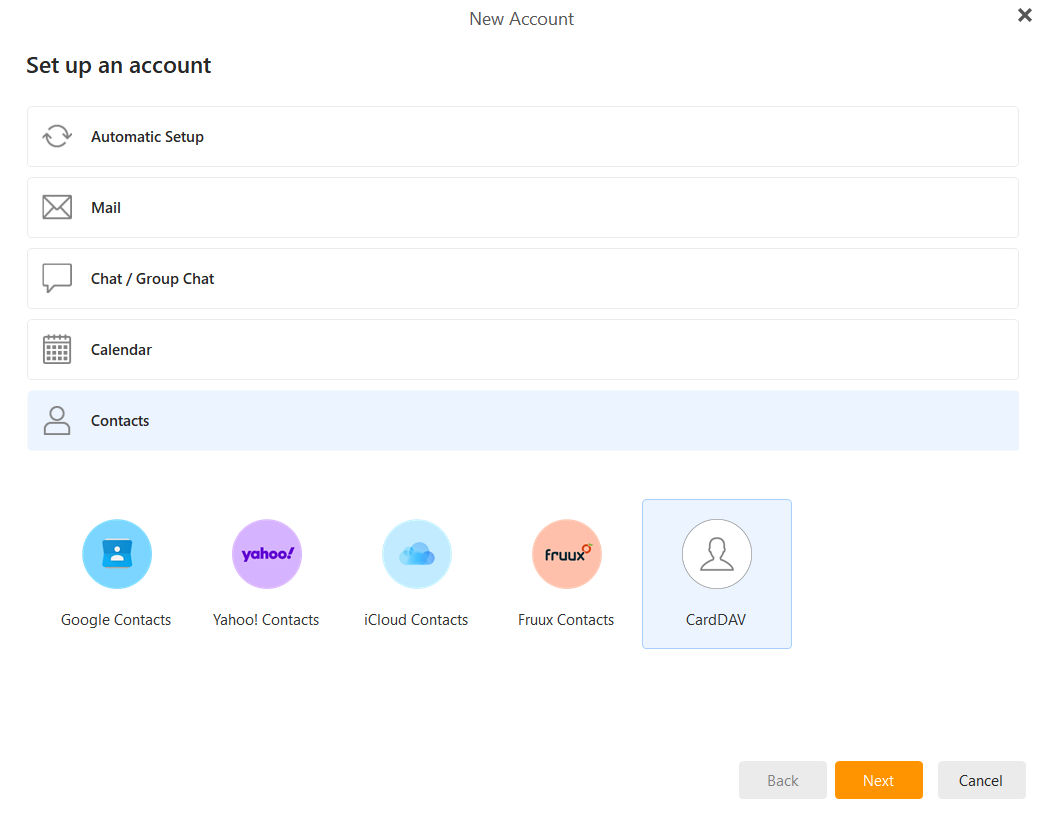
Choose CalDAV (for Calendars) or CardDAV (for Contacts).
Step 3: Enter Connection Details
When prompted for account details, use the Manual or Advanced setup option:
-
Username: Your full email address (e.g., john@mydomain.com).
-
Password: Your email account password.
-
Server URL: Paste the specific URL you copied from your webmail in Step 1.
-
Description: Give the account a name, such as "Work Calendar" or "My Contacts."
Click Finish or Save to complete the setup. Your device will now begin the initial synchronization.
Outlook - CalDAV Synchronizer Setup
Enhanced mailbox only.
Enhanced mailboxes allow you to sync calendars (CalDAV) and contacts (CardDAV) across multiple devices with applications that support the CardDAV/CalDAV protocols.
In Outlook you can sync via CalDAV / CardDAV by installing the caldavsynchronizer - an Open Source plugin that you can install on your computer and use with your Outlook. This plugin supports Outlook 2007 to Outlook 2016 and is Free and Open-Source Software (FOSS), licensed under AGPL 3 and developed by Alexander Nimmervoll and Gerhard Zehetbauer. You can find the project on Github and SourceForge.
This is a step-by-step guide to installing and setting up the caldavsynchronizer plugin.
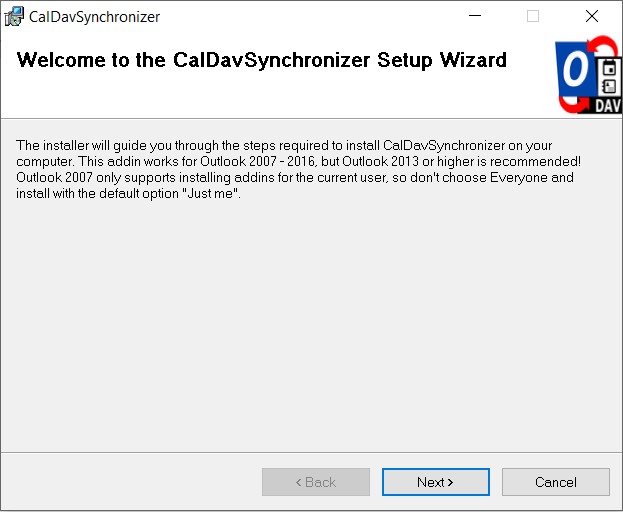
1. Download the caldavsynchronizer
You can download the caldavsynchronizer plugin from the project's website: https://caldavsynchronizer.org/.
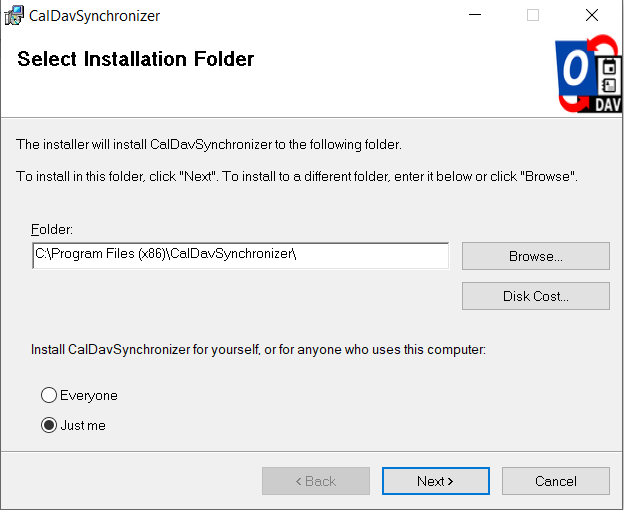
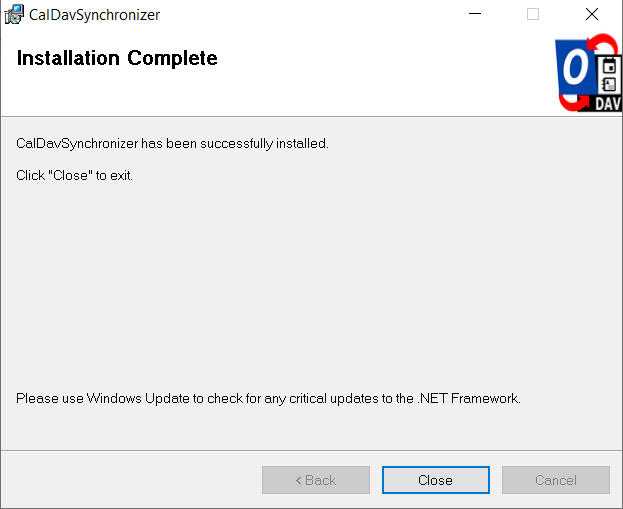
2. Install the caldavsynchronizer
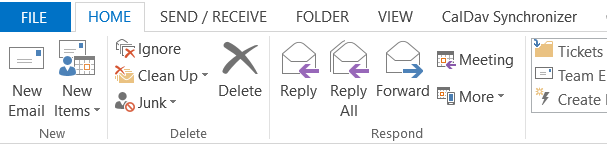
Extract the downloaded .zip file and start the installation. Once the installation is complete, you will see a new ribbon called "CalDav Synchronizer" in your Outlook.
3. Get your CalDAV / CardDAV URLs
First, you need to obtain your CalDAV / CardDAV URLs. CalDAV is for Calendar synchronization, and CardDAV is for Contacts.
- Log into the Webmail using your full e-mail address and your current e-mail password
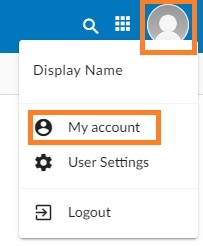
- Click on the User icon from the top right to activate the menu. Then click on My account

- In the Synchronization tab, find the CalDAV / CardDAV URL. You will need to copy and use these URLs with the caldavsynchronizer.
4. Set up the caldavsynchronizer
- Open Outlook on your computer.
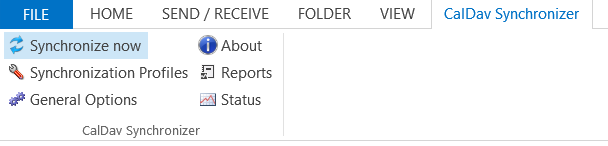
- Go to the CalDav Synchronizer ribbon. Click on the Synchronization Profiles option.
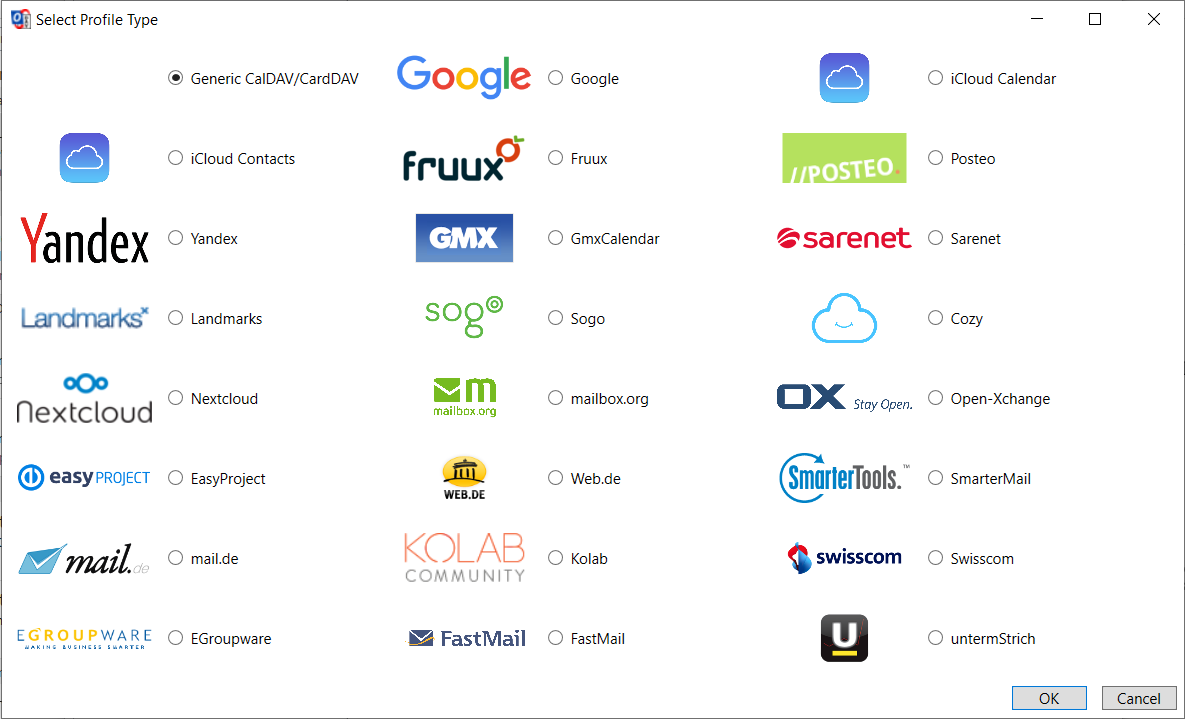
- Click on the Add button (plus sign) to set up a new Calendar or Addressbook to sync. Select the profile type Generic CalDAV/CardDAV.
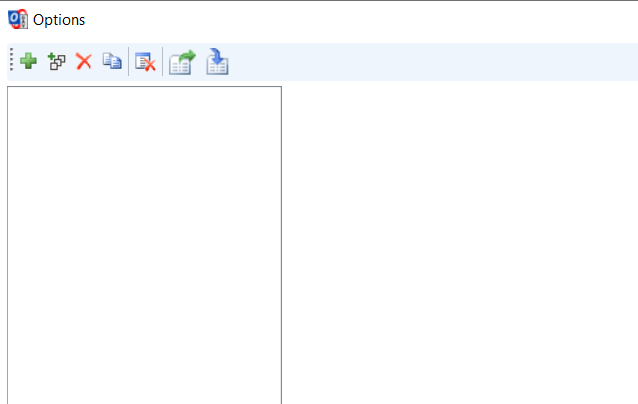
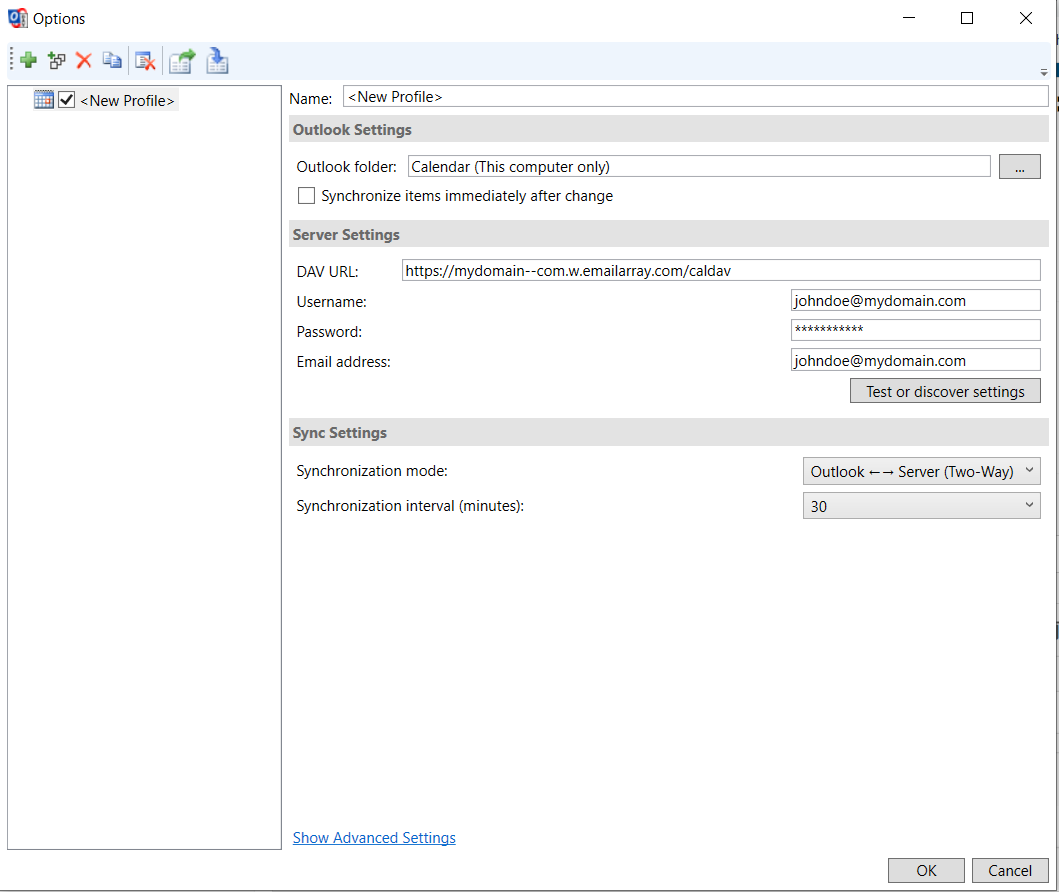
- A new profile window will show. Fill in the following details:
- Name: give a name to this profile. For example, Calendar - personal, or Calendar - work.
- Outlook folder: create a new folder in the Calendar Items or Contact Items category. You can also choose an existing Calendar or Contact folder.
- Server Settings: these are your CalDAV / CardDAV details:
- DAV URL: if you're adding a Calendar, use the CalDAV URL obtained from the Webmail at step 3. This URL should be in the form of https://mydomain–com.w.emailarray.com/caldav - be sure to replace mydomain--com with your own domain name. If you're adding a Contact list, use the CardDAV URL.
- Username: your full email address
- Password: your email password
- Email address: your full email address
- Click on the Test or discover settings button. If you have multiple Calendars (or Contact lists) you can choose which one of them to sync with this Profile.
- Sync Settings: choose how and how often to synchronize the Profile. We recommend the Outlook ↔ Server (Two-Way) synchronization mode.
- After you finish the setup, you can choose to synchronize items immediately after change by ticking the option in the Outlook Settings. Please note you can only activate this option after you have finished the above setup and clicked on the Test or discover settings.
- Click on the OK button to finish setup and save changes.
5. Synchronize your new Profile
If the synchronization didn't start automatically, you could manually sync by going to the CalDAV Synchronization ribbon in Outlook and clicking the Synchronize now option.
You can now set up a new Calendar or Contact list by adding a new Profile (step 4).
Thunderbird - Syncing Contacts and Calendars
Keep your schedule and address book in sync across all your devices using CalDAV and CardDAV protocols. This allows you to manage your data directly within Thunderbird rather than using a web interface.
Note: Please ensure your email account is an Enhanced mailbox, as these mailboxes support advanced synchronization features.
Step 1: Get Your Server URLs
You will need a specific URL for your Calendar and another for your Contacts. You can find these in your webmail:
-
Log into your Webmail.
-
Click on your Profile Picture/Icon in the top corner.
-
Select My Account.

-
Navigate to the Synchronization tab on the left-hand menu.
-
Copy the unique links found under CalDAV URL and CardDAV URL.
Example URL Formats:
-
CalDAV:
https://yourdomain--com.w.emailarray.com/caldav
Step 2: Set Up Your Calendar (CalDAV)
-
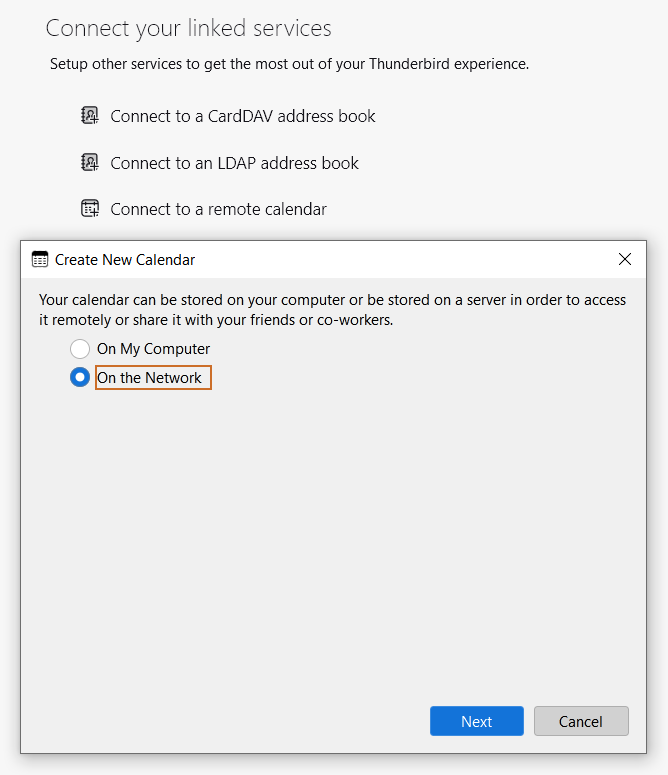
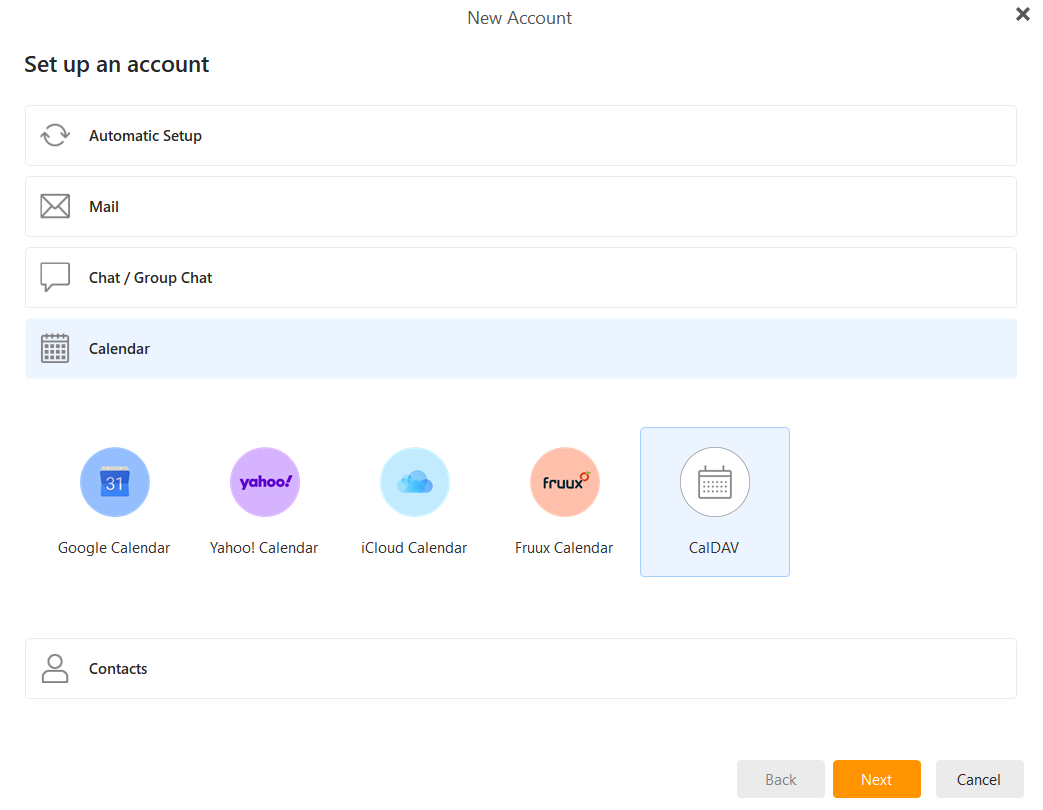
In Thunderbird, locate the Connect your linked services section and click Connect to a remote calendar.
-
In the "Create New Calendar" window, select On the Network and click Next.

-
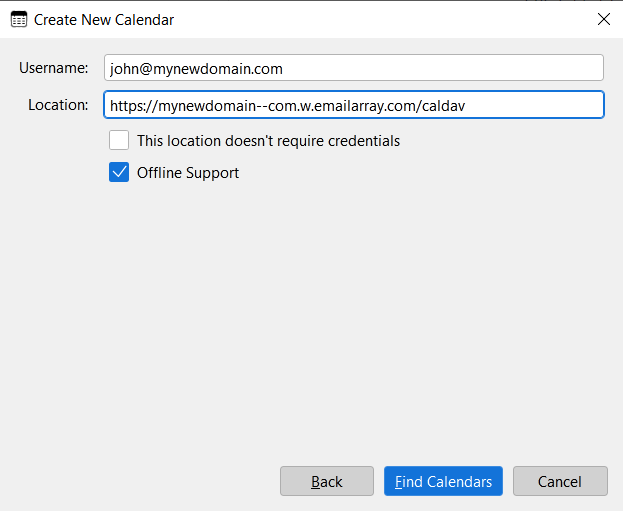
Enter Connection Details:
-
Username: Your full email address.
-
Location: Paste your unique CalDAV URL from Step 1.
-
Click Find Calendars.

-
-
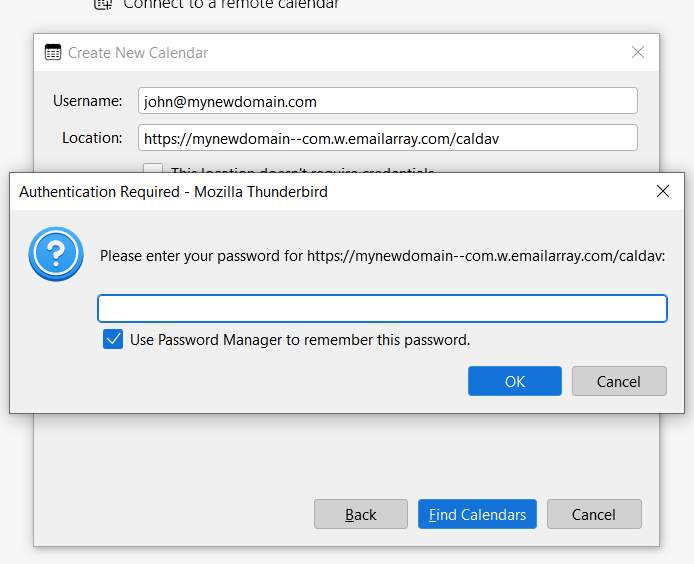
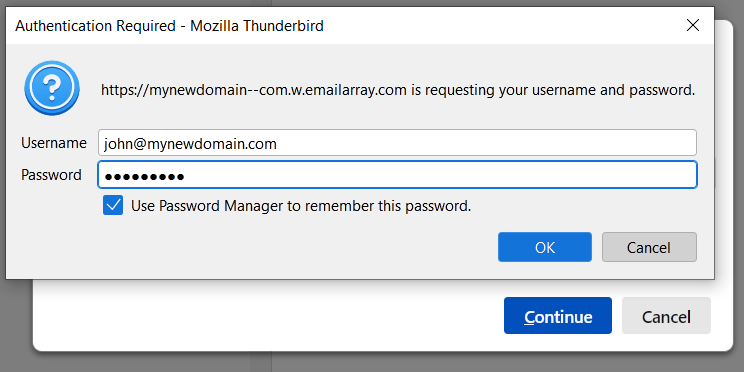
Authentication: A prompt will appear asking for your password. Enter your email password and check Use Password Manager to remember this password.

-
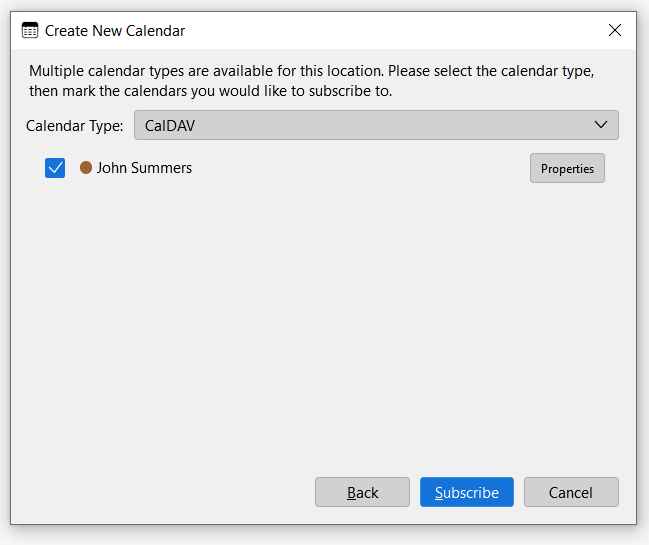
Finalize: Select the calendar(s) you wish to subscribe to and click Subscribe.

Step 3: Set Up Your Contacts (CardDAV)
-
In the Connect your linked services section, click Connect to a CardDAV address book.
-
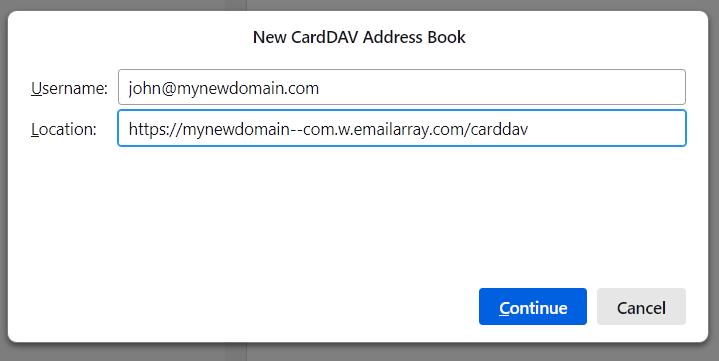
Enter Connection Details:
-
Username: Your full email address.
-
Location: Paste your unique CardDAV URL from Step 1.
-
Click Continue.

-
-
Authentication: When the "Authentication Required" window appears, verify your username and enter your email password. Check the box to remember the password and click OK.

-
Your address book will now synchronize with Thunderbird.
Troubleshooting Tips
Verify Your Plan: Basic mailboxes support email synchronization only. If you cannot see the Synchronization tab in webmail, you may need to upgrade to an Enhanced plan.
Check Your URL: Ensure there are no extra spaces at the beginning or end of the URL when pasting it into Thunderbird.
Direct Sync: Unlike standard IMAP which only syncs email, these steps ensure your Calendar, Contacts, and Tasks stay updated across your computer, phone, and tablet.
eM Client - Syncing Calendar and Contacts
eM Client is a powerful groupware tool that allows you to manage your professional life in one place. By connecting your Calendar (CalDAV) and Contacts (CardDAV), you can keep your schedule and address book perfectly synchronized between eM Client and your other devices.
Note: Please ensure your email account is an Enhanced mailbox, as these mailboxes support advanced synchronization features.
Step 1: Get Your Server URLs
You will need a specific URL for your Calendar and another for your Contacts. You can find these in your webmail:
-
Log into your Webmail.
-
Click on your Profile Picture/Icon in the top corner.
-
Select My Account.
-
Navigate to the Synchronization tab on the left-hand menu.
-
Copy the unique links found under CalDAV URL and CardDAV URL.
Example URL Formats:
-
CalDAV:
https://yourdomain--com.w.emailarray.com/caldav
Step 2: Set Up Your Calendar (CalDAV)
-
Open eM Client and go to Menu > Accounts > Add Account.
-
Select the Calendar tab and choose CalDAV. Click Next.

-
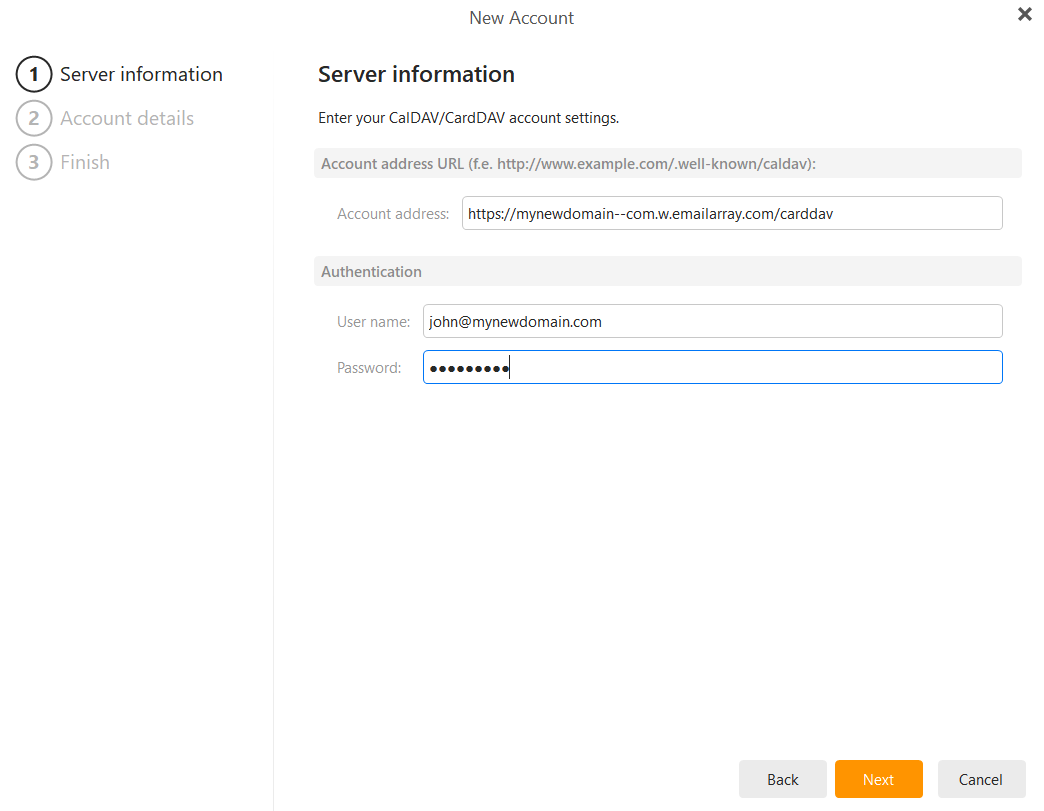
Enter Server Information:
-
Account address: Paste your unique CalDAV URL.
-
User name: Your full email address.
-
Password: Your email account password.
-
Click Next.

-
-
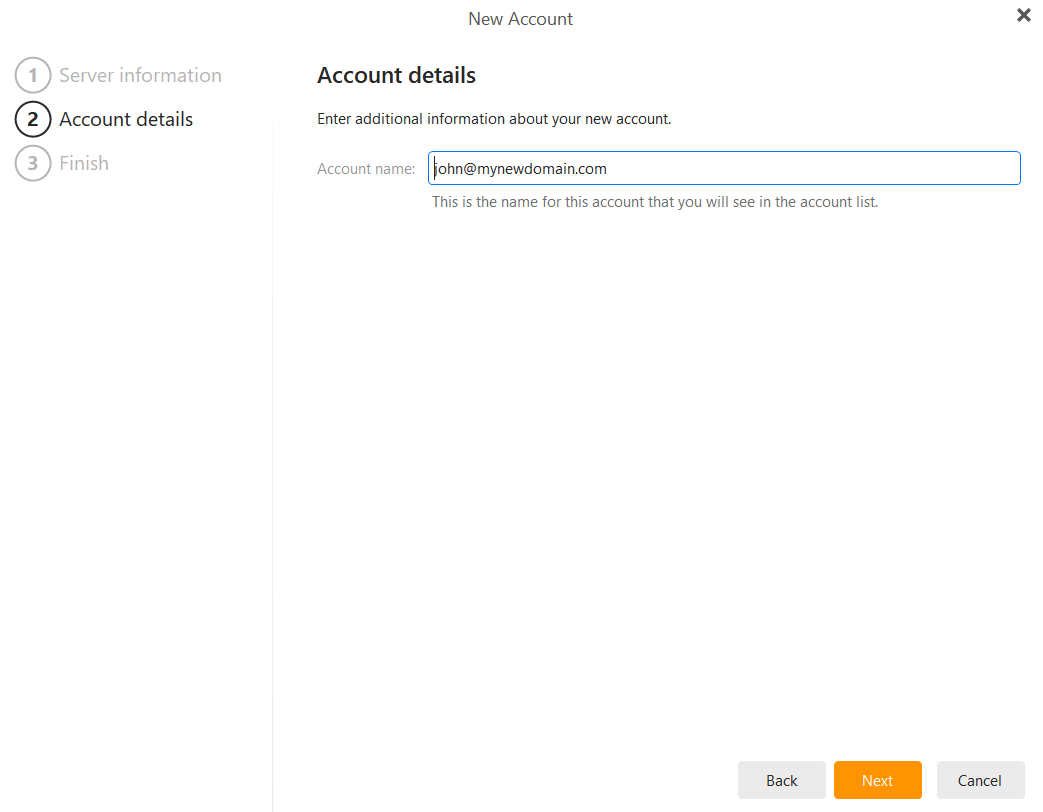
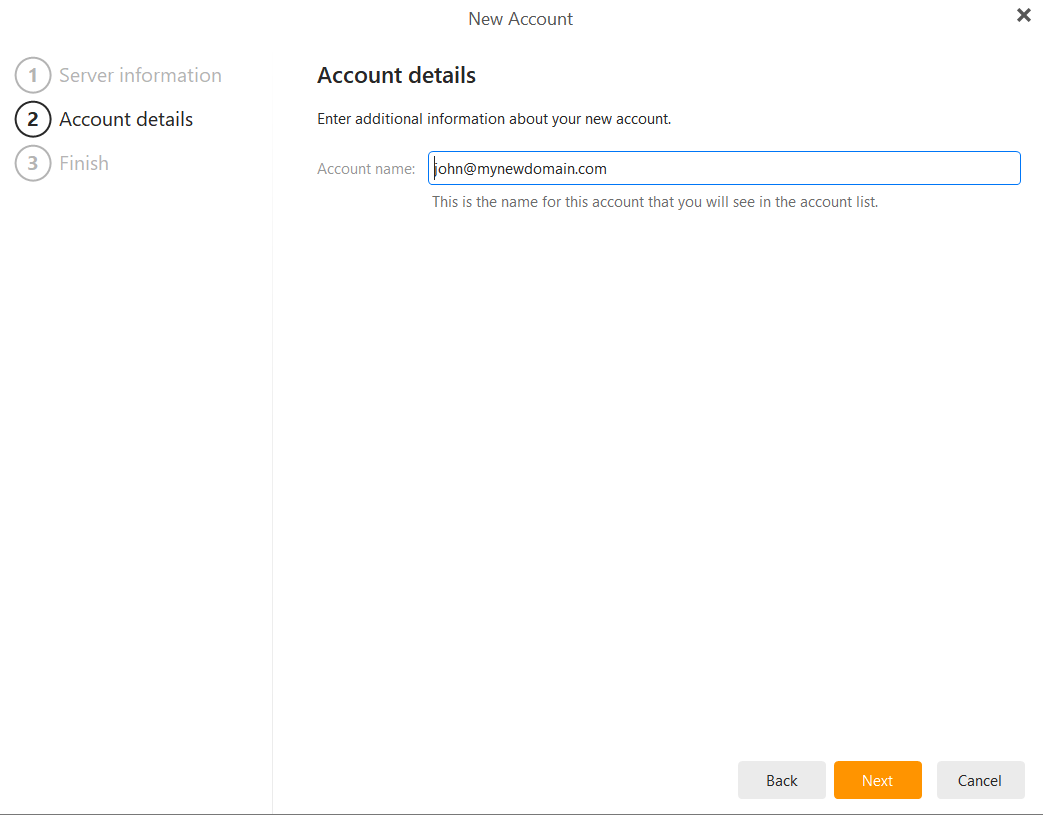
Account Details: Enter an Account name (e.g., "Work Calendar") so you can easily identify it in your list. Click Next.

-
Finalize: Click Finish to complete the setup. Your events will now begin to sync.


Step 3: Set Up Your Contacts (CardDAV)
-
Go to Menu > Accounts > Add Account.
-
Select the Contacts tab and choose CardDAV. Click Next.

-
Enter Server Information:
-
Account address: Paste your unique CardDAV URL.
-
User name: Your full email address.
-
Password: Your email account password.
-
Click Next.

-
-
Account Details: Enter an Account name (e.g., "Company Contacts") and click Next.

-
Finalize: Click Finish. Your address book is now connected.
Troubleshooting & Tips
-
Authentication Errors: Ensure you are using your full email address as the username.
- Connection Security: eM Client automatically uses secure connections for these protocols.
- Dynamic Storage: Remember that your combined storage (including calendar attachments and contacts) is shared across your mailbox.
ActiveSync / EAS - Syncing Calendars and Contacts
Sync your email, calendar, and contacts in real-time.
ActiveSync is the most powerful way to connect your mailbox to your mobile devices and desktop apps. Unlike standard email setups, ActiveSync provides a real-time "push" connection that synchronizes your email, calendar, contacts, and notes instantly across all your devices. This ensures your data is always consistent, no matter where you are:
- Effortless Management: When you delete an email on your phone, it’s instantly removed from your computer, and when you add a meeting to your calendar, it appears everywhere.
- Contacts on the Go: If you save a new client's phone number on your smartphone while out of the office, that contact will be waiting for you in your webmail address book the moment you sit down at your desk.
- Real-time Updates: If you update a contact’s email address or job title in your desktop email app, your phone's native contacts list will reflect that change automatically without you having to lift a finger.