# Tasks Sharing

Sharing your task lists is an excellent way to keep your team organized and on track. Whether you want a colleague to simply view project milestones or you need to give a team member the ability to add and complete tasks, you can easily customize their access levels.

## How to Share Your Task List

Follow these steps to give other users or groups access to your tasks:

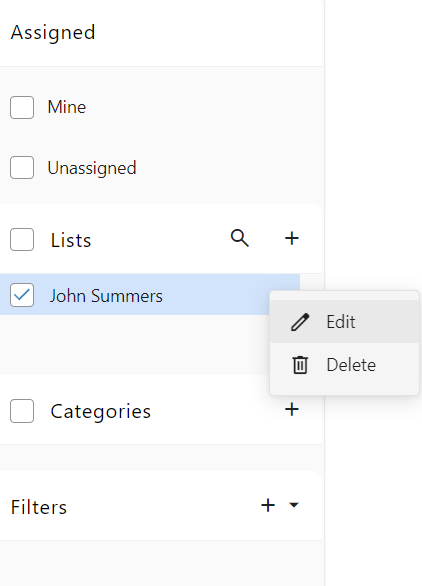
1. <span class="" data-path-to-node="6,0,0,0">**Open Task Settings:** Navigate to your Tasks page and find your specific task list under the "Lists" section on the left sidebar. Click the menu next to the list name and select **Edit**</span><span class="" data-path-to-node="6,0,0,1"><sup class="superscript"></sup></span><span class="" data-path-to-node="6,0,0,2">.   
      
    [![Webmail - Tasks settings icon.PNG](https://wikidev.emailarray.com/uploads/images/gallery/2026-11/scaled-1680-/webmail-tasks-settings-icon.PNG)](https://wikidev.emailarray.com/uploads/images/gallery/2026-11/webmail-tasks-settings-icon.PNG)  
      
    </span>
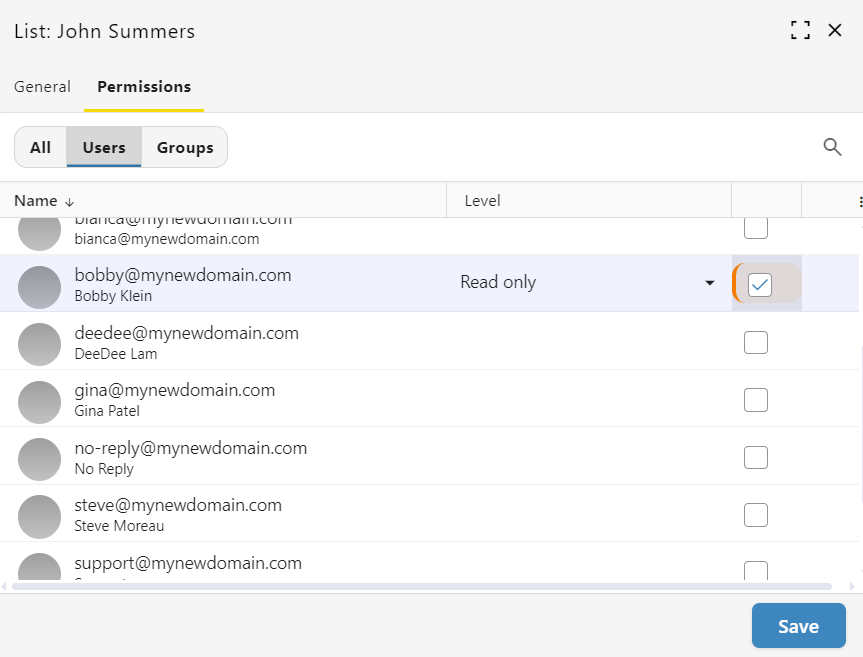
2. <span class="" data-path-to-node="6,1,0,0">**Navigate to Permissions:** In the pop-up window, click the **Permissions** tab</span><span class="" data-path-to-node="6,1,0,1"><sup class="superscript"></sup></span><span data-path-to-node="6,1,0,2">. You can use the top filters to view All, Users, or Groups</span><span class="" data-path-to-node="6,1,0,3"><sup class="superscript"></sup></span><span data-path-to-node="6,1,0,4">.</span>
3. <span class="" data-path-to-node="6,2,0,0">**Select Users:** Locate the colleague you want to share with and check the box on the far right side of their name</span><span class="" data-path-to-node="6,2,0,1"><sup class="superscript"></sup></span><span class="" data-path-to-node="6,2,0,2">.   
      
    [![Webmail - Tasks settings pop-up - Permissions - Add new user or group.PNG](https://wikidev.emailarray.com/uploads/images/gallery/2026-11/scaled-1680-/webmail-tasks-settings-pop-up-permissions-add-new-user-or-group.PNG)](https://wikidev.emailarray.com/uploads/images/gallery/2026-11/webmail-tasks-settings-pop-up-permissions-add-new-user-or-group.PNG)  
      
    </span>
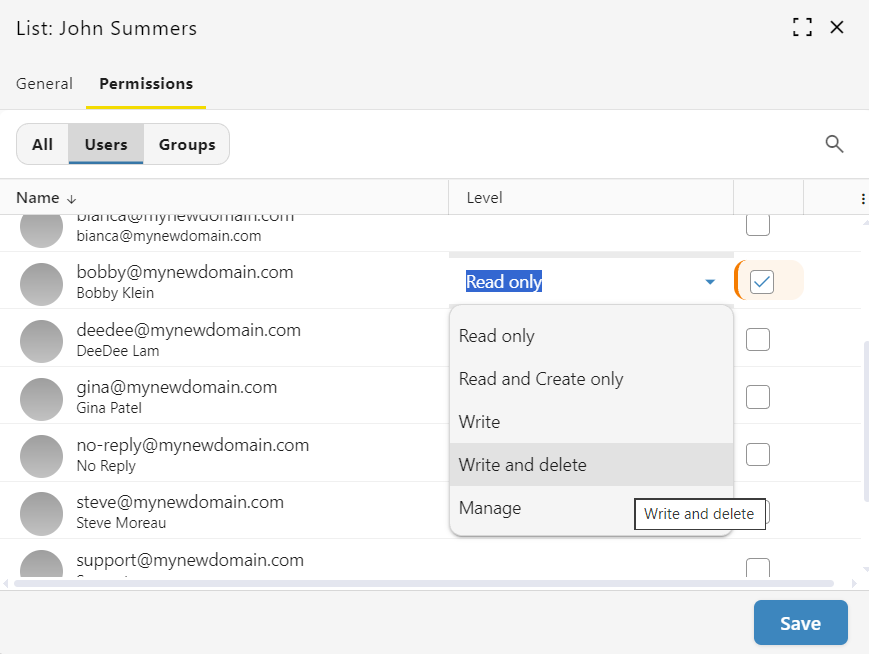
4. <span class="" data-path-to-node="6,3,0,0">**Adjust Access Levels:** The system assigns "Read only" access by default</span><span class="" data-path-to-node="6,3,0,1"><sup class="superscript"></sup></span><span data-path-to-node="6,3,0,2">. Click the permission drop-down menu next to their name to change their access level to options like "Write and delete"</span><span class="" data-path-to-node="6,3,0,3"><sup class="superscript"></sup></span><span class="" data-path-to-node="6,3,0,4">.   
      
    [![Webmail - Tasks settings pop-up - Permissions - Update permission.PNG](https://wikidev.emailarray.com/uploads/images/gallery/2026-11/scaled-1680-/webmail-tasks-settings-pop-up-permissions-update-permission.PNG)](https://wikidev.emailarray.com/uploads/images/gallery/2026-11/webmail-tasks-settings-pop-up-permissions-update-permission.PNG)  
      
    </span>
5. <span class="" data-path-to-node="6,4,0,0">**Save Your Changes:** Click the **Save** button at the bottom of the window to apply your updates</span><span class="" data-path-to-node="6,4,0,1"><sup class="superscript"></sup></span><span data-path-to-node="6,4,0,2">.</span>