Embedding Events on Your Website
Embedding EasyMeet directly into your website lets visitors view your availability and book appointments without leaving your page. You can generate a custom embed code for any of your event types and add it to your site in just a few steps.
Before you start
Make sure you have already enabled EasyMeet and created at least one event type. If you need help getting set up, see EasyMeet - Online Appointment Scheduling.
Step 1: Open the Embed Menu
-
Log in to your Webmail and select the EasyMeet tab in the top navigation bar.
-
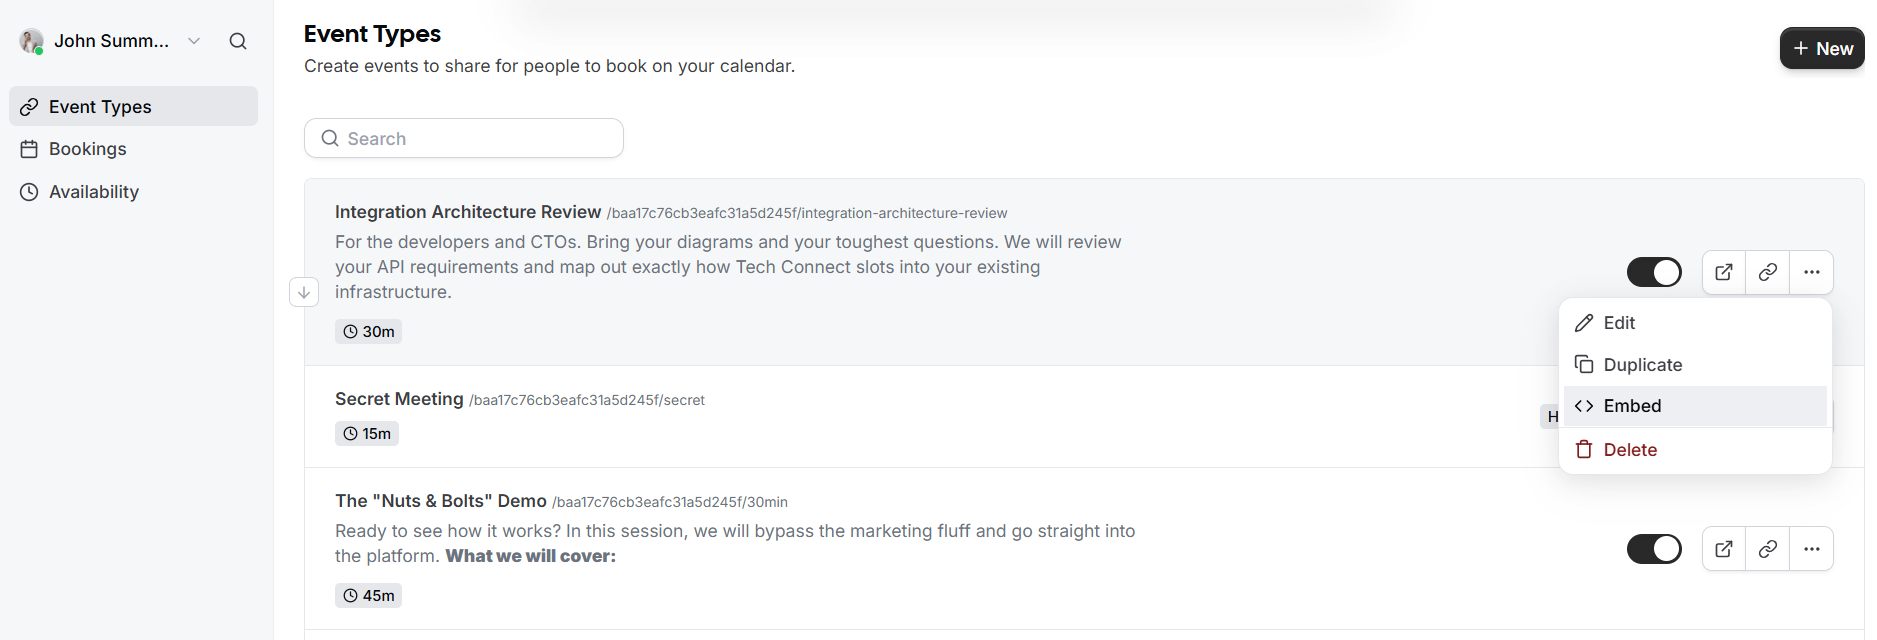
In the left sidebar, click Event Types.
-
Find the event you want to embed on your website and click the three-dots menu icon (
...) on the right side of the event card. -
Select Embed (
</>) from the dropdown menu.
Step 2: Choose Your Embed Style
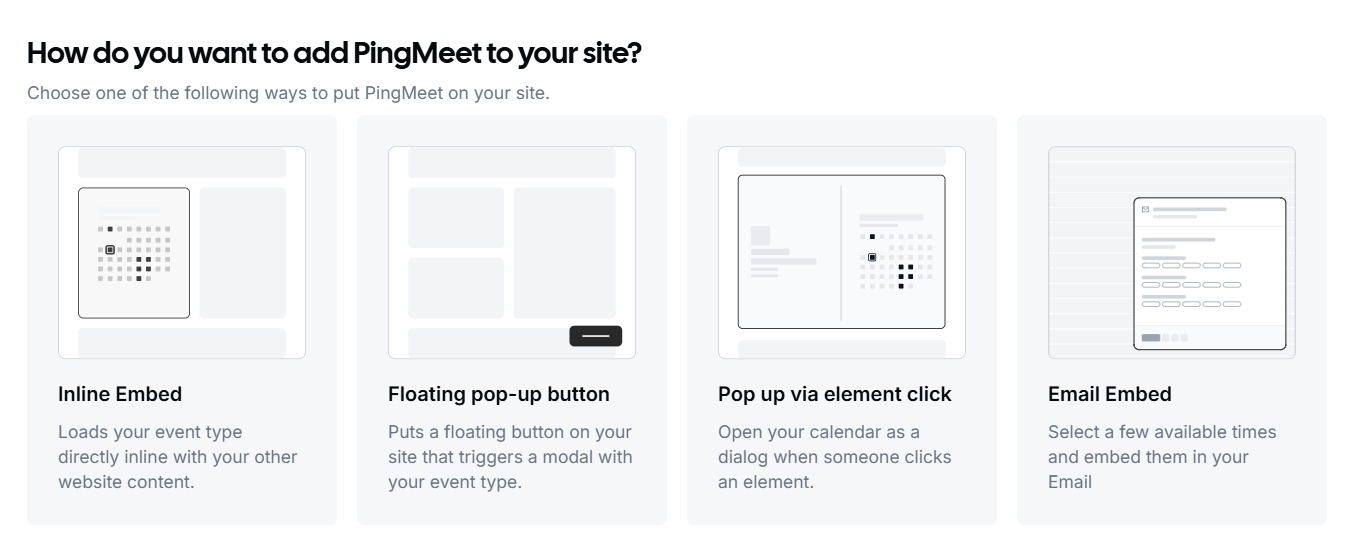
Select how you would like the booking calendar to appear on your website:
-
Inline Embed: Loads your event booking calendar directly inside the page alongside your existing website content.
-
Floating pop-up button: Places a persistent floating button in the corner of your site that opens your booking calendar in a pop-up window when clicked.
-
Pop up via element click: Triggers your booking calendar to open as a pop-up dialog when a visitor clicks a specific link, button, or element on your page.
-
Email Embed: Lets you select a few available time slots to paste directly into an email message.
Click on your preferred option to move to the customization screen.
Step 3: Customize and Copy the Embed Code
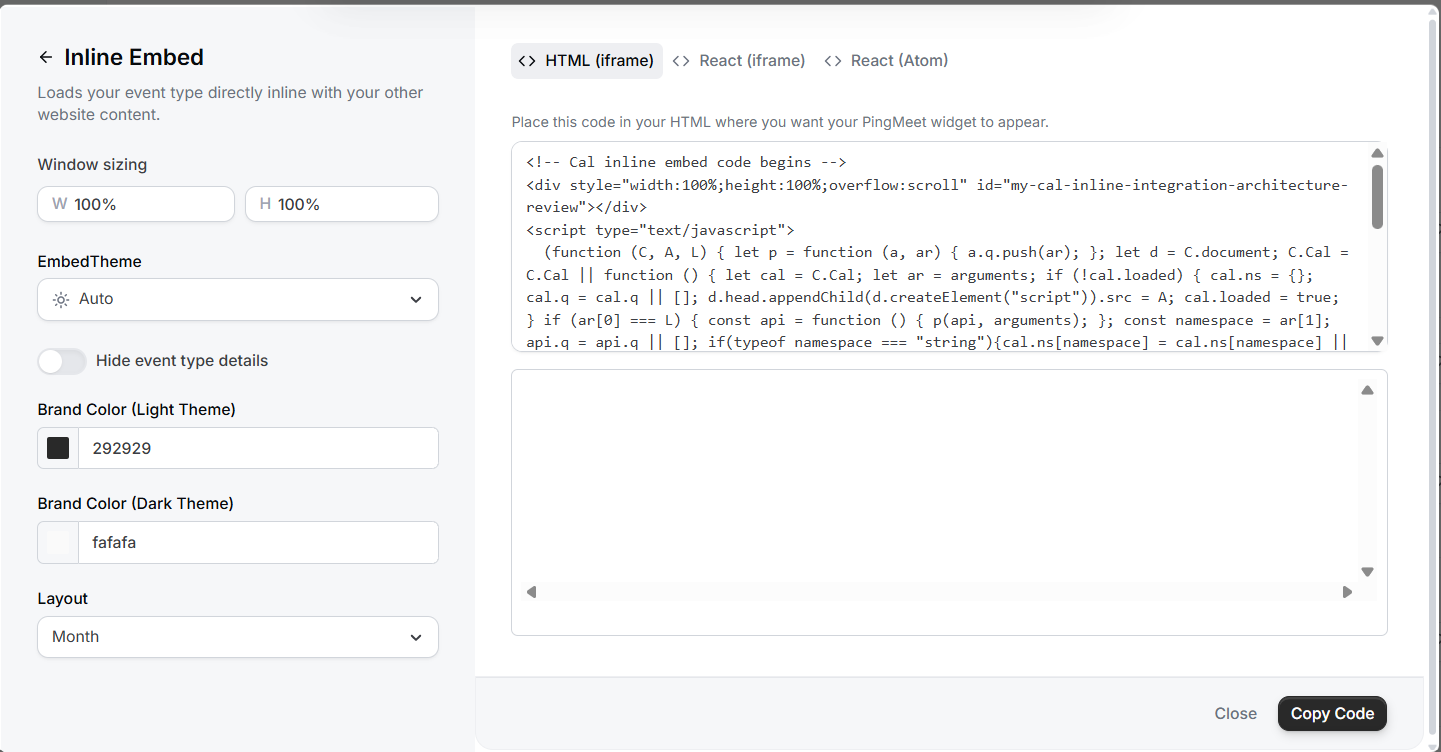
Once you select an embed style (such as Inline Embed), you can adjust how the calendar looks to match your website's design:
-
Choose your framework: At the top of the code panel, select HTML (iframe) for standard websites, or choose React (iframe) or React (Atom) if you are building a React application.
-
Adjust appearance settings (left panel):
-
Window sizing: Set the width (
W) and height (H) percentages for the booking window (defaults to100%). -
EmbedTheme: Choose Auto, Light, or Dark to match your site's background.
-
Hide event type details: Toggle this on if you already describe the meeting on your webpage and only want to show the calendar dates and times.
-
Brand Color: Enter hex color codes for your Light Theme and Dark Theme accents.
-
Layout: Choose how the calendar displays availability (such as Month view).
-
-
Click Copy Code in the bottom right corner.
Step 4: Add the Code to Your Website
Paste the copied code snippet into your website's HTML editor where you want the booking widget or button to appear, then save and publish your changes.