**Note:** This feature is available exclusively for **Enhanced** accounts.
### Before you start Log in to the **Webmail** before following these steps. If you need help, see [How to log in to the Webmail](https://wikidev.emailarray.com/books/1-configure-a-new-e-mail-address-getting-started/page/webmail-access). ## Getting Started To begin using EasyMeet, log in to your Webmail and look for the **EasyMeet** tab in the top navigation bar. If you are using it for the first time, you will see an enablement screen. Click **Enable EasyMeet** to activate the feature for your mailbox. [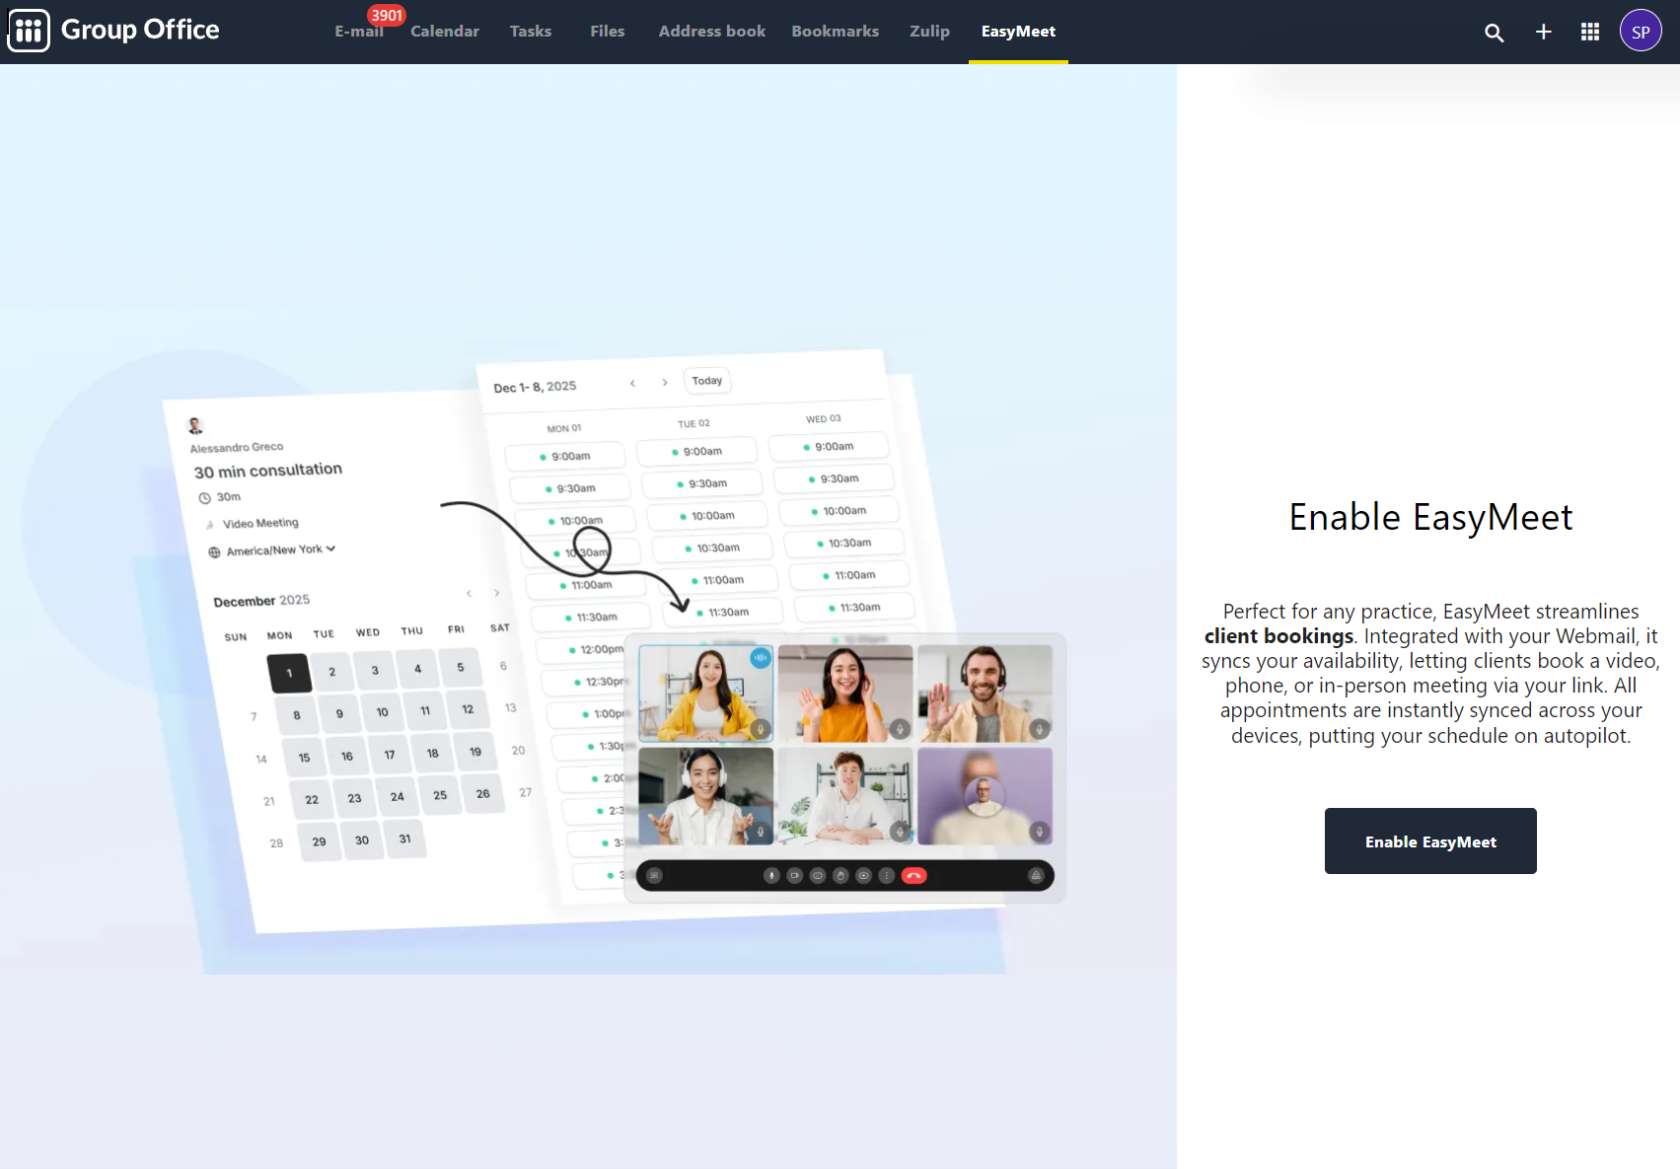](https://wikidev.emailarray.com/uploads/images/gallery/2026-05/easymeet-enable-from-the-webmail-if-you-have-an-enhanced-mailbox.PNG) ## Configuring Your Availability Your availability determines when guests can book time with you. You can manage this under the **Availability** section in the left sidebar. ### Setting Working Hours 1. Select the **Availability** tab. 2. Toggle the days of the week you are available. 3. Define your time slots for each day (e.g., 9:30 AM to 5:00 PM). 4. Select your correct **Timezone** from the dropdown menu to ensure appointments are synced accurately for both you and your guests. 5. Click **Save** to apply your schedule. [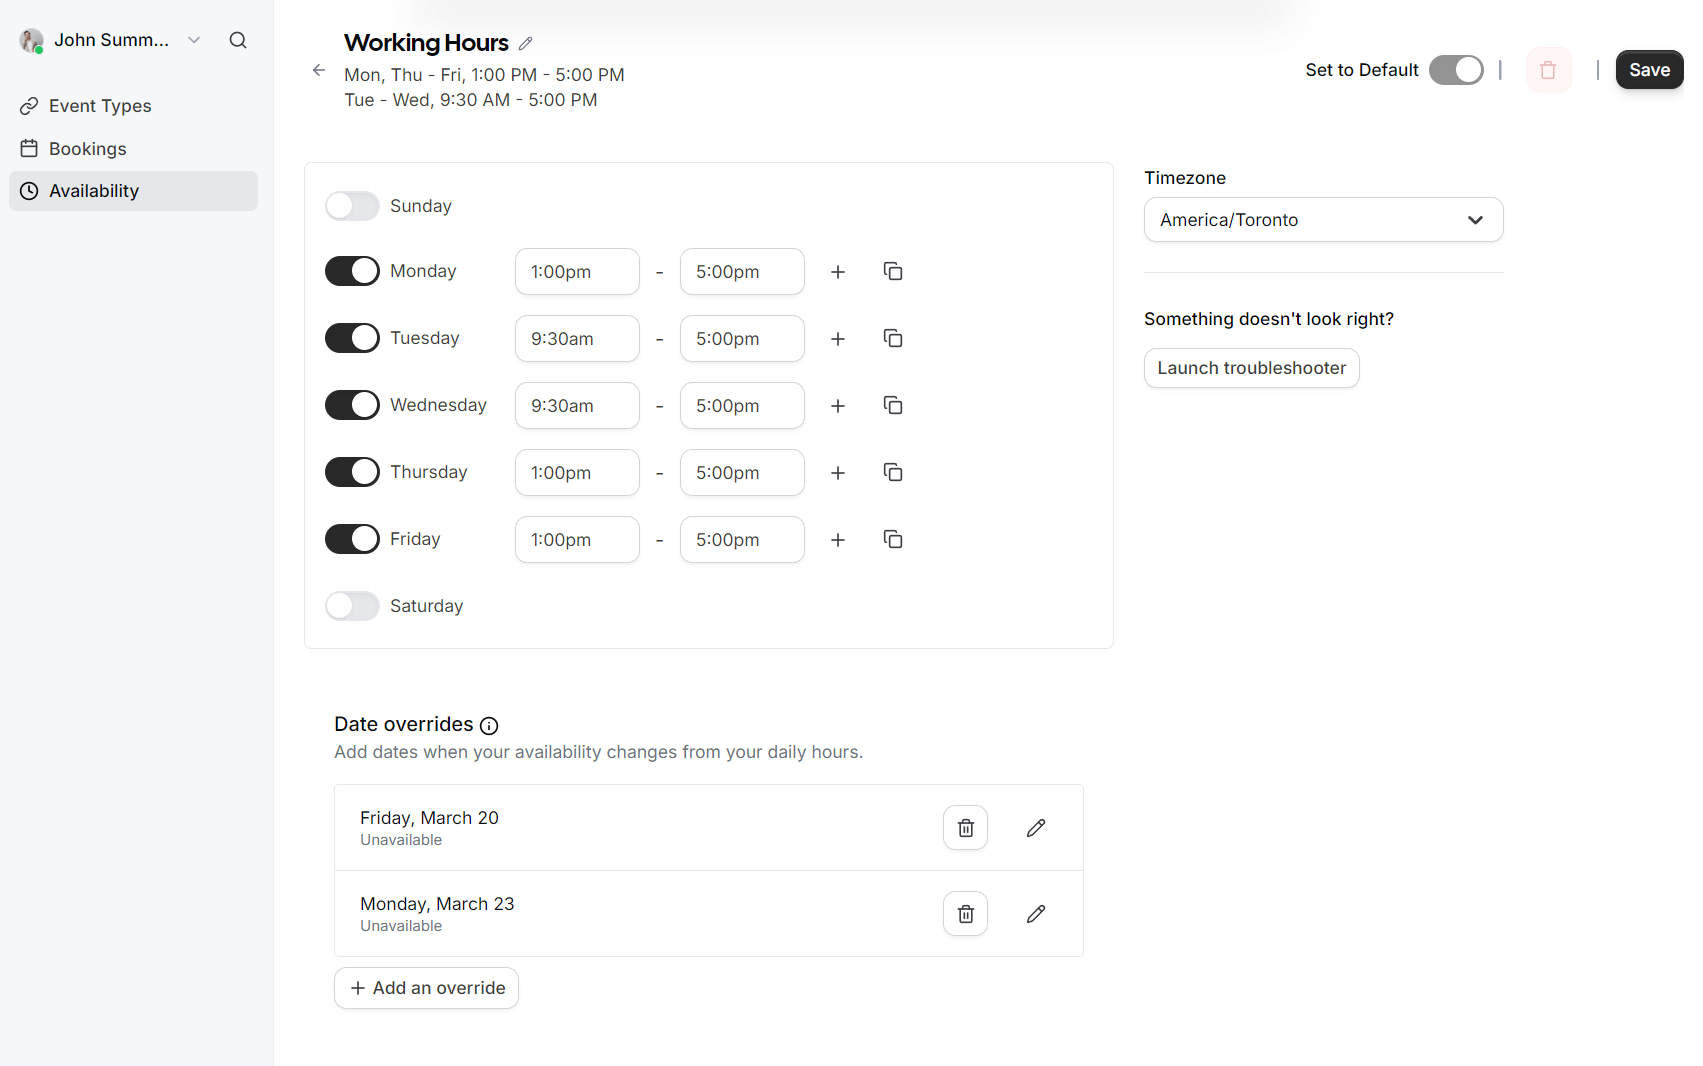](https://wikidev.emailarray.com/uploads/images/gallery/2026-05/easymeet-1-availability-schedule-with-date-overrides.PNG) ### Date Overrides If you have specific days where your schedule differs from your standard working hours (such as holidays or a one-off afternoon off), you can use **Date overrides**. - Click **Add an override**. - Select the specific date on the calendar. [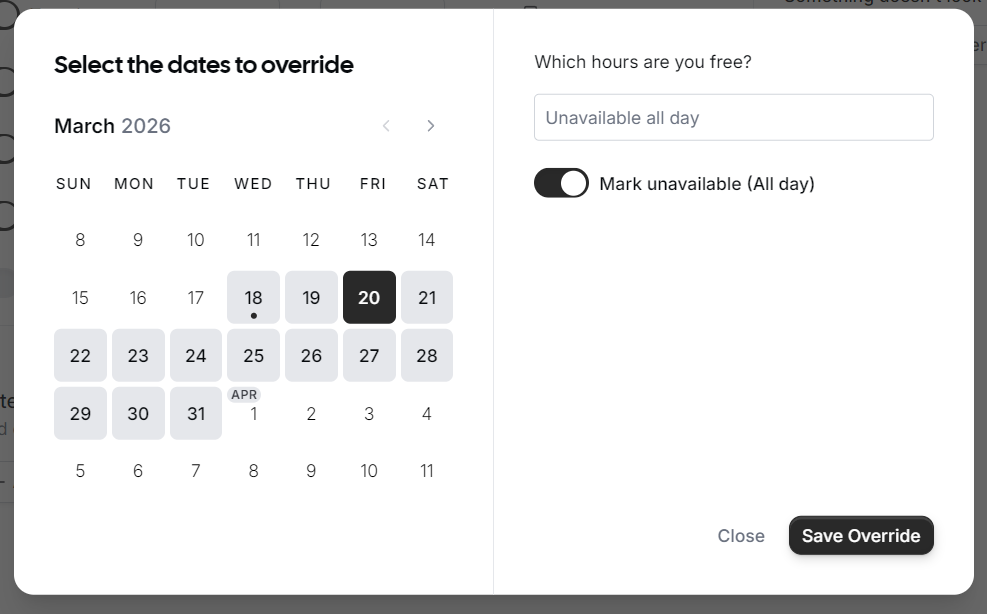](https://wikidev.emailarray.com/uploads/images/gallery/2026-05/easymeet-1-setup-your-working-hours-add-an-exception-to-override-the-existing-schedule.PNG) - Choose to either mark yourself as **Unavailable (All day)** or set specific custom hours for that date only. - Click **Save Override**. ## Managing Event Types Event Types allow you to define different kinds of meetings, such as a 15-minute "Quick Chat" or a 60-minute "Consultation." [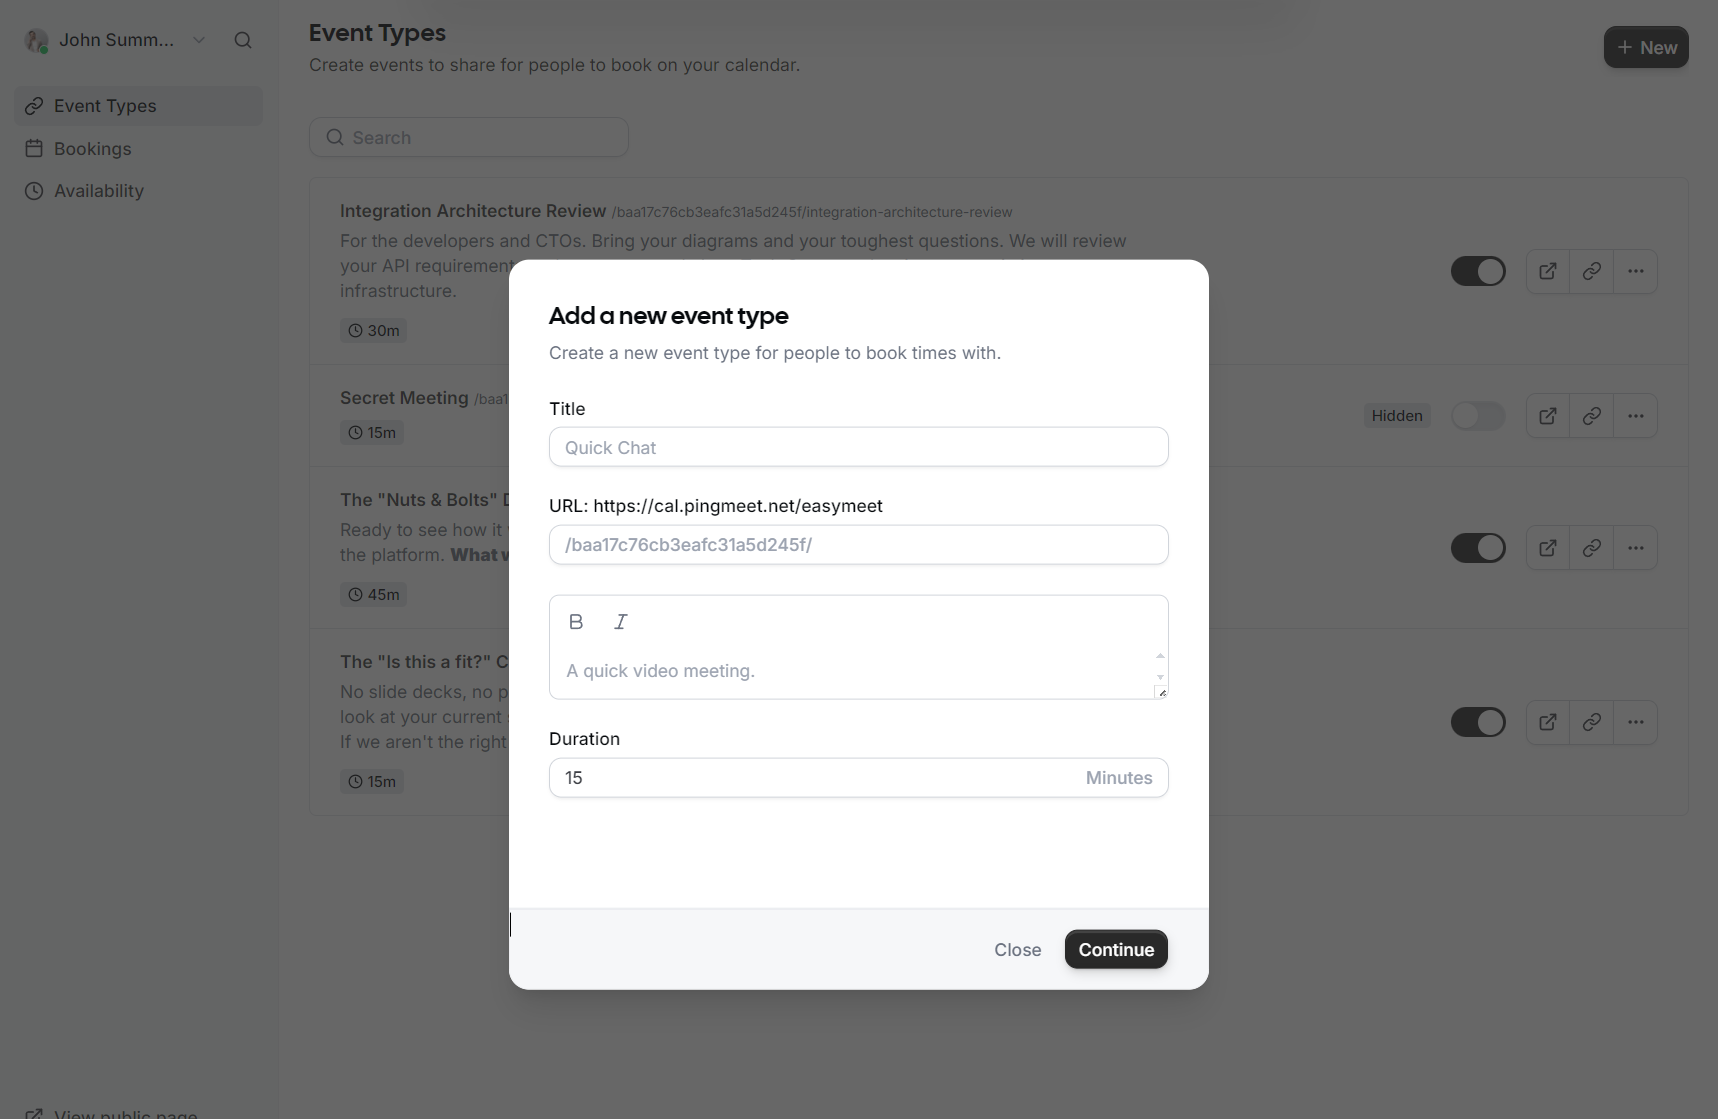](https://wikidev.emailarray.com/uploads/images/gallery/2026-05/easymeet-2-add-event-types-type-of-meetings-your-customers-can-schedule.PNG) 1. Navigate to **Event Types** in the sidebar. 2. Click **+ New** to create a meeting type. 3. Provide a **Title** and a brief **Description** so your guests know what the meeting is about. 4. Set the **Duration** (e.g., 15, 30, or 60 minutes). 5. Choose a **Location** (e.g., Video Meeting). 6. Customize the **URL** slug for this specific event. 7. Click **Continue** or **Save** to publish the event type. ## Sharing Your Link Once your event types are set up, you can share them with the world: [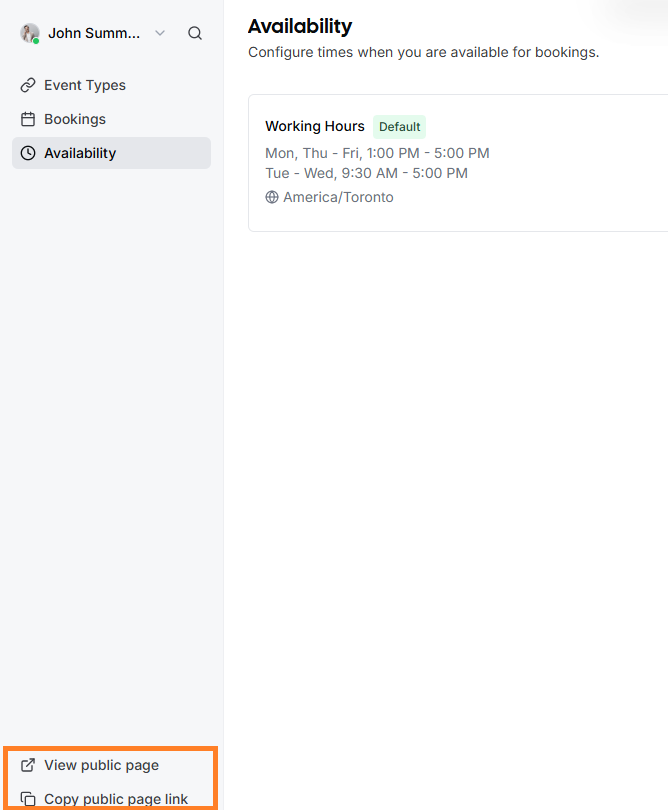](https://wikidev.emailarray.com/uploads/images/gallery/2026-05/easymeet-3-get-your-public-link.png) - **Public Page:** In the bottom left corner of the EasyMeet interface, click **View public page** to see what your customers see. - **Copy Link:** Use the **Copy public page link** to grab your URL and add it to your email signature or share it directly in a chat. ## Managing Bookings When a guest books a meeting, you will receive an email notification, and the event will automatically appear in your calendar. [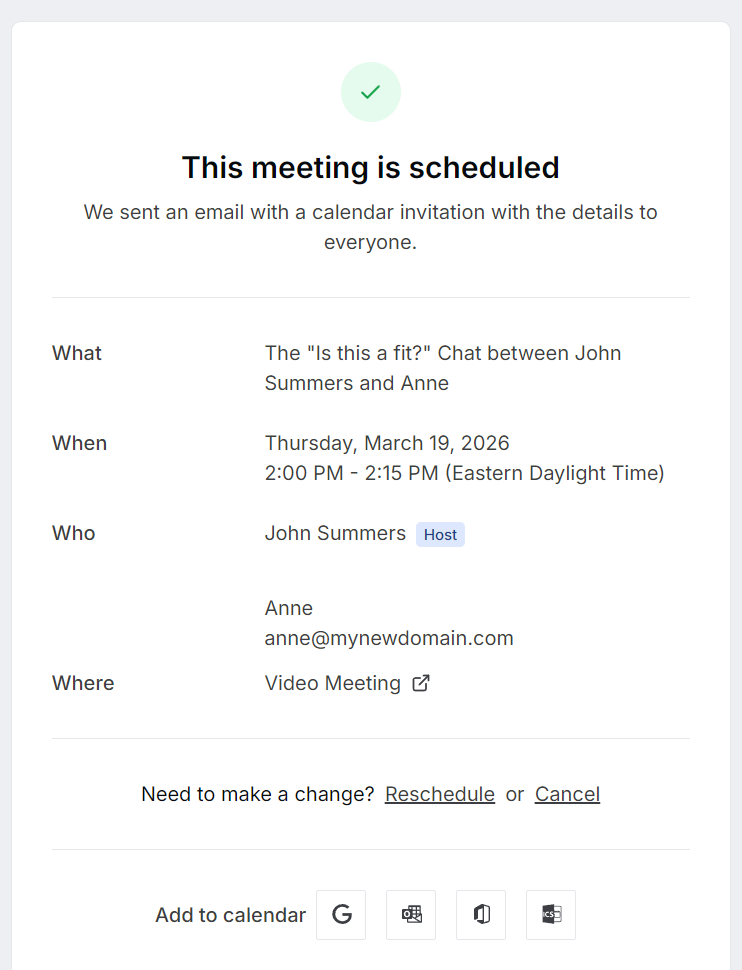](https://wikidev.emailarray.com/uploads/images/gallery/2026-05/easymeet-3-public-link-event-confirmed.PNG) - To view a list of all scheduled meetings, go to the **Bookings** tab. - You can filter between **Upcoming**, **Past**, and **Canceled** events. - Each booking includes a direct link to the **Video Meeting** if applicable. - If you need to change a meeting, you can use the **Reschedule** or **Cancel** options directly from the booking details. [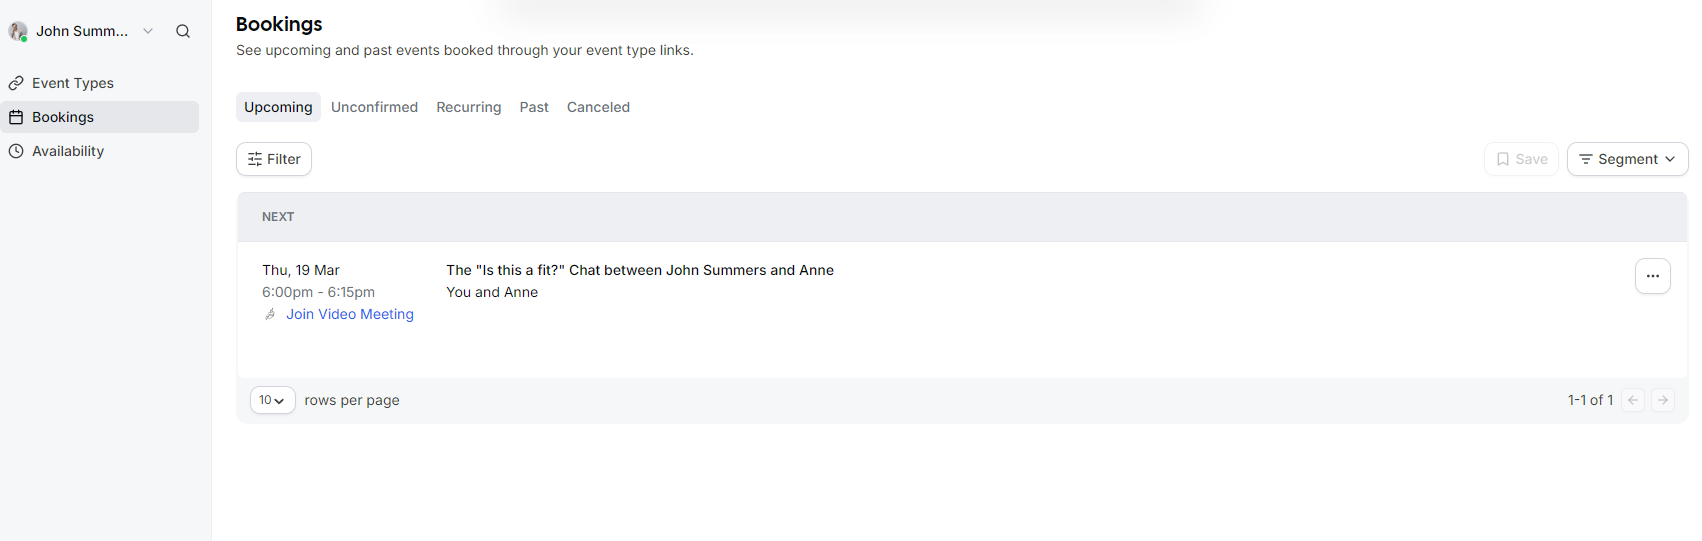](https://wikidev.emailarray.com/uploads/images/gallery/2026-05/easymeet-3-list-bookings.PNG) # Event Advanced Setup This guide details how to configure your **Event Types** to perfectly match your meeting requirements, from basic setup to advanced booking rules. --- ## Creating a New Event Type To start, navigate to the **Event Types** tab and click the **+ New** button. A modal will appear where you can define the core parameters of your meeting: - **Title**: Give your event a clear name, such as "Consultation" or "Quick Chat". - **URL**: Customize the specific link slug guests will use to book this event. - **Description**: Briefly explain what the meeting is for so guests know what to expect. - **Duration**: Select how long the meeting will last in minutes. [](https://wikidev.emailarray.com/uploads/images/gallery/2026-05/easymeet-2-add-event-types-type-of-meetings-your-customers-can-schedule.PNG) --- ## Event Setup Once the event is created, you can access more granular settings in the **Event Setup** section: - **AI Translation**: You can toggle an option to automatically translate your title and description to the visitor's browser language using AI. - **Interface Language**: Set the default language for the booking interface or allow it to match the visitor's browser language. - **Duration Flexibility**: In addition to a fixed duration, you can enable an option that allows the booker to select their preferred meeting length. - **Location**: Define where the meeting takes place, such as a **Video Meeting**. [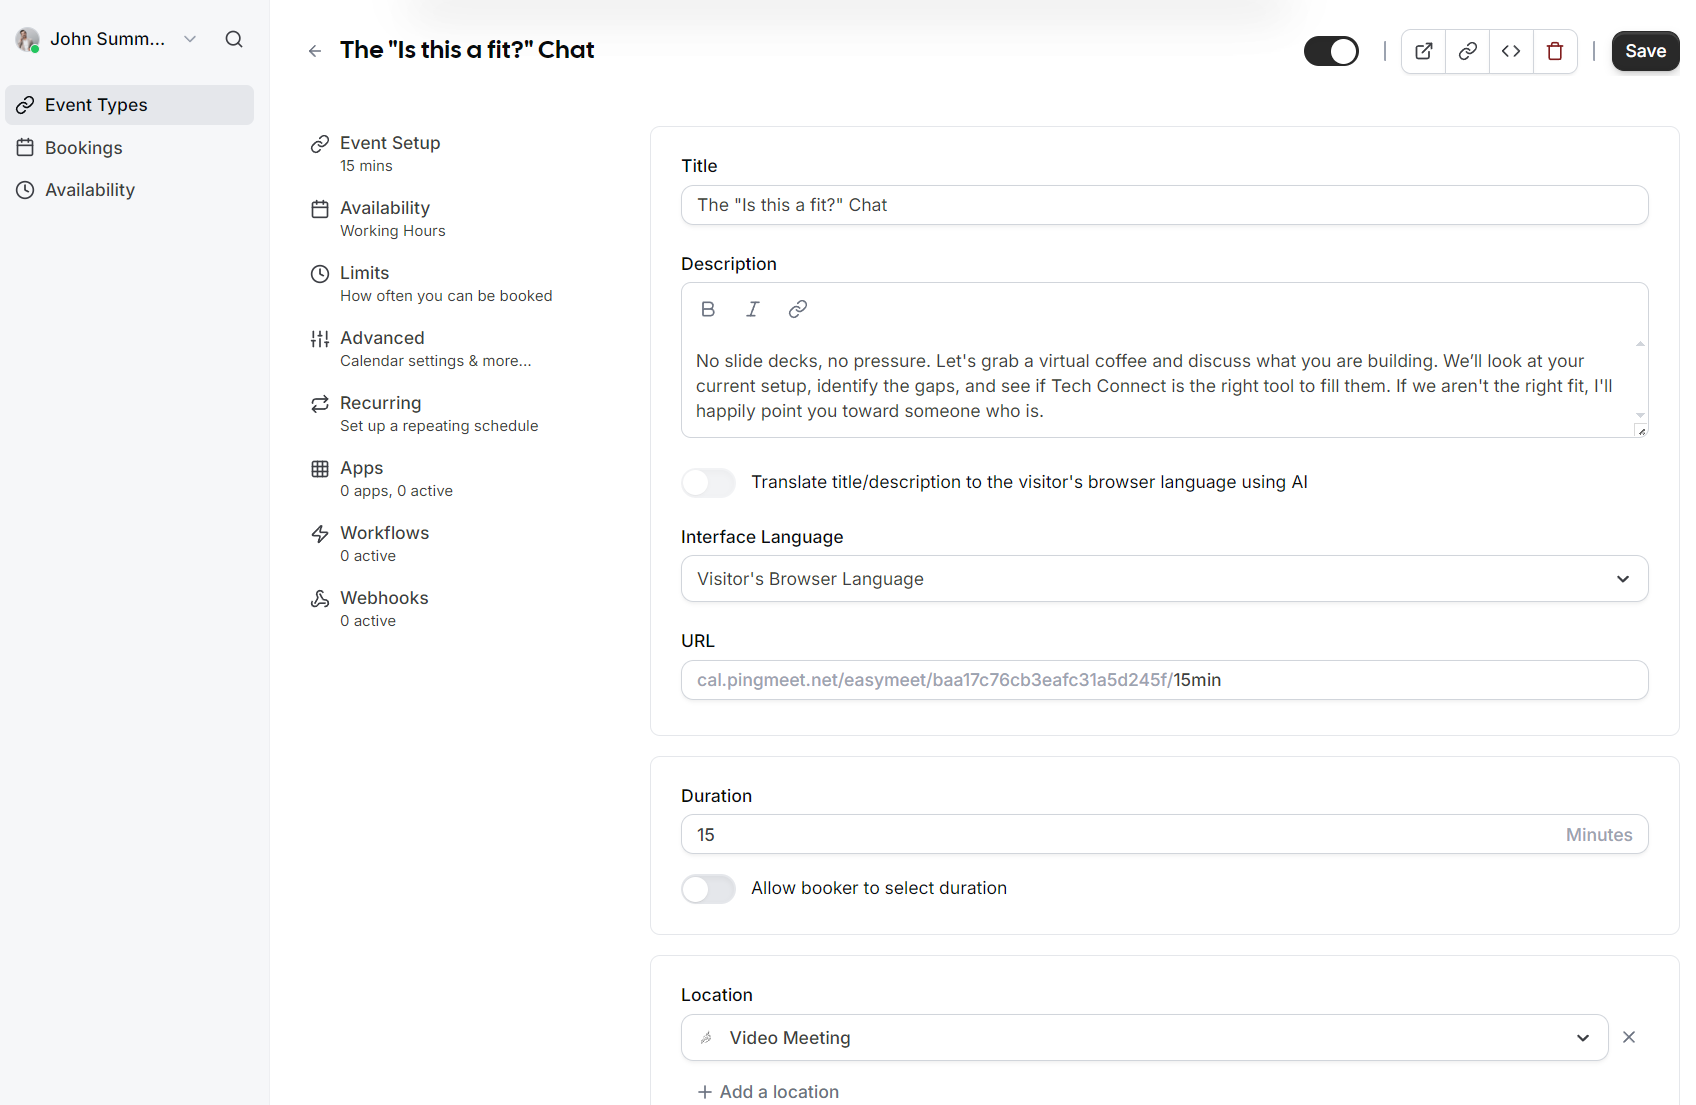](https://wikidev.emailarray.com/uploads/images/gallery/2026-05/easymeet-2-add-event-types-event-setup.PNG) --- ## Availability Assign which schedule this event type should follow. By default, this uses your standard **Working Hours**, but you can select different schedules if you have created them. [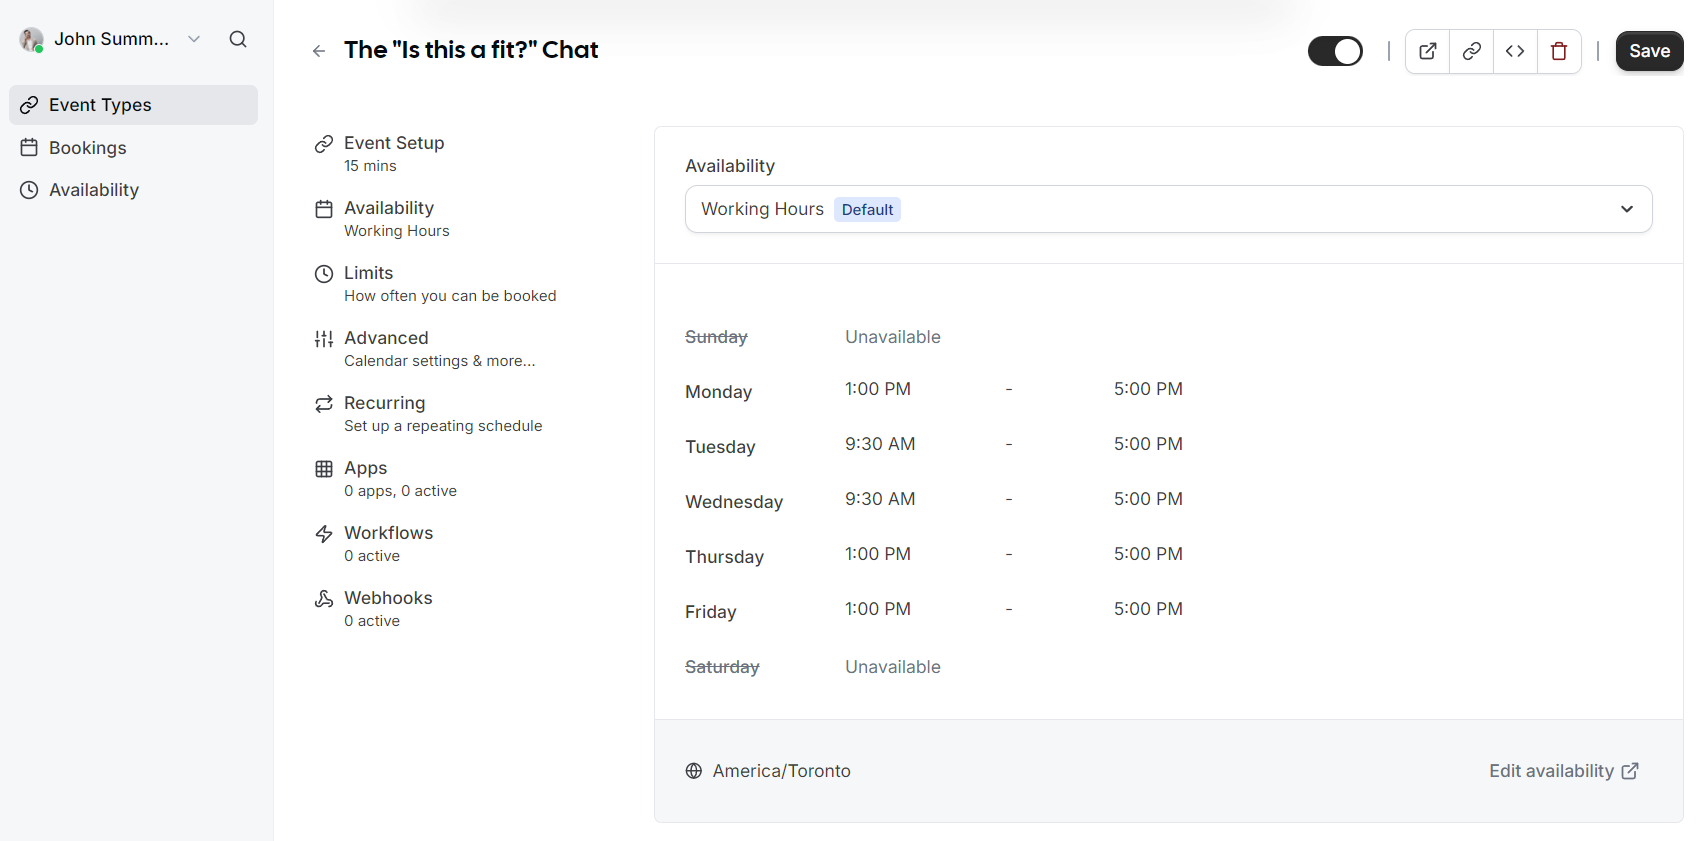](https://wikidev.emailarray.com/uploads/images/gallery/2026-05/easymeet-2-add-event-types-availability.PNG) ## Limits - **Buffers**: Add "No buffer time" or specific intervals before and after events to prevent back to back meetings. - **Minimum Notice**: Prevent last minute surprises by requiring a minimum amount of notice (e.g., 2 hours) before someone can book. - **Time-slot intervals**: Choose how frequently slots are displayed (e.g., every 15 minutes or based on event length). - **Booking Frequency**: Limit how many times this specific event can be booked overall. - **Future Bookings**: Set a limit on how far into the future guests are allowed to schedule a meeting. [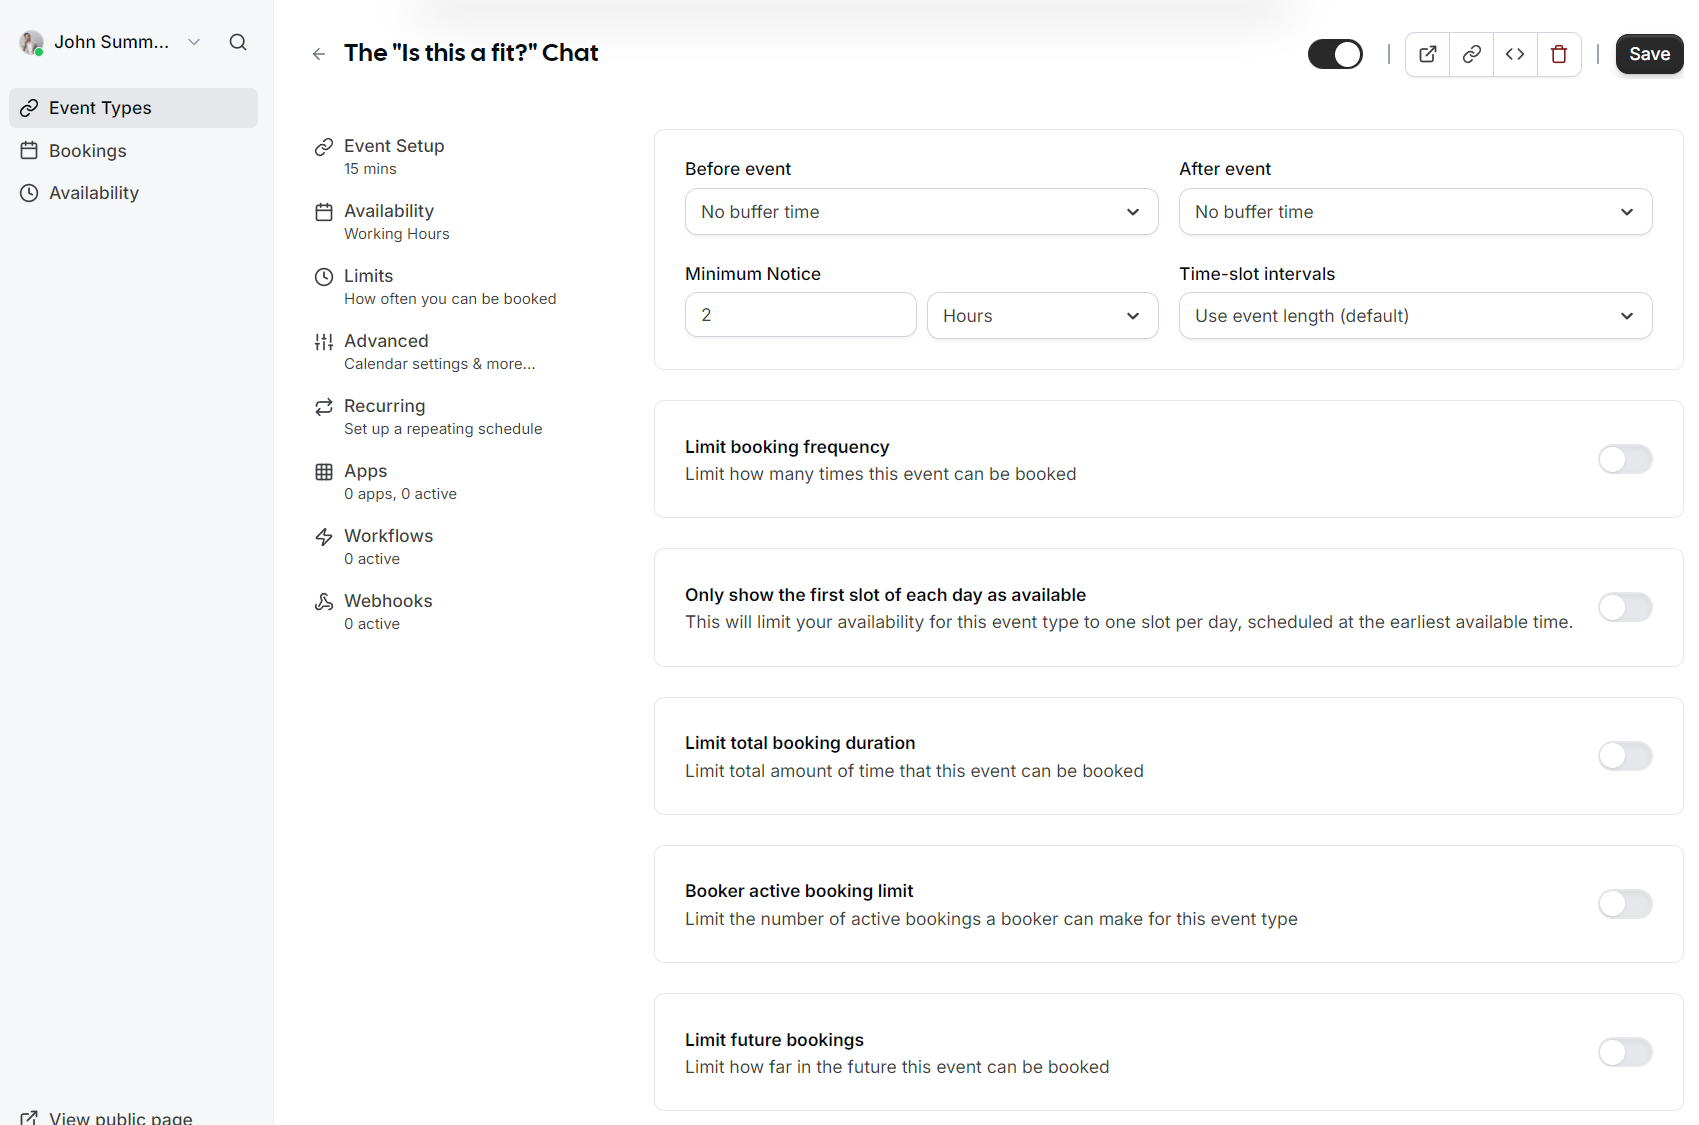](https://wikidev.emailarray.com/uploads/images/gallery/2026-05/easymeet-2-add-event-types-limits.PNG) --- ## Advanced Options| [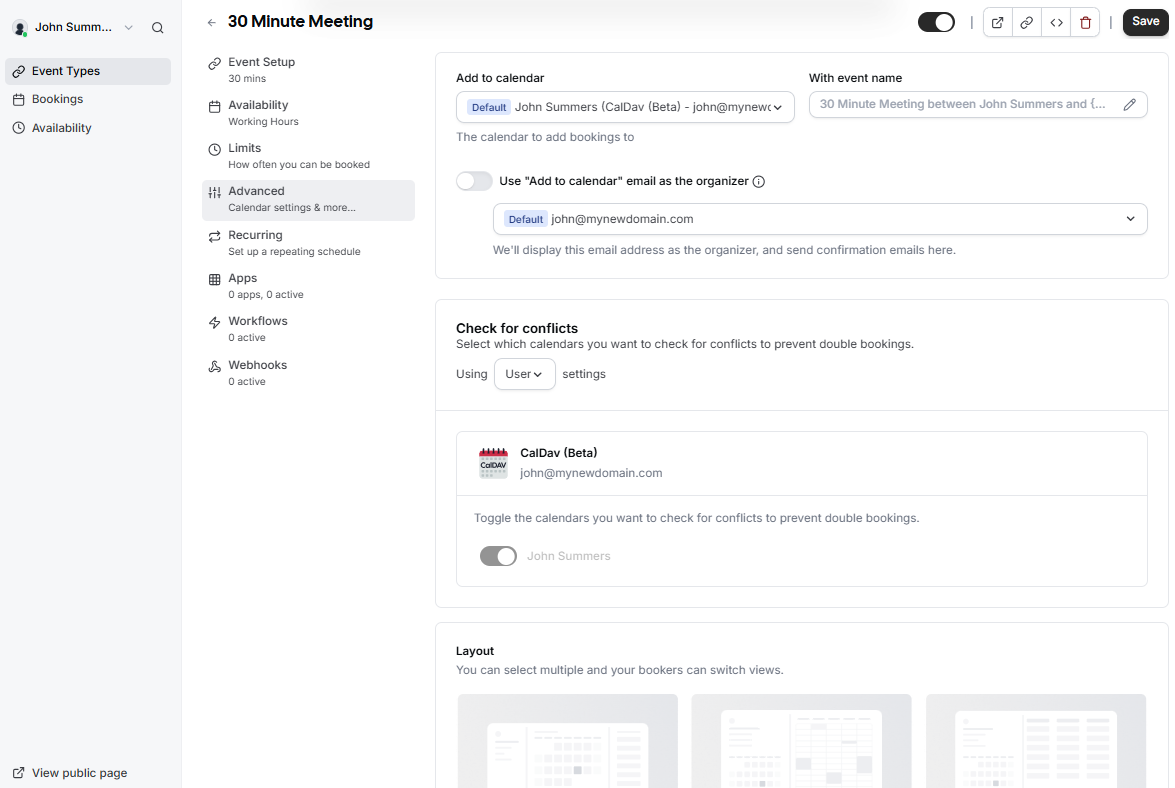](https://wikidev.emailarray.com/uploads/images/gallery/2026-05/easymeet-event-setup-advanced-tab-1.png) | [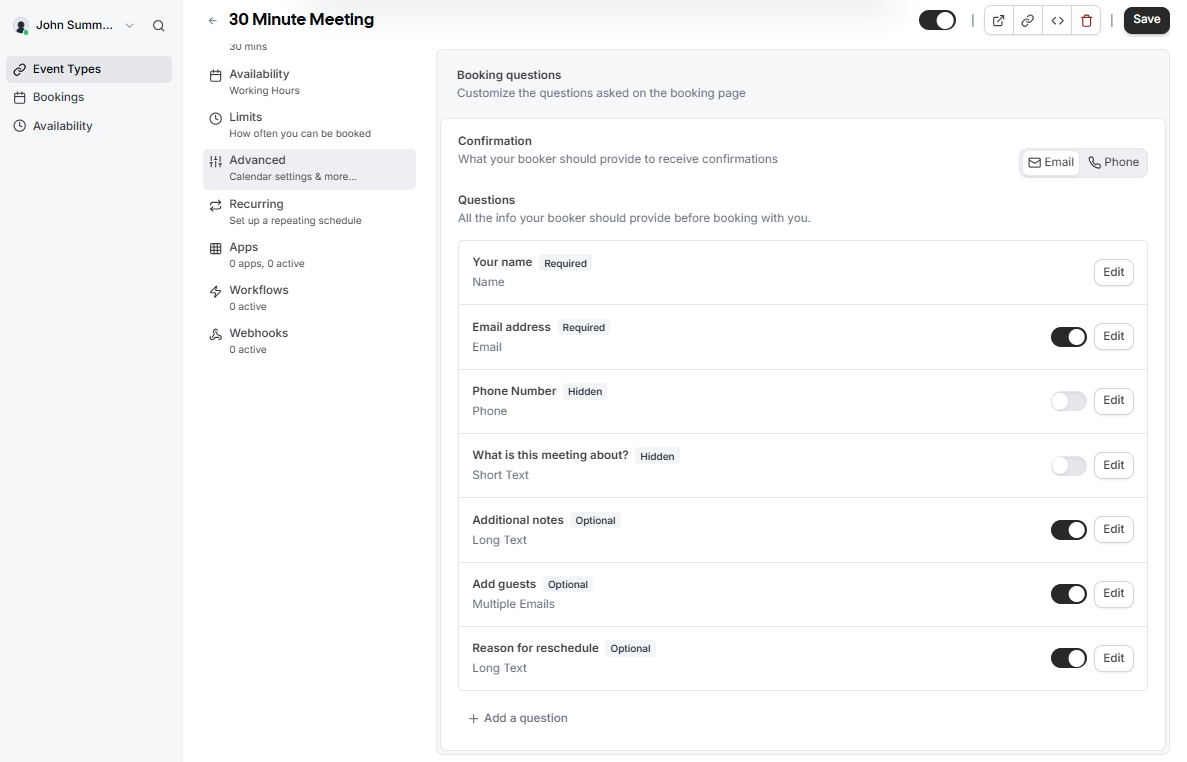](https://wikidev.emailarray.com/uploads/images/gallery/2026-05/easymeet-event-setup-advanced-tab-2.png) | [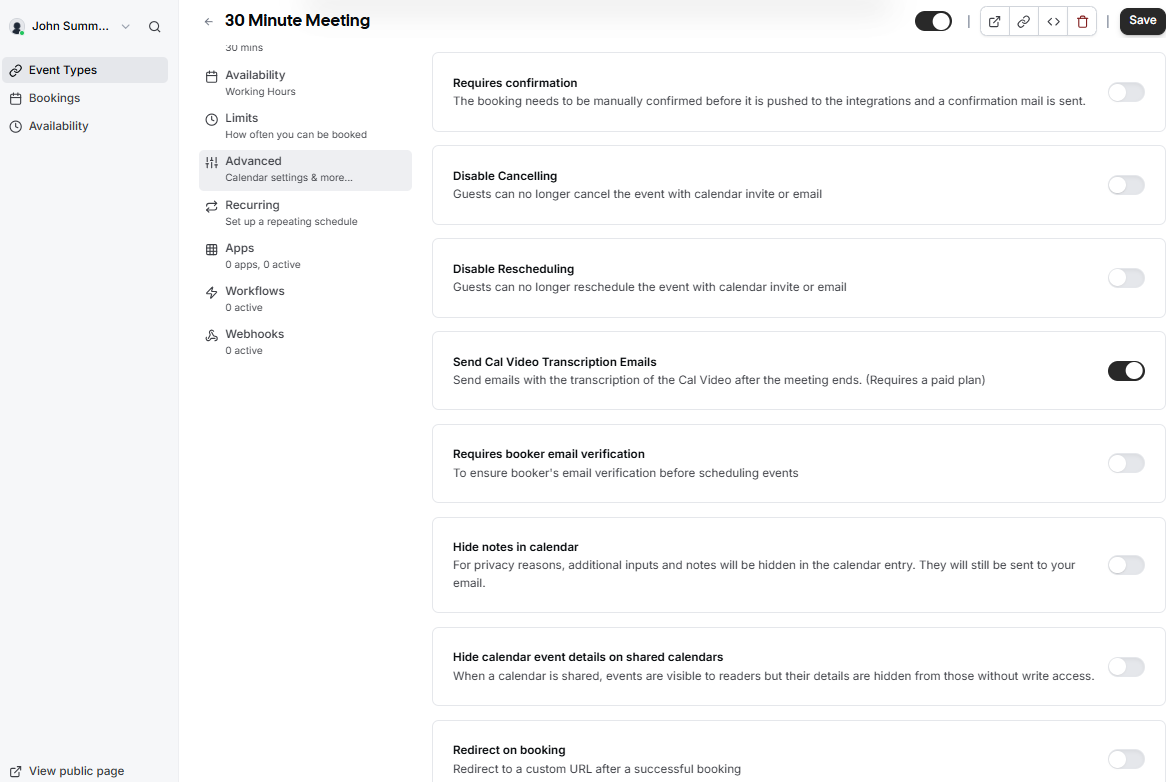](https://wikidev.emailarray.com/uploads/images/gallery/2026-05/easymeet-event-setup-advanced-tab-3.png) | [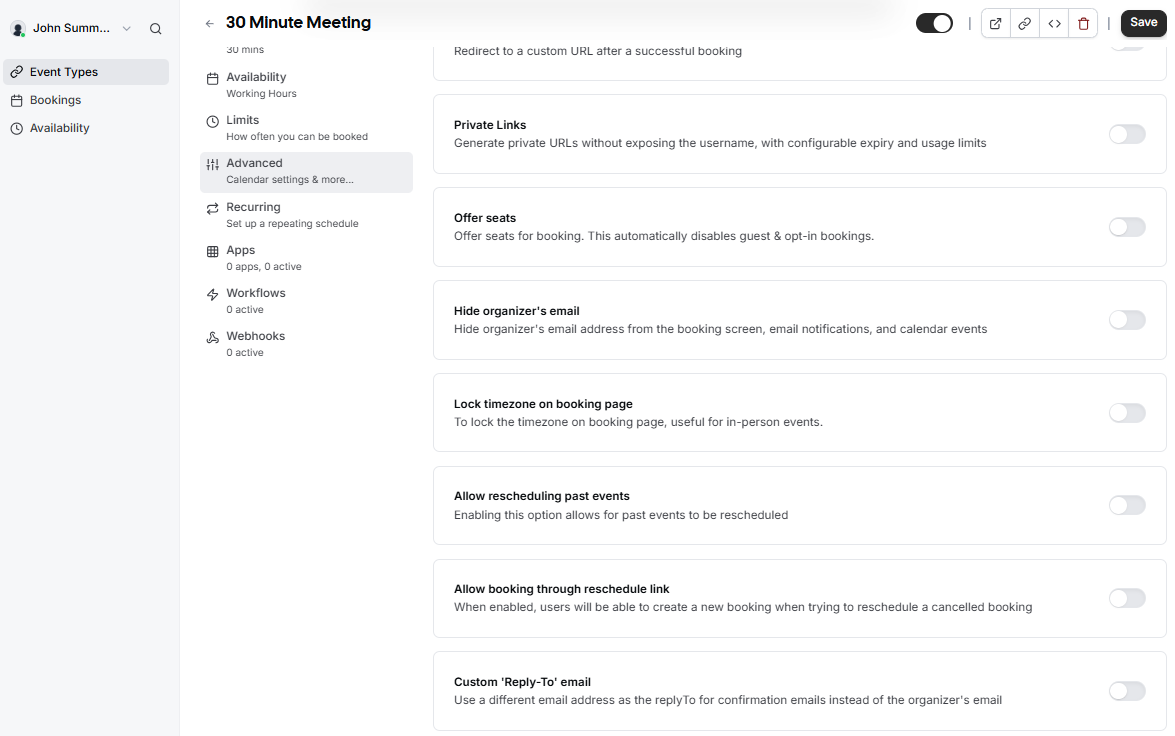](https://wikidev.emailarray.com/uploads/images/gallery/2026-05/easymeet-event-setup-advanced-tab-4.png) |