EasyMeet
Introducing EasyMeet - a professional appointment scheduling powered by Cal.com, built directly into your webmail. Just seamless online scheduling where you already work. Available for Enhanced mailboxes only.
- No separate apps
- No data sharing
- Seamless Webmail integration
-
Lives directly in your Webmail, and syncs with all your calendars to prevent double-bookings
-
Share your availability with a single link
-
Your clients see your real-time calendar and book a meeting in the slot that’s open for both of you
EasyMeet - Online Appointment Scheduling
EasyMeet is an integrated scheduling tool that eliminates the back and forth of finding the perfect meeting time. By sharing a public link, you allow clients and partners to view your availability and book appointments directly into your calendar.
You can set your working hours, create event types, share a public booking link, and view bookings from the Webmail.
Note: This feature is available exclusively for Enhanced accounts.
Before you start
Log in to the Webmail before following these steps. If you need help, see How to log in to the Webmail.
Getting Started
To begin using EasyMeet, log in to your Webmail and look for the EasyMeet tab in the top navigation bar. If you are using it for the first time, you will see an enablement screen. Click Enable EasyMeet to activate the feature for your mailbox.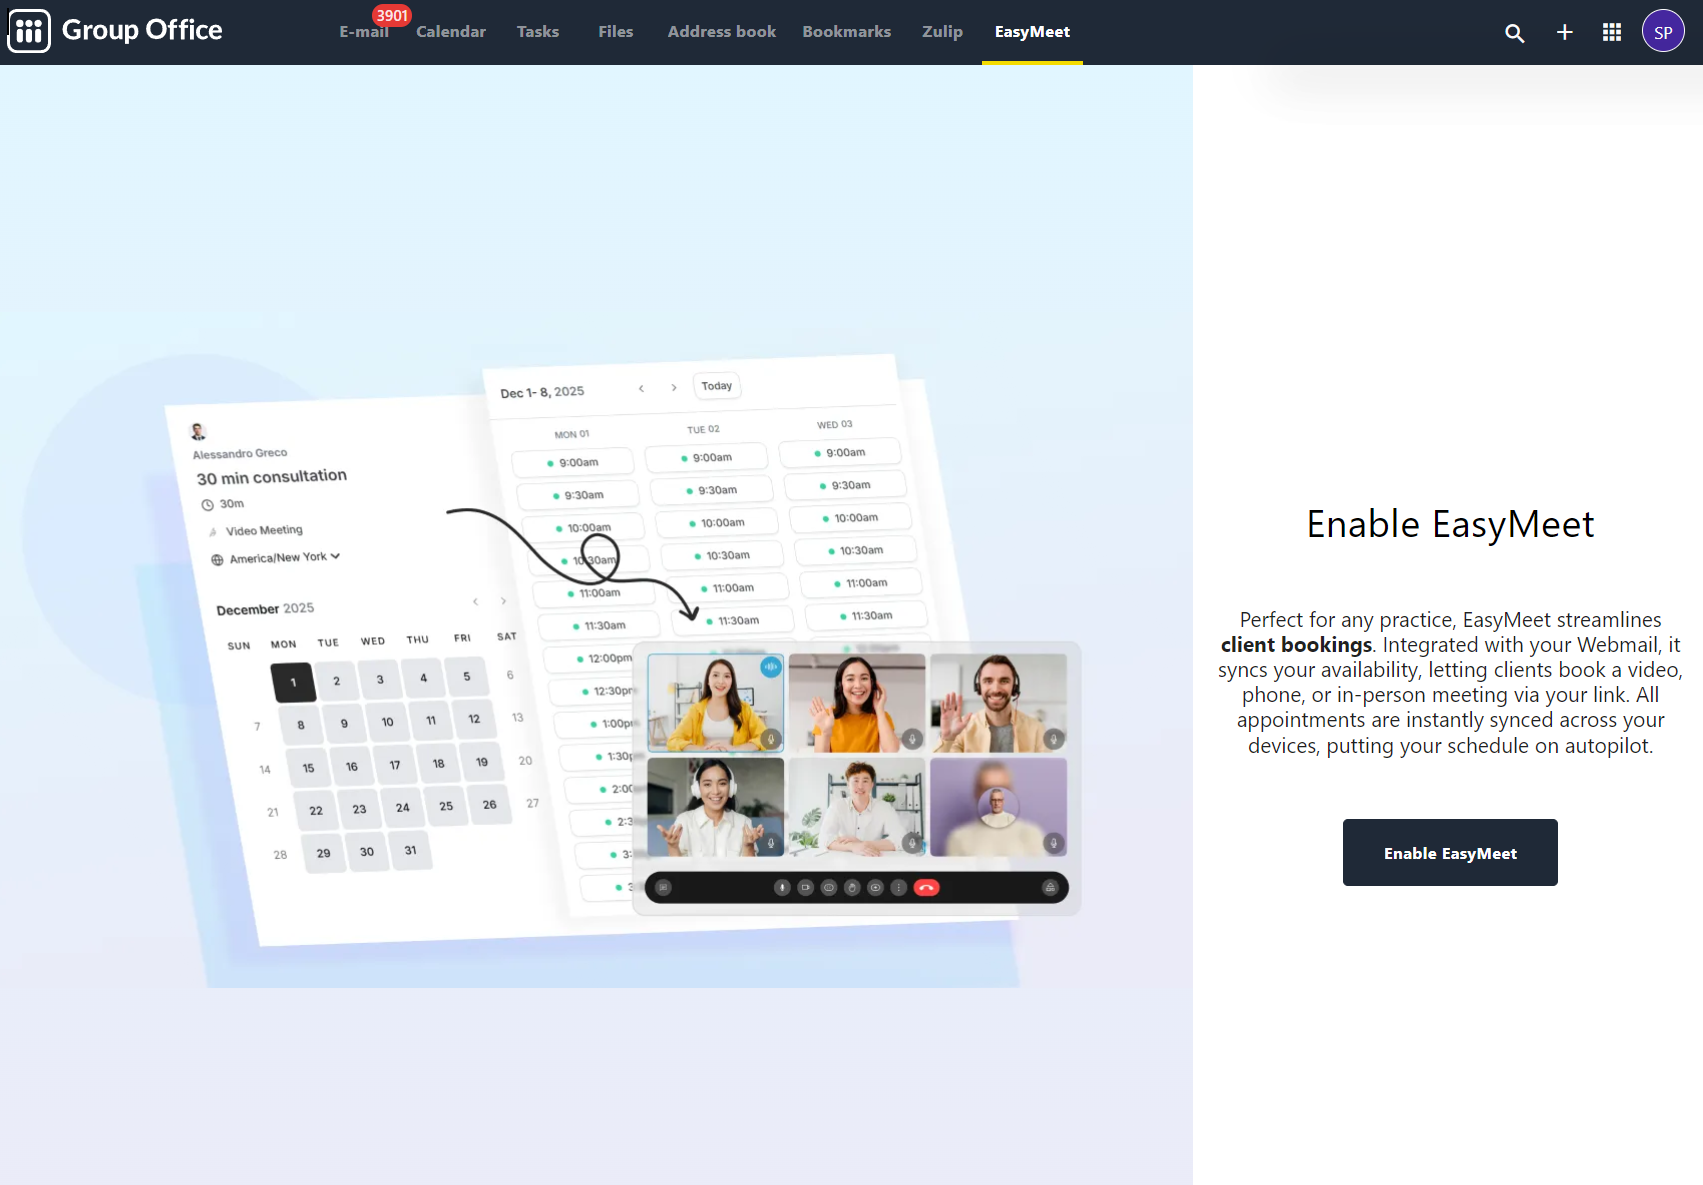
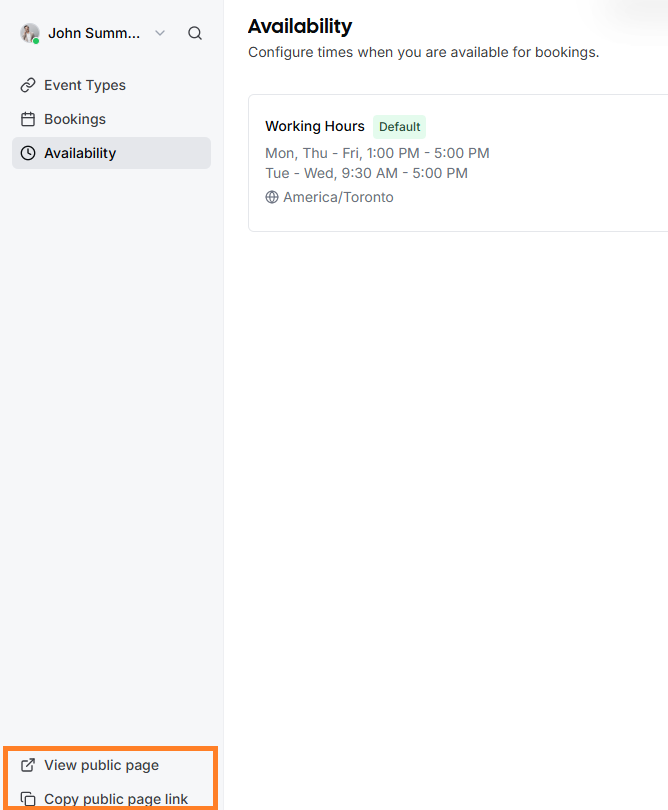
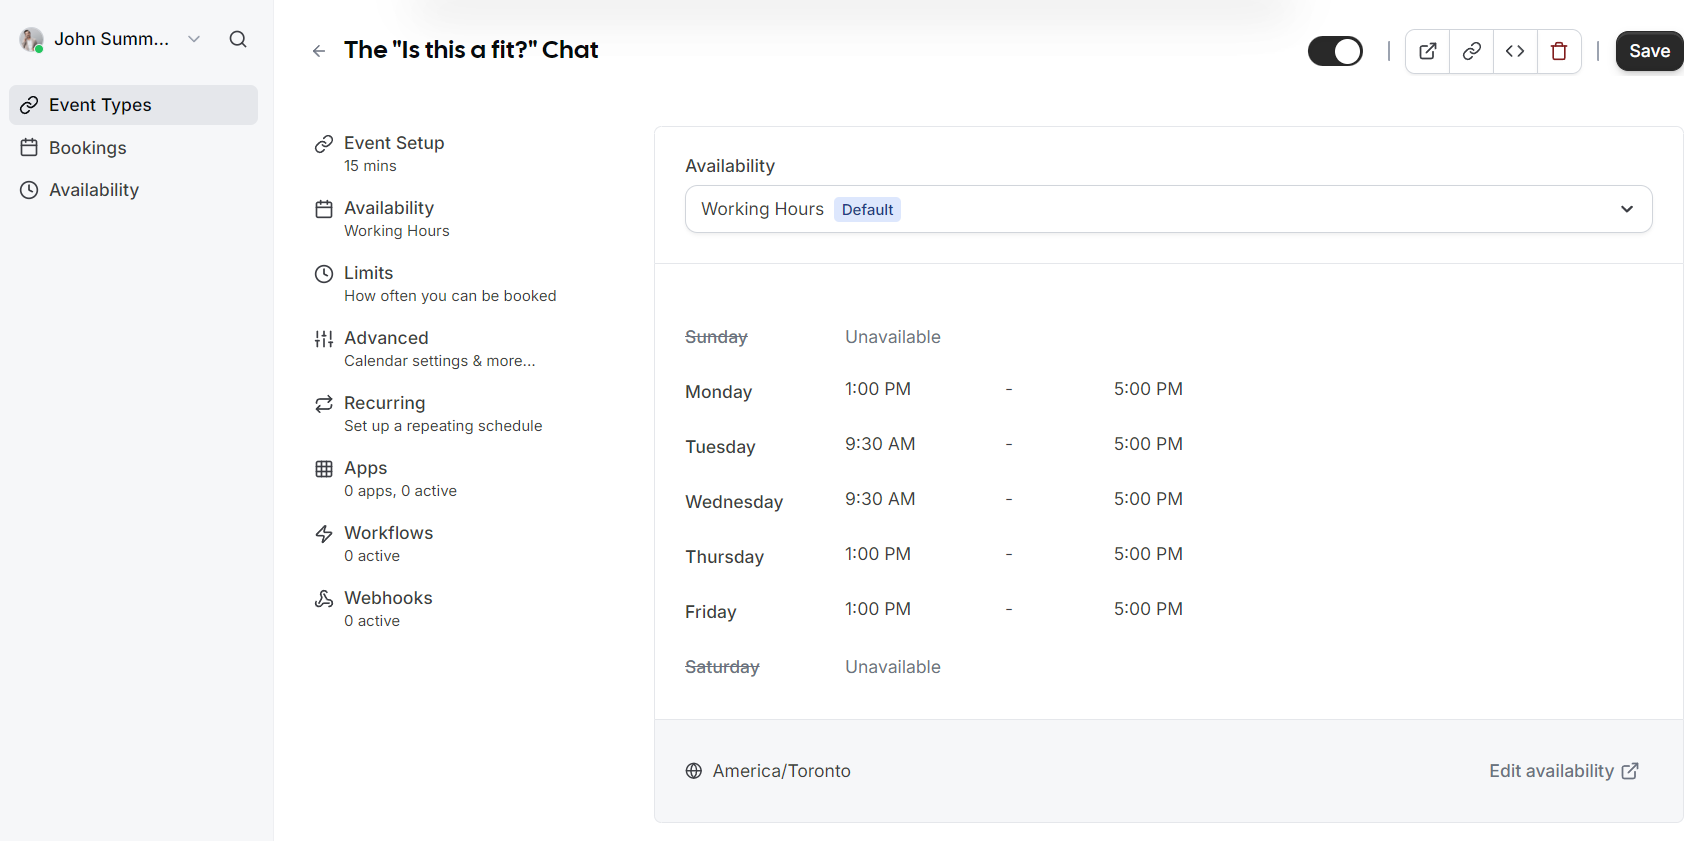
Configuring Your Availability
Your availability determines when guests can book time with you. You can manage this under the Availability section in the left sidebar.
Setting Working Hours
-
Select the Availability tab.
-
Toggle the days of the week you are available.
-
Define your time slots for each day (e.g., 9:30 AM to 5:00 PM).
-
Select your correct Timezone from the dropdown menu to ensure appointments are synced accurately for both you and your guests.
-
Click Save to apply your schedule.

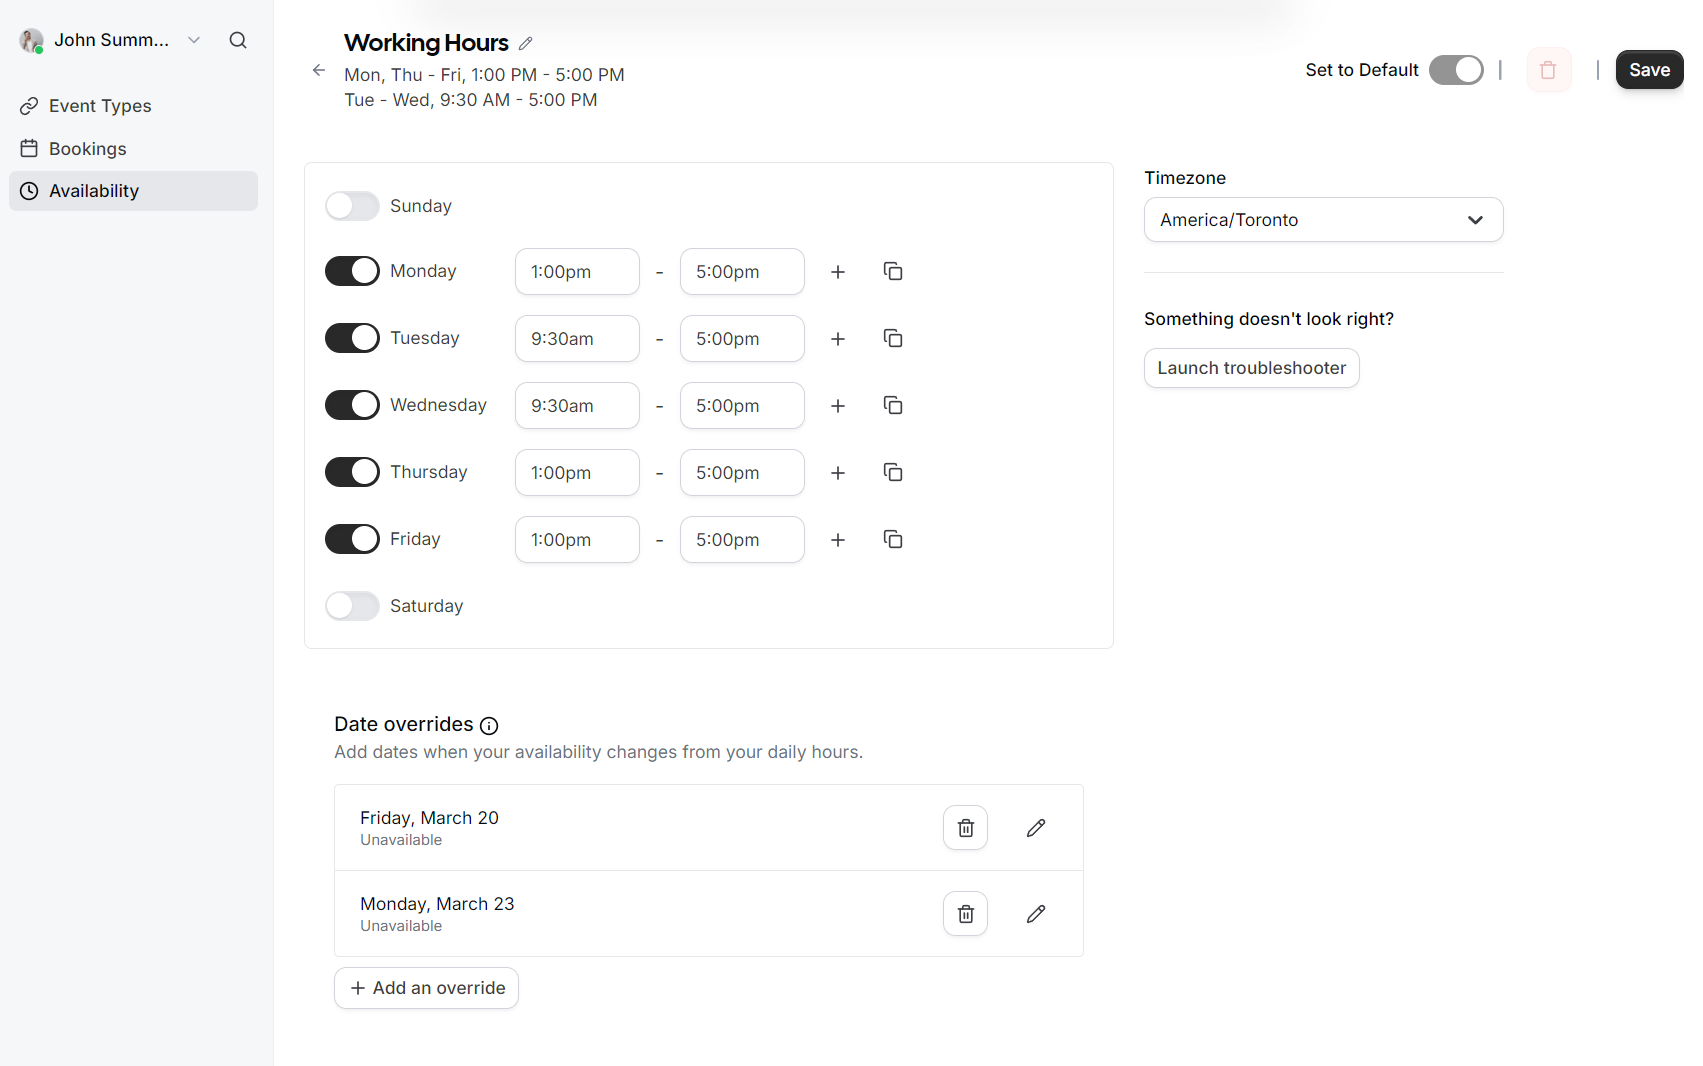
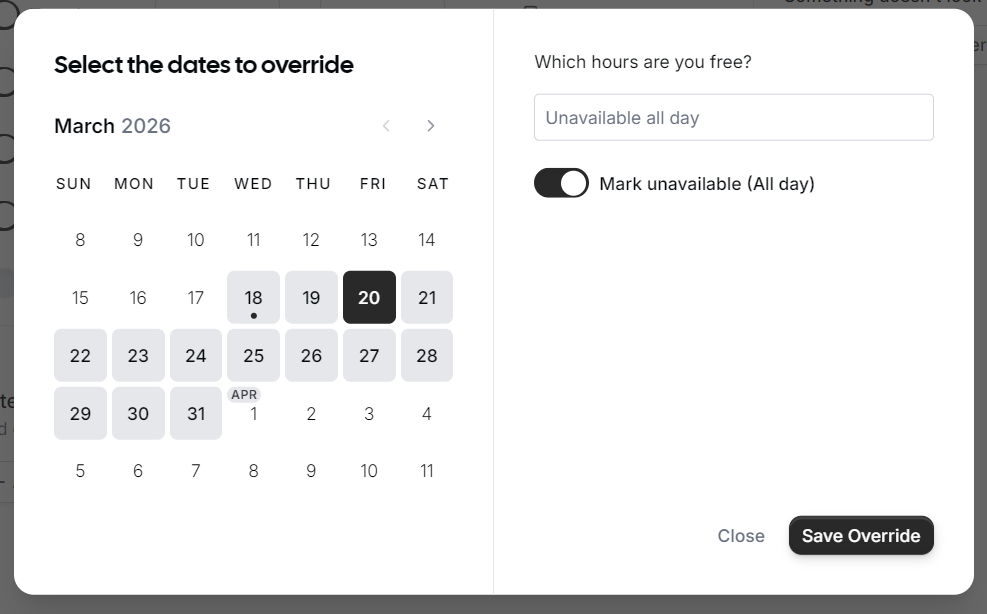
Date Overrides
If you have specific days where your schedule differs from your standard working hours (such as holidays or a one-off afternoon off), you can use Date overrides.
-
Click Add an override.
-
Select the specific date on the calendar.

-
Choose to either mark yourself as Unavailable (All day) or set specific custom hours for that date only.
-
Click Save Override.
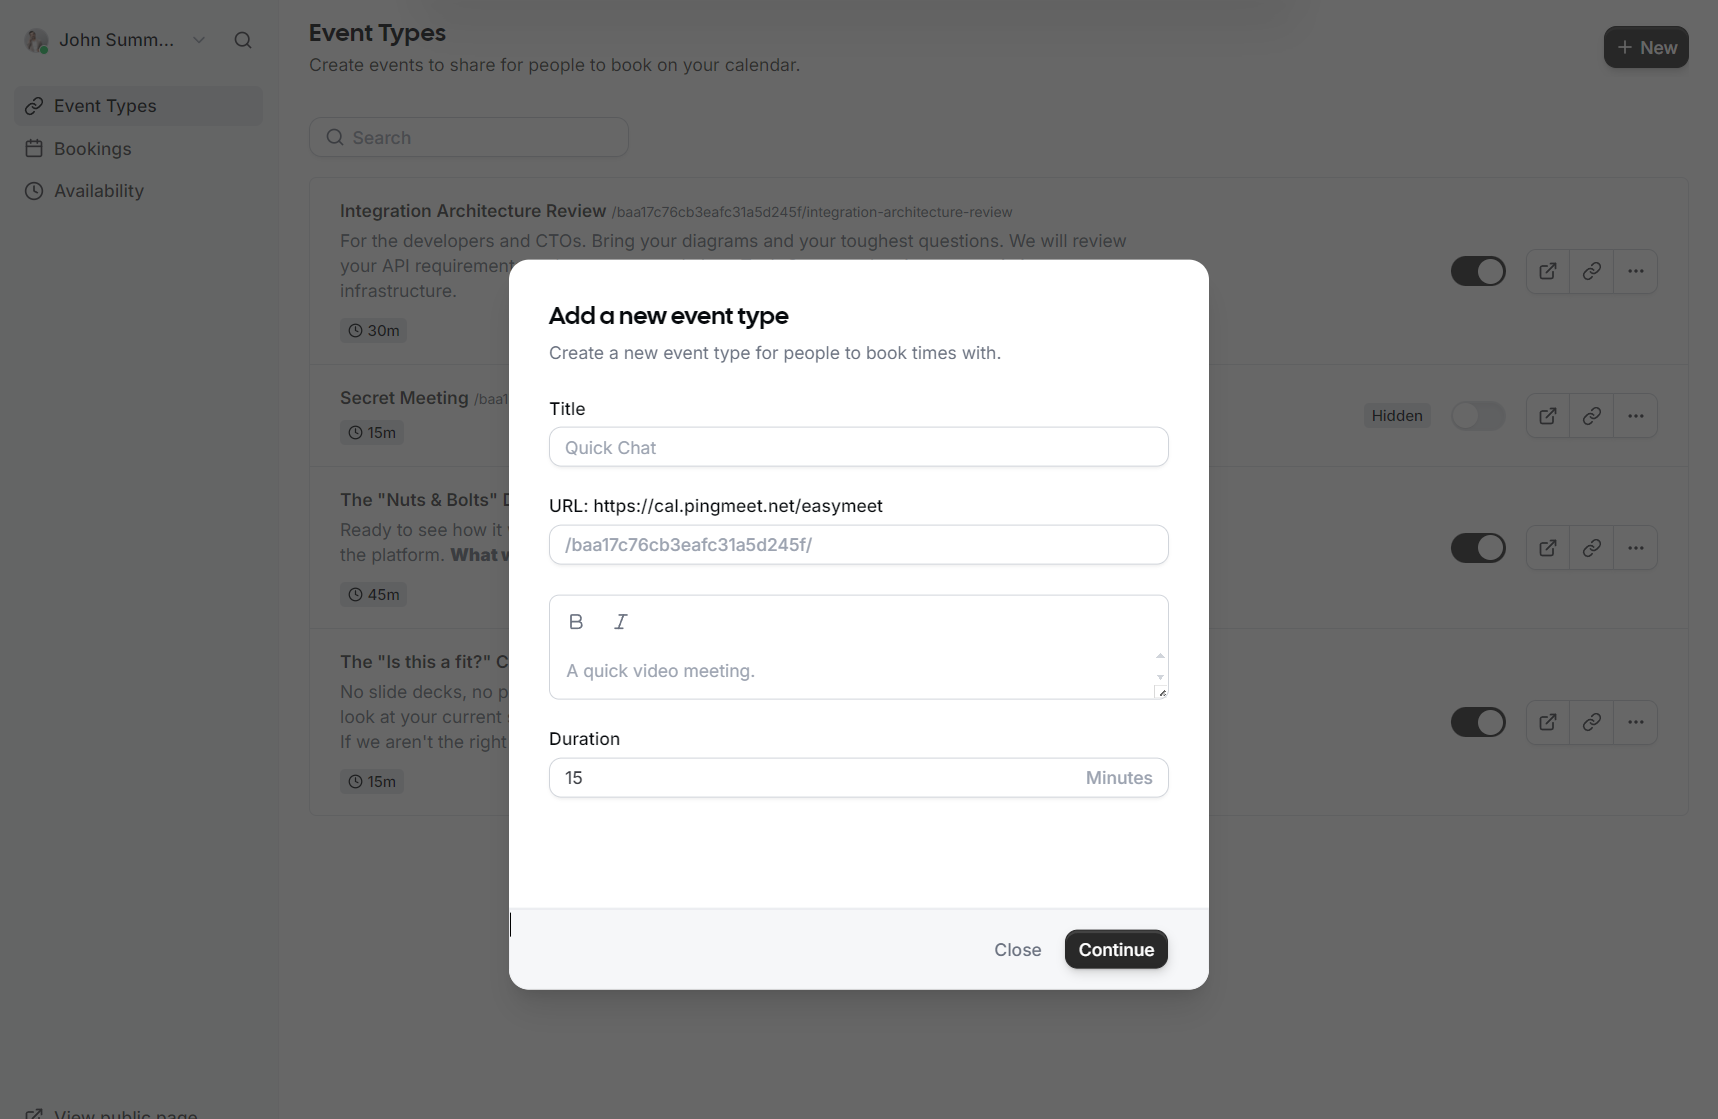
Managing Event Types
Event Types allow you to define different kinds of meetings, such as a 15-minute "Quick Chat" or a 60-minute "Consultation."
Sharing Your Link
Once your event types are set up, you can share them with the world:
-
Public Page: In the bottom left corner of the EasyMeet interface, click View public page to see what your customers see.
-
Copy Link: Use the Copy public page link to grab your URL and add it to your email signature or share it directly in a chat.
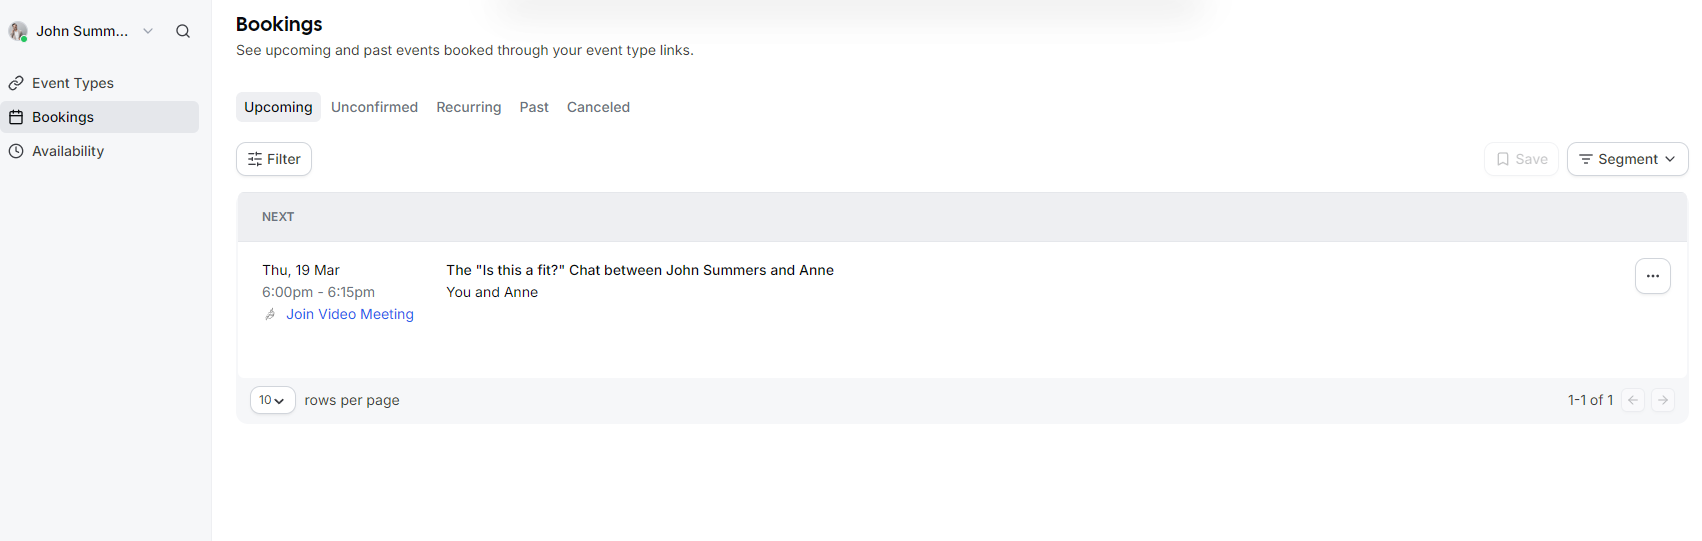
Managing Bookings
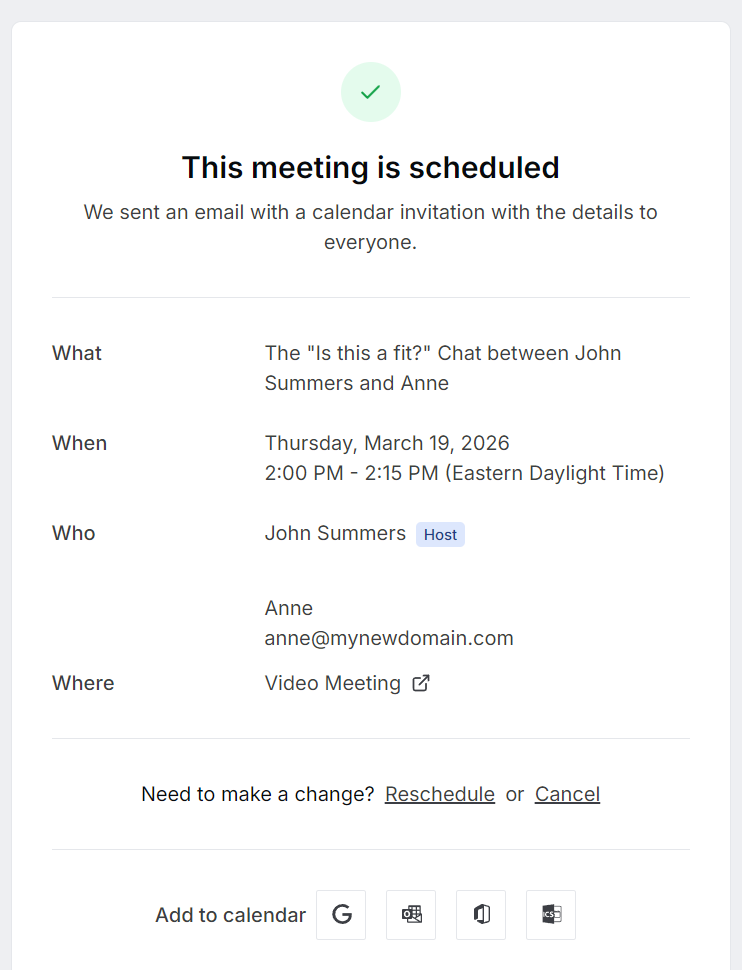
When a guest books a meeting, you will receive an email notification, and the event will automatically appear in your calendar.
-
To view a list of all scheduled meetings, go to the Bookings tab.
-
You can filter between Upcoming, Past, and Canceled events.
-
Each booking includes a direct link to the Video Meeting if applicable.
-
If you need to change a meeting, you can use the Reschedule or Cancel options directly from the booking details.

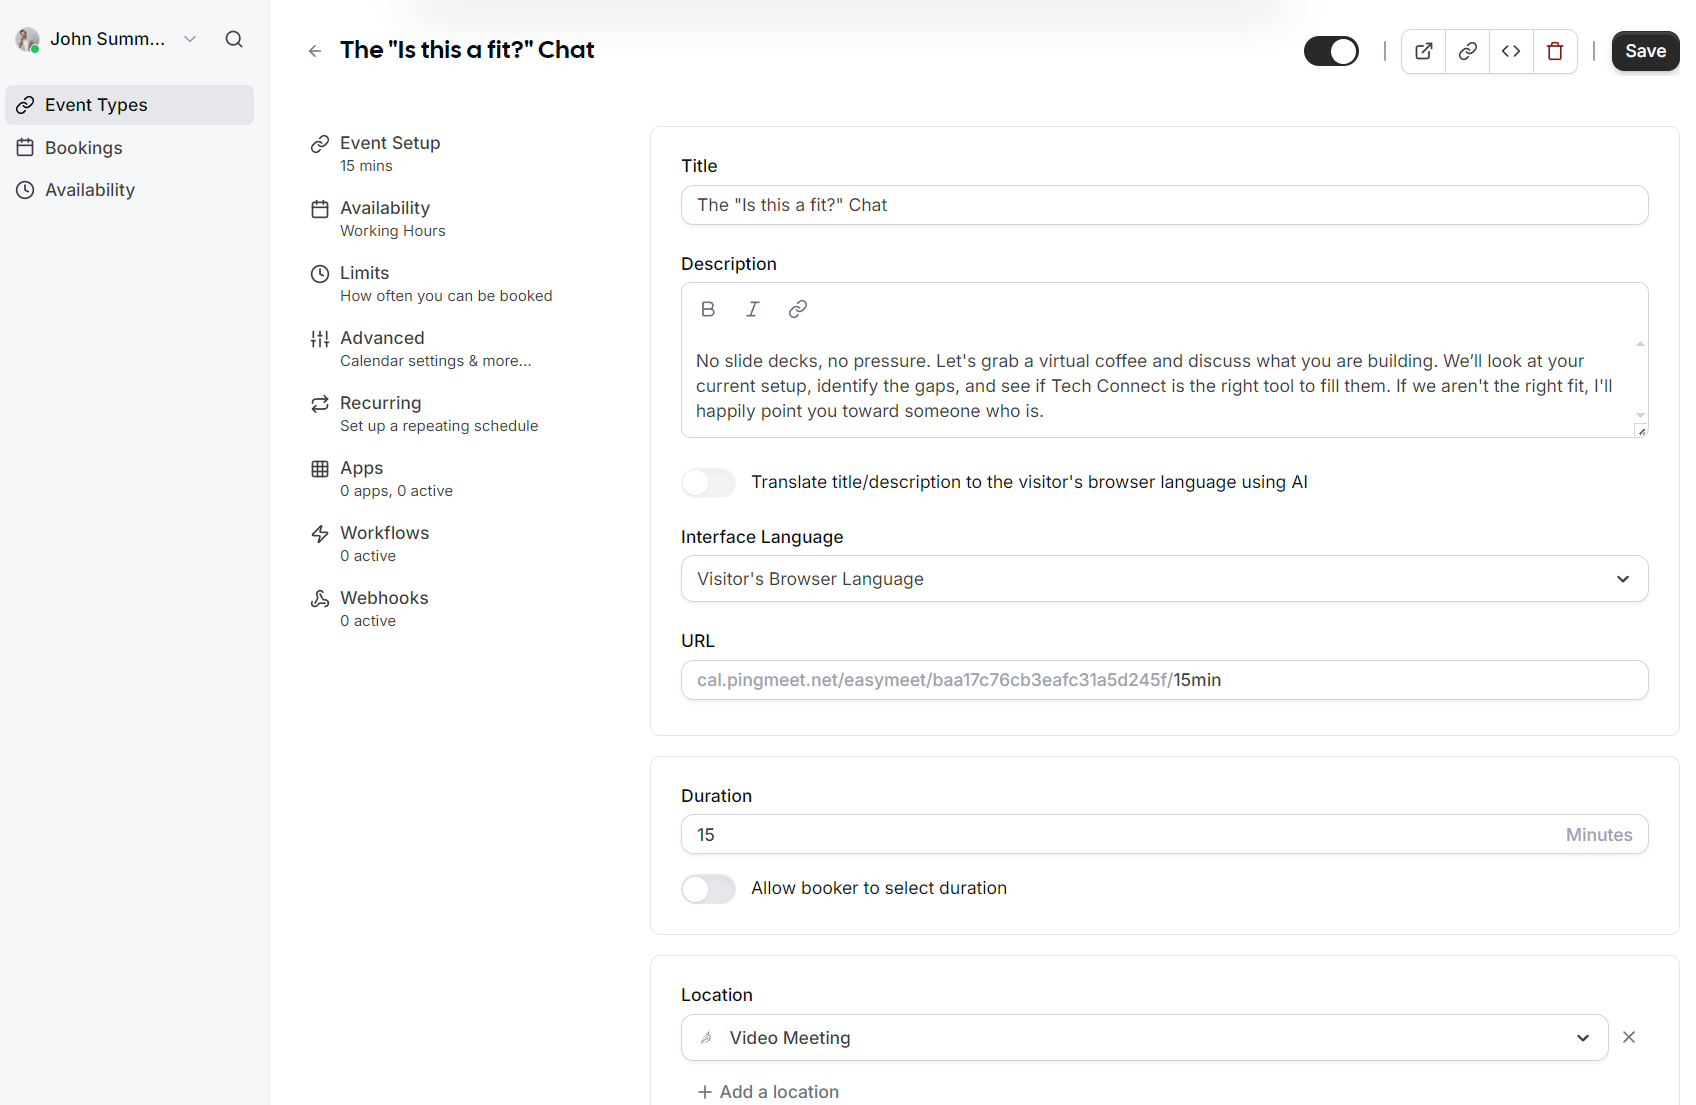
Event Advanced Setup
This guide details how to configure your Event Types to perfectly match your meeting requirements, from basic setup to advanced booking rules.
Creating a New Event Type
-
Title: Give your event a clear name, such as "Consultation" or "Quick Chat".
-
URL: Customize the specific link slug guests will use to book this event.
-
Description: Briefly explain what the meeting is for so guests know what to expect.
-
Duration: Select how long the meeting will last in minutes.
Event Setup
Once the event is created, you can access more granular settings in the Event Setup section:
-
AI Translation: You can toggle an option to automatically translate your title and description to the visitor's browser language using AI.
-
Interface Language: Set the default language for the booking interface or allow it to match the visitor's browser language.
-
Duration Flexibility: In addition to a fixed duration, you can enable an option that allows the booker to select their preferred meeting length.
-
Location: Define where the meeting takes place, such as a Video Meeting.
Availability
Assign which schedule this event type should follow. By default, this uses your standard Working Hours, but you can select different schedules if you have created them.
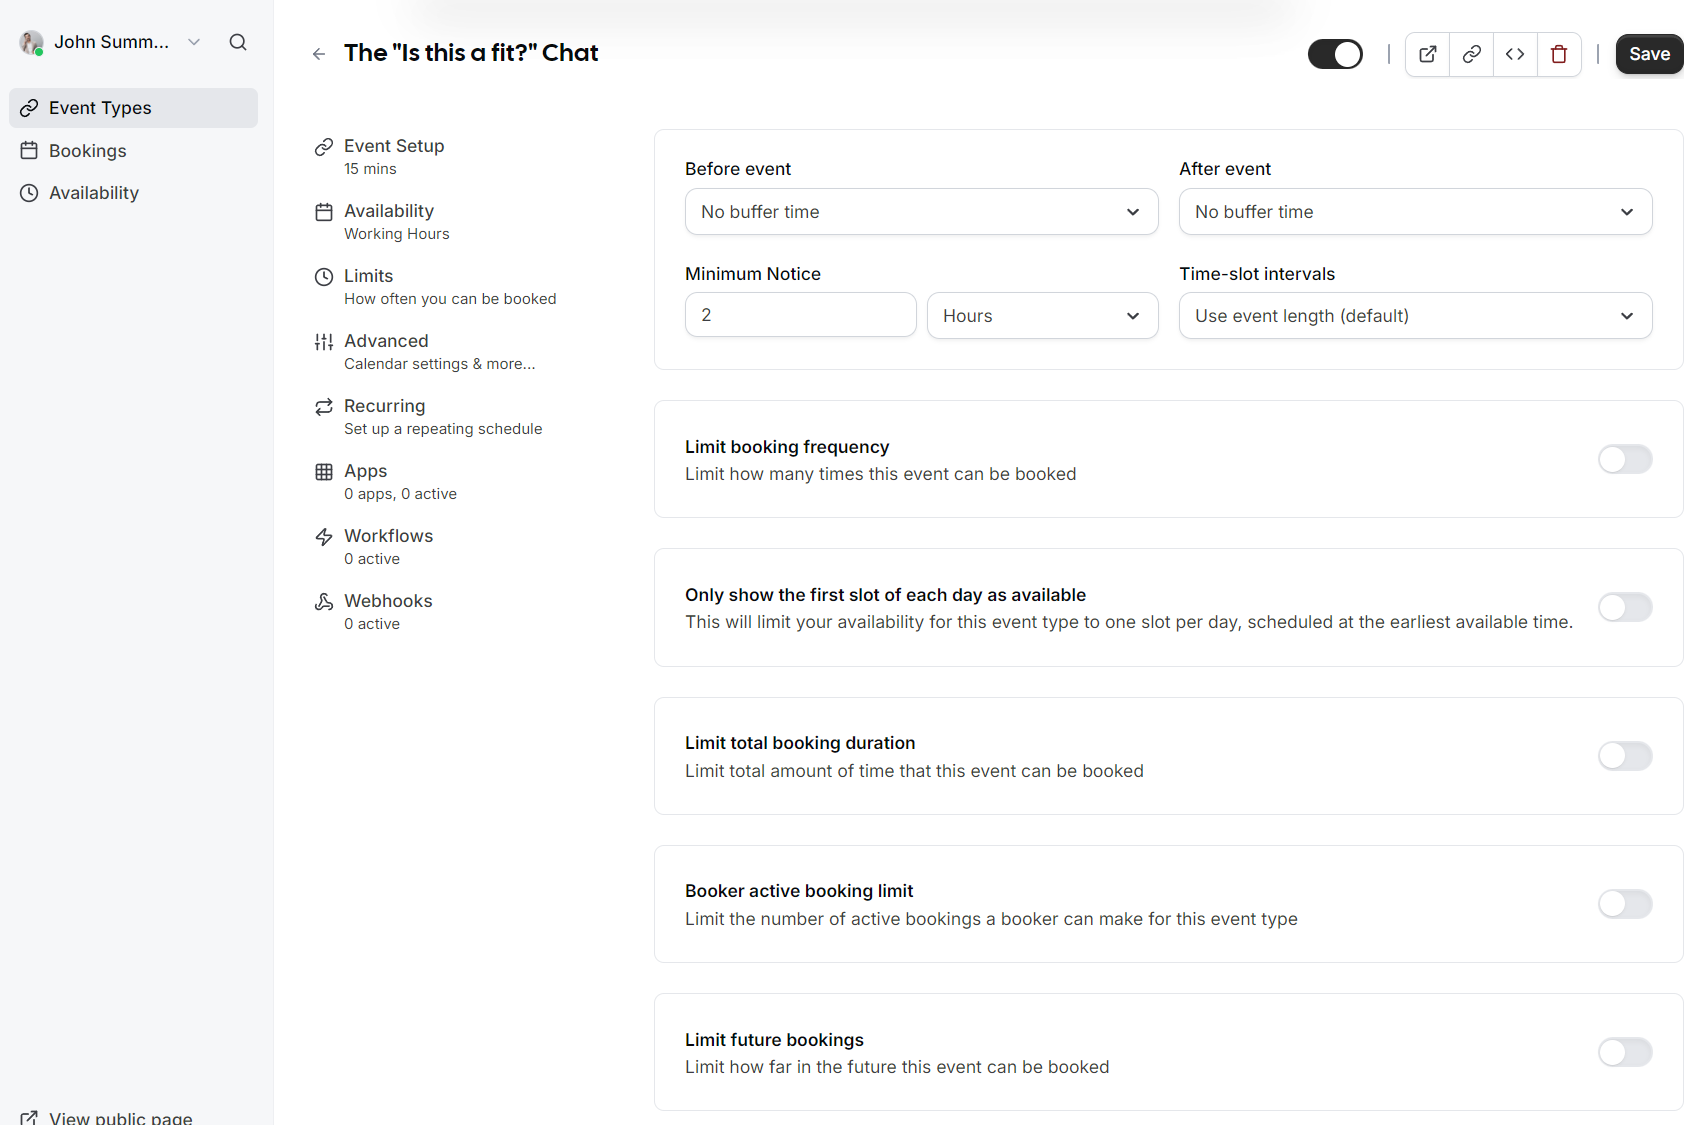
Limits
-
Buffers: Add "No buffer time" or specific intervals before and after events to prevent back to back meetings.
-
Minimum Notice: Prevent last minute surprises by requiring a minimum amount of notice (e.g., 2 hours) before someone can book.
-
Time-slot intervals: Choose how frequently slots are displayed (e.g., every 15 minutes or based on event length).
-
Booking Frequency: Limit how many times this specific event can be booked overall.
-
Future Bookings: Set a limit on how far into the future guests are allowed to schedule a meeting.
Advanced Options
 |
 |
 |
 |
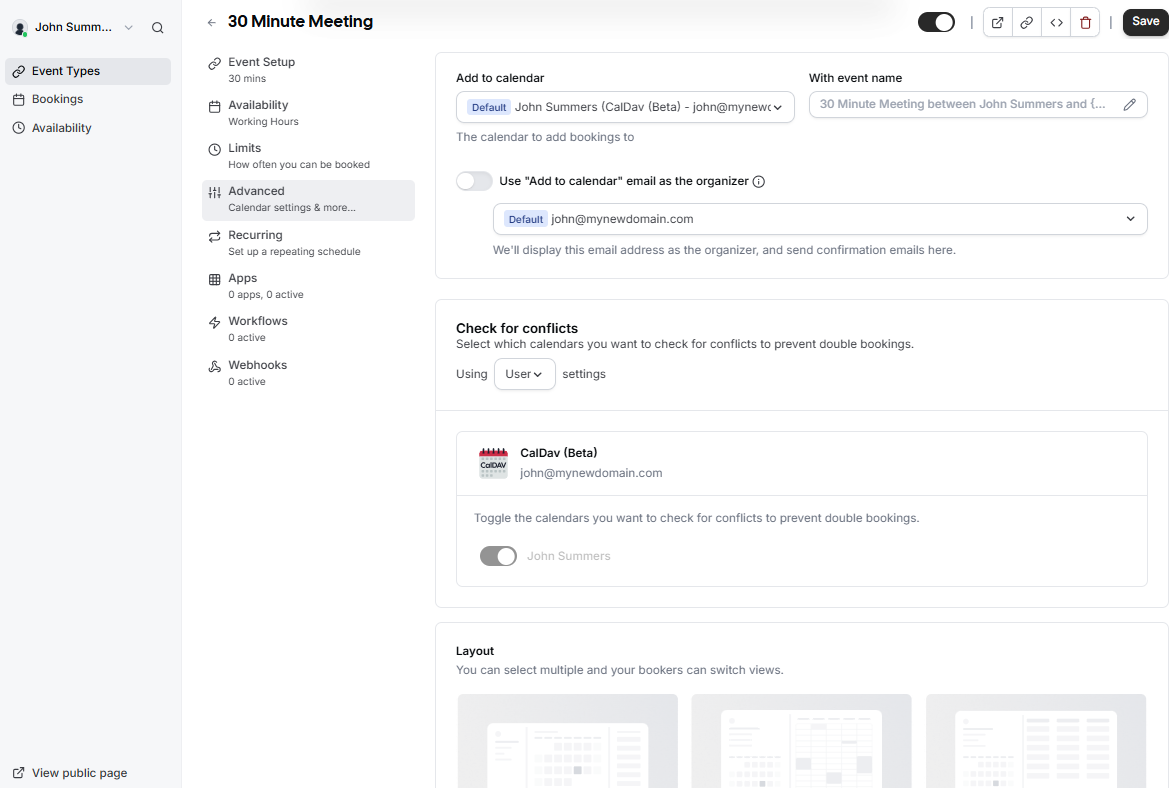
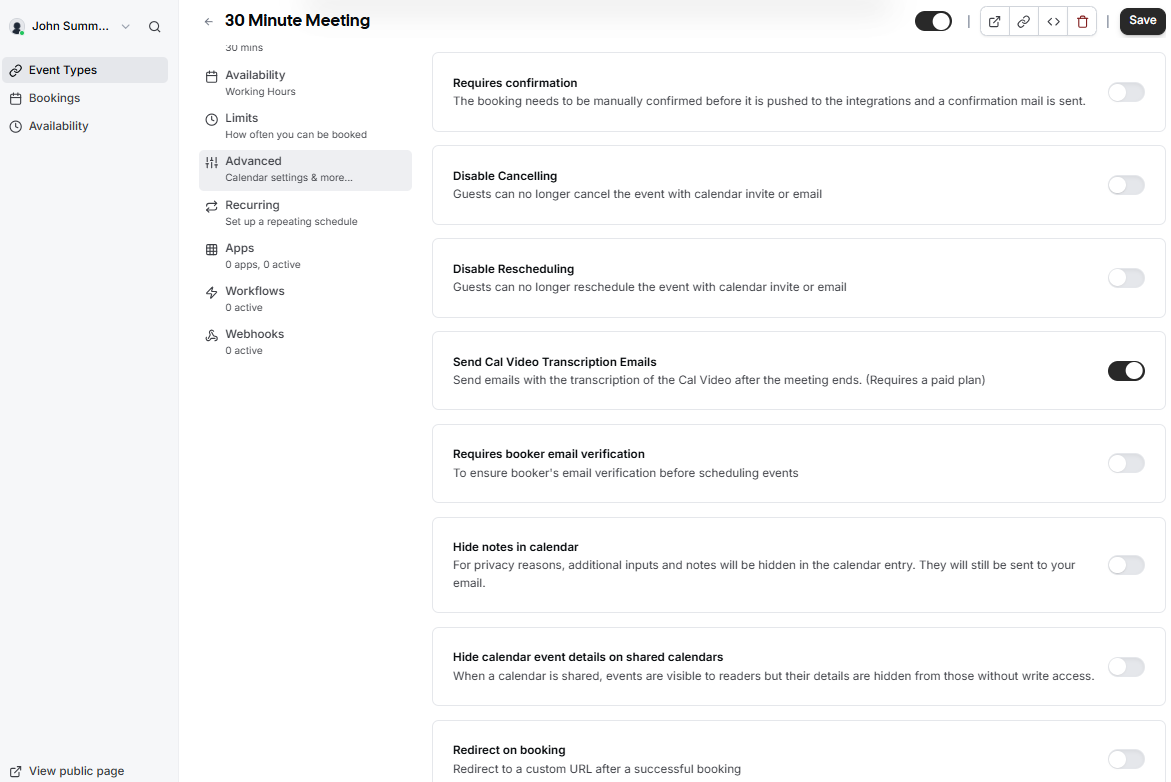
The Advanced tab provides granular control over your calendar integration, the booking process, and how your event appears to guests.
Calendar and Syncing
Manage how bookings interact with your existing calendar to prevent double bookings.
-
Add to calendar: Select the specific calendar where new bookings should be recorded.
-
Event name: Customize the format of the meeting name as it will appear in your calendar.
-
Check for conflicts: Toggle which calendars the system should monitor to prevent overlapping appointments.
-
Organizer identity: Choose whether to use the default calendar email as the meeting organizer.
Layout and Booking Questions
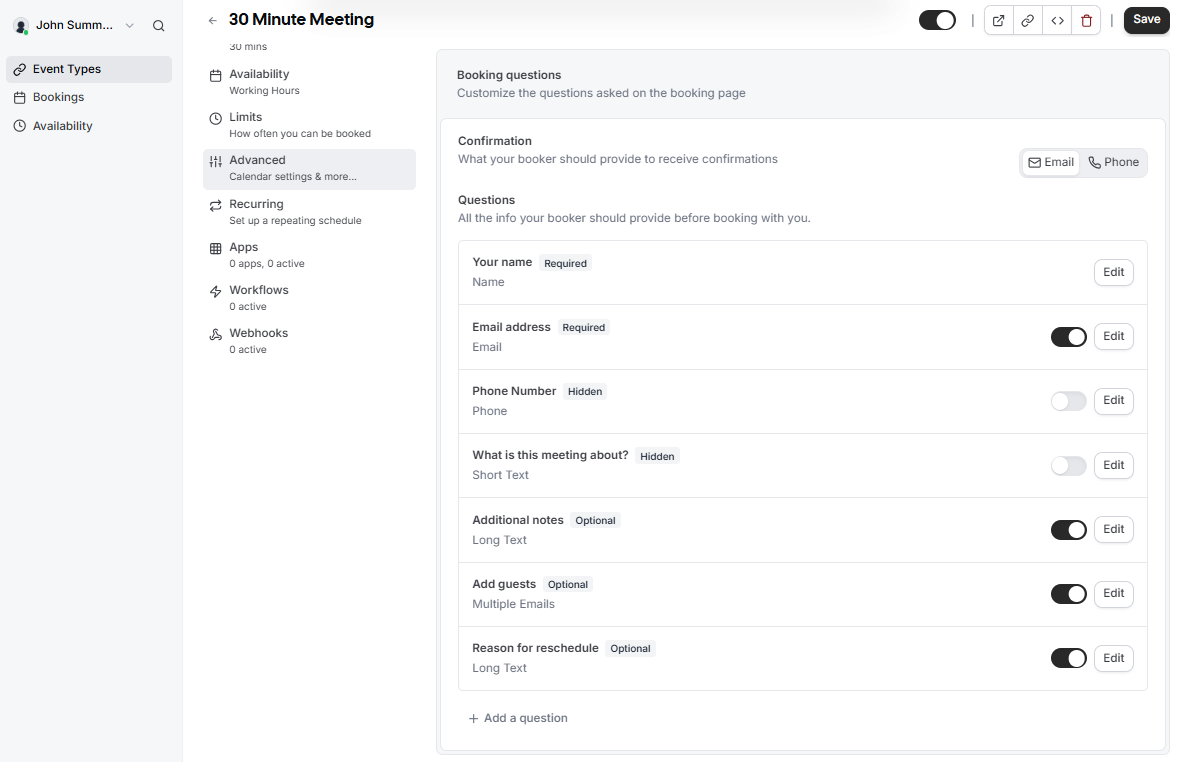
Customize what your guests see and what information they must provide.
-
Display Layout: Enable different views like Month, Weekly, or Column to allow bookers to switch their preferred view.
-
Confirmation Method: Choose whether bookers receive confirmations via Email or Phone.
-
Custom Questions: While Name and Email are required by default, you can add or edit fields for Phone Number, Additional notes, or Reason for reschedule.
-
Guest Invitations: Enable the Add guests option to allow bookers to invite additional attendees during the scheduling process.
Booking Rules and Workflow
Define the logic and restrictions for every appointment.
-
Requires confirmation: Enable this if you want to manually approve each booking before it is finalized and added to your calendar.
-
Disable Cancel or Reschedule: Prevent guests from changing or cancelling their appointments through the automated links.
-
Email Verification: Require bookers to verify their email address before they can successfully schedule an event.
-
Redirect on booking: Automatically send guests to a custom URL after they finish scheduling.
-
Offer seats: Use this for group sessions where multiple guests can book the same time slot.
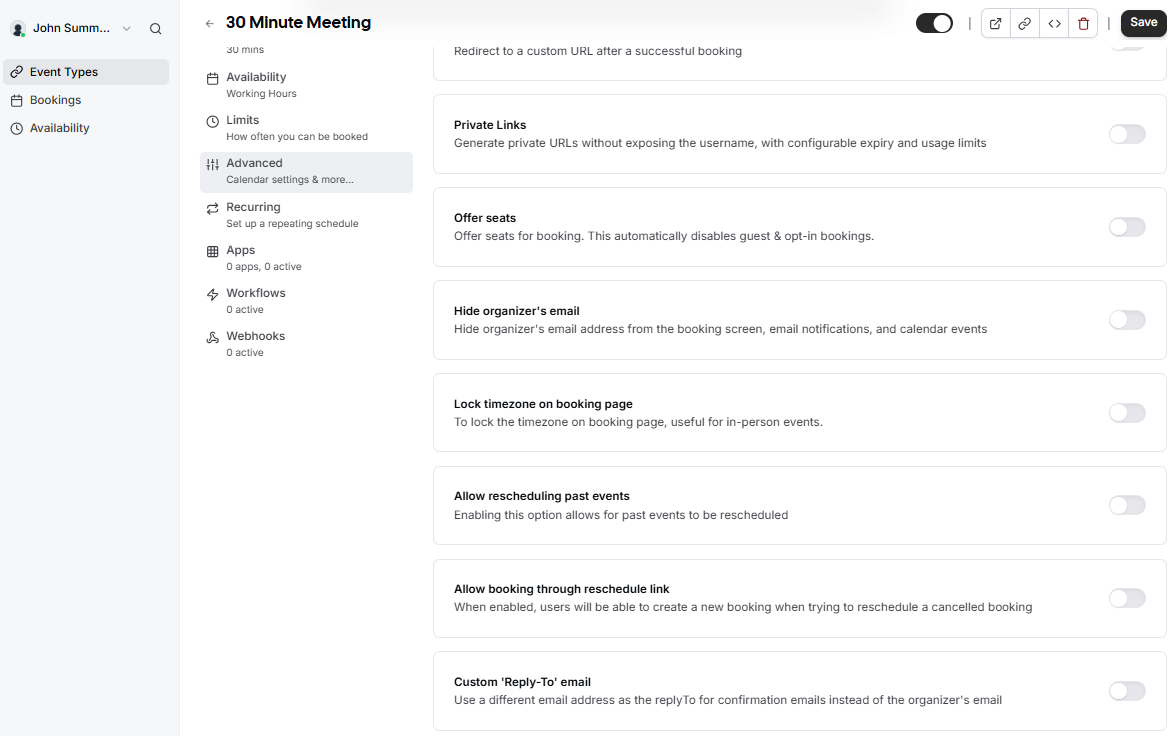
Privacy and Advanced Customization
Protect your sensitive data and tailor the communication style.
-
Private Links: Generate unique URLs with configurable expiry and usage limits to avoid exposing your main username.
-
Hide Personal Details: You can choose to hide your email address from the booking screen or hide event notes in the calendar entry for privacy reasons.
-
Lock Timezone: Fix the timezone on the booking page, which is particularly helpful for coordinating in-person events.
-
Custom Reply-To: Specify a different email address to receive replies to confirmation emails instead of the default organizer email.
-
Rescheduling Logic: Toggle whether users can reschedule past events or create new bookings through a reschedule link.
Administrative Settings
-
Offer Seats: Enable this for group sessions where multiple guests can book the same time slot.
-
Custom Reply-To: Use a specific email address for confirmation replies instead of the default organizer email.
-
Event Type Color: Assign a color to the event type to help differentiate bookings within your internal dashboard.