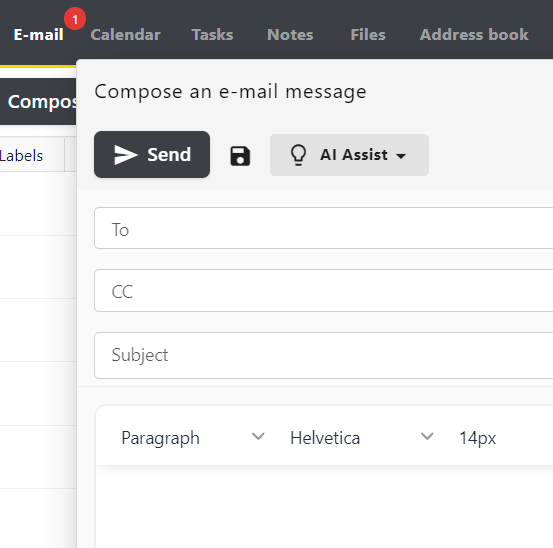
AI Assist
AI Assist is designed to help you communicate more effectively and manage your workflow with greater efficiency. By connecting your preferred AI provider, such as Gemini, Anthropic, or OpenAI, you can unlock a range of intelligent features directly within your Webmail.
AI Assist allows you to:
-
Draft Messages: Create complete emails from brief descriptions or bullet points.
-
Smart Reply: Generate professional, context-aware responses to emails.
-
Summarize: Quickly distill long emails into key takeaways.
The AI Assist feature is built on a "Bring Your Own Key" (BYOK) model, which prioritizes your data sovereignty and privacy while giving you several critical advantages:
-
Direct Privacy Control: You maintain a direct relationship with the AI provider, allowing you to manage data sharing and memory retention policies through your own provider dashboard.
-
Training Protections: Most enterprise AI APIs do not use your data to train their models; using your own key ensures you can verify and enforce these "no-training" policies according to your specific compliance needs.
-
Data Retention Management: You can configure advanced settings, such as "Zero Data Retention," directly at the provider level to ensure sensitive information is not stored longer than necessary for processing.
-
Full Auditability.
Learn how to configure and master the AI Assist tools in your daily work.
How to Enable the AI Assist Feature
AI Assist is a powerful tool integrated directly into your Webmail. It allows you to compose emails from short descriptions, generate replies, translate text, and summarize long threads instantly.
This feature operates on a "bring-your-own-key" basis, giving you full control over which AI provider and model you use. You can currently connect with providers such as Gemini, Anthropic, or OpenAI.
Step 1: Enable AI at the Domain Level
Before individual users can access AI tools, you must configure the AI provider for the entire domain.
-
Log in to your Admin Panel.
-
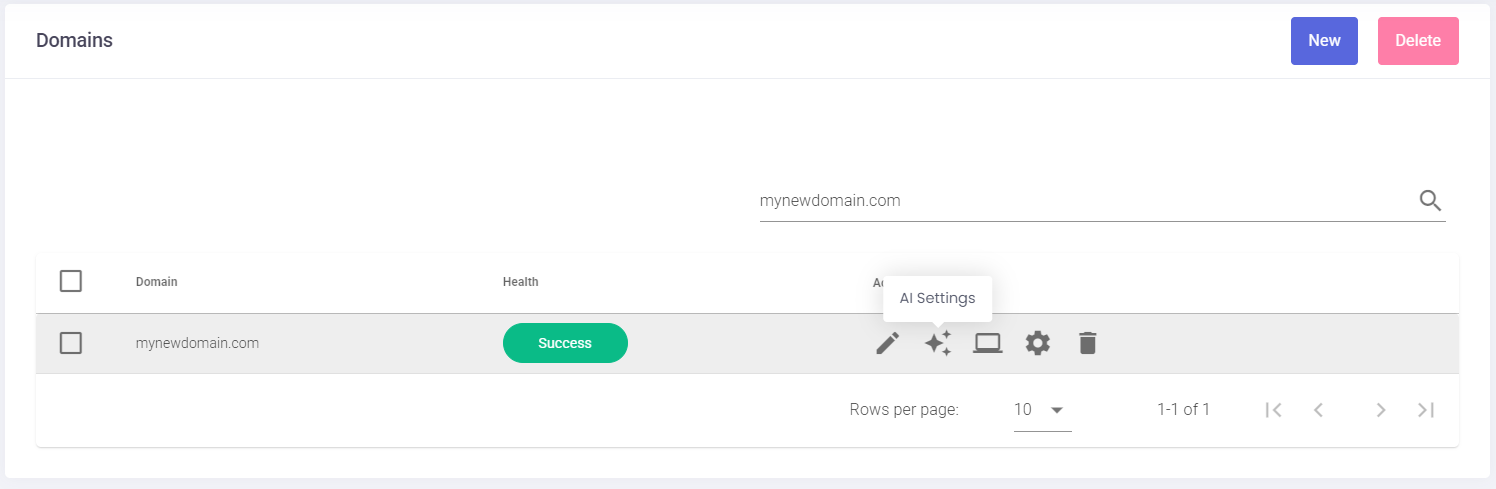
Navigate to the Domains section.
-
Locate the domain you wish to manage and click the AI Settings icon (represented by a sparkle symbol) in the actions list.


-
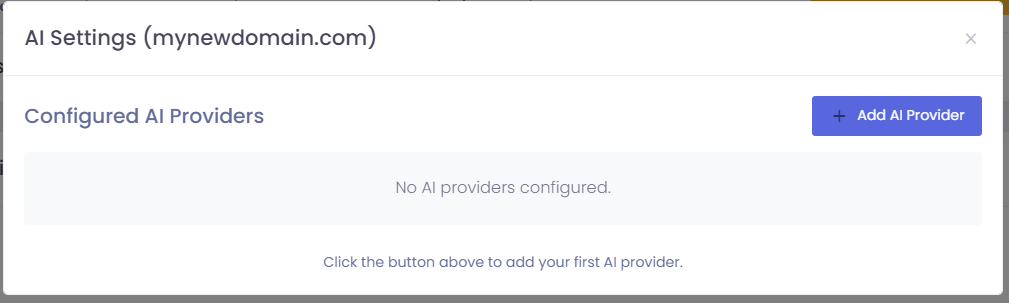
Click the Add AI Provider button.
-
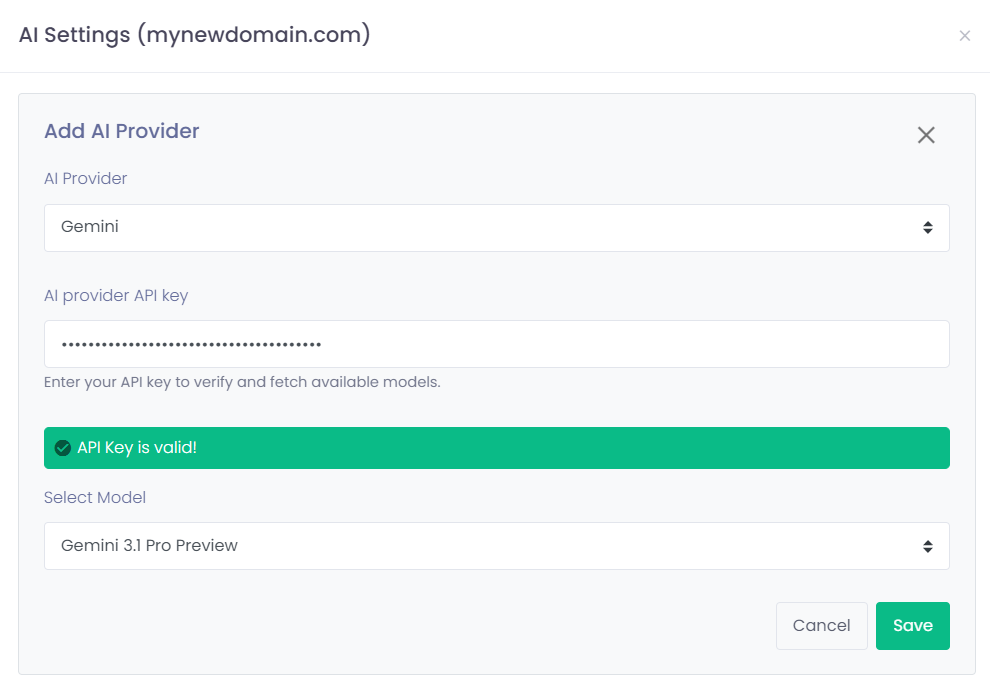
Select your preferred AI Provider and enter your API key to verify the connection.

-
Select a Model: You can choose between high-performance complex models or faster, more cost-effective ones.
Tip: For standard email composition and summarizing, a "fast" model (such as a Flash-tier model) typically provides the best balance of speed and cost-efficiency.
-
Click Save.
Step 2: Grant User Permissions
Once the domain is configured, you must specify which users have permission to use the AI tools.
-
In the Admin Panel, go to the Users section.
-
Select the relevant domain from the list.
-
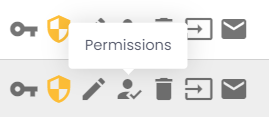
Locate the specific user and click the Permissions icon (represented by a person with a checkmark).

-
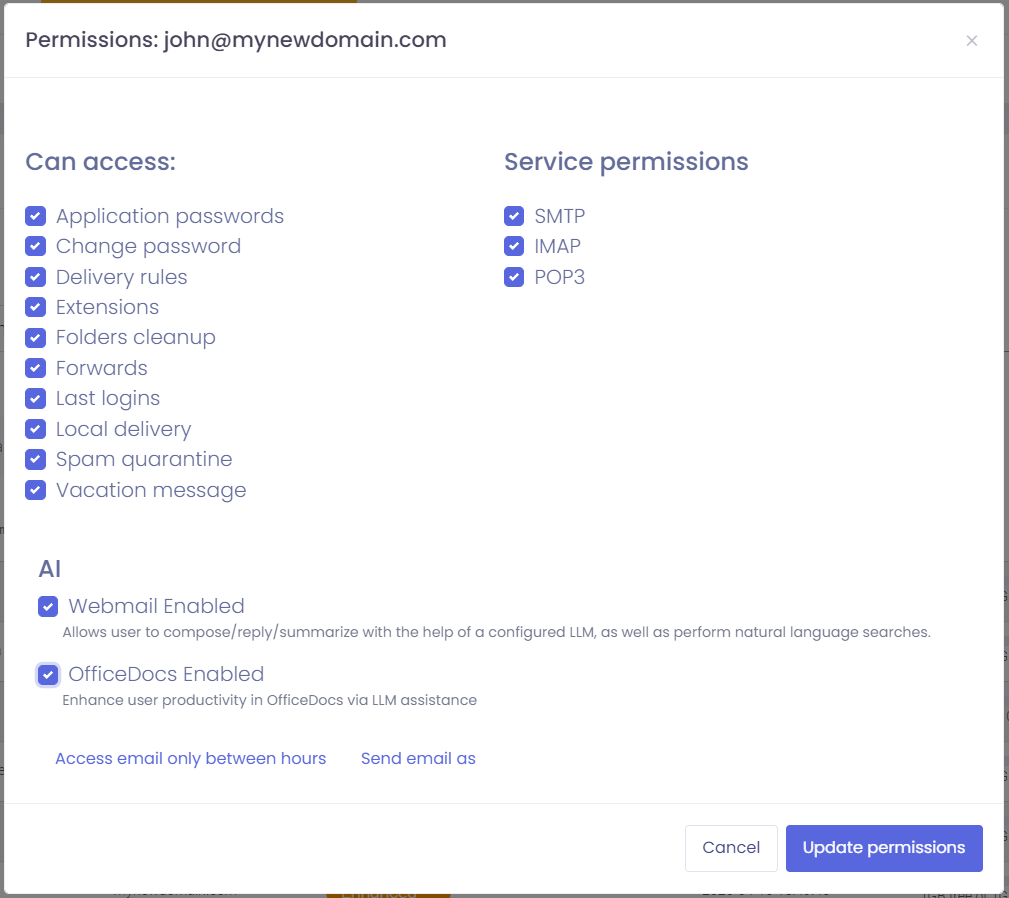
Scroll down to the AI section of the permissions window.
-
Check the boxes for the tools you want to enable:
-
Webmail Enabled: Allows the user to use AI for composing, replying, and summarizing within their email interface.
-
OfficeDocs Enabled: Enhances productivity by enabling AI assistance within the office document editor.

-
-
Click Update permissions to finalize the changes.
Using AI Assist
Once enabled, users will see the AI Assist button in their Webmail interface. It is available in:
-
The Compose Window: To draft new messages from brief notes.
-
Reply Windows: To suggest professional responses based on the conversation history.
-
Email Summaries: To quickly digest long or complex email threads.