Working with Tables
Tables help organize information into rows and columns, making content easier to read and compare. This guide explains how to insert a table, edit its structure, format its appearance, and use common table tools in the document editor.
Inserting a table
To insert a table into your document:
- Place the cursor where you want the table to appear.
- Open the Insert tab.
- Click Table.
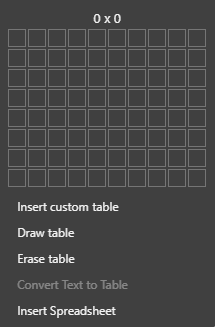
- Select the number of rows and columns from the grid.
- Insert the table into the document.
Adding rows and columns
After inserting a table, you can add more rows or columns as needed. To access these options, right-click inside the table to open the context menu. These same actions are also available from the Rows & Columns section in the right sidebar.
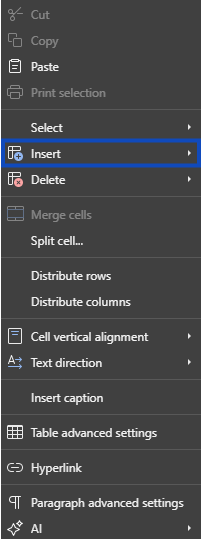
- Right-click a cell and insert a row above the current row
- Right-click a cell and insert a row below the current row
- Right-click a cell and insert a column to the left
- Right-click a cell and insert a column to the right
- Use the table options to add multiple rows or columns when needed
Deleting rows and columns
To remove part of a table, right-click inside the table and choose the option you need from the context menu. You can also access these actions from the Rows & Columns tools.
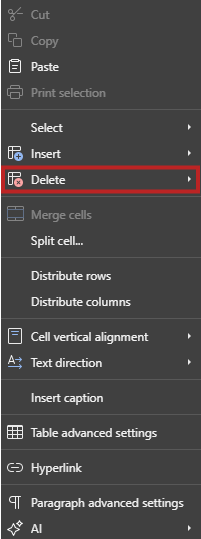
- Delete a selected row
- Delete a selected column
- Delete selected cells
- Delete the entire table
Merging and splitting cells
OfficeDocs includes tools for combining cells or splitting them into smaller sections. These options are available when you select the relevant cell or cells, then open the right-click menu or use the table tools.
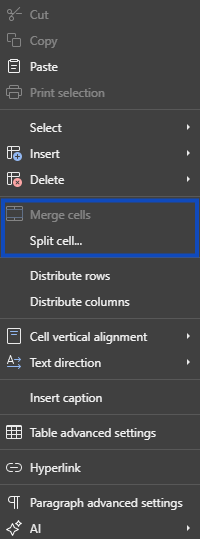
Merge cells
- Select two or more adjacent cells.
- Right-click the selected cells.
- Click Merge Cells to combine them into one cell.
Split cells
- Click inside the cell you want to split.
- Right-click the cell.
- Select Slipt Cell.
- Enter the number of rows and columns you want to create.
- Confirm to apply the change.
Table formatting
OfficeDocs includes advanced table formatting options to help you control the size, spacing, layout, and appearance of your tables. You can adjust settings for the full table, individual cells, borders and background, text wrapping, and accessibility information. These options are available from the table’s advanced settings.
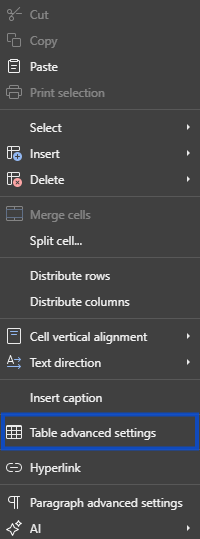
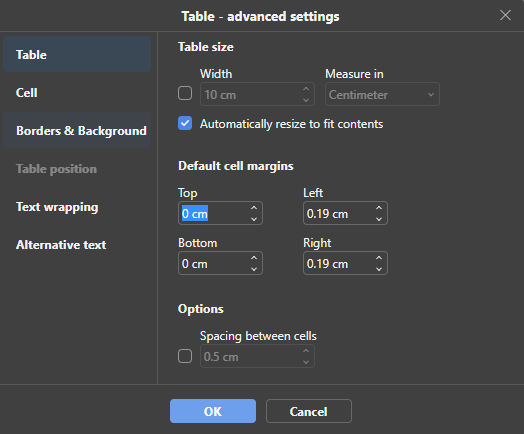
Table properties
Use the Table settings to control the overall size and spacing of the table.
- Set a fixed Width for the table
- Choose the measurement unit used for sizing
- Enable Automatically resize to fit contents so the table adjusts to the text inside it
- Set default cell margins for the Top, Bottom, Left, and Right
- Adjust Spacing between cells if you want space between table cells
These settings are useful when you want a table to fit neatly into the page layout or follow a more consistent structure.
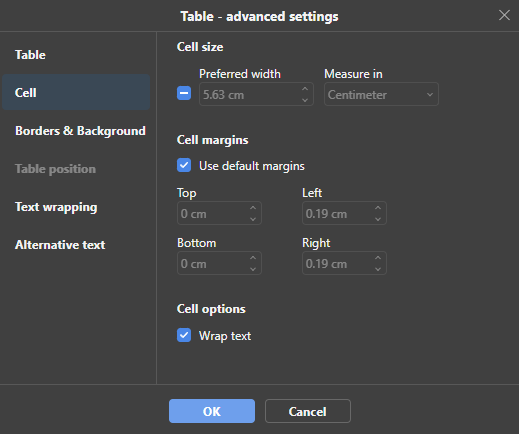
Cell properties
Use the Cell settings to control the size and internal spacing of individual cells.
- Set a Preferred width for the selected cell
- Choose the measurement unit for the cell width
- Use default margins or define custom margins for the cell
- Adjust the Top, Bottom, Left, and Right cell margins
- Enable Wrap text to keep long text inside the cell instead of overflowing
These options help make table content easier to read, especially when working with narrow columns or longer text.
Borders and background
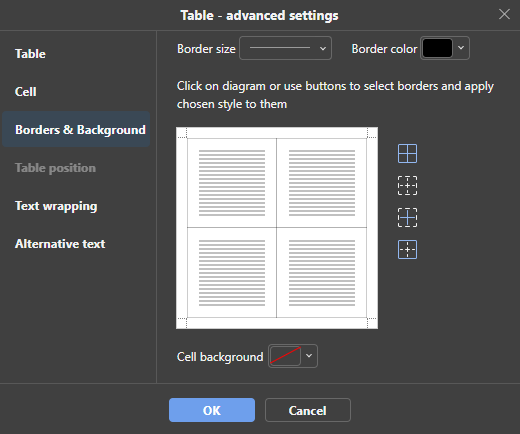
Use Borders & Background to change the visual style of the table or selected cells.
- Choose a Border size
- Choose a Border color
- Select which borders to apply the style to
- Set a Cell background color
This section is useful for emphasizing headers, separating data clearly, or making the table match the rest of the document design. The current document editor supports border styling and background color changes in table settings.
Text wrapping
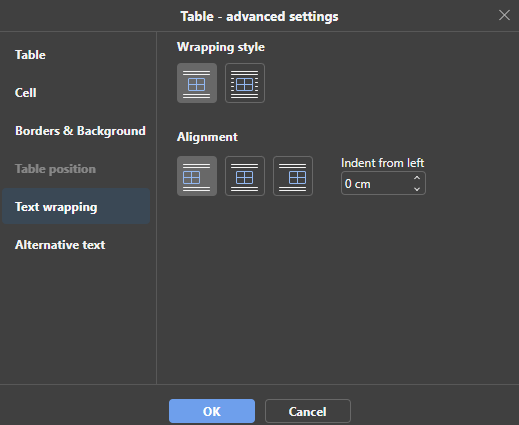
Use Text wrapping to control how the table is positioned in relation to the surrounding text.
- Choose the wrapping style for the table
- Set the table alignment
- Adjust the Indent from left value
These settings help you control whether the table stays inline or is positioned more freely on the page. The current table settings also include table positioning and wrapping behavior in advanced settings.
Alternative text
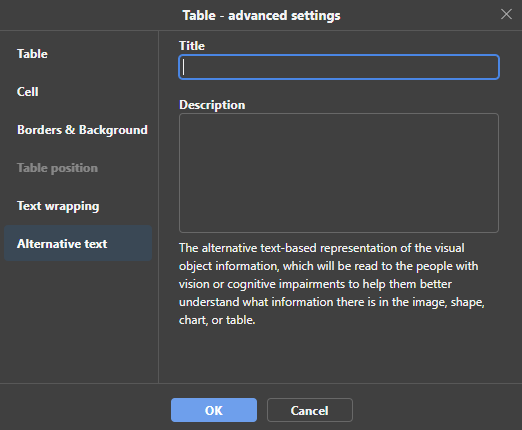
Use Alternative text to make the table more accessible.
- Add a Title for the table
- Add a Description that explains the table content
Alternative text helps people using assistive technologies understand the purpose or content of the table. ONLYOFFICE currently supports alternative text for visual objects, including tables.
Resizing tables
To resize a table manually:
- Drag column borders to change column width
- Drag row borders to change row height
- Use the table handle to move or resize the full table
- Distribute rows or columns evenly when needed
Converting text to a table
If you already have text in your document, you can convert it into a table.
- Select the text you want to convert.
- Open the table tools.
- Choose Convert Text to Table.
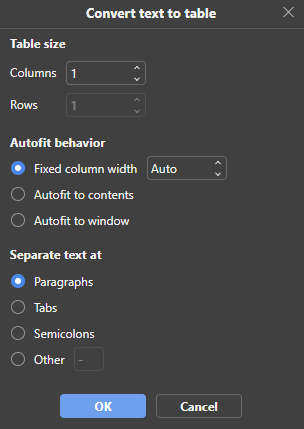
- Set how the text should be separated, such as by paragraphs, tabs, semicolons, or another delimiter.
- Confirm to create the table.