Inserting Images and Media
OfficeDocs lets you add images and other visual elements to your documents to make content clearer and more engaging. This guide covers the main options for inserting images, adjusting their size and position, and working with related visual tools in the document editor.
Inserting images
You can insert images directly into your document from a local file or from a URL. The document editor supports common image formats such as BMP, GIF, JPEG, JPG, and PNG.
From your computer
- Place the cursor where you want the image to appear.
- Open the Insert tab.
- Click the Image button.
- Select Image from File.
- Choose the image from your computer and click Open.
From URL
- Place the cursor where you want the image to appear.
- Open the Insert tab.
- Click the Image button.
- Select Image from URL.
- Enter the image address and confirm.
Supported image formats
The document editor supports these image formats:
- JPEG / JPG
- PNG
- GIF
- BMP
Resizing images
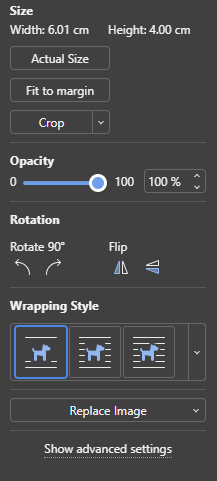
Once an image is inserted, you can resize it directly on the page or fine-tune its dimensions from the image settings.
- Click the image to select it
- Drag the resize handles to change its size
- Use image settings to adjust width and height more precisely
- Keep Constant proportions enabled if you want to preserve the original aspect ratio
Positioning images
You can place images inline with text or move them more freely on the page, depending on the layout you need.
Text wrapping
Text wrapping controls how text flows around an image.
- Inline: The image behaves like part of the text
- Square: Text wraps around the rectangular image boundary
- Tight: Text wraps around the visible edges of the image
- Top and bottom: Text appears only above and below the image
- In front: The image appears over the text
- Behind: The image appears behind the text
Alignment and position
When the image is not inline, you can place it more precisely on the page.
- Align the image to the left, center, or right
- Set an exact horizontal or vertical position
- Choose whether the image moves with the text
- Allow or prevent overlap with other objects
Image editing
OfficeDocs includes built-in tools for making basic image adjustments after insertion.
Crop
Use the crop tool to keep only the part of the image you need.
- Select the image.
- Click the Crop button.
- Drag the crop handles to define the visible area.
- Click outside the image, press Esc, or click Crop again to apply the change.
Rotate and flip
You can quickly change the orientation of an image.
- Rotate the image by 90° clockwise or counterclockwise
- Flip the image horizontally
- Flip the image vertically
- Use advanced image settings if you need a specific rotation angle
Other media
In addition to images, the document editor also supports other visual elements that can help structure and enhance your content.
Shapes
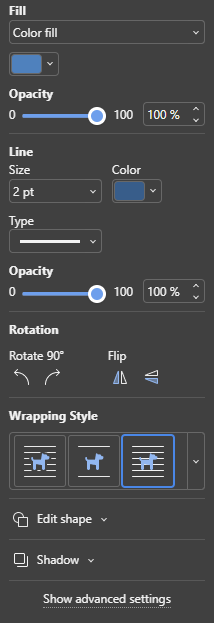
You can insert shapes directly from the Insert tab.
- Open the Insert tab.
- Click Shape.
- Choose a shape from the gallery.
- Click in the document to insert it.
- Resize, move, or format the shape as needed.
Icons
Vector icons can be inserted in ONLYOFFICE, but they depend on the Icons plugin. Since ONLYOFFICE Doc 8.2, plugins are not installed by default, so this feature may not be available in every OfficeDocs instance.
If the plugin is available:
- Open the Plugins tab.
- Select Icons.
- Search or browse the icon library.
- Insert the icon you want to use.
Alt text for accessibility
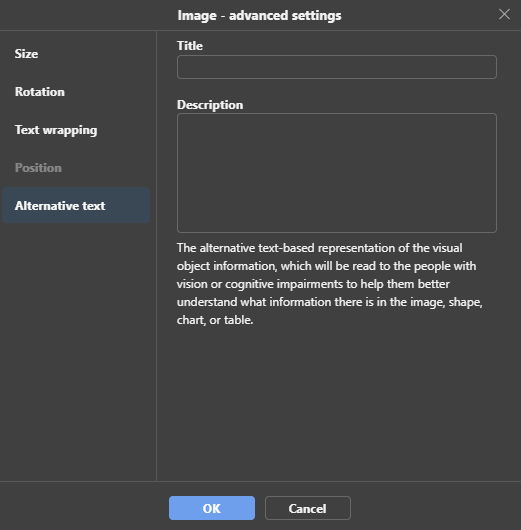
You can add alternative text to images to improve accessibility for users who rely on screen readers.
- Select the image.
- Open the image advanced settings.
- Enter a title and description in the Alternative Text section.
- Save the changes.