Connecting to Your Account
OnlyOffice Desktop Editors can connect directly to your OfficeDocs account, giving you access to your cloud documents from a desktop application.
Prerequisites
Before connecting your account, make sure you have:
- OnlyOffice Desktop Editors installed on your computer
- Your OfficeDocs account credentials
- An active internet connection
Adding Your Account
- Open OnlyOffice Desktop Editors.
- Go to the Clouds section or click the cloud icon.

- Select Connect for ONLYOFFICE.

- Enter your server URL then click Connect.

- Enter your username and password.

- After clicking Next, your PolarisMail account automatically opens.


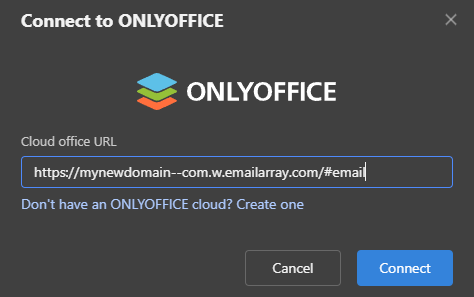
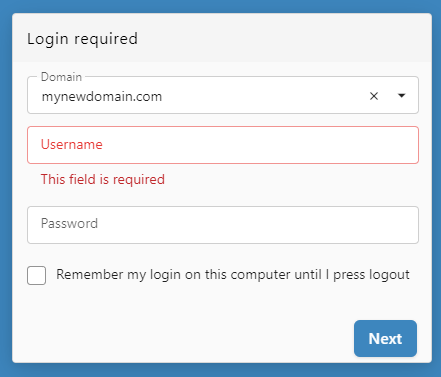
Server URL
Your server URL is the web address of your OfficeDocs installation. It may look similar to:
-
https://yourcompany.com
-
https://docs.yourcompany.com
If you are not sure which address to use, contact your administrator.
Two-Factor Authentication
If your account uses two-factor authentication:
- Enter your username and password as usual.
- Wait for the verification prompt to appear.
- Open your authenticator application.
- Enter the current verification code.
- Click Verify.
Authenticator Apps
Common authenticator apps include:
- Google Authenticator
- Microsoft Authenticator
- Authy (recommended)
- 1Password
Authentication
Depending on your organization’s setup:
- You may sign in with your usual account username and password
- You may be redirected to a login page in your browser or app window
- Two-factor authentication may be required before access is granted
After Connecting
Once your account is connected:
- Your cloud files appear in the file browser
- You can open, edit, and save documents from your account
- Changes sync with the server automatically
- You may be able to continue working with cached files when offline


Multiple Accounts
You can connect more than one account if needed:
- Click Add Account or Connect Another.
- Enter the second account’s server address and login details.
- Repeat the process for any additional accounts.
- Switch between accounts as needed from the cloud list.

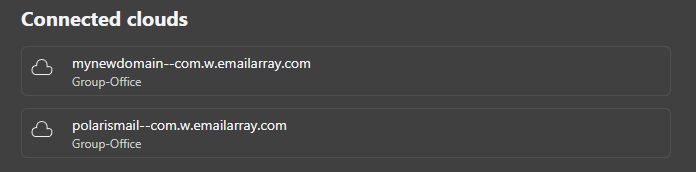
Disconnecting
- Open the cloud tab.
- Find the connected account you want to remove.
- Click the Three Dots then Logout or Remove from list.

- Confirm the action if prompted.
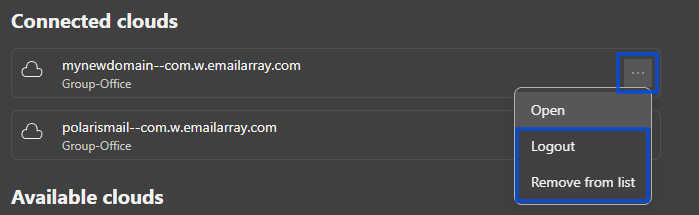
Local cached files may be removed depending on your setup.
Troubleshooting Connection
Cannot connect
- Verify that the server URL is correct
- Check that your internet connection is working
- Make sure your username, email, and password are entered correctly
- Try opening the server URL in a web browser first
Connection lost
- Check your internet connection
- Wait for the application to reconnect automatically
- Reopen the account if needed
- Unsaved local changes may remain available until syncing resumes
Authentication fails
- Verify your username or email and password
- Check whether your password has expired
- Complete any required two-factor authentication steps
- Contact your administrator if your account has access restrictions