OfficeDocs
Office Docs transforms your email account into a complete workspace. It allows you to seamlessly open and edit standard file formats natively inside your webmail.
When you use an Enhanced mailbox, you unlock a full suite of collaboration tools:
-
Real-time co-editing: Work on the same document with your team and see changes as they happen.
-
Sharing and permissions: Share links securely with internal team members or external clients.
-
Version history: Easily track changes and restore previous versions with one click.
-
Cross-platform access: Work in your browser or sync files with desktop and mobile apps.
Explore the guides below to set up your workspace and learn how to use these features.
- Getting started
- Introduction to OfficeDocs
- Opening Documents
- Creating Documents
- Saving Documents
- Supported File Formats
- Document Editing
- Editing Word Documents
- Editing Spreadsheets
- Editing Presentations
- Working with PDF Documents
- Formatting Text
- Inserting Images and Media
- Working with Tables
- Working with Charts
- Find and Replace
- Spell Check
- Downloading and Exporting
- Collaboration
- Version History
- Internal Sharing
- External Sharing
- Creating Share Links
- Share Link Types
- Link Expiration Dates
- Controlling Version History Access
- Managing External Shares
- Revoking External Access
- External User Access
- Accessing a Shared Document
- Email Verification Process
- Editing as an External User
- Viewing Version History as External User
- File Management
- Using the File Browser
- Creating Folders
- Moving Files and Folders
- Copying Files
- Renaming Files and Folders
- Deleting Files and Folders
- Managing Favorites
- Uploading Files
- Viewing File Properties
- Desktop Application
- Desktop Application Introduction
- Installing Desktop Editors
- Connecting to Your Account
- Browsing Cloud Files
- Creating Documents from Desktop
- Sharing from Desktop
- Offline Editing
- Mobile Application
- Mobile Application Introduction
- Installing the Mobile App
- Connecting Your Account
- Browsing Files on Mobile
- Viewing Documents on Mobile
- Editing Documents on Mobile
- AI Features
Getting started
Introduction to OfficeDocs
OfficeDocs is a document editing and collaboration platform included with your email hosting account. It allows you to create, edit, and share documents, spreadsheets, and presentations directly from your web browser
What you can do with OfficeDocs
- Create documents: Start new text documents, spreadsheets, presentations, and PDF forms.
- Edit documents: Make changes using the full-featured editor.
- Collaborate in real time: Work with colleagues on the same document at the same time.
- Share externally: Send secure links to people outside your organization.
- Track version history: Review previous changes and restore earlier versions.
- Access your files anywhere: Use OfficeDocs from a web browser, desktop application, or mobile app.
Access Levels
You can access OfficeDocs in several ways:
- Web browser: Open your file manager and select a document to launch it in OfficeDocs.
- Desktop application: Use the OnlyOffice desktop editors connected to your account.
- Mobile app: Use the OnlyOffice mobile app on Android or iOS.
Getting Help
Use the table of contents to navigate to specific OfficeDocs topics, or browse the related guides to learn more about the available features.
Opening Documents
OfficeDocs allows you to open and edit documents directly from your web browser. This guide explains the different ways to open a document, depending on where it is stored or how it was shared with you.
Opening from the File Manager
To open a document from the File Manager:
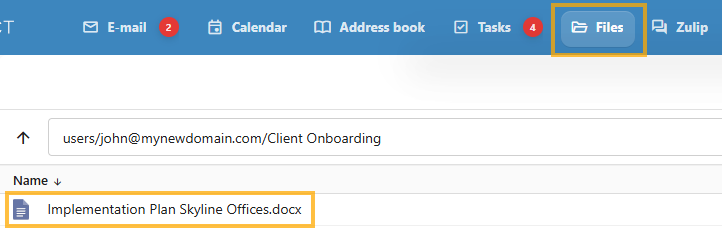
- Open the Files module in your account.

- Browse to the folder that contains the document.
- Click the document name.
- The document will open in the OfficeDocs editor in a new tab.
Opening from Recent Files
Recently opened documents can be accessed from your recent files list.
- Open the Files module.
- Locate the Recent Files section or filter.
- Click the document you want to open.
Opening from a Share Link
If a document has been shared with you by link:
Opening from Desktop Editors
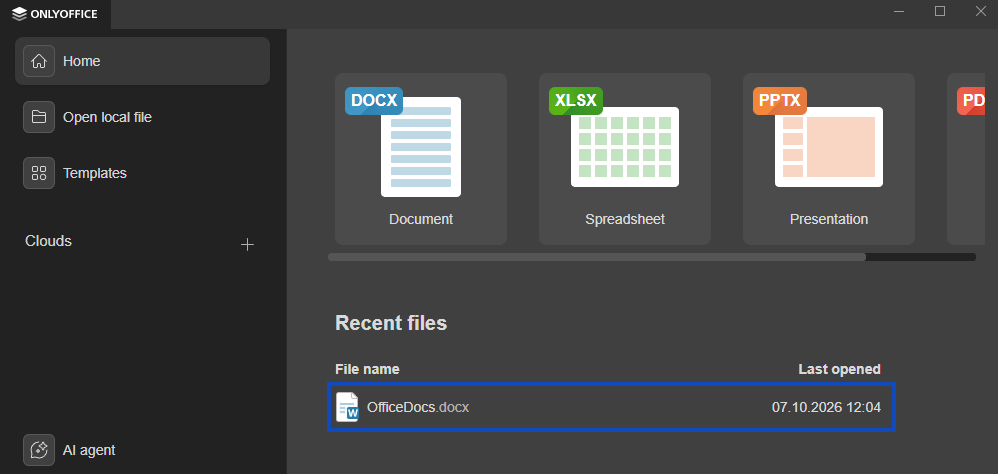
You can also open documents using the OnlyOffice Desktop Editors.
- Open OnlyOffice Desktop Editors.
- Connect the application to your account, if it is not already connected.
- Browse to the document using the file browser.

- Double-click the document to open it.
Opening from the Mobile App
To open a document from the mobile app:
- Open the OnlyOffice mobile app.
- Sign in to your account.
- Browse to the document in the file list.
- Tap the document to open it.
Supported File Types
OfficeDocs supports a variety of file formats, including:
- .docx: Microsoft Word documents
- .xlsx: Microsoft Excel spreadsheets
- .pptx: Microsoft PowerPoint presentations
- .pdf: PDF documents
- .docxf: OnlyOffice form documents
Troubleshooting
Document does not open
- Make sure you have permission to access the file.
- Confirm that the file format is supported.
- Refresh the page and try opening the document again.
Document opens in read-only mode
- Your account may have view-only access.
- The file may have been shared with limited permissions.
- Another user may currently have the document locked for editing.
Creating Documents
OfficeDocs allows you to create new documents, spreadsheets, presentations, and forms directly from your file storage. This guide explains the main ways to create a new file and the account requirements to do so.
Create a document from the File Manager
- Open the Files module in your account.
- Browse to the folder where you want to create the document.
- Click New or the + menu.

- Select the document type you want to create.
- Enter a name for the new document.
- The file will open automatically in the OfficeDocs editor.
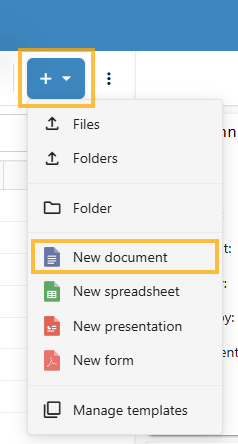
You can create:
- Document: Word document (.docx)
- Spreadsheet: Excel spreadsheet (.xlsx)
- Presentation: PowerPoint presentation (.pptx)
- Form document: Fillable form (.docxf)
Create a document from Desktop Editors
- Open OnlyOffice Desktop Editors.
- Connect the application to your account, if needed.
- Click Create new.
- Select the document type.
- The file will be created and opened for editing.
Create a document from the Mobile App
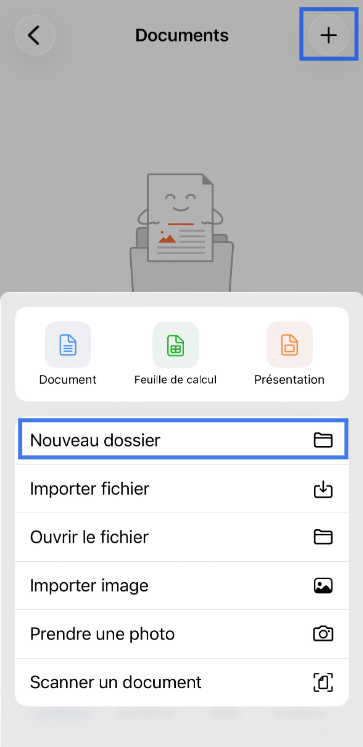
- Open the OnlyOffice mobile app.
- Sign in to your account.
- Open the folder where you want to create the document.
- Tap the + or Create button.
- Select the document type.

- Enter a file name.
- The document will open for editing.
Account requirements
Creating new documents requires an Enhanced account. Users with a Basic account can view documents shared with them, but cannot create new files.
File naming tips
- Use clear, descriptive names.
- Avoid unsupported special characters such as:
\ / : * ? " < > |
- The correct file extension is added automatically based on the document type.
Saving Documents
OfficeDocs saves your work automatically while you edit. This guide explains how saving works, how version history is created, and how to download a copy of your document when needed.
How saving works
OfficeDocs automatically saves changes as you work, so in most cases you do not need to save manually. A status indicator in the editor shows when changes are being saved.
If you want to save manually, you can:
- Press Ctrl+S on Windows or Linux
- Press Cmd+S on Mac
- Click the Save icon in the toolbar
- Use File > Save
Manual saves can create version history entries, making it easier to return to earlier points in the document.
Version history
Each saved version can be reviewed later. Version history allows you to:
- View previous versions of a document
- Compare changes between versions
- Restore an earlier version if needed
If you want to learn more, refer to the Viewing Version History guide.
Download a copy of your document
To save a copy of the document to your device:
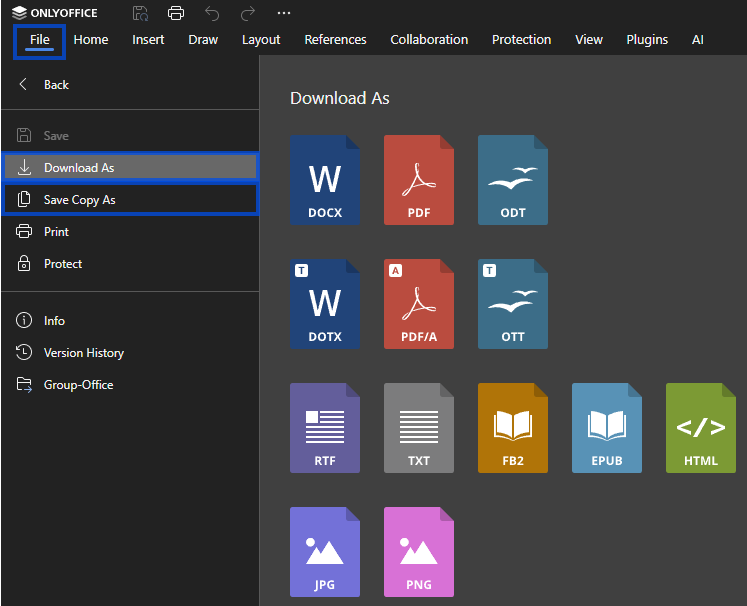
Available formats may include:
- Original format (.docx, .xlsx, .pptx)
- Other compatible file types
Offline editing
When using OnlyOffice Desktop Editors, documents may be cached locally for offline access. Any changes made offline are synchronized when the application reconnects to the server.
Troubleshooting
Changes are not saving
- Check your internet connection.
- Verify that you have edit permissions for the document.
- Refresh the page and reopen the document if needed.
A version does not appear in history
- Wait a few moments for the save to complete.
- Refresh the version history panel.
- Very small changes may be grouped with later saves.
Supported File Formats
OfficeDocs supports a wide range of file formats for viewing and editing. This guide outlines the main supported formats, how legacy files are handled, and which formats are not currently supported.
Document formats
OfficeDocs supports the following document formats:
- .docx: Microsoft Word document
- .doc: Legacy Microsoft Word format, converted to
.docxfor editing - .odt: OpenDocument text file
- .rtf: Rich Text Format
- .txt: Plain text file
- .docxf: OnlyOffice form document
Spreadsheet formats
Supported spreadsheet formats include:
- .xlsx: Microsoft Excel workbook
- .xls: Legacy Microsoft Excel format, converted to
.xlsxfor editing - .ods: OpenDocument spreadsheet
- .csv: Comma-separated values file
Presentation formats
Supported presentation formats include:
- .pptx: Microsoft PowerPoint presentation
- .ppt: Legacy PowerPoint format, converted to
.pptxfor editing - .odp: OpenDocument presentation
PDF formats
OfficeDocs also supports:
- .pdf: PDF document for viewing, annotation, and form filling
Format conversion
When downloading files, OfficeDocs can convert them into other supported formats.
Examples:
- Documents can be downloaded as .docx, .pdf, .odt, .rtf, or .txt
-
Spreadsheets can be downloaded as .xlsx, .pdf, .ods, or .csv
-
Presentations can be downloaded as .pptx, .pdf, or .odp
Legacy format support
Legacy Microsoft Office formats such as .doc , .xls , and .ppt are automatically converted to modern formats for editing. This allows changes to be saved in a more current and compatible file type.
Unsupported formats
The following formats are not currently supported:
- Apple iWork formats such as .pages , .numbers , and .keynote
- Native Google Docs formats
- Specialized proprietary formats such as Microsoft Visio or Publisher files
Document Editing
Editing Word Documents
OfficeDocs includes a full-featured word processor for creating and editing text documents. This guide provides an overview of the main editing tools and document features available in the editor.
Document editor overview
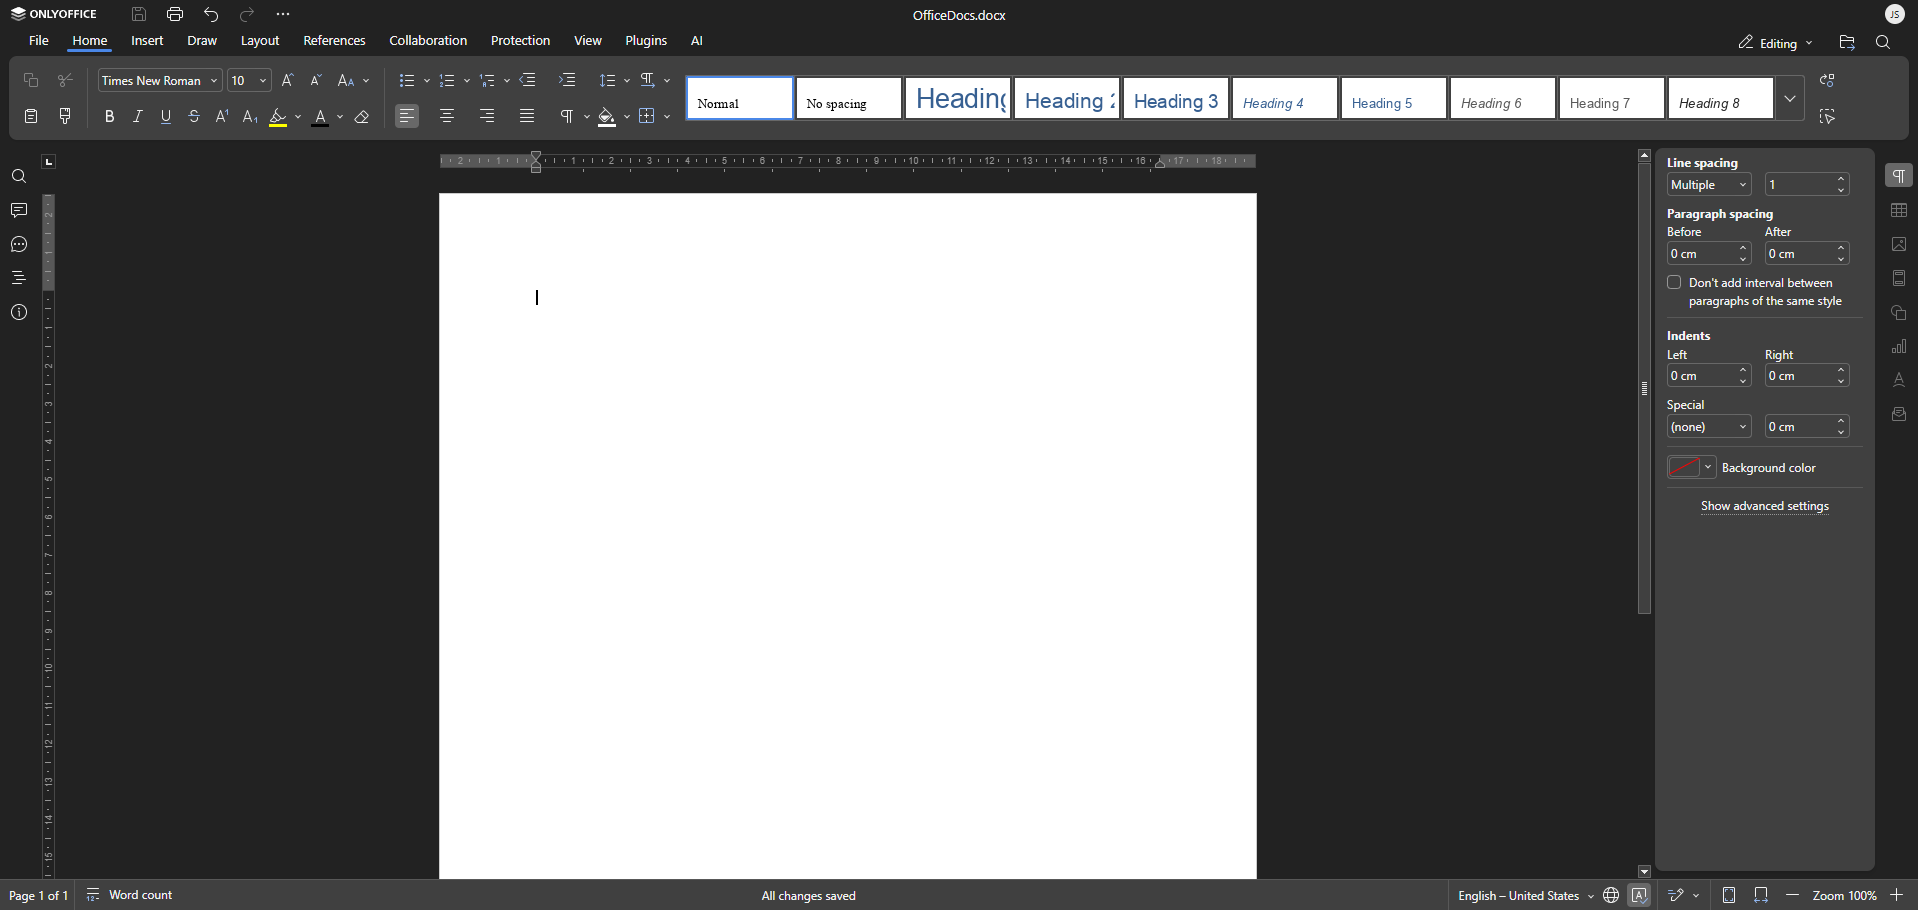
When you open a Word document, the editor includes:
- Toolbar: Formatting and editing tools at the top of the page
- Document area: The main workspace where you write and edit content
- Status bar: Page count, word count, and zoom controls
- Sidebar panels: Additional tools for navigation, styles, and comments
Basic editing
You can perform common editing actions directly in the document.
Typing and editing text
- Click anywhere in the document to place the cursor.
- Type to insert text at the cursor position.
- Use Backspace to remove characters before the cursor.
- Use Delete to remove characters after the cursor.
Selecting text
- Click and drag to select text.
- Double-click to select a word.
- Triple-click to select a paragraph.
- Press Ctrl+A to select all content.
Formatting Options
The toolbar gives you quick access to common formatting options, including:
- Font family and size
- Bold, italic, underline, and strikethrough
- Text color and highlighting
- Text alignment
- Line spacing
- Bulleted and numbered lists
- Indentation
Working with document structure
Use document structure tools to organize content more clearly.
Headings
- Apply Heading 1, Heading 2, or other heading styles from the style list.
- Use headings to create a clear document outline.
- Headings can also be used to generate a table of contents.
Sections
- Insert section breaks from the Layout menu.
- Use sections to apply different headers, footers, or margins in different parts of the document.
Inserting content
- Images
- Tables
- Charts
- Shapes
- Hyperlinks
- Page breaks
- Headers and footers
- Page numbers
- A table of contents
- Etc.
Page setup
Page layout options are available from the Layout menu, including:
- Margins
- Orientation
- Paper size
- Columns
Review tools
OfficeDocs includes review features to help you check and collaborate on documents.
- Spell Check: Identify and correct spelling errors
- Comments: Add notes without editing the main content
- Track Changes: Record edits for review
Saving your work
Changes are saved automatically as you work. You can also press Ctrl+S to save manually. Each save may create a version history entry.
Editing Spreadsheets
OfficeDocs includes a spreadsheet editor for working with Excel files and other spreadsheet formats. This guide introduces the main tools and features available when editing spreadsheets.
Spreadsheet editor overview
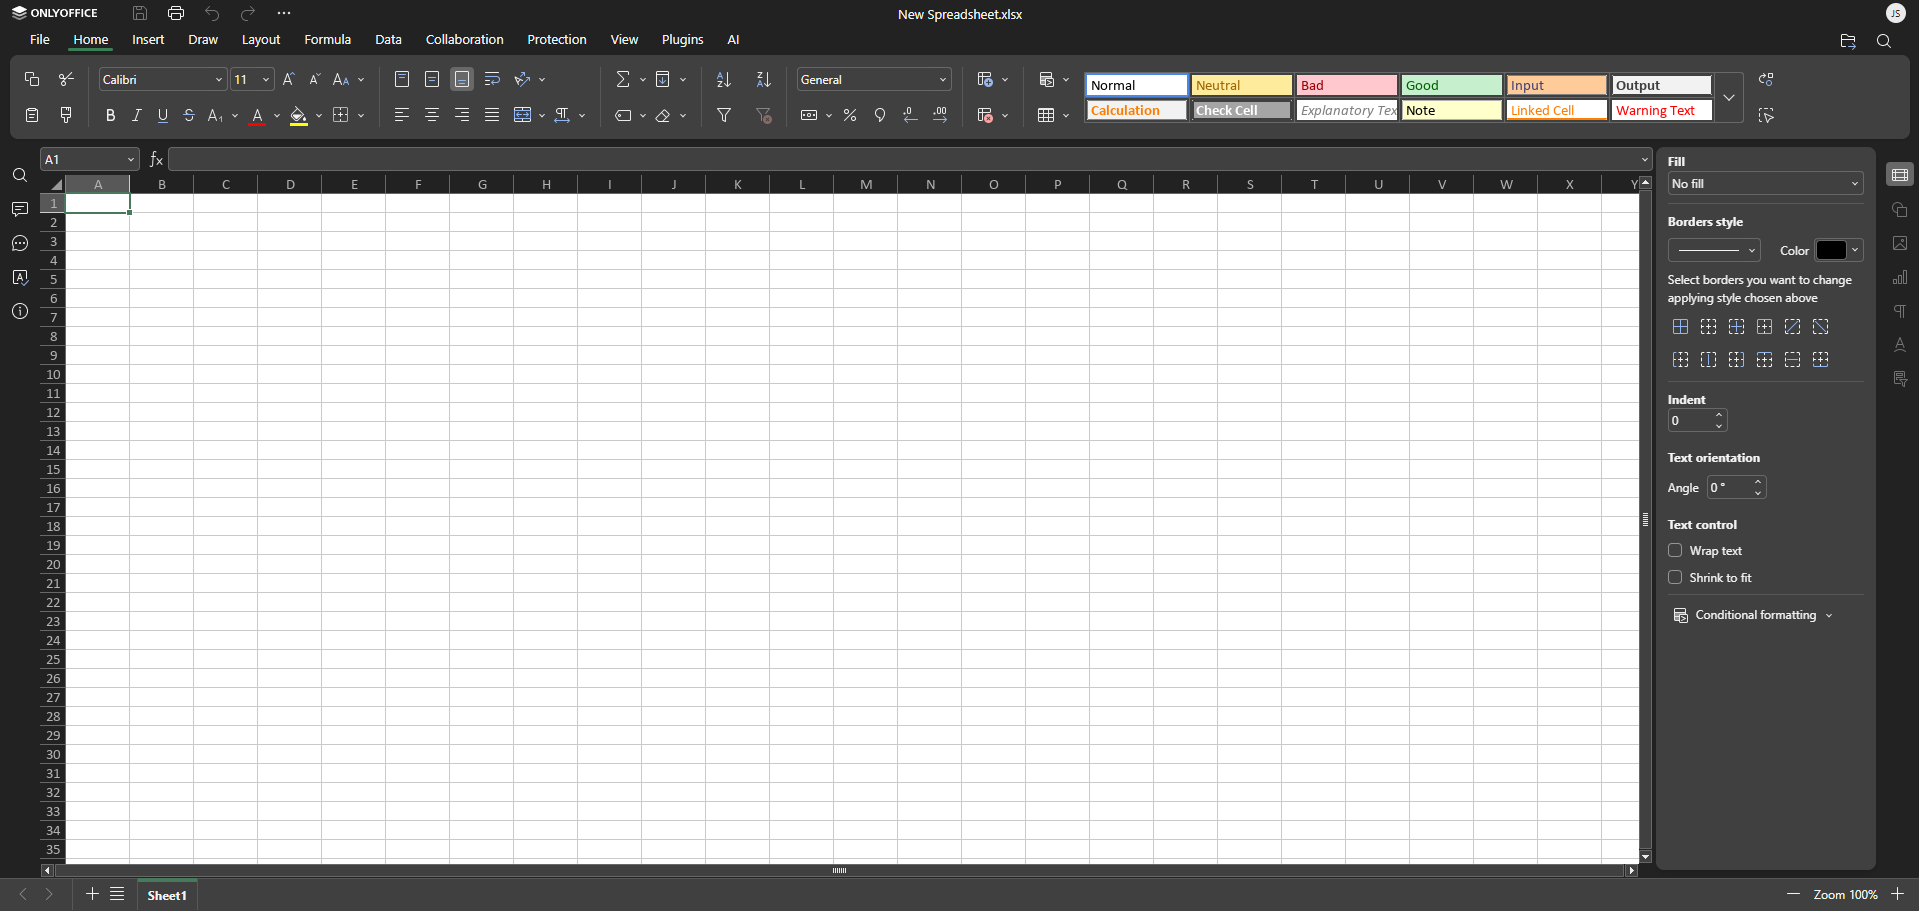
When you open a spreadsheet, the editor includes:
- Toolbar: Formatting, formulas, and data tools
- Formula bar: Displays and edits the contents of the selected cell
- Column and row headers: Help identify cell locations
- Cell grid: The main area for entering and editing data
- Sheet tabs: Switch between worksheets
- Status bar: Displays quick calculations and zoom controls
Working with cells
You can perform common actions directly in the spreadsheet.
Selecting cells
- Click a cell to select it.
- Click and drag to select a range.
- Click a column header to select an entire column.
- Click a row header to select an entire row.
- Press Ctrl+A to select all cells.
Entering and editing data
- Select a cell and start typing to enter data.
- Press Enter to confirm and move down.
- Press Tab to confirm and move right.
- Press Esc to cancel editing.
- Double-click a cell or press F2 to edit existing content.
- Use the Formula bar to edit longer values or formulas.
Working with formulas
Formulas in OfficeDocs begin with the = sign.
Examples:
-
=A1+B1 to add two cells
-
=SUM(A1:A10) to total a range
-
=AVERAGE(B1:B20) to calculate an average
-
=IF(A1>10,"Yes","No") to apply conditional logic
For more advanced usage, refer to the Working with Formulas guide.
Formatting cells
OfficeDocs provides a range of formatting options, including:
- Number formats such as currency, percentage, and dates
- Font size, font color, and cell fill color
- Borders and alignment
- Text wrapping
- Merging cells
Managing rows, columns, and sheets
You can adjust the structure of a spreadsheet as needed.
- Insert or delete rows and columns
- Resize rows and columns by dragging borders
- Hide or unhide rows and columns
- Rename, add, or remove sheets
- Reference cells from other sheets in formulas: =Sheet2!A1
Data tools
OfficeDocs includes tools to help organize and analyze spreadsheet data.
- Sort: Reorder data by column values
- Filter: Show only rows that match selected criteria
- Pivot Tables: Summarize larger datasets
- Charts: Present data visually
Saving your work
Changes are saved automatically as you work. You can also press Ctrl+S to save manually. Spreadsheets can be downloaded in supported formats such as .xlsx, .ods, .csv, or .pdf.
Editing Presentations
OfficeDocs includes a presentation editor for working with PowerPoint files and other presentation formats. This guide helps you understand the editor layout, manage slides, update content, apply design changes, and present your slideshow with confidence.
Presentation editor overview
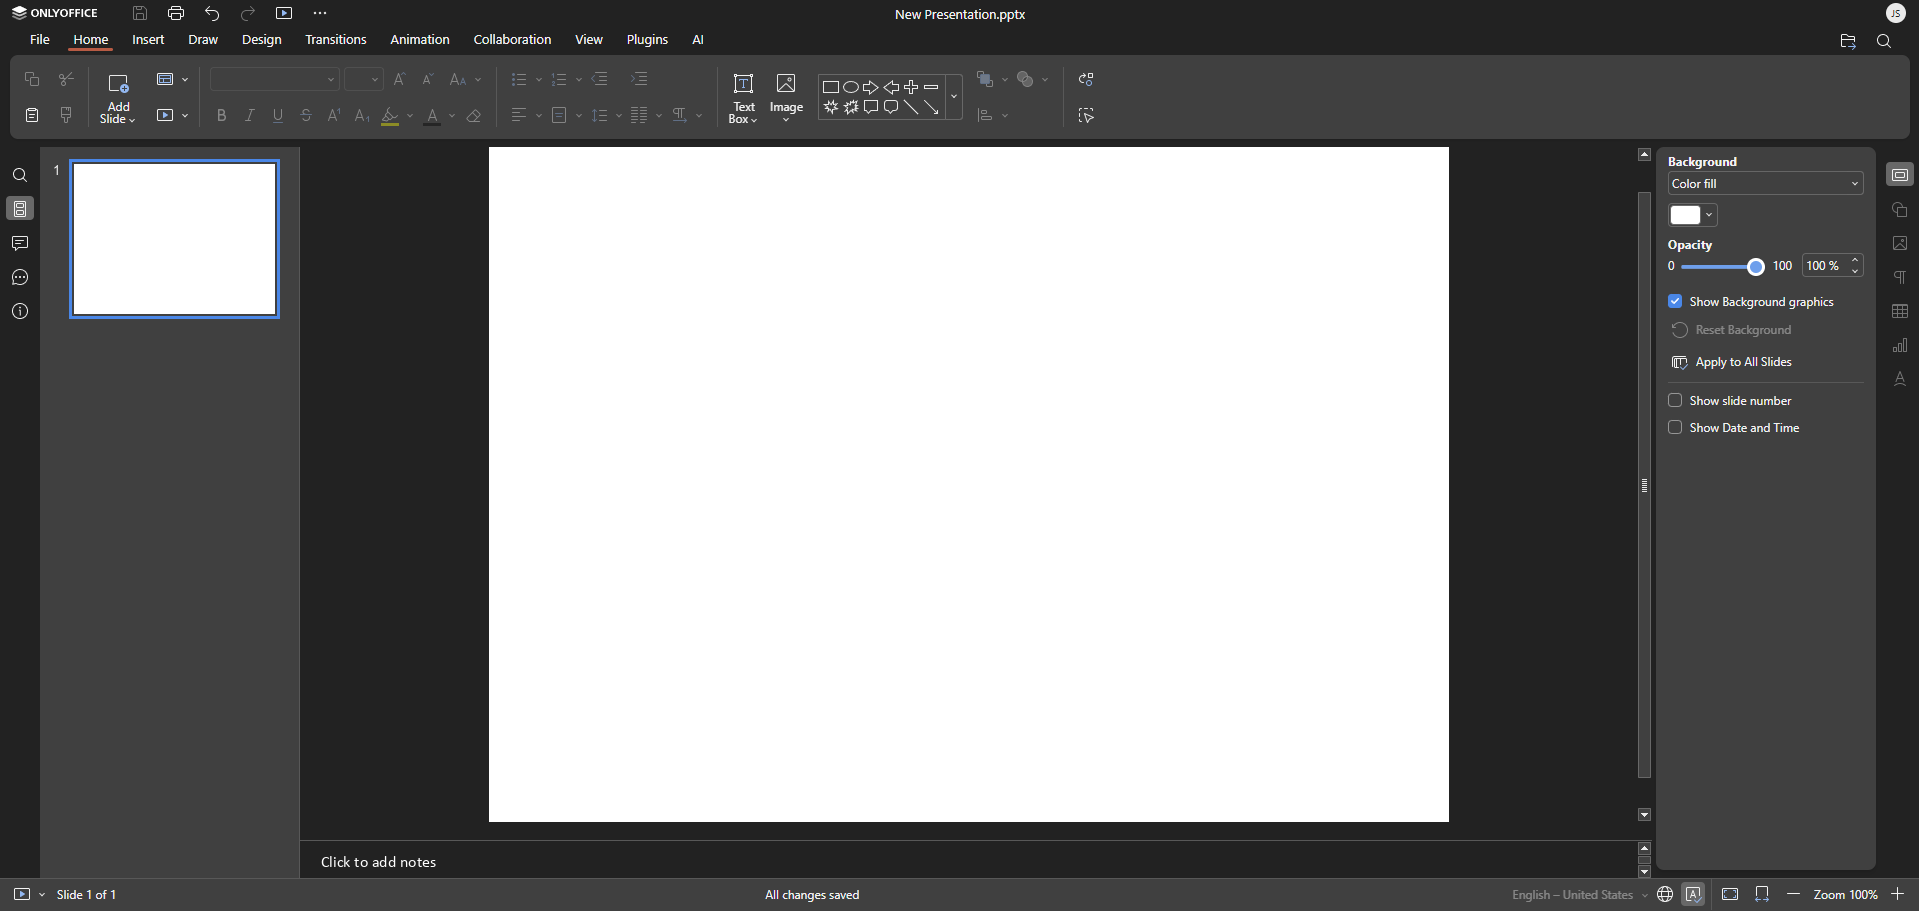
When you open a presentation, the editor gives you access to the main tools you need to build and organize your slides efficiently.
- Toolbar: Access formatting, design, and editing tools
- Slide panel: View and select slide thumbnails
- Slide canvas: Edit the selected slide in the main workspace
- Notes panel: Add speaker notes below the slide
- Status bar: View slide details and display options
Working with slides
Slides can be added, moved, and removed directly from the slide panel, making it easy to organize your presentation as you work.
Adding slides
Use any of the following methods to insert a new slide:
- Click New Slide in the toolbar
- Right-click in the slide panel and select New Slide
- Press Ctrl+M on your keyboard
- Choose a layout that fits your content
Move through your presentation quickly using the slide panel or keyboard shortcuts.
- Click any slide thumbnail to open it
- Use Page Up and Page Down to move between slides
- Scroll through the slide panel to browse the full presentation
Reordering slides
You can change the sequence of your slides at any time.
- Drag and drop slide thumbnails into a new position
- Cut and paste slides to move them elsewhere in the presentation
Deleting slides
If a slide is no longer needed, you can remove it in just a few clicks.
- Select the slide and press Delete
- Right-click the slide and select Delete Slide
Editing slide content
OfficeDocs makes it easy to update text, insert content, and adjust formatting directly on the slide.
Working with text boxes
Text can be edited directly inside placeholders or added manually with a new text box.
- Click inside a text placeholder to edit existing text
- Use Insert > Text Box to add a new text box
- Drag text boxes to reposition them
- Use the handles to resize them
Formatting text
Use the toolbar to make your content clearer and more visually consistent.
- Change the font, size, color, and alignment
- Apply bold or italic formatting where needed
- Add bullet points or numbered lists to organize information
Adding content
- Images and photos
- Shapes and icons
- Tables
- Charts
- Videos and audio
- Hyperlinks
Slide design
Design tools help you keep your presentation clean, professional, and visually consistent.
Changing layouts
Layouts define how content is arranged on a slide.
- Right-click a slide and select Layout
- Choose from title slides, content slides, or blank slides
Themes and backgrounds
Themes and backgrounds can quickly improve the appearance of your presentation.
- Use the Design tab to apply a theme
- Right-click a slide and select Format Background
- Apply the change to one slide or the entire presentation
Animations and transitions
Animations and transitions add movement and help guide the viewer’s attention.
- Animations: Control how text or objects appear on a slide
- Transitions: Control how one slide changes to the next
- Preview effects before presenting to make sure they fit your content
- See Animations and Transitions guides
Presenting
When your presentation is ready, you can launch the slideshow from the beginning or from the current slide.
- Press F5 to start from the beginning
- Press Shift+F5 to start from the current slide
- See Presenting Your Slideshow
Speaker notes
Speaker notes are useful for adding reminders or talking points without displaying them on the slide itself.
- Add notes in the notes panel below each slide
- View notes in Presenter View, depending on your presentation setup
- See Speaker Notes
Working with PDF Documents
OfficeDocs lets you open, review, annotate, and fill out PDF documents directly in your browser. This guide introduces the main tools available in the PDF viewer and explains how to navigate files, add annotations, complete forms, and save your work.
Opening PDF files
To open a PDF document in OfficeDocs:
PDF viewer interface
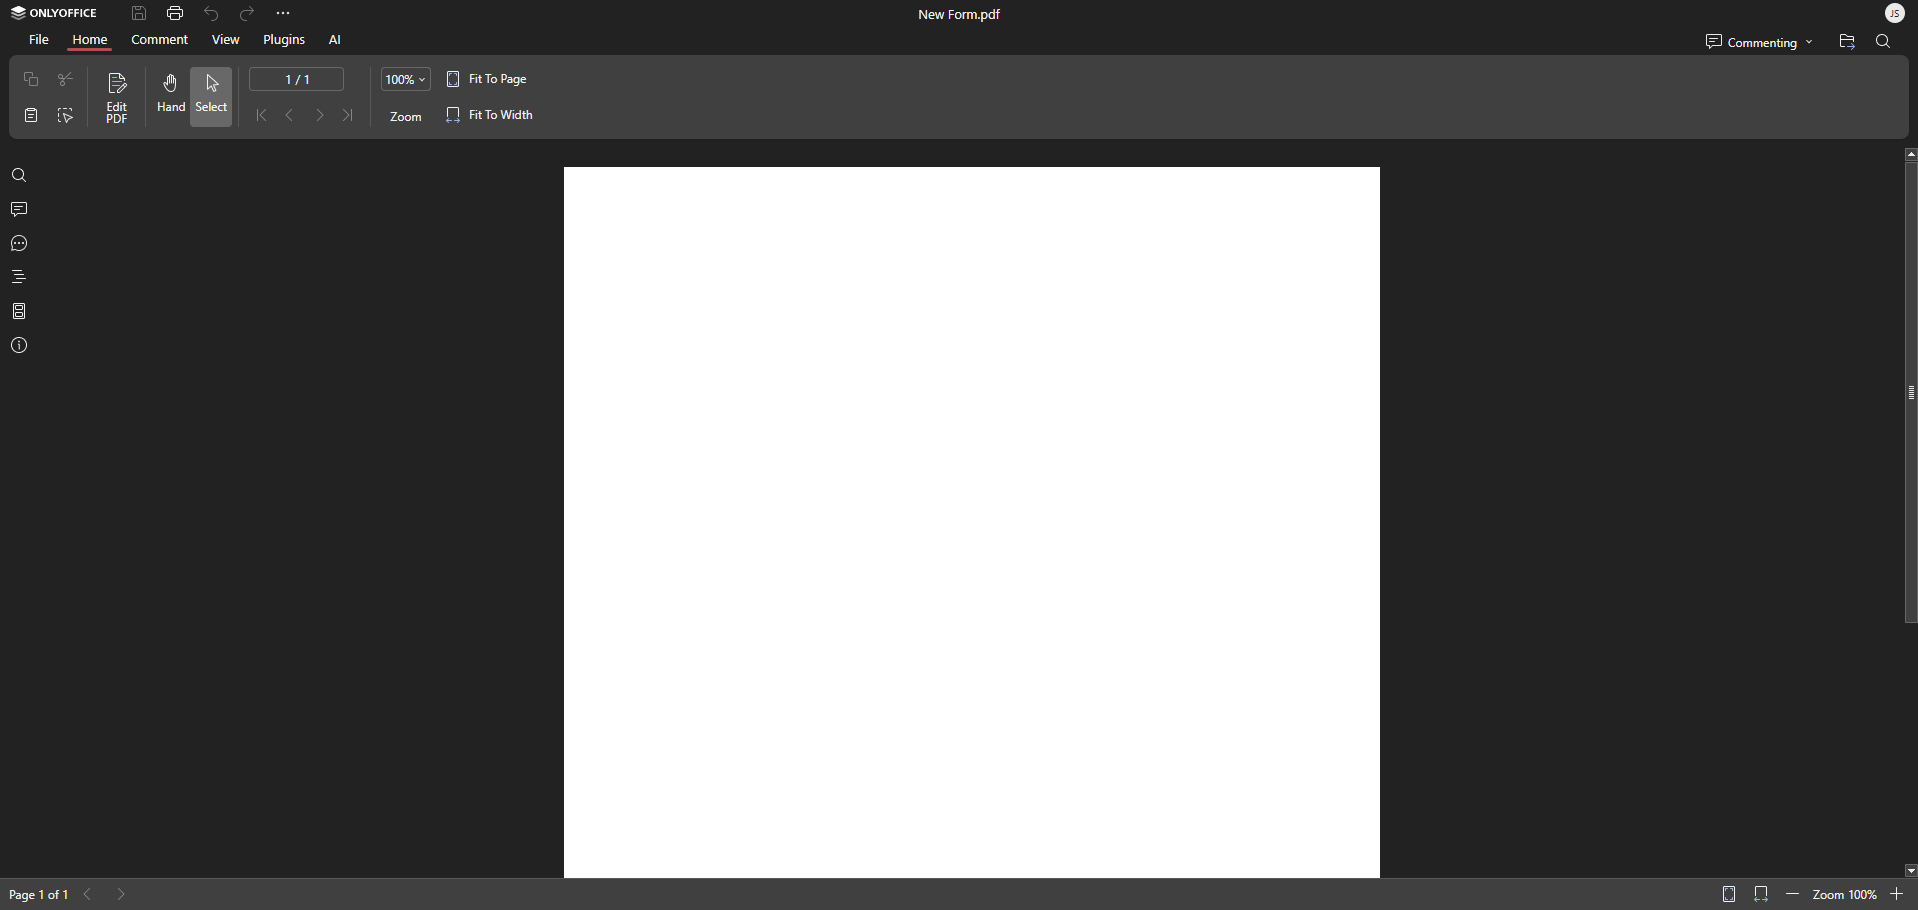
When you open a PDF file, the viewer includes several key areas:
- Toolbar: Provides navigation, zoom, and annotation tools
- Page thumbnails: Displays an overview of all pages in the sidebar
- Document view: Shows the PDF in the main viewing area
- Page controls: Lets you move between pages and adjust zoom settings
Navigating PDFs
OfficeDocs makes it easy to move through long PDF files and adjust how pages are displayed.
- Scroll to move through the document
- Click page thumbnails in the sidebar to jump to a specific page
- Enter a page number in the page field
- Use Page Up and Page Down to move between pages
Zoom
Use zoom controls to make the document easier to read.
- Use the zoom controls in the toolbar
- Press Ctrl++ to zoom in
- Press Ctrl+- to zoom out
- Use Fit to page or Fit to width for a better reading view
View options
Choose the display mode that best fits your document.
- Single Page: View one page at a time
- Continuous: Scroll through all pages in one view
- Two-Page: Display two pages side by side
- Full Screen: Maximize the viewing area
Annotations
You can annotate PDF files directly in the viewer to highlight information, leave notes, or draw attention to specific areas.
Highlighting
- Select the highlight tool
- Click and drag over the text you want to highlight
- Choose the highlight color
Comments
- Select the comment or note tool
- Click where you want to place the note
- Type your comment
Drawing
Use drawing tools to mark up the document visually.
- Freehand drawing tools
- Shapes such as rectangles, circles, and lines
- Arrows for pointing to important content
Filling PDF forms
If the PDF includes fillable fields, you can complete the form directly in OfficeDocs.
- Click a form field.
- Enter text or select an option.
- Press Tab to move between fields.
- Save the document to preserve your entries.
Form field types
OfficeDocs supports several common form field types:
- Text fields: Enter typed responses
- Checkboxes: Click to check or uncheck
- Radio buttons: Select one option from a group
- Dropdown lists: Choose from available options
- Signature fields: Add a signature when supported
Searching PDFs
Use search to quickly find words or phrases in the document.
- Press Ctrl+F.
- Enter your search term.
- Move between matches in the document.
Downloading and printing
Once you finish reviewing or updating the file, you can save or print it.
- Download the PDF to your computer
- Print directly from the viewer
- Saved annotations are included in downloaded files when supported
Limitations
Some PDF features may depend on the file type and how the document was created.
- PDF text content cannot always be edited directly
- To make major text changes, convert the PDF to an editable format first
- Some complex PDF files may have limited annotation or form support
Formatting Text
OfficeDocs includes a full set of text formatting tools to help you create clear, professional-looking documents. This guide introduces the main formatting options available for text, paragraphs, lists, styles, and reusable formatting.
Basic formatting
You can quickly apply common text formatting using the toolbar or keyboard shortcuts.
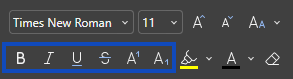
- Bold: Makes selected text stand out
- Italic: Adds emphasis to selected text
- Underline: Draws attention to important text
- Strikethrough: Marks text as removed or no longer needed
- Subscript: Places smaller text below the line
- Superscript: Places smaller text above the line
Common shortcuts include:
- Ctrl+B for bold
- Ctrl+I for italic
- Ctrl+U for underline
- Ctrl+. for subscript
- Ctrl+, for superscript
Font settings
Font settings help you control how your text looks and feels throughout the document.
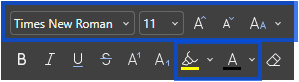
- Font family: Choose from the available fonts in the dropdown menu
- Font size: Select a preset size or enter a custom value
- Font color: Change the color of the selected text
- Highlight color: Add background highlighting to make text easier to notice
Paragraph formatting
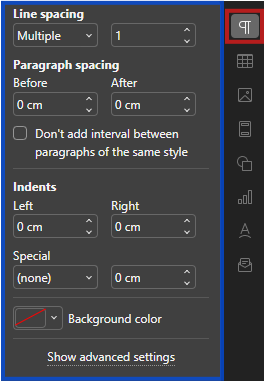
Paragraph tools help you improve readability and organize content more clearly.
- Alignment: Align text to the left, center, right, or justify it
- Line spacing: Use single, 1.5, double, or custom spacing
- Indentation: Create first-line, hanging, or block indents
- Spacing: Add space before or after paragraphs
Lists
Lists are useful for breaking information into clear and easy-to-follow points.
To create a bulleted or numbered list:
- Place the cursor where you want the list to begin.
- Click the bulleted list or numbered list button.
- Type the first item and press Enter to add the next one.
- Press Enter twice, or click the list button again, to end the list.
To change the list style, use the dropdown arrow next to the list buttons.
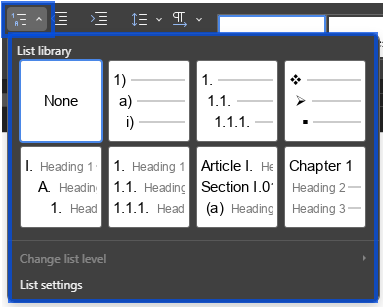
Styles
Styles help keep formatting consistent across your document and save time when working with longer content.
Available styles may include:
- Heading 1–6: Use for section titles and subheadings
- Normal: Standard body text
- Quote: Use for quoted text or callout sections
- Code: Use for monospace or code-style formatting
To apply a style, select the text and choose the desired option from the Styles dropdown.

Clear formatting
If you want to remove formatting and return text to a simpler style, you can clear formatting from the selected text.
- Select the text
- Click the Clear Style icon

This is useful when pasted text includes unwanted formatting.
Format Painter
Format Painter lets you copy formatting from one part of the document and apply it somewhere else.
To use Format Painter:
- Select text that already has the formatting you want to reuse.
- Click the Copy Style button.

- Select the text where you want to apply the same formatting.
Double-click Copy Style if you want to apply the same formatting to multiple selections.
Inserting Images and Media
OfficeDocs lets you add images and other visual elements to your documents to make content clearer and more engaging. This guide covers the main options for inserting images, adjusting their size and position, and working with related visual tools in the document editor.
Inserting images
You can insert images directly into your document from a local file or from a URL. The document editor supports common image formats such as BMP, GIF, JPEG, JPG, and PNG.
From your computer
- Place the cursor where you want the image to appear.
- Open the Insert tab.
- Click the Image button.
- Select Image from File.
- Choose the image from your computer and click Open.
From URL
- Place the cursor where you want the image to appear.
- Open the Insert tab.
- Click the Image button.
- Select Image from URL.
- Enter the image address and confirm.
Supported image formats
The document editor supports these image formats:
- JPEG / JPG
- PNG
- GIF
- BMP
Resizing images
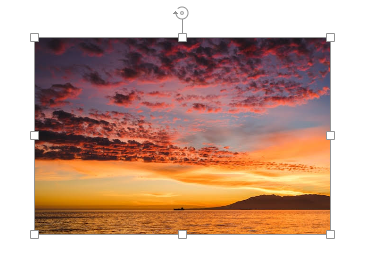
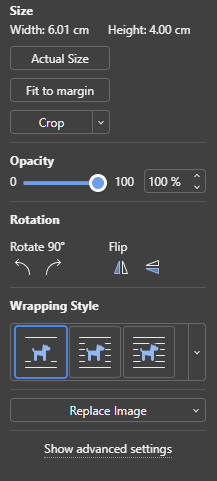
Once an image is inserted, you can resize it directly on the page or fine-tune its dimensions from the image settings.
- Click the image to select it
- Drag the resize handles to change its size
- Use image settings to adjust width and height more precisely
- Keep Constant proportions enabled if you want to preserve the original aspect ratio
Positioning images
You can place images inline with text or move them more freely on the page, depending on the layout you need.
Text wrapping
Text wrapping controls how text flows around an image.
- Inline: The image behaves like part of the text
- Square: Text wraps around the rectangular image boundary
- Tight: Text wraps around the visible edges of the image
- Top and bottom: Text appears only above and below the image
- In front: The image appears over the text
- Behind: The image appears behind the text
Alignment and position
When the image is not inline, you can place it more precisely on the page.
- Align the image to the left, center, or right
- Set an exact horizontal or vertical position
- Choose whether the image moves with the text
- Allow or prevent overlap with other objects
Image editing
OfficeDocs includes built-in tools for making basic image adjustments after insertion.
Crop
Use the crop tool to keep only the part of the image you need.
- Select the image.
- Click the Crop button.
- Drag the crop handles to define the visible area.
- Click outside the image, press Esc, or click Crop again to apply the change.
Rotate and flip
You can quickly change the orientation of an image.
- Rotate the image by 90° clockwise or counterclockwise
- Flip the image horizontally
- Flip the image vertically
- Use advanced image settings if you need a specific rotation angle
Other media
In addition to images, the document editor also supports other visual elements that can help structure and enhance your content.
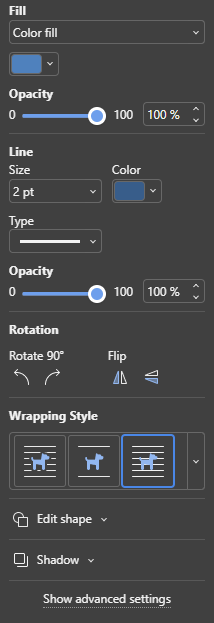
Shapes
You can insert shapes directly from the Insert tab.
- Open the Insert tab.
- Click Shape.
- Choose a shape from the gallery.
- Click in the document to insert it.
- Resize, move, or format the shape as needed.
Icons
Vector icons can be inserted in ONLYOFFICE, but they depend on the Icons plugin. Since ONLYOFFICE Doc 8.2, plugins are not installed by default, so this feature may not be available in every OfficeDocs instance.
If the plugin is available:
- Open the Plugins tab.
- Select Icons.
- Search or browse the icon library.
- Insert the icon you want to use.
Alt text for accessibility
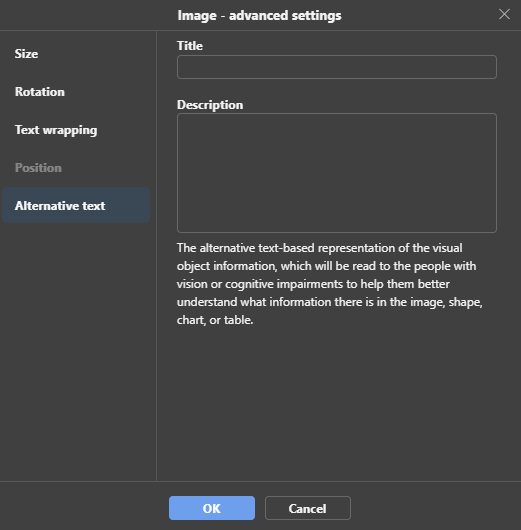
You can add alternative text to images to improve accessibility for users who rely on screen readers.
- Select the image.
- Open the image advanced settings.
- Enter a title and description in the Alternative Text section.
- Save the changes.
Working with Tables
Tables help organize information into rows and columns, making content easier to read and compare. This guide explains how to insert a table, edit its structure, format its appearance, and use common table tools in the document editor.
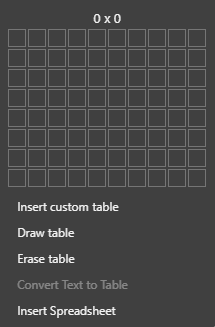
Inserting a table
To insert a table into your document:
- Place the cursor where you want the table to appear.
- Open the Insert tab.
- Click Table.
- Select the number of rows and columns from the grid.
- Insert the table into the document.
Adding rows and columns
After inserting a table, you can add more rows or columns as needed. To access these options, right-click inside the table to open the context menu. These same actions are also available from the Rows & Columns section in the right sidebar.
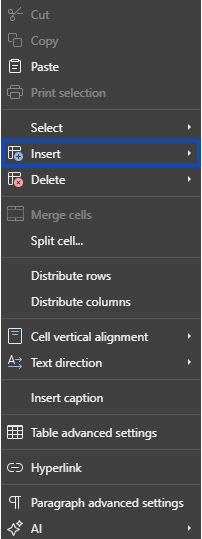
- Right-click a cell and insert a row above the current row
- Right-click a cell and insert a row below the current row
- Right-click a cell and insert a column to the left
- Right-click a cell and insert a column to the right
- Use the table options to add multiple rows or columns when needed
Deleting rows and columns
To remove part of a table, right-click inside the table and choose the option you need from the context menu. You can also access these actions from the Rows & Columns tools.
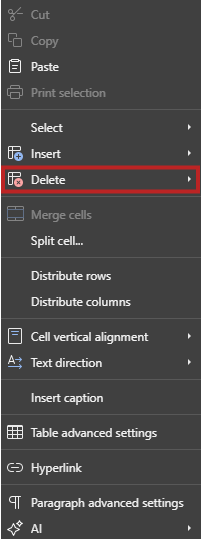
- Delete a selected row
- Delete a selected column
- Delete selected cells
- Delete the entire table
Merging and splitting cells
OfficeDocs includes tools for combining cells or splitting them into smaller sections. These options are available when you select the relevant cell or cells, then open the right-click menu or use the table tools.
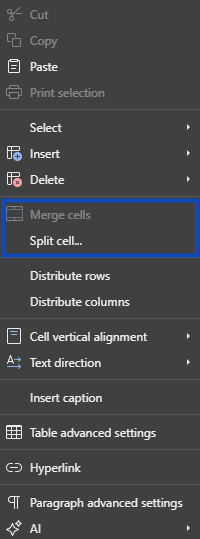
Merge cells
- Select two or more adjacent cells.
- Right-click the selected cells.
- Click Merge Cells to combine them into one cell.
Split cells
- Click inside the cell you want to split.
- Right-click the cell.
- Select Slipt Cell.
- Enter the number of rows and columns you want to create.
- Confirm to apply the change.
Table formatting
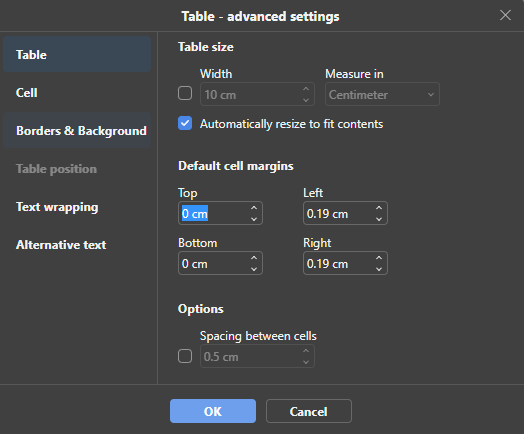
OfficeDocs includes advanced table formatting options to help you control the size, spacing, layout, and appearance of your tables. You can adjust settings for the full table, individual cells, borders and background, text wrapping, and accessibility information. These options are available from the table’s advanced settings.
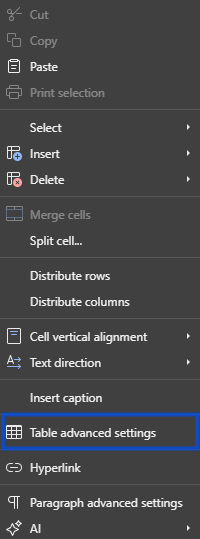
Table properties
Use the Table settings to control the overall size and spacing of the table.
- Set a fixed Width for the table
- Choose the measurement unit used for sizing
- Enable Automatically resize to fit contents so the table adjusts to the text inside it
- Set default cell margins for the Top, Bottom, Left, and Right
- Adjust Spacing between cells if you want space between table cells
These settings are useful when you want a table to fit neatly into the page layout or follow a more consistent structure.
Cell properties
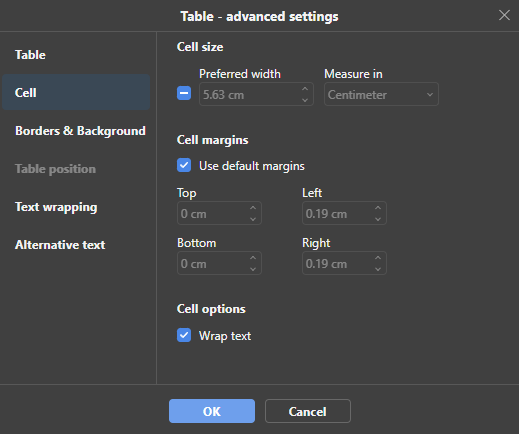
Use the Cell settings to control the size and internal spacing of individual cells.
- Set a Preferred width for the selected cell
- Choose the measurement unit for the cell width
- Use default margins or define custom margins for the cell
- Adjust the Top, Bottom, Left, and Right cell margins
- Enable Wrap text to keep long text inside the cell instead of overflowing
These options help make table content easier to read, especially when working with narrow columns or longer text.
Borders and background
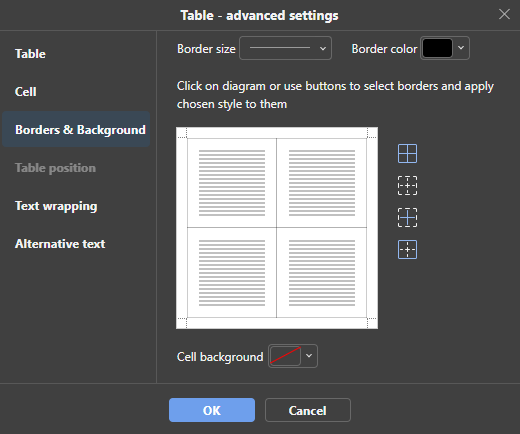
Use Borders & Background to change the visual style of the table or selected cells.
- Choose a Border size
- Choose a Border color
- Select which borders to apply the style to
- Set a Cell background color
This section is useful for emphasizing headers, separating data clearly, or making the table match the rest of the document design. The current document editor supports border styling and background color changes in table settings.
Text wrapping
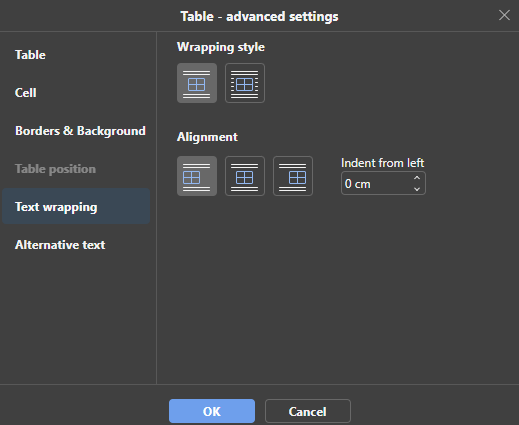
Use Text wrapping to control how the table is positioned in relation to the surrounding text.
- Choose the wrapping style for the table
- Set the table alignment
- Adjust the Indent from left value
These settings help you control whether the table stays inline or is positioned more freely on the page. The current table settings also include table positioning and wrapping behavior in advanced settings.
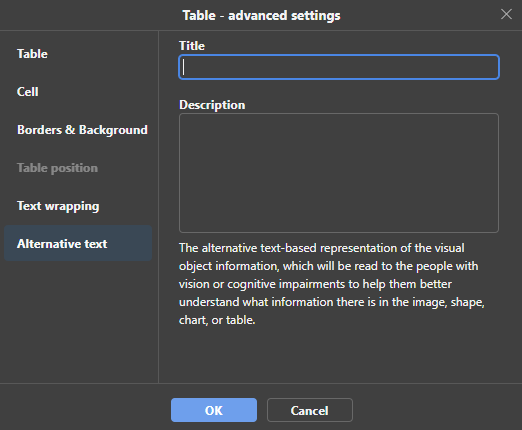
Alternative text
Use Alternative text to make the table more accessible.
- Add a Title for the table
- Add a Description that explains the table content
Alternative text helps people using assistive technologies understand the purpose or content of the table. ONLYOFFICE currently supports alternative text for visual objects, including tables.
Resizing tables
To resize a table manually:
- Drag column borders to change column width
- Drag row borders to change row height
- Use the table handle to move or resize the full table
- Distribute rows or columns evenly when needed
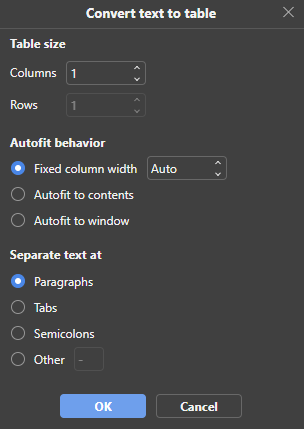
Converting text to a table
If you already have text in your document, you can convert it into a table.
- Select the text you want to convert.
- Open the table tools.
- Choose Convert Text to Table.
- Set how the text should be separated, such as by paragraphs, tabs, semicolons, or another delimiter.
- Confirm to create the table.
Working with Charts
Charts help turn data into visuals that are easier to read and compare. OfficeDocs supports charts in documents, spreadsheets, and presentations, with tools for inserting charts, editing data, changing chart types, and formatting chart elements.
Inserting a chart
You can add charts in different ways depending on the editor you are using. In documents and presentations, you usually insert a chart first and then edit its sample data. In spreadsheets, charts are typically created from selected cell data.
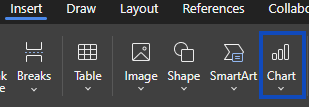
In documents and presentations
- Place the cursor where you want the chart to appear.
- Open the Insert tab.
- Click Chart.
- Choose the chart type you want to use.
- A sample chart is inserted.
- Edit the sample data to match your own information.
In spreadsheets
- Select the data range you want to use.
- Open the Insert tab.
- Click Chart.
- Choose the chart type you want to create.
- The chart is generated from the selected data range.
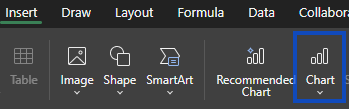
Chart types
OfficeDocs supports several common chart categories. The main chart groups currently documented include Column, Line, Pie, Bar, Area, Stock, XY (Scatter), Radar, and Combo charts. Some chart styles and subtypes depend on the editor and the selected chart.
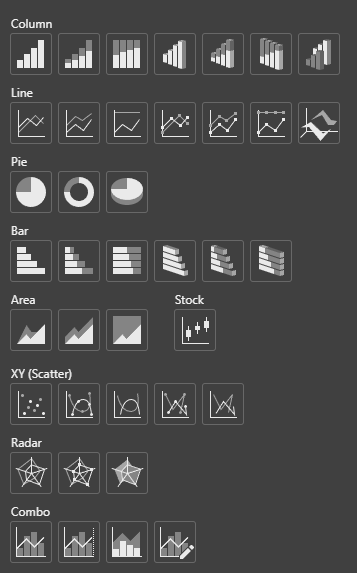
Column and bar charts
Use these chart types to compare values across categories.
- Clustered Column shows separate values side by side
- Stacked Column shows how values contribute to a total
- 100% Stacked Column compares percentage distribution
- Bar charts display the same type of comparison horizontally
Line charts
Use line charts to show change over time or across ordered categories.
- Line charts show overall trends
- Line with markers makes each data point easier to identify
- Line and scatter charts may also support lines and markers options depending on the editor and chart settings
Pie and doughnut charts
Use these charts to show how each part contributes to a whole.
- Pie charts show proportions
- Doughnut charts display similar data in a ring layout
- Pie charts do not use axes or gridlines
Area, scatter, and other charts
Other chart types are useful for more specific data patterns.
- Area charts emphasize volume or magnitude over time
- Scatter (XY) charts show relationships between values
- Stock, Radar, and Combo charts are also supported in current documentation
Editing chart data
Once a chart is inserted, you can update the data used to build it. The editing method depends on the editor.
In documents and presentations
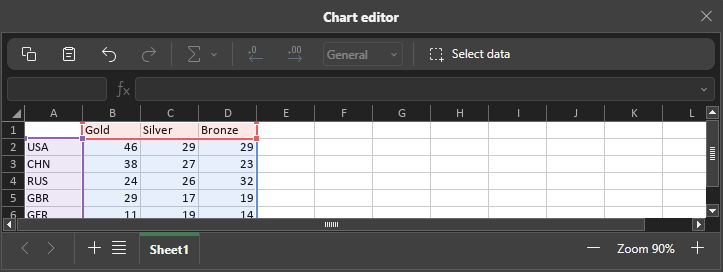
- Double-click the chart or use Edit Data.
- Update the values in the chart data editor.
- Add or adjust rows and columns as needed.
- Close the editor when your changes are complete.
In spreadsheets
- Click the chart to select it.
- Open the chart data options, such as Select Data on the sidepanel.
-

- Adjust the source data range if needed.
- The chart updates based on the new selection.
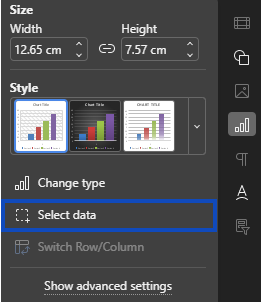
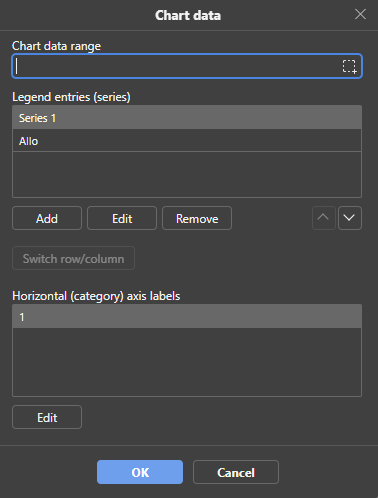
Chart elements
You can show, hide, or format key chart elements to make the chart easier to understand. There is support for elements such as Chart title, Legend, and Data labels, while additional options like axis titles and gridlines depend on the editor and chart type.
- Chart title adds a main heading
- Legend identifies data series
- Data labels show values directly on the chart
- Axis titles help describe chart axes when applicable
- Gridlines can make values easier to read
- Some chart types, such as pie charts, do not use axes or gridlines
Formatting charts
You can customize the overall appearance of a chart using chart design and formatting tools. There is options for changing chart type, applying preset chart designs, editing colors, and formatting individual chart elements on the sidepanel.
Chart styles
- Select the chart.
- Open the Chart Design tab, if available.
- Choose a predefined design or style for the chart.
Color schemes
- Select the chart.
- Open the available color or chart design options.
- Choose a color palette that fits your document or presentation.
Individual elements
You can also format specific parts of a chart, such as the title, legend, plot area, data series, axes, or labels.
- Click the chart element you want to change
- Open its formatting options
- Adjust properties such as fill, line, text, or label formatting as available
Resizing and moving charts
Charts can be resized and moved after insertion. In presentations, charts can be dragged and resized manually, or positioned more precisely through the settings panel or advanced settings. Similar resizing and positioning controls are also documented for charts in other editors.
- Click the chart to select it
- Drag the corner or side handles to resize it
- Drag the chart to move it
- Use advanced settings or the sidebar when exact size or position is needed
Chart tips
These simple practices help make charts clearer for clients and end users.
- Choose the chart type that best matches the data
- Keep the chart focused on the most important information
- Use clear titles and labels
- Apply colors consistently
- Avoid unnecessary visual effects if they make the chart harder to read
Find and Replace
Find and Replace helps you quickly locate text in a document and, if needed, replace it with new content. This is useful when you want to make the same change throughout the document or review repeated terms one by one.
Finding text
Use the search tools to locate words, phrases, or repeated content in your document. You can open a small search panel for quick results or the full panel for more options.
Basic find
- Press Ctrl+F to open the search panel.
- Type the word or phrase you want to find.
- Press Enter or use the navigation arrows.
- Move through the matches one by one until you find the result you need.

Find options
Use search options to make your results more precise.
- Match Case finds only text with the same uppercase and lowercase letters
- Whole Words Only finds complete words and ignores partial matches
- Highlight All highlights every match in the document when available in the search panel options
Replacing text
If you want to update text after finding it, you can use the replace tools to change one match at a time or all matches at once.
Basic replace
- Press Ctrl+H or the search icon to open the full Find and Replace panel.
- Enter the text you want to find in the Find field.
- Enter the new text in the Replace with field.
- Choose how you want to apply the change.
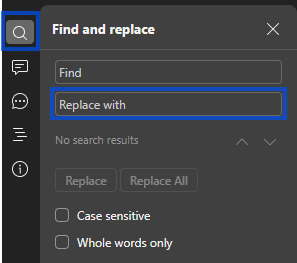
Replace options
You can choose the replacement method that fits your task.
- Replace changes the current match and moves to the next one
- Replace All changes all matches in the document at once
- Use the navigation arrows to skip a match and move to the next result without replacing it
Advanced find
You can refine your search further when you need to find formatting or special characters instead of regular text.
Using special characters
You can search for certain nonprinting or special characters when cleaning up document formatting.
Common examples include:
- Paragraph marks (Code: ^p)
- Tab characters (Code: ^t)
- Line break (Code: ^l)
- Page break (Code: ^m)
- Any character (Code: ^?)
- Any digit (Code: ^#)
- Any letter (Code: ^$)
Navigation shortcuts
These shortcuts help you work faster when searching through a document.
- Ctrl+F opens the search panel
- Ctrl+H opens the Find and Replace panel
- Enter moves to the next result from the search field
- Esc closes the search panel
Tips
These habits can help avoid unwanted changes when using replace tools.
- Review matches carefully before using Replace All
- Use Match Case when letter case matters
- Use Whole Words Only to avoid partial matches
- Check the document after bulk changes to make sure the results are correct
Spell Check
OfficeDocs helps you catch spelling mistakes while you work so your documents stay clear and professional. This guide explains how to review flagged words, manage spell check settings, and work with language options.
Automatic spell check
Spell check can run as you type. When a word is flagged, it appears with a red underline so you can review it quickly.
Correcting spelling errors
You can correct spelling mistakes directly in the document using the right-click menu.
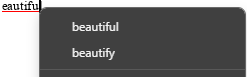
Using the context menu
- Right-click the underlined word.
- Select one of the suggested corrections.
- If you do not want to change the word, choose another action instead:
- Ignore skips this occurrence
- Ignore All skips the same word everywhere in the document
- Select language lets you assign a different language to that word or selection
- Add to Dictionary saves a word so it is no longer marked as misspelled. This option is available in the desktop version.
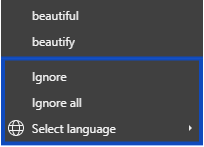
Spell Check Options
Turning spell check on or off
You can enable or disable spell check at any time.
- Open File, then Advanced Settings
- Enable or Disable Spell checking
- Click Apply if needed
Language settings
Spell check uses the language assigned to the document or selected text.
Set the document language
- Click the Set Document Language option on the status bar.
- Choose the language you want to use.
- Click OK.

Set the language for selected text
- Select the text you want to update.
- Use the language selector on the status bar.
- Choose the correct language for that selection.
Personal dictionary
If your OfficeDocs setup includes a personal or custom dictionary if available, you can use it for words that should not be marked as misspelled again, such as:
- technical terms
- company names
- product names
- abbreviations and acronyms
Ignoring certain text
Some words may be correct even if they are flagged, especially in technical or multilingual documents.
You may want to ignore:
- code samples
- commands
- names or abbreviations
- words written in another language
To skip these, right-click the word and choose Ignore or Ignore All. You can also assign the correct language to the selected text when needed.
Common spell check issues
A correct word is marked as misspelled
- Check whether the document language is correct
- Check whether the selected text uses the right language
- If available, add the word to your dictionary
A misspelled word is not flagged
- Spell check may be turned off
- The word may belong to another selected language
- Some spelling issues depend on context and may still need manual review
Too many words are flagged
- Make sure the document language is set correctly
- Check whether part of the text is using the wrong language
- Review technical terms, names, and abbreviations separately
Downloading and Exporting
OfficeDocs lets you download a copy of your file to your computer or export it to another format for sharing, printing, or continued work in another app. Depending on the editor you are using, the list of available formats may vary.
Downloading a document
You can download a file directly from the editor while you are working on it.
From the editor
- Open the file you want to download.
- Click File.
- Select Download as or Save Copy as, depending on the editor.
- Choose the format you want.
- The file is downloaded to your computer.
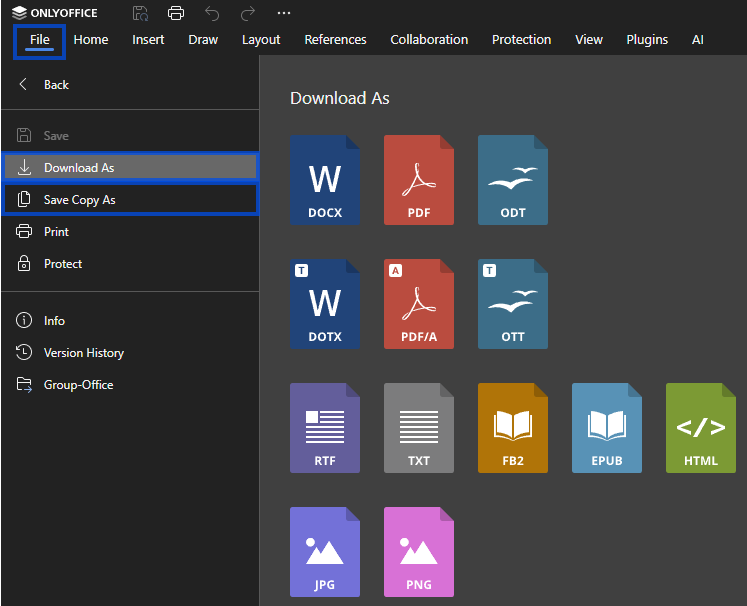
From the file browser
If your workspace includes a file browser, you may also be able to download the original file directly from there.
- Locate the file in the file browser.
- Right-click the file.
- Select Download.
- The file is downloaded in its current format.
Export formats
OfficeDocs supports different download and export formats depending on the type of file you are working with.
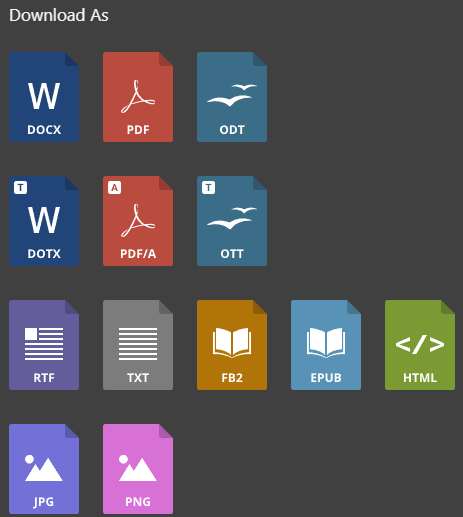
Documents
Common document export formats include:
- DOCX for Microsoft Word
- PDF for sharing or printing
- ODT for OpenDocument text files
- RTF for rich text documents
- TXT for plain text files
Spreadsheets
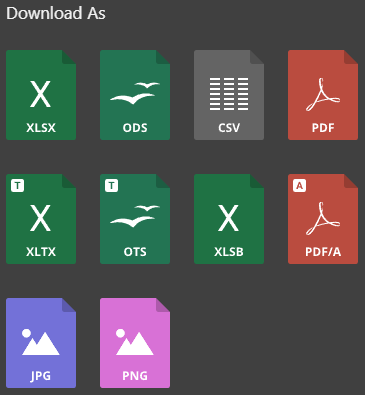
Common spreadsheet export formats include:
- XLSX for Microsoft Excel
- ODS for OpenDocument spreadsheets
- CSV for data-only export
- PDF for sharing or printing
- In some cases, other formats such as PDF/A, XLTX, OTS, JPG, or PNG may also be available.
Presentations
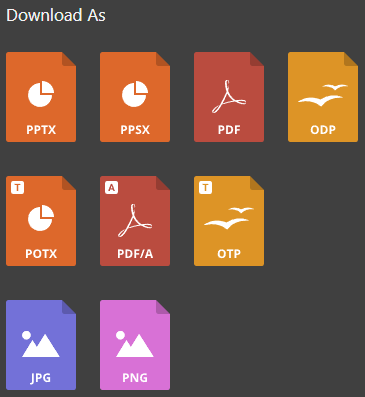
Common presentation export formats include:
- PPTX for Microsoft PowerPoint
- PDF for sharing or distribution
- ODP for OpenDocument presentations
- In some cases, presentation templates or PDF/A may also be available.
Exporting to PDF
PDF is a useful option when you want to share a file without expecting further edits.
PDF export is useful for:
- Sharing a file with users who do not use office software
- Printing a document or spreadsheet
- Keeping the layout more consistent
- Creating a version intended mainly for viewing
PDF options
Some editors may offer extra PDF export settings, such as:
- Page range selection
- Output quality
- Print-related settings
- Comment visibility, depending on the editor and file type
Download vs. export
Downloading and exporting are similar, but they are not always the same.
- Download keeps the file in its current or original format
- Export creates a copy in a different format
- Download is useful when you want to keep editing the file later
- Export is useful when you need a file for sharing, printing, or compatibility with another app
Tips
- Use PDF when you want to share a more stable final version
- Keep the original format if you plan to continue editing
- Use CSV only when you need spreadsheet data without formatting
- Review exported files to make sure the formatting looks correct after conversion
Collaboration
Real-Time Co-Editing
OfficeDocs lets multiple users work on the same document at the same time. This makes it easier to collaborate, review updates, and keep everyone working in the same file instead of sending separate copies back and forth.
How It Works
When multiple people open the same document, they join the same editing session.
- Each person works in the same document
- Changes can appear while other users are editing
- Users do not need to take turns editing separate copies
- The document stays synchronized during collaboration
Starting a Co-Editing Session
To start working together on a document: (wikidev.emailarray.com)
Seeing Other Users
OfficeDocs shows when other people are active in the same document.
User Presence
- Names or avatars can appear in the editor interface
- You can see how many users are currently in the document
- Each collaborator can be identified while working in the file
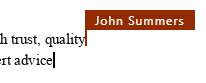
Cursor Tracking
- You may see colored cursors showing where others are editing
- Cursor labels can show collaborator names
- In live collaboration, text can appear as others type
Collaboration Modes
OfficeDocs includes two collaboration modes that control how updates from other users appear while you work.
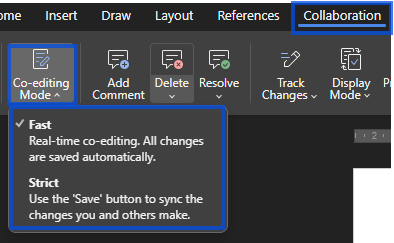
Fast Mode
Fast mode is best for active, real-time collaboration.
- Changes sync character by character
- You can see typing in real time
- This mode works well when several users are editing together at the same time
Strict Mode
Strict mode gives you more control over when updates from others appear.
- Changes sync when you save
- Text being edited can be marked while another user is working in that area
- This mode can help prevent conflicts in sensitive documents
Conflict Handling
When several users edit the same document, OfficeDocs includes tools that help manage overlapping changes.
- Edits made in different parts of the document can be combined during collaboration
- If two people work on the same content, saved updates determine what other users receive next
- You can use version history to review or recover earlier changes if needed
Best Practices
These habits can make co-editing easier and more organized:
- Communicate about who is working on which section
- Use comments when questions or feedback are needed
- Save regularly, especially in Strict mode
- Work in different areas of the document when possible
Requirements
To use co-editing effectively:
- All collaborators need access to the document
- Users need permission to edit the file
- Depending on your workspace setup, editing may require the appropriate account access
- A stable internet connection is recommended for smooth online collaboration
Viewing Active Users
OfficeDocs shows when other people are viewing or editing the same document. These presence indicators help teams stay aware of who is active in the file and make collaboration easier to manage.
Where to see active users
You can usually see active user indicators in the editor interface while a shared document is open. These indicators may appear in the editor header and show how many people are currently working in the file.
Look for active users in:
- the editor header or toolbar area
- user avatars or initials
- participant count indicators or user badges
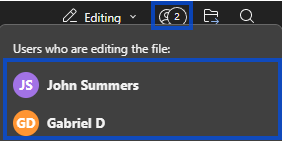
User information displayed
When you hover over or click a user indicator, you may see more details about that person’s activity in the file.
This information can include:
- Name — the user’s display name
- Status — whether the user is viewing or editing
- Color — the color associated with that user during collaboration
Cursor presence
During collaborative editing, OfficeDocs can show where other people are working in the document. In some collaboration modes, edited areas and active cursors are visible to help users avoid overlapping work.
In collaborative sessions:
- each user may have a colored cursor
- the cursor can show the user’s current position in the document
- labels can identify who the cursor belongs to
- selections or edited areas may appear in user-specific colors
Internal vs. external users
Depending on how the document is shared, the people shown in the active user list may include both internal users and external users. External users can access shared documents through external links, while portal users are part of your organization’s workspace.
Internal users
Internal users are users from your organization or workspace.
- they belong to your organization’s workspace
- their names can appear in the user list
- they may have profile pictures or account information associated with their account
External users
External users are people who access a document through a shared link instead of through a full portal account. In ONLYOFFICE materials, these users are tracked separately from portal users.
- they access the file through a shared external link
- they may appear separately from internal users
- depending on your setup, their displayed identity may differ from portal users
Using presence information
Presence indicators can help teams work more efficiently when several people are involved in the same file.
You can use this information to:
- avoid editing the same section as someone else
- know when to start a collaborative discussion
- see whether reviewers or collaborators have opened the document
- coordinate handoffs between team members
When presence updates
Presence information updates automatically as users join or leave a shared document session.
- opening a document adds your presence to the session
- closing the document removes your presence
- if the connection is interrupted, your status may update temporarily
- reconnecting restores your active presence in the file
Privacy note
Presence indicators are visible to people who already have access to the document.
- other users can see when you open a shared file
- collaborators may be able to see where you are working in the document
- user presence is part of the collaboration experience in shared editing sessions
Adding Comments
Comments let you leave notes, suggestions, and feedback without changing the main content of the document. They are useful for collaboration, review, and follow-up during editing. Comments also remain attached to the document until they are resolved or deleted.
Adding a comment
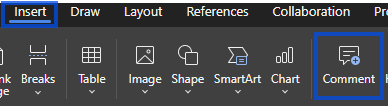
You can add a comment to selected text or content when you want to ask a question, suggest a change, or leave feedback for another user. Comments can be added from the toolbar or by using a keyboard shortcut.
- Select the text or content you want to comment on.
- Open the Insert tab, click Collaboration tab and choose Add Comment

- Type your comment in the comment box or side panel.
- Add the comment to post it.
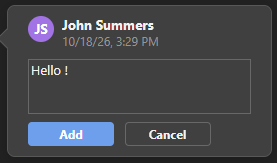
Viewing comments
Comments can appear next to the document content or inside the comments panel. This makes it easier to follow discussions and jump back to the exact place where feedback was left.
When you open a comment, you can usually:
- read the full comment text
- see who wrote the comment
- reply to the comment
- resolve or delete the comment
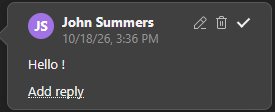
Comments panel
You can open the comments panel to see all comments in one place.
- The Comments panel is located in the left side panel of the editor, where you can view, reply to, resolve, and manage comments.
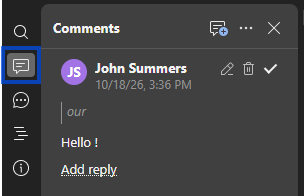
Replying to comments
Replies help keep discussions together inside the same comment thread.
- Click the comment you want to reply to.
- Click Add Reply.
- Type your response.
- Send the reply.
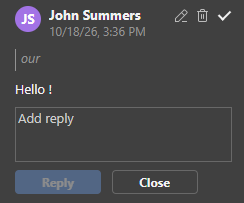
Comment threads help keep feedback organized and easier to review later.
Resolving comments
Once a comment has been addressed, you can mark it as resolved.
- Open the comment.
- Click Resolve or the resolve icon.

- The comment is marked as resolved and may be hidden from the main view, depending on your settings.


Deleting comments
You can remove comments that are no longer needed.
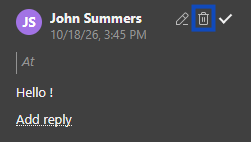
Delete a single comment
- Click the comment.
- Click Delete or the delete icon.
- Confirm the deletion if prompted.
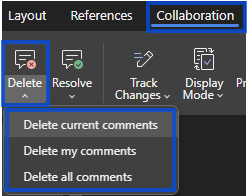
Delete all comments
If your editor includes this option, you can remove all comments at once from the Collaboration tab.
- Open the comment management options.
- Select Delete All Comments.
- Confirm the action.
Comment best practices
These habits can help keep comments useful and easy to manage:
- be specific and refer to the exact text or issue
- be constructive when suggesting changes
- resolve comments once the issue is addressed
- delete outdated comments before finalizing the document
Track Changes
Track Changes records edits made to a document so reviewers can see what was changed, who made the change, and decide whether to keep or reject it. This feature is useful for review, approval, and collaborative editing workflows.
Enabling Track Changes
To start recording edits:
- Open the Collaboration tab.
- Click Track Changes.
- The button becomes active.
- New edits are recorded and marked in the document.
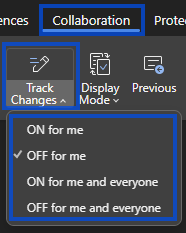
In some cases, Track Changes can also be enabled from the status bar.

How tracked changes appear
Tracked edits are shown directly in the document so you can review them clearly.
- Insertions appear as newly added text

- Deletions appear as removed text with strikeout formatting

- Formatting changes can be shown in the document or in the review details


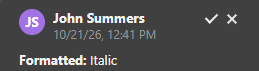
Changes made by different users may appear in different colors.
Viewing tracked changes
You can choose how tracked changes are displayed while reviewing the document.
Display modes
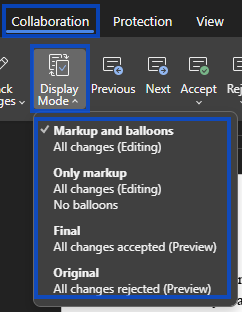
- Markup and balloons shows tracked changes in the document and in balloons
- Only markup shows tracked changes in the document text only
- Final shows how the document looks if all changes are accepted
- Original shows how the document looks if all changes are rejected
These display modes change how the document is shown, but they do not automatically accept or reject changes.
Accepting and rejecting changes
You can review changes one by one or apply an action to all changes.
Individual changes
- Click a tracked change.
- Click Accept to keep the change.
- Click Reject to remove the change.
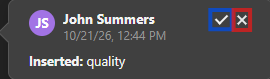
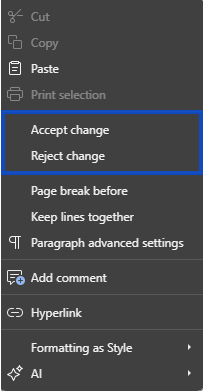
You can also right-click a change and choose Accept Change or Reject Change.
All changes
Use these options when you want to apply the same action to every tracked change in the document.
- Accept All keeps every tracked change
- Reject All removes every tracked change
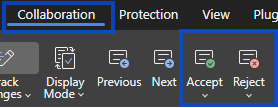
To move through changes one at a time:
- click Next to go to the next change
- click Previous to go to the previous change
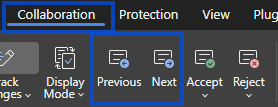
Track Changes in collaboration
Track Changes is especially useful when several people work on the same file.
- reviewers can suggest edits without changing the final content directly
- collaborators can review one another’s changes before accepting them
- tracked changes help teams keep a clear approval process
If a document is shared with review-only access, tracking may already be enabled by default.
Finalizing a Document
Once the review is complete, you can finalize the document by applying the remaining tracked changes.
To finalize the document:
- Review all remaining tracked changes.
- Use Accept or Reject for each change, or use Accept All or Reject All if appropriate.
- Switch to Final view if you want to preview the finished version.
- Make sure no unresolved review changes remain.
- Save the document when the review is complete.
This helps ensure the final version is clean and ready to share.
Best practices
These habits can make review work easier:
- Enable Track Changes before sending for review
- Include comments explaining significant changes
- Review changes carefully before accepting
- Always finalize documents before distribution
Version History
Viewing Version History
OfficeDocs saves document versions as you work, making it easier to review earlier changes, compare updates, and restore a previous version when needed. Version history is especially useful when several people are editing the same file or when you want to track how a document has changed over time.
Accessing version history
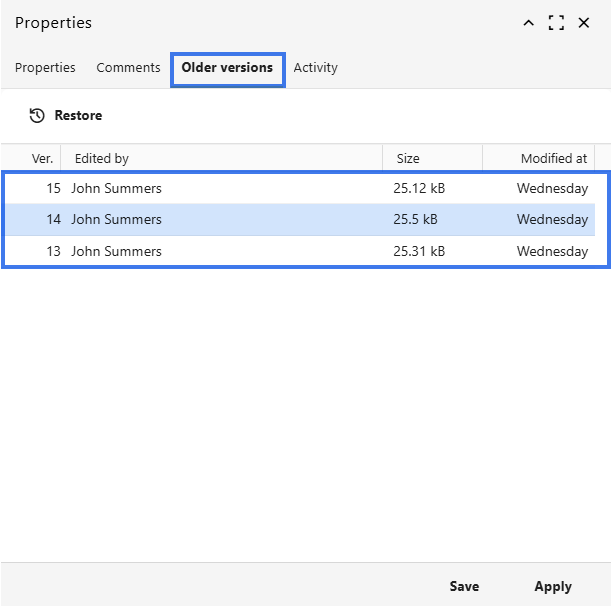
You can open version history either from the file browser or from inside the editor. In both cases, you will see a list of saved versions and revisions for the file.
From the file browser
- Open the folder that contains the file.
- Right-click the file, or click the version indicator next to the file name if it is available.
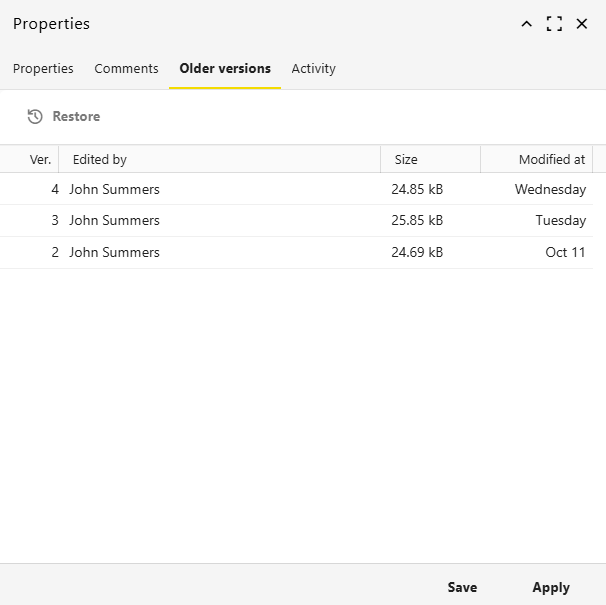
- Open Properties, then select Older versions.
- A panel opens and shows the saved versions of the file.
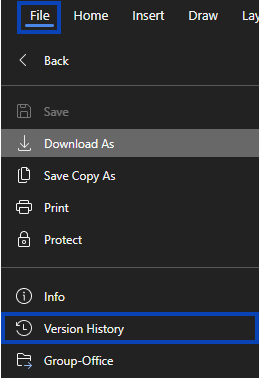
From the editor
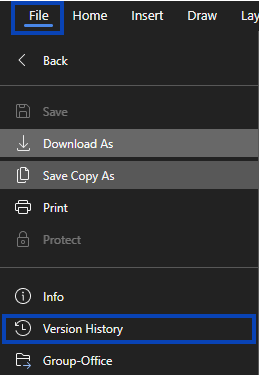
- Open the document.
- Click File.
- Select Version History from the left panel.
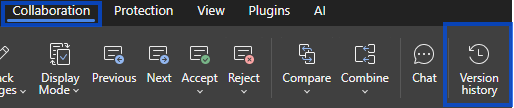
You may also be able to open version history from the Collaboration tab or from a Version History button in the toolbar.
Understanding the version list
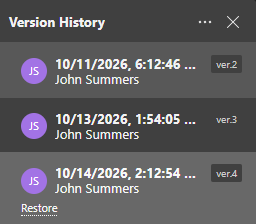
Each version entry helps you identify when the file changed and who made the update. Depending on the workspace, version history can also include revisions grouped inside larger versions.
A version entry may show:
- Date and time — when the version was saved
- Author — who made the changes
- Comments or notes — short details about the change
- Version number — such as ver.3
- Size — the file size for that version, if shown in your interface
Viewing a previous version
You can open an earlier version to review it before deciding whether to restore it.
- Open the version history panel.
- Click the version you want to review.
- The document opens in preview mode for that version.
- Changes made in that version can be highlighted in the document.
- You can review the content, but you do not edit the historical version directly.
What creates versions
New versions and revisions can be created while the document is being edited and saved. A full version is typically created when an editing session ends, while smaller revisions can also be saved during work, depending on your settings.
New versions or revisions may be created when:
- you manually save the file
- the editor saves an intermediate revision
- the editing session ends
- a collaborator saves changes during shared editing
Version information
Version history can also help you understand what changed between saved versions.
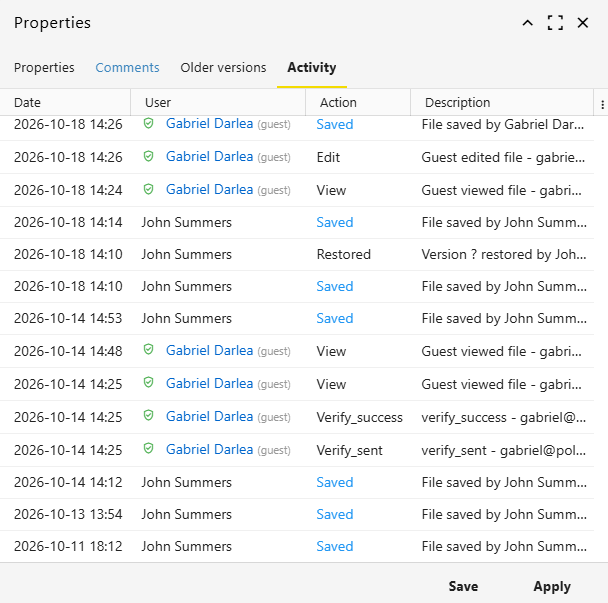
Who made changes
Version history shows the name of the person who saved a version. In some workspaces, external users may appear differently from internal users, depending on how the document was shared.
- internal users may appear by name
- external collaborators may appear differently depending on the sharing method
- multiple contributors may be involved during co-editing sessions
Size changes
If the file size changes significantly between versions, it may indicate larger updates to the file.
This can happen when:
- large sections of content are added or removed
- images or media are inserted or deleted
- the file structure changes significantly
Searching version history
If a document has many saved versions, version history details can help you find the one you need more quickly. In some interfaces, comments, dates, and author names help identify the correct version.
You may be able to use version details to:
- look for a specific date or time
- identify the author of a version
- review comments or notes if they are available
- compare older and newer saved states of the file
Version history limits
Version history can vary depending on your workspace settings and storage rules. Some environments may limit how many saved versions are kept or how long old versions remain available.
Possible limits may include:
- a maximum number of saved versions
- automatic cleanup of older versions
- storage or retention rules set by your workspace administrator
If needed, check with your administrator for details about retention and version availability.
Returning to the current version
After reviewing an older version, you can return to the current document at any time.
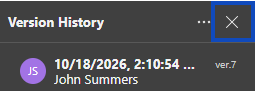
- Click Close History at the top of the version list, or
- close the version history panel to return to the latest version of the file.
Restoring a previous version
If you need to return the document to an earlier state, you can restore a previous version from the version history panel.
- Open Version History.
- Select the version you want.
- Click Restore.
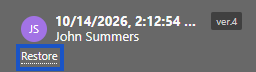
When a version is restored, the file returns to that saved state as a new current version. You can also preview or download older versions before restoring them.
Restoring Previous Versions
If you need to return a document to an earlier state, you can restore a previous version from version history. This is useful when important content was removed, changes need to be undone, or an older draft should become the current version again.
When to Restore
Consider restoring a previous version when:
- important content was deleted by mistake
- recent changes made the document worse or incorrect
- you need to undo multiple edits at once
- an earlier draft is a better starting point going forward
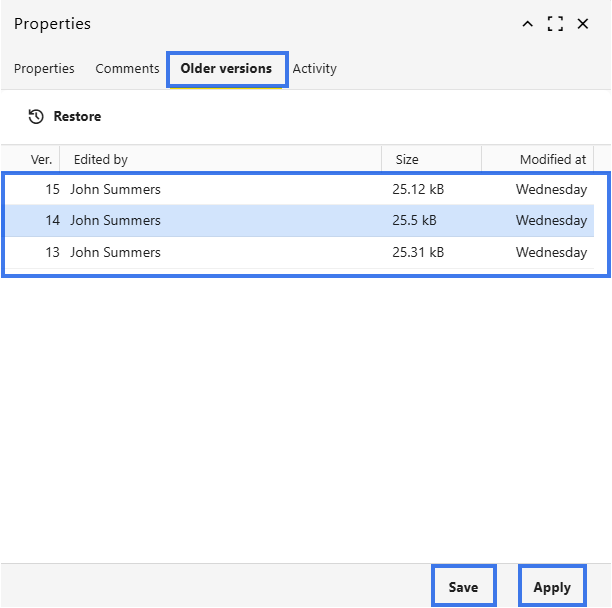
Restoring from File Browser
You can restore a version directly from the file list.
- Open the folder that contains the file.
- Rick-click and select Properties.
- Open the file’s Older Versions.
- Browse the saved versions.
- Select the version you want to restore.
- Click Save then Apply.
Restoring from the Editor
You can also restore a version while the document is open.
- Open the document.
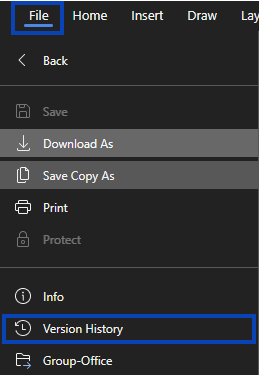
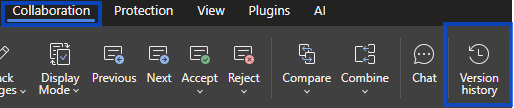
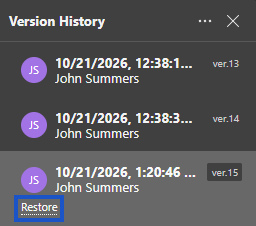
- Open Version History from File or Collaboration.


- Select the version you want to restore.
- Click Restore.

- The document returns to that version as the new current version.
What Happens When You Restore
When you restore a version:
- the selected version becomes the current document
- a new version is created to record the restoration
- earlier versions remain in version history
- you can restore another version later if needed
Partial Restoration
If you only need part of an older version, you do not need to restore the whole document.
- Open the older version in view mode by not Restoring.
- Copy the content you need.
- Return to the current version.
- Paste the content where needed.
This lets you recover specific text while keeping the rest of the current document unchanged.
Restoration and Collaborators
- collaborators will see the restored version as the new current file
- recent changes may be replaced by the restored version
- the restoration is recorded in version history
- it is a good idea to inform collaborators before restoring a shared file
Download Instead of Restore
If you want to keep the current document unchanged but still keep a copy of an older version:
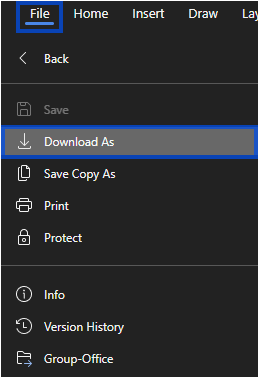
Downloading from the Editor
- Open Version History.
- Select the older version.
- Choose Download As from the File tab.

- The current version remains unchanged.
Downloading from File Browser
- Open Version History from the file browser.
- Select the older version.
- Double-click on the version selected.
- The current version remains unchanged.
Restore Permissions
Restoring a previous version may depend on your access rights.
Restoration may require:
- permission to edit the document
- access to the document’s version history
- the required sharing or workspace permissions
If you do not see the restore option, your current access level may not allow restoration.
After Restoration
After a version is restored:
- review the restored document carefully
- make sure the needed content is present
- continue editing from that point if needed
- remember that version history still keeps earlier versions
Undoing a Restore
If you restore the wrong version, you can go back again using version history.
- Open Version History.
- Find the version that was current before the restore.
- Restore that version instead.
This allows you to reverse an accidental restoration by making another version current.
Version History in the Editor
Access version history directly from within the OfficeDocs editor without leaving your document. This makes it easier to review saved versions, preview older content, and restore an earlier version when needed.
Accessing Version History from Editor
To open version history from inside the editor:
- Open the document in the editor.
- Click File.
- Select Version History.
- The version history panel opens.
The Version History Panel
The version history panel shows saved versions of the document and helps you review changes over time.
The panel can display:
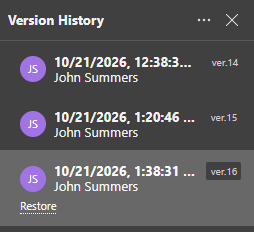
- a list of saved versions
- the date and time of each version
- the author who made the changes
- version notes, if available
Working with Versions in Editor
From the editor, you can review older versions without leaving your current document.
Preview a Version
To preview an earlier version:
- Click a version in the list.
- The document view updates to show that version.
- Review the content at that point in time.
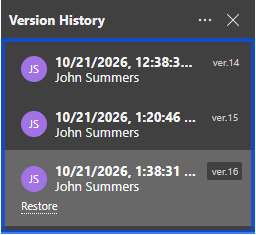
Restore a Version
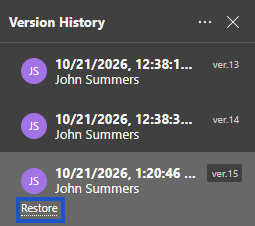
If you want to make an older version current again:
- Select the version you want to restore.
- Click Restore.

- Confirm the restoration.
- The document reverts to that version.
Version History vs. Undo
Both Version History and Undo help you go back, but they are used differently.
Version History
- shows saved versions
- stays available after the document is closed
- shows who made changes
- can restore an older saved version
Undo (Ctrl+Z)
- shows recent unsaved changes
- only works within the current editing flow
- does not show who made changes
- is best for reversing recent edits
Creating Version Checkpoints
To create clearer restore points while editing:
- Make your changes.
- Press Ctrl+S to save.
- A new version or revision may be added to history.
- Add a version note if that option is available.
Closing Version History
When you finish reviewing older versions:
- click the X on the version history panel
- or click Back to editing, if shown
- the current version is displayed again
Tips
- save before major changes to create restore points
- use version notes to describe important updates
- review version history before restoring an older version
- remember that version history may also be available from the file browser
Internal Sharing
Sharing with Internal Users
Sharing from File Browser
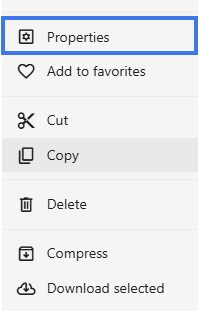
- Open the folder that contains the file.
- Right-click the file.
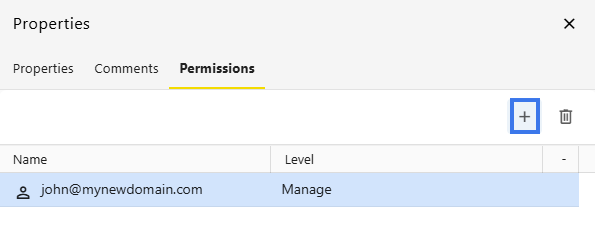
- Select Properties and then Permissions.


- The sharing window opens.
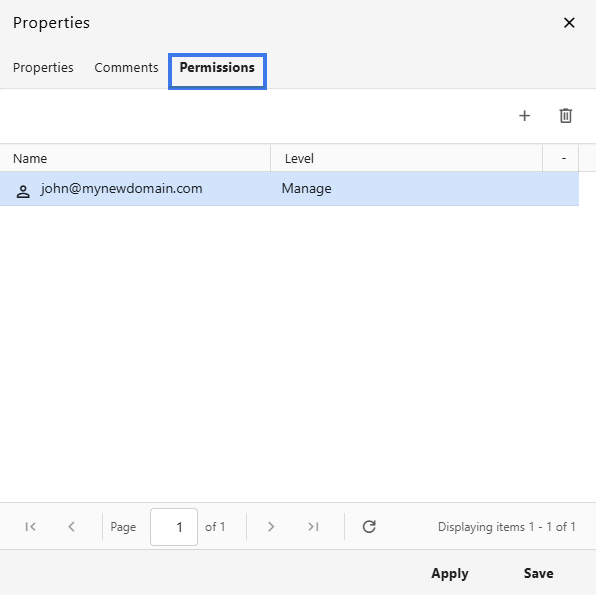
Adding Users
Use the sharing window to add one or more internal users.
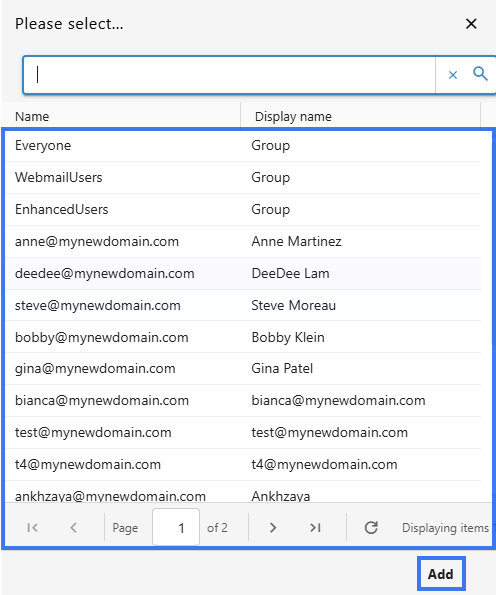
- In the sharing window, find the user search field.

- Type the user’s name or email address.
- Select the user from the results.

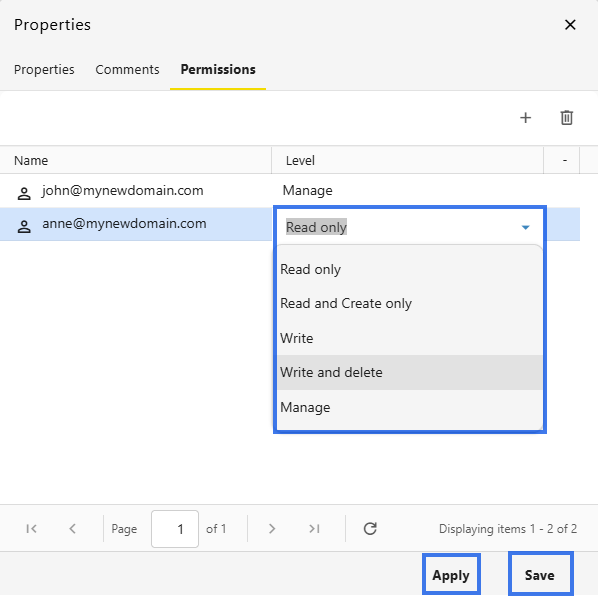
- Choose the permission level.
- Click Apply and then Save.
Permission Levels
The available permission levels may vary depending on the file type and workspace settings.
View Only
With view-only access, a user can usually:
- open and read the document
- not make changes to the file
- download the file, if downloading is allowed
- view collaboration details such as comments or version-related information, depending on the file settings
Can Edit
With edit access, a user can usually:
- edit the document
- save changes
- collaborate in real time
- create updates that appear in the document history
Sharing with Groups
If your organization uses groups, you can share with a group instead of adding users one by one.
- Search for the group name.
- Select the group.

- Choose the permission level.

- Save the sharing settings.
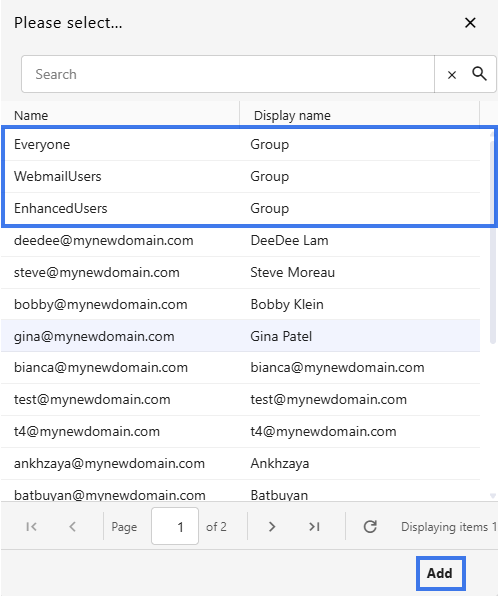
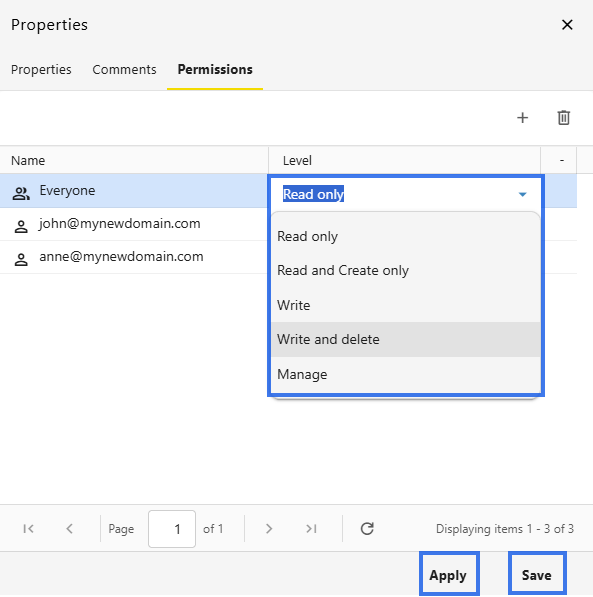
All group members then receive access based on the permission level you selected.
Viewing Current Shares
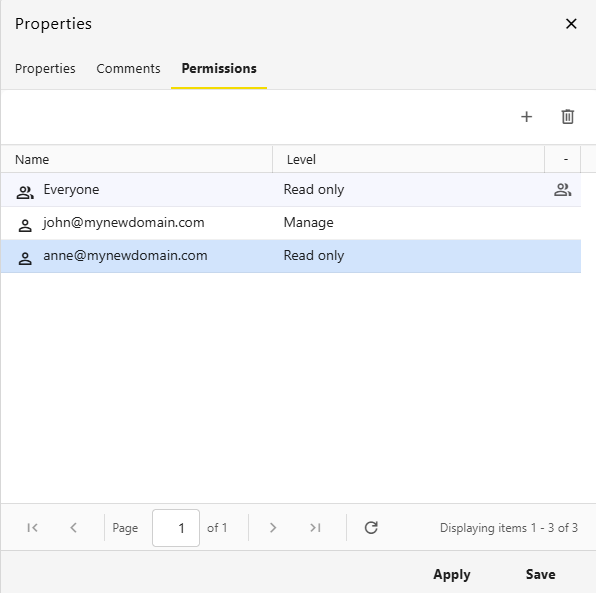
The sharing window also lets you review who already has access.
- Open the sharing window.
- View the list of users and groups with access.
- See each user’s permission level.
- Identify the document owner if shown.
Modifying Permissions
You can update a user’s access level at any time.
- Open the sharing window.
- Find the user in the list.
- Change the permission level by double-clicking on it.
- Changes take effect once the new settings are applied.
Removing Access
If someone no longer needs access, you can remove them from the share list.
- Open the sharing window.
- Find the user you want to remove.
- Click the Delete option.

- Confirm the removal if prompted.
- The user loses access immediately.
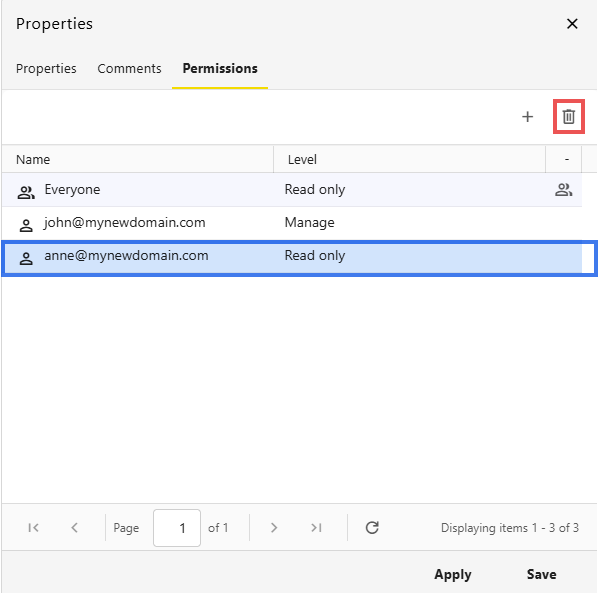
Notification Options
When sharing a file, you may have options to:
- send an email notification to the user
- include a custom message
- skip the notification for silent sharing
Sharing with Groups
What Are Groups
Groups are collections of users created for easier permission management. Depending on your organization, groups may include:
- departments
- teams
- roles
- custom groups for specific purposes
Sharing with a Group
- Right-Click a folder and select Properties.

- In the Permissions field click on the + icon to add users.

- In the search field, type the group name.

- Select the group from the results.
- Click Add.
- Choose the permission level, Apply then Save.

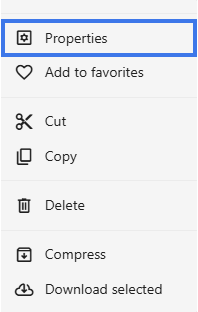
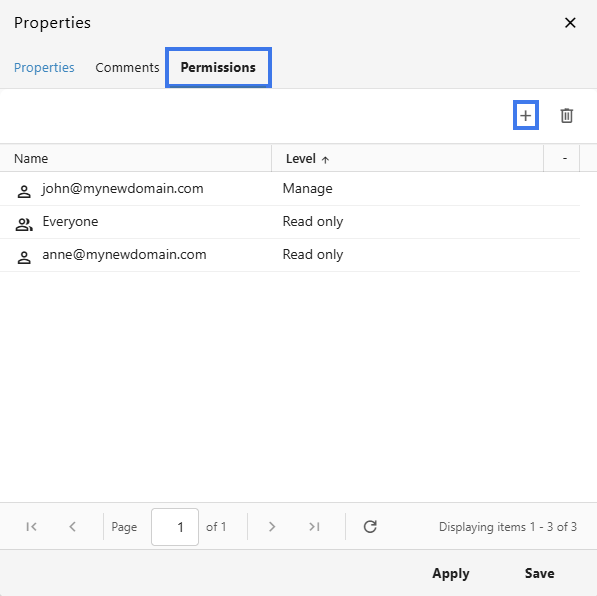
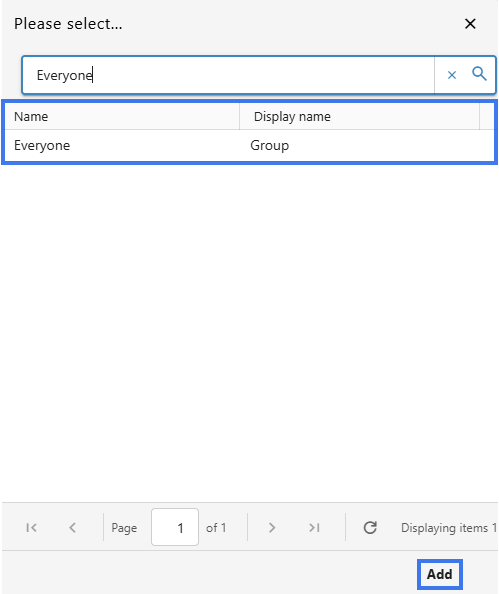
Group Permissions
- all current group members receive access
- new members added to the group may also receive access automatically
- users removed from the group may lose access
- all members of the group receive the same permission level from that group share
Viewing Group Access
To review which groups already have access:
- Open the sharing dialog.
- Look for the group entries in the sharing list.

- Select a group to review its access details.
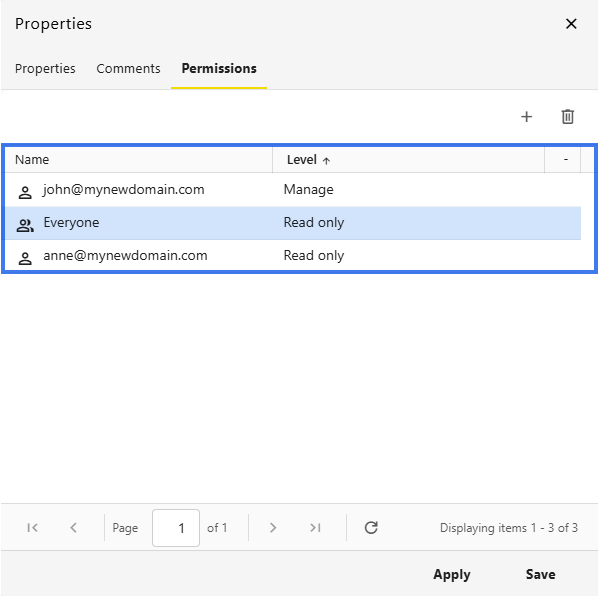
Changing Group Permissions
You can update a group’s permission level at any time.
- Open the sharing dialog.
- Find the group in the list.
- Double-Click and change the permission level using the dropdown.
- The updated access level applies to the group.
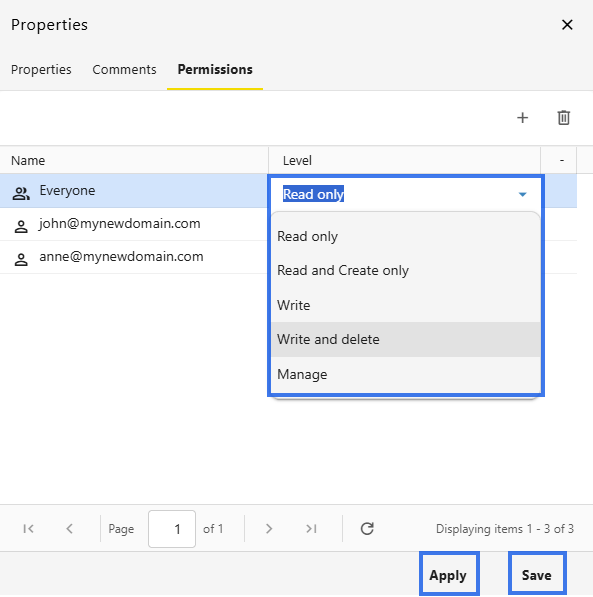
Removing Group Access
If a group no longer needs access:
- Open the sharing dialog.
- Find the group you want to remove.
- Click the delete option.

- Confirm the removal if prompted.
- Group members lose access through that group share.
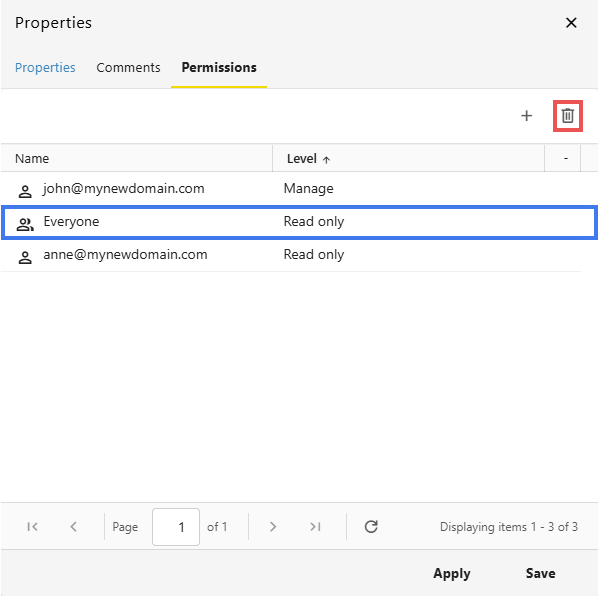
Groups vs. Individual Sharing
Both methods are useful, but they work differently.
Group Sharing
Individual Sharing
Combining Group and Individual Sharing
You can use both group sharing and individual sharing on the same document.
For example, you can:
Best Practices
- use groups for team-wide documents
- keep group membership updated
- review shared group access regularly
- use individual sharing only when different access is needed for specific users
Sharing Folders
Sharing a Folder
- Navigate to the folder in the file browser.
- Right-click the folder.
- Select Properties.

- Click on Permissions and add users.

- Choose the permission level.
- Click Apply then Save.
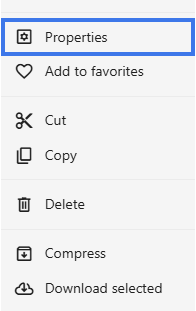
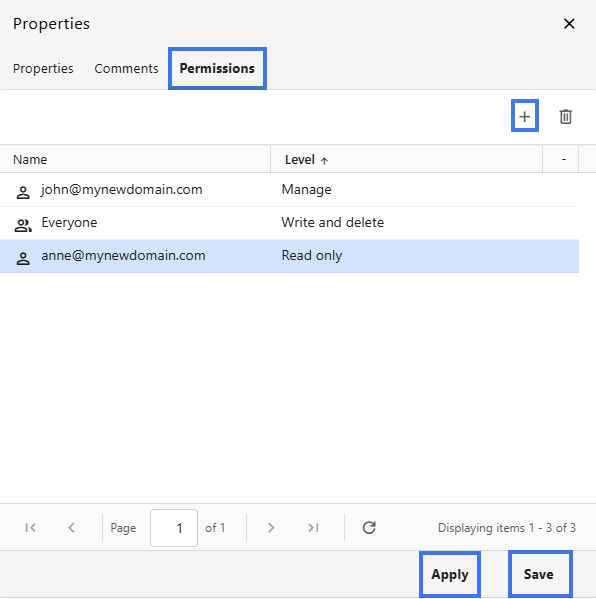
What Folder Sharing Includes
- all files in the folder can become accessible to the people you shared it with
- subfolders can also be included
- new files added later can also become available through the shared folder
- the selected permissions can apply to the folder contents
Permission Inheritance
Creating Shared Project Folders
Folder sharing works well for project-based collaboration.
- Create a folder for the project.

- Slide all project documents into the folder.

- Share the folder with the project team.
- Team members can then access the project files from one shared location.
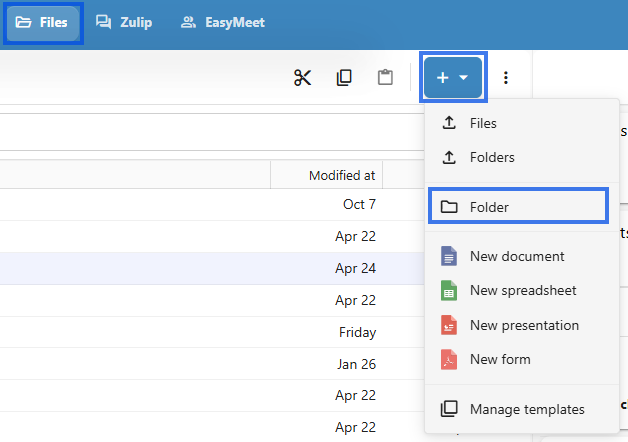

Managing Folder Shares
You can review and update folder sharing settings whenever needed.
View Who Has Access
- Right-click the folder.
- Select Properties.
- View the list of users and groups with access.

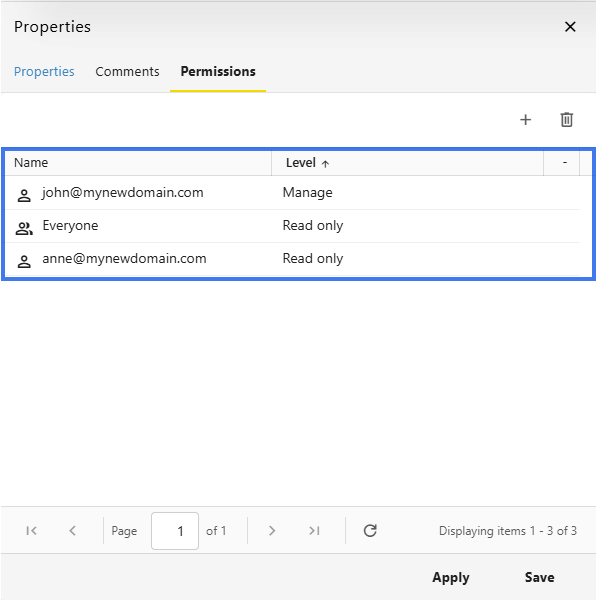
Change Permissions
- Open the folder Properties settings.
- Find the user or group.
- Double-click and change their permission level.

- Save the changes.
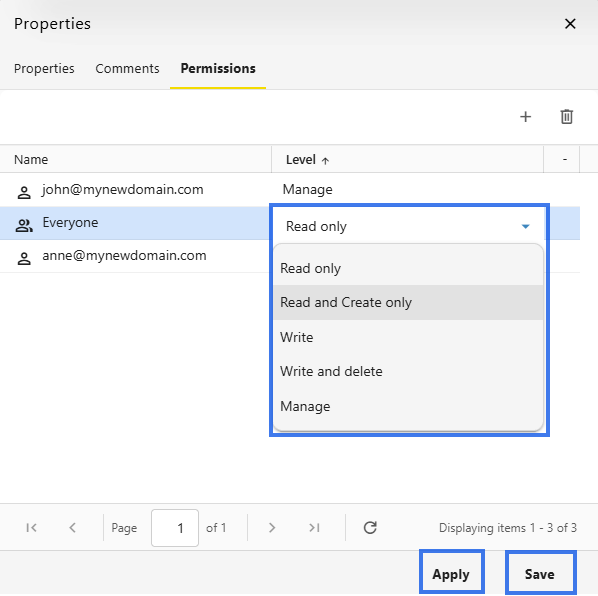
Remove Access
- Open the folder sharing settings.
- Find the user or group you want to remove.
- Click the Delete Icon.

- Their access to the folder is removed.
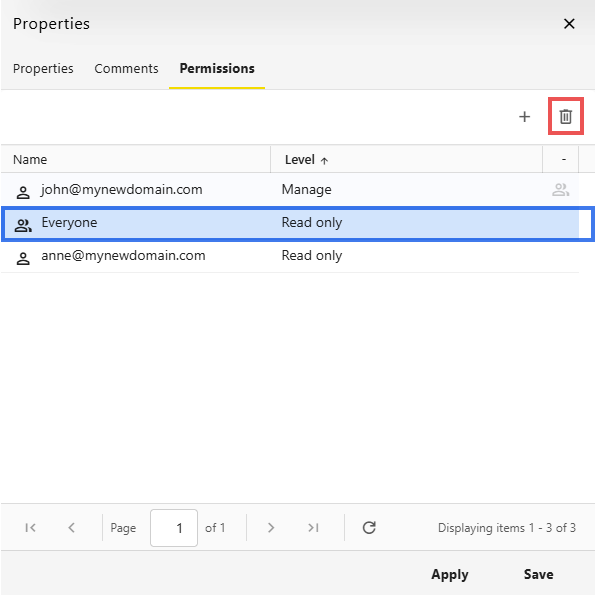
Nested Folder Sharing
When folders are nested:
- sharing a parent folder can include its subfolders
- subfolders can also have their own sharing settings
- more restrictive permissions can take priority in some cases
Folder Sharing vs. File Sharing
Both folder sharing and file sharing are useful, but they are meant for different situations.
Folder Sharing
File Sharing
Best Practices
- organize files into clear folders before sharing
- use folder sharing for ongoing collaboration
- review folder permissions regularly
- remember that sharing a folder can also affect the files inside it
Understanding Permissions
Permissions control what users can do with shared documents. Understanding permissions helps you share files appropriately, securely, and with the right level of access for each person.
Permission Levels
Different permission levels control how much access a user has to a document.
View Only
Users with View Only access can usually:
- open and read the document
- navigate through the document
- view formatting and images
- see collaborators, depending on the document state
- access version history, if that option is available to them
- download the file, if downloading is allowed
Users with View Only access usually cannot:
- make changes to the document
- add comments
- share the document with others
Edit (Can Edit)
Users with Edit access can usually do everything available in View Only, plus:
- modify document content
- add and respond to comments
- save changes
- participate in real-time collaboration
Users with Edit access typically cannot:
Owner
The Owner has the highest level of control over the document.
Owners can usually:
- do everything available in Edit
- share the document with other users
- change permission levels
- remove user access
- delete the document
- move the document
- transfer ownership, if that option is available
Choosing the Right Permission
Choose the permission level based on what the person needs to do.
Use View Only When:
- sharing final documents for reference
- distributing reports or policies
- the user only needs to read the file
- you want to prevent changes
Use Edit When:
- collaborating on document creation
- users need to contribute content
- review cycles require markup or updates
- working on shared project files
Permission Inheritance
Permissions can also be affected by where the file is stored.
Account Type Limitations
Some workspaces may apply limits based on account type.
- Basic accounts may have more limited access
- Enhanced accounts may have broader editing and collaboration capabilities, depending on the permission granted
Checking Your Permission
If you are not sure what access you have, you can usually check by:
- looking for editing tools or indicators in the editor
- trying to make a change
- reviewing the sharing or access panel, if available
Permission Best Practices
- give users the minimum access they need
- use View Only for final or approved documents
- use Edit only when collaboration is needed
- review permissions regularly
- remove access when it is no longer required
External Sharing
Creating Share Links
Creating a Share Link
- Navigate to the file in the Files module.
- Right-click the file and open Share Externally.

- Select Create Share.

- Configure the link settings.
- Click Create or save the link.

- A link is then generated and can be Copied or Deleted.
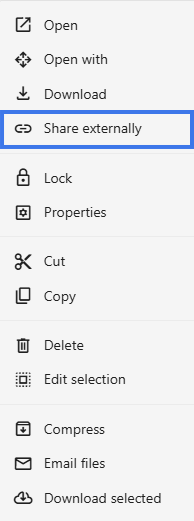
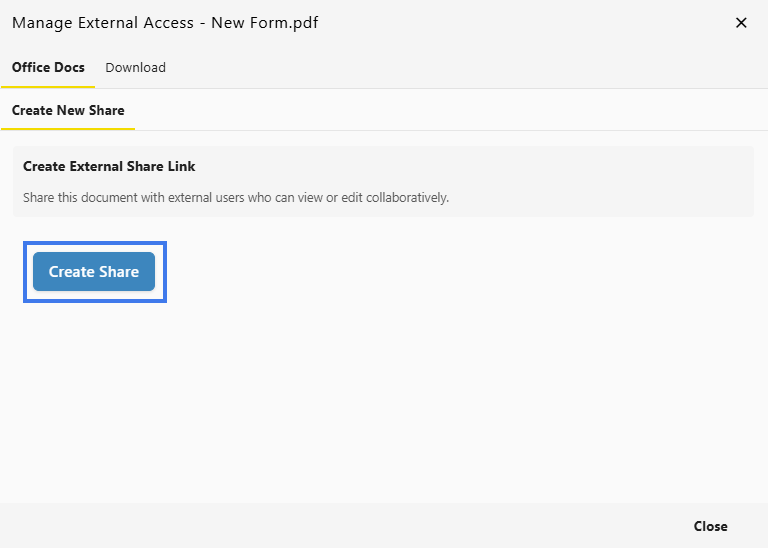
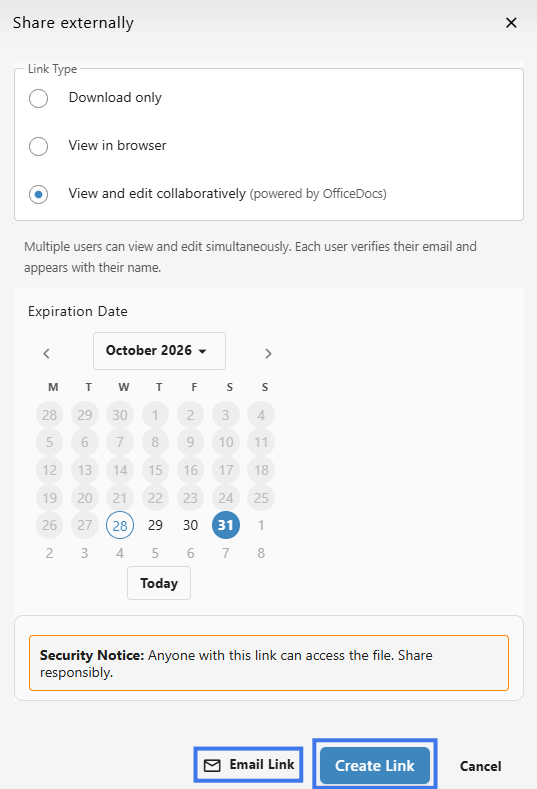
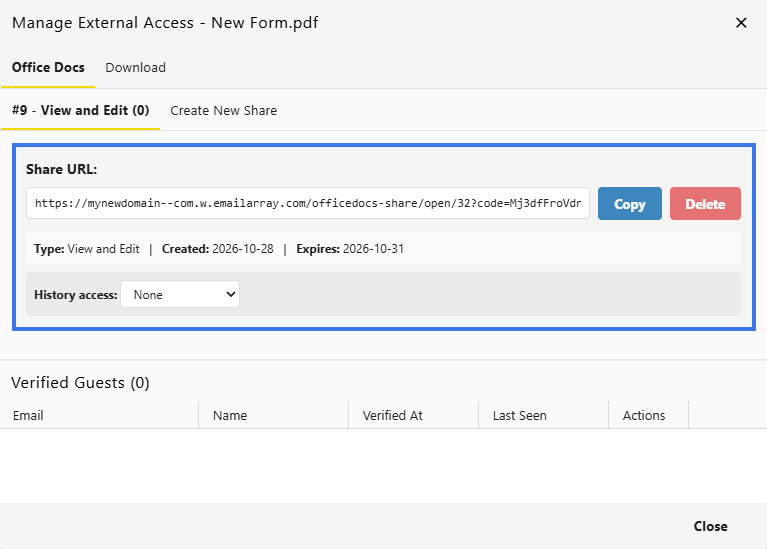
Link Settings
When creating a share link, you can configure different access and security options.
Permission Level
- Download Only
- View in Browser lets recipients read the document without editing it
- View and Edit lets recipients modify the document if editing access is allowed through the link

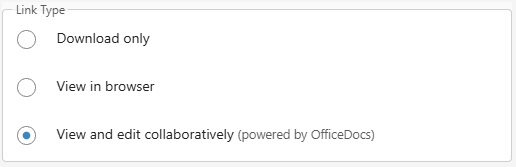
Expiration Date
You can set a time limit for the link.
- choose a date when the link stops working
- after the expiration date, recipients can no longer use the link

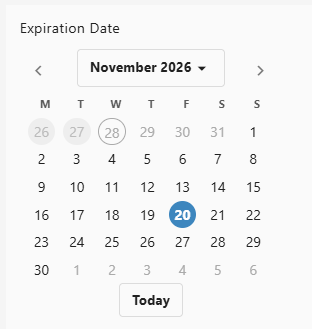
Sharing the Link
Once the link is created:
- Copy the generated link.

- Send it to recipients by email, chat, or another method.
- Recipients use the link to open the shared document.
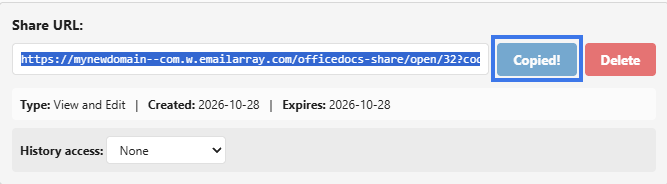
You may also be able to send the link directly from the sharing window.
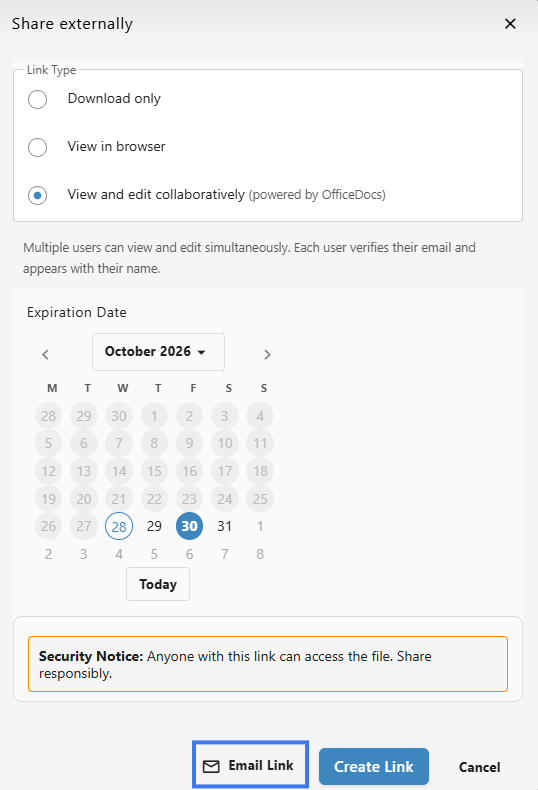
What Recipients Experience
When someone opens a shared link, they may go through a short access process before opening the file.
A recipient may need to:
- Click the share link.
- Enter their Email Address and Full Name if requested.

- Receive a verification code by email.


- Enter the code to verify access.

- The document will open automatically.
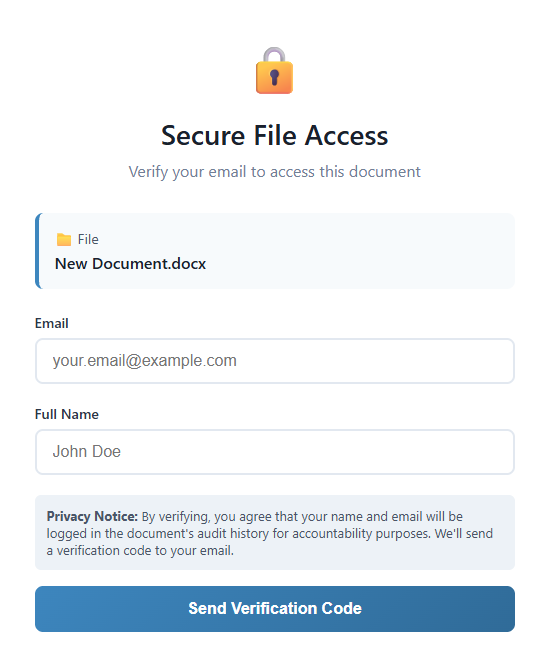
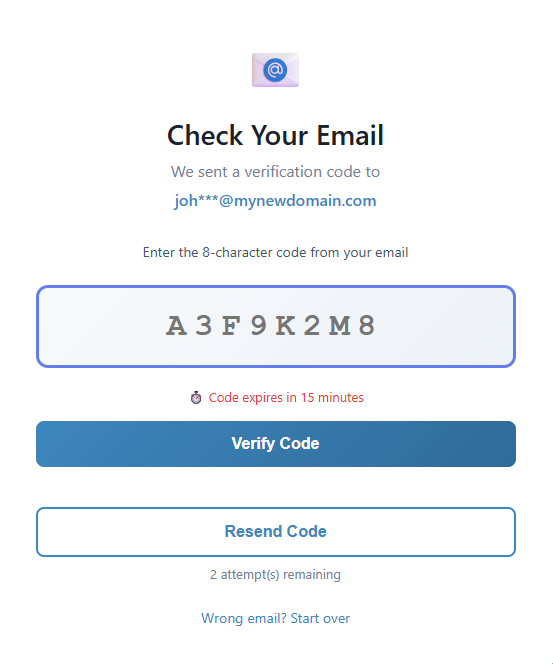

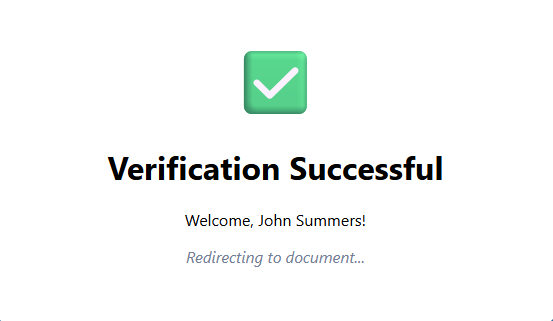
Managing Share Links
You can review and manage active links after they are created.
View Existing Links
- Open the External Sharing Window for the document.
- View the active links and their settings.
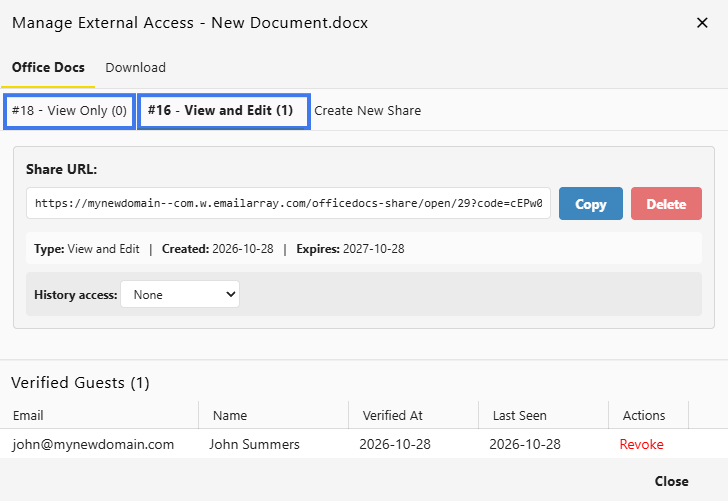
Delete a Link
- Find the link you want to remove.
- Click Delete.

- Confirm the deletion if prompted.
- The link stops working immediately.
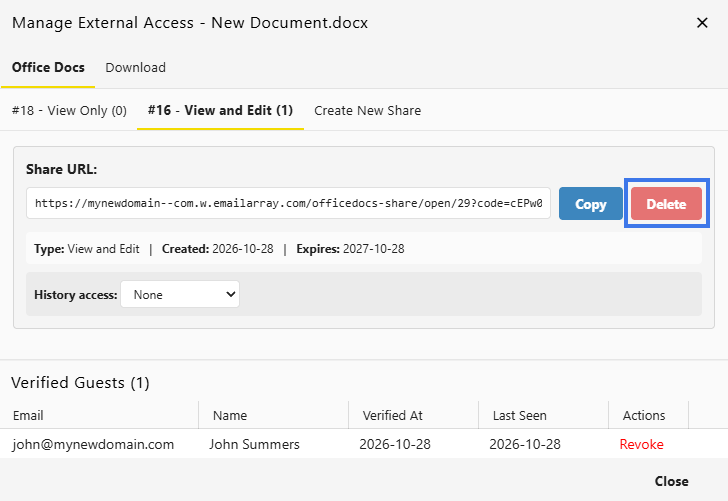
Multiple Links
You can create more than one share link for the same document.
This can be useful when you need:
- different links for different recipients
- different permission levels for different use cases
- separate links for easier tracking and control
Security Considerations
- use recipient restrictions for sensitive documents
- set an expiration date when possible
- use View Only when editing is not required
- review active links regularly
- remove links that are no longer needed
Link Access Tracking
You may be able to review how a link has been used.
This can include:
- when the link was used
- which email addresses accessed the document

Share Link Types
When creating external share links, you can choose different link types based on what you want recipients to be able to do with the document.
Download Links
Download links let recipients download a copy of the document.
Features
- recipients get a copy on their device
- there is no need to view the file in the browser
- the file can be downloaded for offline use
- the shared document remains separate from the downloaded copy
Use Cases
- distributing final documents
- sharing files for offline use
- providing copies recipients can keep
View-Only Links
View-only links let recipients read the document in their browser without changing it.
Features
- the document opens in a web viewer
- recipients can navigate and read the file online
- they cannot edit the document
- downloading may still be allowed, depending on the link settings
Use Cases
- sharing reports for review
- distributing reference documents
- providing read access without edit risk
Edit Links
Edit links let recipients modify the original document through the shared link.
Features
- recipients can edit the original document
- changes are saved to the original file
- users can collaborate in real time
- changes can appear in version history
Use Cases
- collaborating with external partners
- collecting feedback directly in the file
- co-authoring with clients or contractors
Comparing Link Types
Each link type supports a different level of access.
Download
- recipients get a separate copy of the file
- changes made to the downloaded file do not affect the original
- real-time collaboration is not used
View
- recipients can read the document online
- the original file stays unchanged
- editing is not allowed
Edit
- recipients can modify the original file
- changes are saved back to the shared document
- real-time collaboration is available
Choosing the Right Type
Choose the link type based on what the recipient needs to do.
Choose Download When:
- the recipient needs a permanent copy
- the document is final and should not change
- offline access is needed
Choose View When:
- the recipient only needs to read the document
- you want to prevent edits
- the file may continue to be updated later
Choose Edit When:
- the recipient needs to make changes
- you are collaborating together
- feedback should happen directly in the document
Security Considerations
- download links create copies you cannot control afterward
- view links keep the original content on your server
- edit links allow changes to the original document
- use expiration dates when possible for time-limited access
Link Expiration Dates
Expiration dates automatically disable share links after a chosen date. This helps improve security by limiting how long external users can access a document.
Setting an Expiration Date
To set an expiration date for a share link:
- Create a new share link.
- Find the Expiration Date Field.
- Select the date when the link should stop working.

- Create the link.
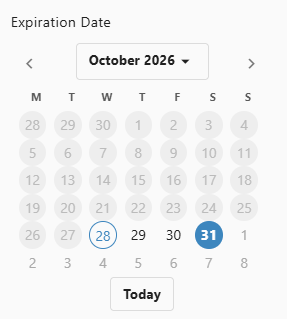
How Expiration Works
When a link has an expiration date:
- the link remains active until the selected expiration date
- once the link expires, it no longer provides access
- recipients cannot continue using the expired link
- continued access requires an active link
Choosing Expiration Dates
Choose the expiration period based on how long access is needed.
Short-Term (Days)
Use short-term expiration dates for:
- quick reviews
- temporary meeting access
- time-sensitive documents
Medium-Term (Weeks)
Use medium-term expiration dates for:
- project collaboration with deadlines
- document review cycles
- contract or approval discussions
Long-Term (Months)
Use longer expiration periods for:
- ongoing partnerships
- reference materials
- longer collaboration windows
Expiration Notifications
Depending on the sharing setup, you may see or receive reminders related to link expiration.
These may include:
- a reminder before the link expires
- a notice when the link has expired
- an alert for the document owner or person managing the link
After Expiration
When a link expires:
- recipients see that the link is no longer active
- they cannot access the document through that link
- a new active link is needed for continued access
- earlier link activity could still remain part of the link history
Best Practices
- match the expiration period to the business need
- review and extend links only when necessary
- use shorter expiration periods for sensitive documents
- let recipients know when their access will expire
Expiration vs. Manual Revocation
Both expiration and manual revocation can end link access, but they work differently.
Expiration
- access ends automatically on the chosen date
- works well for planned access periods
- usually needs less follow-up once it is configured
Manual Revocation
- access ends when you remove or disable the link
- works well when access must stop immediately
- requires someone to take action to revoke the link
Controlling Version History Access
When sharing documents externally, you may be able to control whether recipients can access the document’s version history. This helps you decide how much document history should be visible to external users.
Version History Options
Possible options can include:
- None — recipients can only work with the current version
- View Only — recipients can view earlier versions but cannot restore them
- View & Restore — recipients can view version history and, where allowed, restore earlier versions
Version History Access
To configure version history access for a share link:
- Create a new share link.
- Find the version history.
- Choose the access level you want.

- Close the link panel.
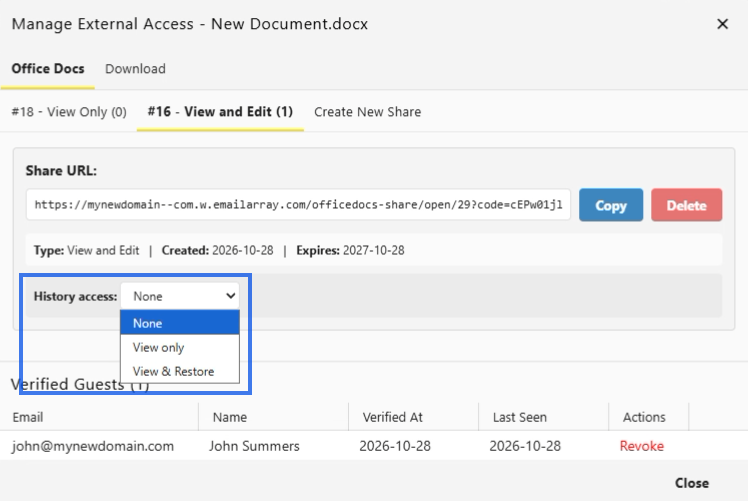
The available settings may vary depending on your workspace configuration and the type of link you are creating.
Why Control Version History Access
Controlling version history access helps you decide how much information external users can see about earlier document states.
Reasons to Restrict
You may want to restrict version history access when:
- previous versions contain sensitive information
- draft versions should not be visible externally
- internal comments or earlier edits should stay private
- you want to simplify the recipient’s experience
Reasons to Allow
You may want to allow version history access when:
- transparency is important during collaboration
- recipients need to track changes over time
- earlier versions may help recover important content
- it is useful for others to see how the document evolved
View-Only Version Access (View Only)
When external users have view-only version access:
- they can browse the version history list
- they can open previous versions for review
- they can compare older document states
- they cannot restore a version as the current document
This option is useful when recipients need visibility into document changes without being able to roll the file back.
Full Version Access (Edit & Restore)
When external users have full version access:
- they can do everything available with view-only version access
- they can access earlier versions more fully
- they may be able to restore a previous version, if the workspace allows it
- restored versions affect the shared document, so this level should be used carefully
Use this option only when the recipient is a trusted collaborator and needs deeper control over the file.
No Version Access (None)
When version history access is disabled:
- external users only work with the current version
- version history is not available through the shared link
- earlier document states are hidden from the recipient
This option is often the safest choice when you want to share a final or controlled version of a document.
Best Practices
- use the most limited version history access that still meets the recipient’s needs
- enable view access for review situations where history visibility is helpful
- use full access only for trusted collaborators
- check version history before sharing if older drafts contain sensitive information
- consider sharing a clean current copy if earlier versions should remain private
Per-Link Settings
Version history access can often be managed separately for each share link.
This means:
- different links can have different version history settings
- one recipient may receive broader access than another
- access can be adjusted based on trust level and business need
Managing External Shares
Viewing All External Shares
For a Single Document
- Open the sharing settings for that file.
- Find the External Links section.

- Review all active share links linked to that document.

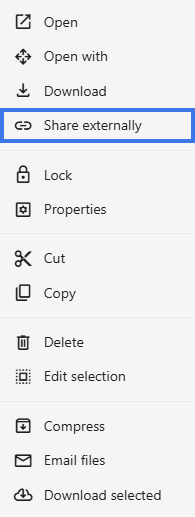
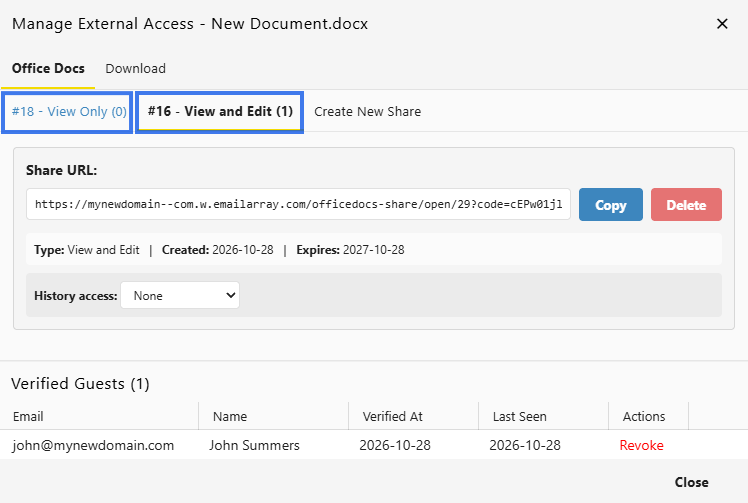
Share Link Information
- Created Date — when the link was created
- Permission — whether the link allows View or Edit
- Expiration — when the link will stop working
- History Access — whether recipients can view the document’s version history
- Verified Guests — who currently has access, with their verified email details
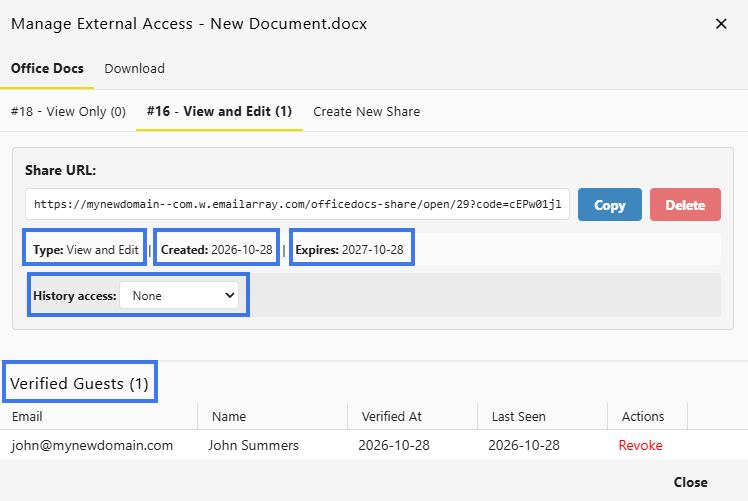
Regular Maintenance
Periodic Review
- Review active external shares on a regular schedule
- Identify expired or unused links
- Remove links that are no longer needed
After Projects End
- Revoke project-related share links
- Archive or secure completed documents
- Keep a record of who had access when needed
Bulk Management
If bulk tools are available in your environment, you may be able to:
- Remove multiple expired links
- Export sharing activity or access reports
Best Practices
- Review external shares regularly
- Remove unnecessary access promptly
- Use expiration dates whenever possible
- Keep notes about why a link was created
- Pay extra attention when sharing sensitive documents
Revoking External Access
When external users no longer need access to a document, you can remove that access by revoking the share link.
When to Revoke Access
You may want to revoke external access when:
- A project or collaboration has ended
- Your relationship with the external party has changed
- The document is no longer relevant
- A security concern has come up
- Access was granted by mistake
- The person who shared the file is no longer with the organization
Revoking a Share Link
- Navigate to the document.
- Open the External Sharing option.
- Find the share link you want to revoke.
- Click Delete.

- Confirm the deletion.
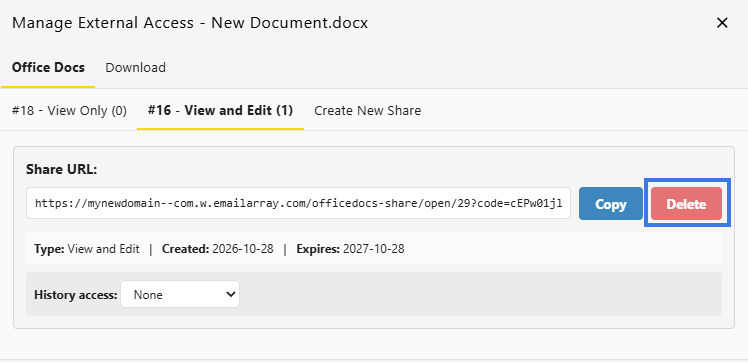
What Happens When Revoked
- The link stops working immediately
- Recipients will no longer be able to use it
- Any active access through that link may end
- Future access with that link is no longer possible
Revoking a Single User
If you only need to remove access for one external user without deleting the entire share link, you can revoke that user individually from the Verified Guests list.
- Open the document sharing settings.
- Find the external share link.
- View the Verified Guests list for that link.
- Locate the user you want to remove.
- Click Revoke in the Actions column.

- Confirm the change.

After revoking that user:
- That person can no longer use the share link
- Other verified users on the same link keep their access
- The share link itself remains active
- The revoked user would need to be verified again or receive new access if needed later
Revocation Is Immediate
Unlike an expiration date, revocation happens as soon as you remove the link.
- Revocation takes effect instantly
- No scheduled end date is required
- It is useful when immediate action is needed
Impact on Recipients
Once access is revoked:
- Users can no longer open the document through that link
- Saved or bookmarked links stop working
- Email links previously sent become invalid
- A new link is required if access needs to be granted again later
Revoking vs. Expiration
Revocation
- Takes effect immediately
- Requires manual action
- Best for unexpected situations
- Does not rely on a scheduled date
Expiration
- Takes effect on a set date
- Ends automatically
- Best for planned access periods
- Works well when you already know when access should end
After Revocation
After a link has been revoked:
- The old link cannot be used again
- A new link must be created if access is needed later
- Access records may still remain available for review or audit purposes
Communicating Revocation
When appropriate, you may want to notify affected users.
- Let them know access has ended
- Share an updated link if continued access is still needed
- Provide context if the change affects an active project
Security Incidents
If access is being revoked because of a security concern:
- Revoke access immediately.
- Review recent access activity.
- Check what may have been opened or viewed.
- Follow any required reporting process.
- Consider additional security steps if needed
External User Access
Accessing a Shared Document
This guide is for external users who have received a share link to access a document in OfficeDocs. Follow these steps to open the document and complete the email verification process.
Step 1: Click the Share Link
Click the link you received by email, chat, or another communication method.
- The link opens the OfficeDocs access page
- You may be asked to verify your email before the document opens
- This helps confirm that the document is being accessed by the intended recipient
Step 2: Enter Your Email and Full Name
- Enter your email address and full name in the field provided.
- Use the same email address the link was intended for.
- Click Send Verification Code.

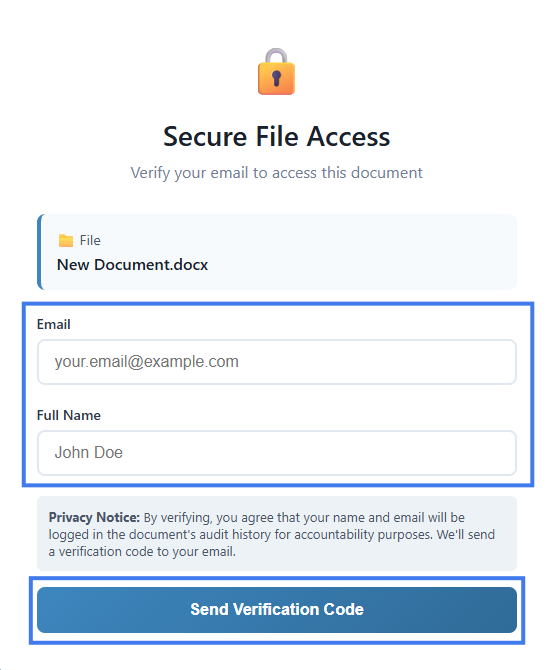
Step 3: Check Your Email
A verification code will be sent to your email address.
- Check your inbox for the verification message
- If you do not see it, check your spam or junk folder
- The email contains a 6-digit verification code

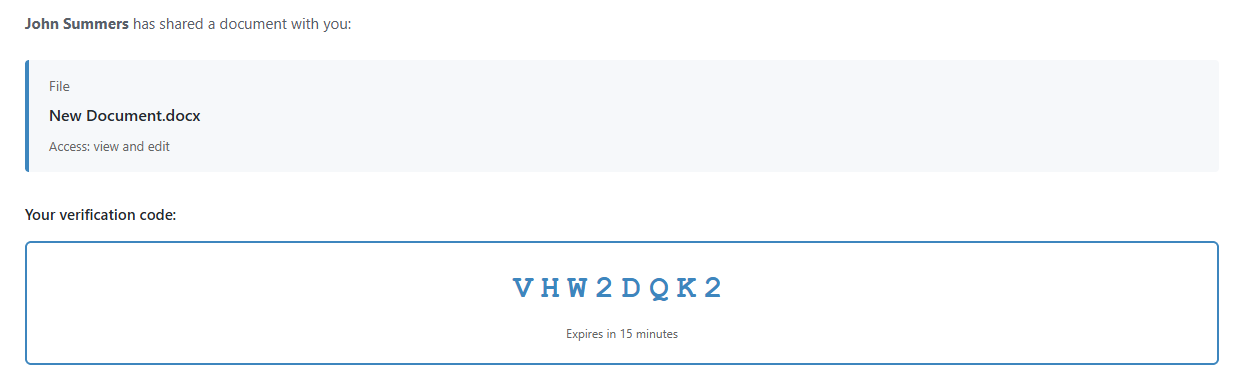
Step 4: Enter the Code
- Return to the verification page.
- Enter the 6-digit code.

- Click Verify.
- The document directly opens in your browser.
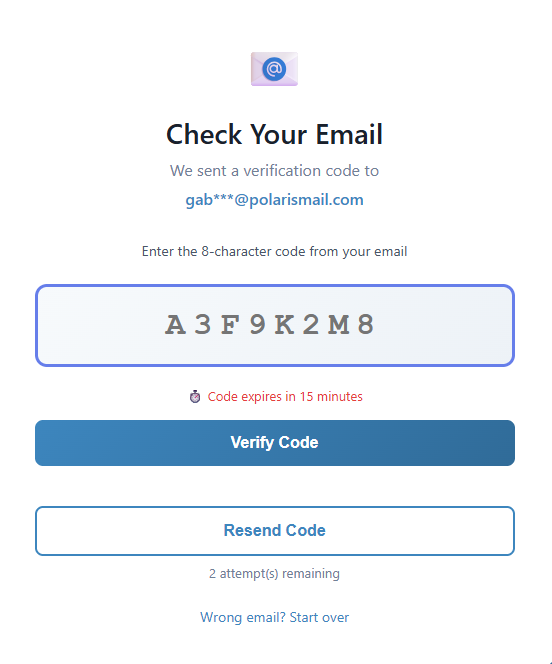
Using the Document
View-Only Access
If you have view-only access:
- You can read and move through the document
- You cannot make changes
- You may be allowed to download a copy, depending on the share settings
View and Edit Access
If you have view and edit access:
- You can make changes directly in the document
- Your changes are saved as you work
- Your activity may be associated with your verified email address
Session Duration
Your access session is usually valid for a limited period.
- You may stay signed in for a set amount of time
- If the session expires, you may need to verify your email again
- The share link itself may still work if it has not been revoked or expired
Returning to the Document
Troubleshooting
Link doesn't work
- The link may have expired
- The owner may have revoked access
- The document may no longer be shared externally
- Contact the person who shared the document if you still need access
Code not received
- Check your spam folder
- Wait a moment and request a new code if the option is available
- Make sure you entered the correct email address
- Confirm that you are using the email address the link was created for
No Account Required
As an external user, you do not need to create a full account to open a shared document.
- Email verification is enough to confirm your identity
- You can access the document through the share link you received
- Your available actions depend on the permission level assigned to that link
Email Verification Process
External users must verify their email address before accessing shared documents. This extra step helps make sure only the intended recipient can open the file.
How Verification Works
- The external user clicks the share link.
- They enter their email address.
- A verification code is sent to that email.
- They enter the code on the verification page.
- Once verified, they can access the document.
The Verification Steps
Step 1: Enter Email and Full Name
Enter your email address and full name in the field provided.
- If the link is restricted to a specific email address, only that address will work
- Make sure you type the email correctly before continuing

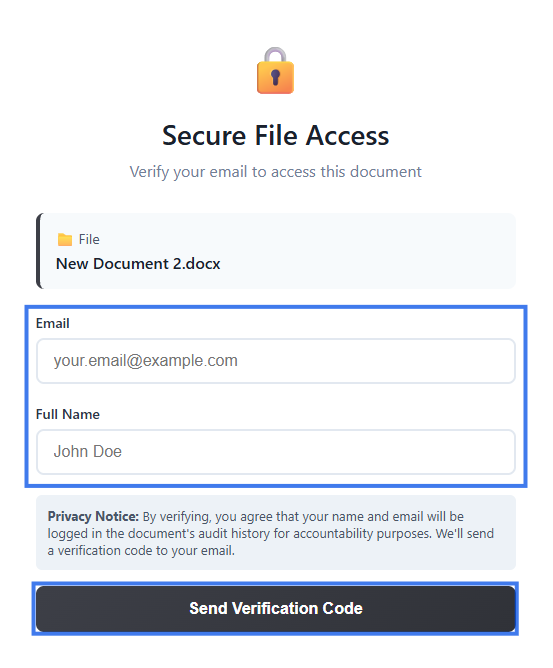
Step 2: Receive Code
A 6-digit verification code is sent to your email.
The email typically includes:
- The verification code
- Information about which document is being accessed
- Information about who shared the document

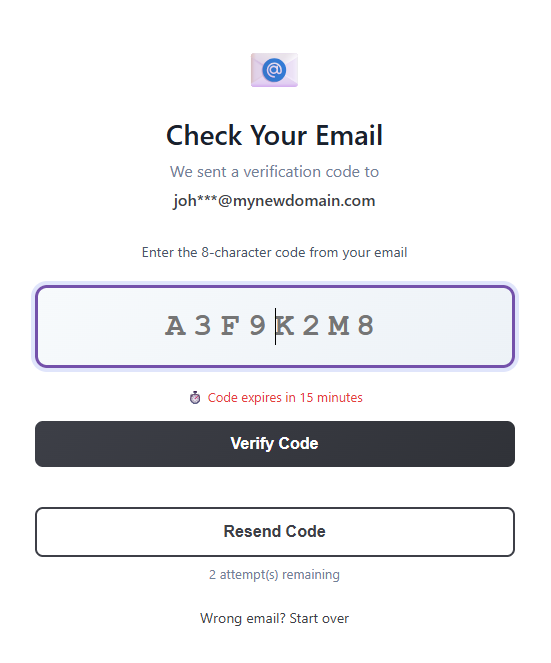
Step 3: Enter Code
Enter the code on the verification page.
- The code is valid for a limited time
- Enter it as soon as you receive it
- If the code expires, request a new one

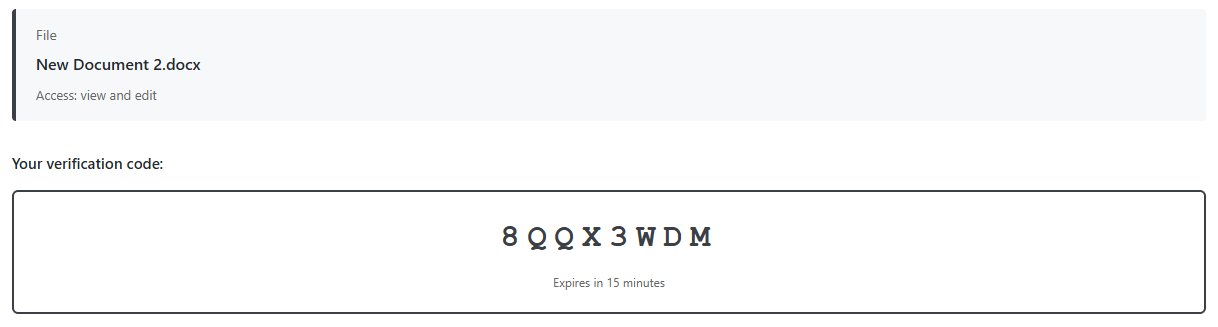
Step 4: Access Granted
After successful verification:
- The document opens in your browser
- A session is created for continued access
- You may not need to verify again right away during the same session

Session Duration
Your verified session usually remains active for a period of time.
- Access may stay active for several hours or longer
- You may need to verify again later
- Closing the browser or being inactive for too long may end the session
Troubleshooting
Code Not Received
- Check your spam folder
- Confirm that your email address was entered correctly
- Wait a moment and request a new code
- Check whether your email filters blocked the message
Code Expired
- Request a new verification code
- Enter the new code promptly after receiving it
Wrong Email Error
- The link may be restricted to a specific email address
- Make sure you are using the intended recipient address
- Contact the document owner if a different email address needs access
Security Benefits
- Confirms the recipient’s identity
- Helps prevent unauthorized link sharing
- Creates a record of verified access
- Connects document access to a verified email address
Re-verification
You may need to verify again when:
- Your session expires
- You open the link from a new device or browser
- Browser cookies have been cleared
- There has been a long period of inactivity
Editing as an External User
If you have received a share link with edit permissions, you can make changes directly in OfficeDocs without needing a full internal account. Your access depends on the permission level assigned to the link.
Confirming View & Edit Access
You have view & edit access if:
- The toolbar shows editing tools
- You can click into the document and type
- The document opens in editing mode instead of read-only mode
Making Edits
With view & edit access, you can:
- Add, delete, and modify text
- Format content such as bold, italic, and similar styling
- Insert images, tables, and other supported elements
- Add comments
- Use the standard editing tools available in the document editor
Saving Your Work
- Changes are saved while you work
- You can also save manually at important moments
- Your edits may appear in version history, depending on the sharing settings and access options applied to the document
Collaboration Features
Real-Time Editing
If other people are editing at the same time:
- You may see their cursors and changes in real time
- You can collaborate in the same document during the same session
- Your presence may be shown to others using your verified email
Comments
- Add comments on specific text or content
- Reply to existing comments
- Resolve comments when appropriate
Your Identity
Your contributions are connected to your verified email address.
- Version history may show your email as the author of changes
- Comments may display your verified email
- Other collaborators may identify your activity through that email address
Limitations
As an external user, you may not be able to:
Session Timeout
If your session expires while you are editing:
- Recent changes should already be saved
- You may need to verify your email again to continue
- Re-verifying quickly helps you return to the document with less interruption
Best Practices
- Save manually at important milestones
- Use comments to communicate with the document owner or collaborators
- Finish important edits before the link expires
- Keep the share link available in case you need to re-open the document later
Viewing Version History as External User
Depending on how the document was shared, you may be allowed to view or restore previous versions of the document.
Version History Access Levels
Your access depends on the share link settings:
- None — Version history is hidden
- View Only — You can see versions but not restore them
- View & Edit — You can view and restore versions
Viewing Version History
If you have access:
- Look for Version History in the File menu.

- Click to open the version history panel.
- Browse the list of saved versions.

- Click a version to view it.
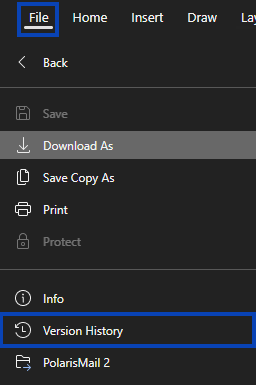
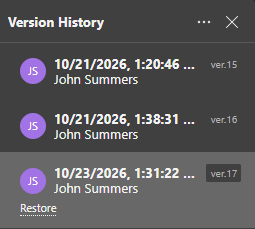
What You Can See
- Date and time of each version
- Who made the changes
- Version notes, if they were added
Viewing Past Versions
- Click a version entry.
- The document opens in that historical state.
- Review the content as it was saved at that time.
- Return to the current version when you are done.
Restoring Versions
If your link includes restore permissions:
- Select the version you want.
- Click Restore.

- Confirm the restoration.
- The document returns to that version.
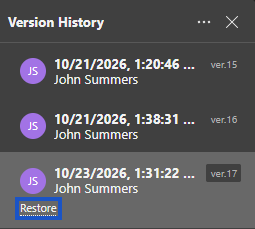
Note: Restoring a version affects the live document for everyone who has access to it. It is a good idea to communicate with the document owner first.
Your Contributions
When you edit the document:
- Your changes can create new versions
- Your verified email may identify you as the author
- Other collaborators may be able to see your contributions in version history
No Version History Access
If version history is not available:
- The option does not appear in the menus
- You can only work with the current version
- Contact the document owner if you need additional access
Why It Matters
Version history can help you:
- Review how the document has evolved
- Recover content that was changed or removed
- Understand changes made by other collaborators
File Management
Using the File Browser
The file browser is your main place for managing documents in OfficeDocs. You can use it to move through folders, locate files, and perform common file actions.
Accessing the File Browser
- Log in to your account.
- Open the Files module.
- Your files and folders are displayed in the file browser.
File Browser Interface
- Navigation Panel — Shows folders and quick-access areas
- File List — Displays the files in the current location
- Toolbar — Provides actions and view options
- Breadcrumb — Shows your current path and helps you move back to earlier folders

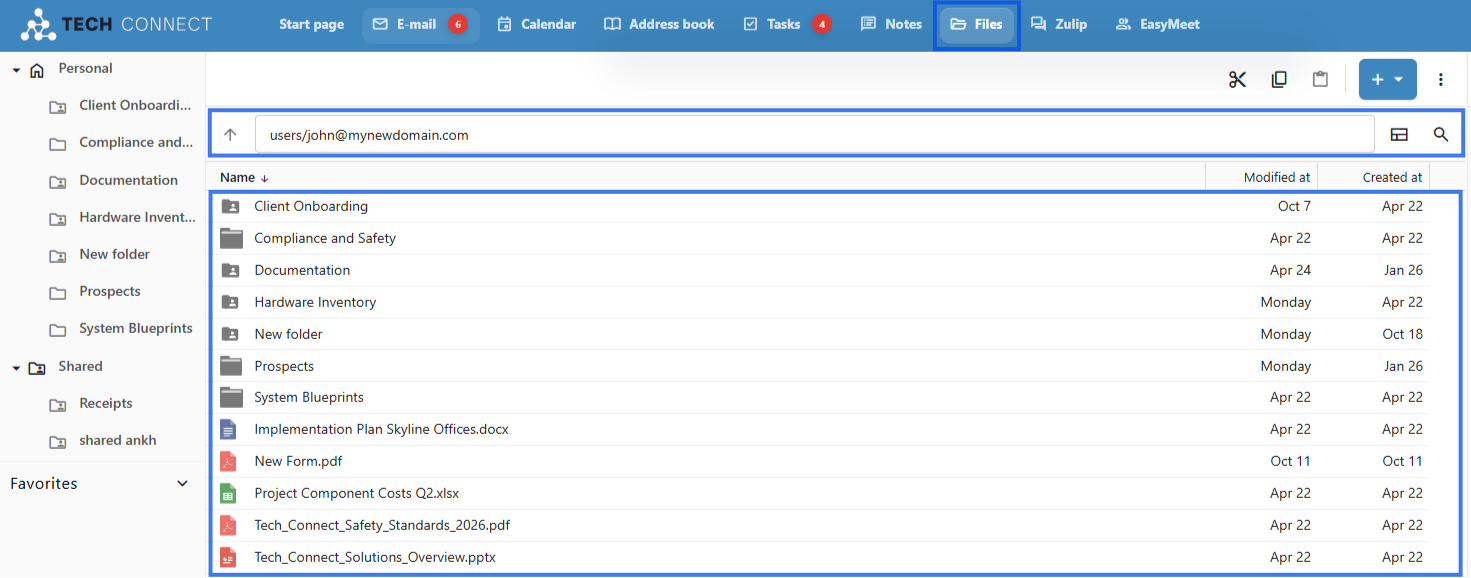
- Click a folder to open it
- Use the breadcrumb to move back up through locations
- Use the navigation panel for quick jumps to other areas
- Double-click a file to open it
View Options
List View
- Files appear in rows with details
- Useful when you want to see file information more clearly
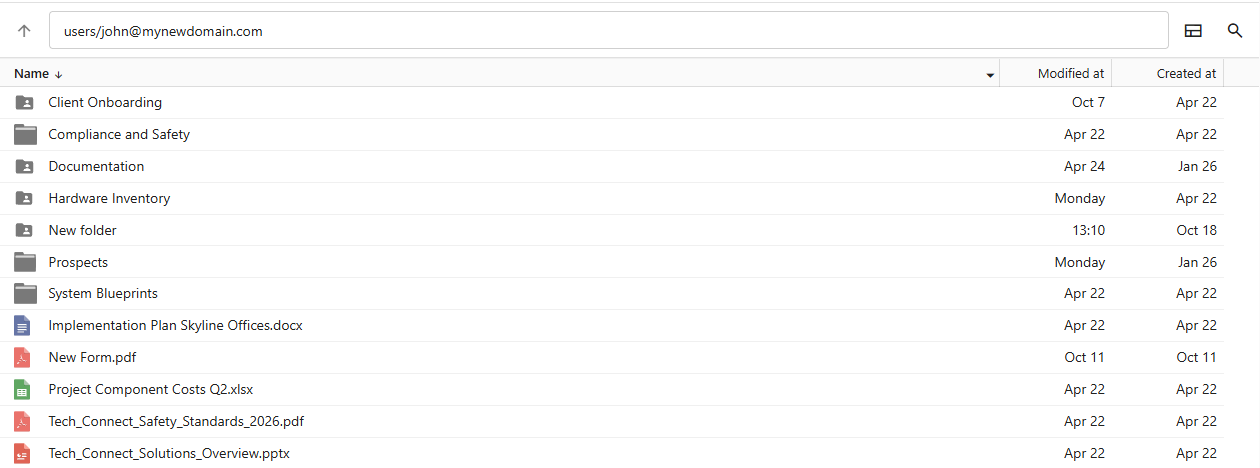
Grid View
- Files appear as thumbnails
- Useful for more visual browsing
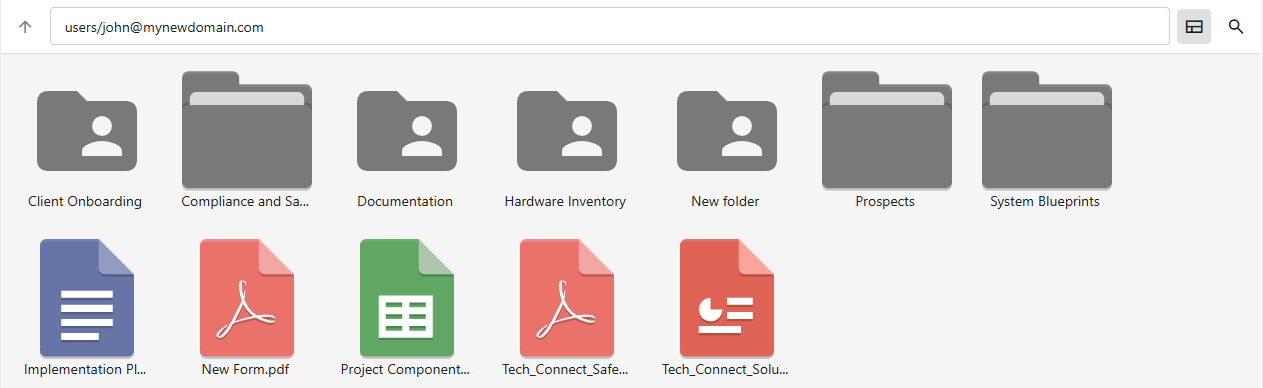
Quick Access Areas
- Personal — Your personal files
- Shared — Files shared by other users
File Actions
Right-click a file to access actions such as:
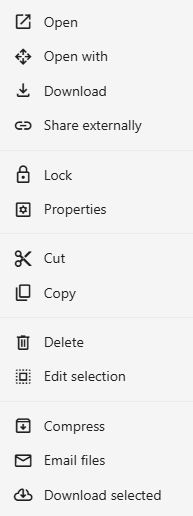
Searching
- Use the search box.
- Type a file name or keyword.
- Results appear as you type.
- Click a result to open its location or access the file.

Creating New Items
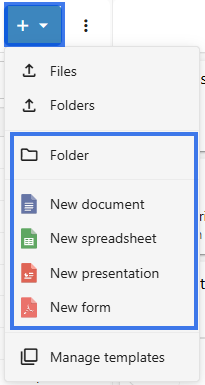
Creating Folders
Organize your documents by creating folders. Folders help you group related files and keep your file space clean and easy to manage.
Creating a New Folder
- Navigate to the location where you want the folder.
- Click the New button or the + Icon button.
- Select Folder.

- Enter a name for the folder.

- Click on Ok.
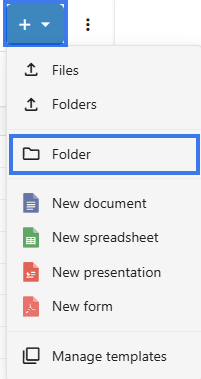
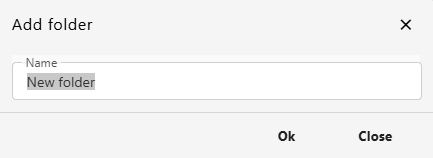
Folder Naming Tips
- Use clear, descriptive names
- Keep names reasonably short
- Avoid special characters such as
\ / : * ? " < > |
- Use a consistent naming style across folders
Creating Nested Folders
- Open an existing folder.
- Create a new folder inside it.

- Continue nesting as needed.

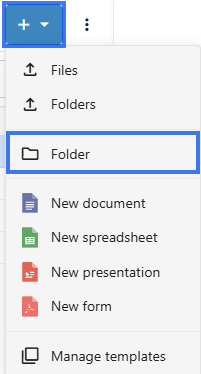

Tip: Try not to nest folders too deeply. In most cases, 3 to 4 levels is enough.
Folder Structure Ideas
By Project
Use project-based folders when you want to group all files related to one job or client.
Projects/
├── Project Alpha/
├── Project Beta/
└── Project Gamma/By Date
Use date-based folders when you want to organize files by year, quarter, or another time period.
2026/
├── Q1/
├── Q2/
├── Q3/
└── Q4/By Type
Use type-based folders when you want to separate documents by purpose.
Documents/
├── Reports/
├── Proposals/
└── Contracts/After Creating
- Move files into the new folder
- Share the folder if needed
- Add it to favorites for faster access later
Moving Files and Folders
Reorganize your documents by moving them between folders. Moving items helps you keep your file structure clean and organized.
Drag and Drop
- Click and hold the file or folder.
- Drag it to the destination folder.
- Drop it to complete the move.
Cut and Paste
- Right-click the file or folder.
- Select Cut.

- Navigate to the destination folder.
- Compose Ctrl+V — Paste
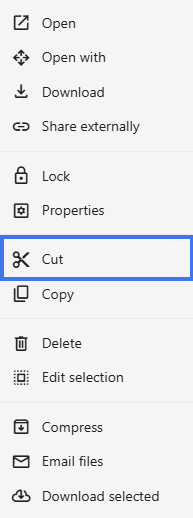
Keyboard Shortcuts
- Ctrl+X — Cut
- Ctrl+V — Paste
Moving Multiple Files
- Select multiple files:
- Ctrl+Click for individual selection
- Shift+Click for range selection
- Use any move method.
- All selected items move together.
What Happens When You Move
- The file appears in the new location
- It is removed from the old location
- Sharing permissions may change depending on the destination folder
- Version history is preserved
Moving Shared Files
When moving files that are already shared:
- Internal sharing may be affected by the destination folder’s permissions
- External share links can continue working, depending on how the file was shared
- File owner permissions remain in place
Moving Folders
Moving a folder also moves everything inside it:
- All files inside move with it
- All subfolders move with it
- The folder structure stays intact
Undo a Move
If you moved something by mistake:
- Use Ctrl+Z right away if the action can still be undone
- Or manually move the item back to its original location
Copying Files
Create copies of files when you want to duplicate content while keeping the original file unchanged. Copying is useful for backups, templates, and alternate versions.
Copy and Paste
- Right-click the file.
- Select Copy.

- Navigate to the destination.
- Right-click and select Paste (Ctrl+V).
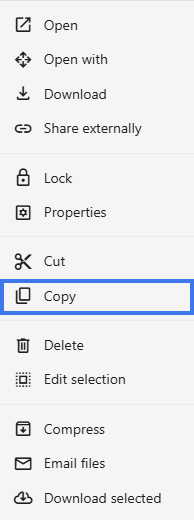
Keyboard Shortcuts
- Ctrl+C — Copy
- Ctrl+V — Paste
Duplicate in Same Folder
- Right-click the file.
- Select Copy.
- A new file appears with (1) in the name.

- Rename it if needed.
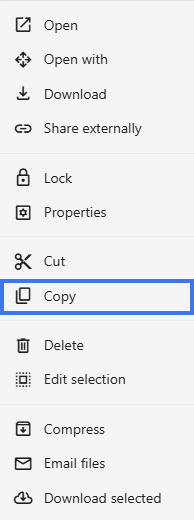

Copy vs. Move
Copy
- Creates a duplicate
- Original stays in place
- Results in two separate files
Move
- Relocates the original
- Original is removed from the old location
- Results in one file in a new location
What Gets Copied
- The file content is duplicated
- Formatting is preserved
- The copy becomes a new, separate file
- Version history starts fresh for the copy
- Sharing permissions are not copied
Copying Folders
When you copy a folder:
- The entire folder structure is duplicated
- All files inside are copied
- All subfolders are copied
Use Cases
- Creating a backup before major changes
- Using an existing document as a template
- Making different versions of the same file
- Sharing a copy instead of the original
Renaming Files and Folders
Change the names of your files and folders to keep them organized and easy to identify.
Renaming a File or Folder
Right-Click Method
- Right-click the item.
- Select Properties then Name, Extension.

- Type the new name.

- Press Enter to confirm.
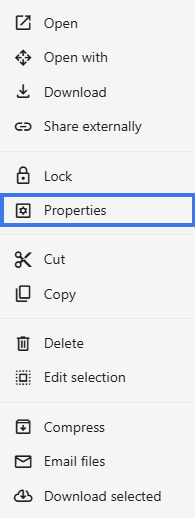
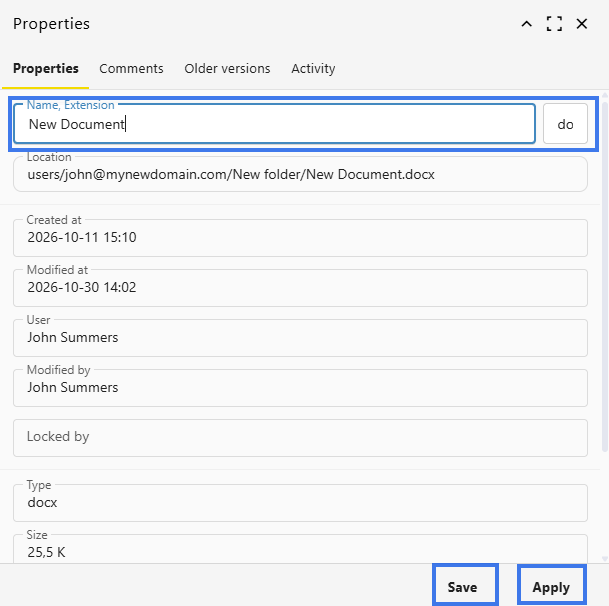
Naming Guidelines
- Use descriptive, meaningful names
- Keep names reasonably short
- Avoid special characters such as
\ / : * ? " < > |
- Include dates when useful, such as YYYY-MM-DD
- Use version numbers when tracking files manually
File Extensions
When renaming files:
- The file extension, such as .docx or .xlsx, should usually stay unchanged
- Changing the extension may affect how the file opens
- The system may show a warning if you try to change the extension
Impact of Renaming
- File content is not changed
- Sharing permissions stay in place
- Internal share links continue working
- External share links continue working
- Version history is preserved
Canceling a Rename
- Press Esc before confirming the new name
- The original name is kept
Undoing a Rename
- Press Ctrl+Z immediately after renaming, if available
- Or rename the item again manually
Best Practices
- Use a consistent naming style
- Include project or client names when helpful
- Add dates for time-sensitive files
- Avoid generic names such as Document1
Deleting Files and Folders
Remove files and folders you no longer need. Deleted items usually go to the trash first, where they can often be recovered before being removed permanently.
Deleting a File
Right-Click Method
- Right-click the file.
- Select Delete.
- Confirm the deletion if prompted.
Keyboard Method
- Select the file.
- Press the Delete key.

- Confirm the deletion if prompted.
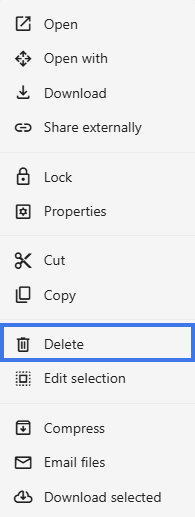
Deleting Folders
When you delete a folder:
- All files inside are deleted with it
- All subfolders are deleted with it
- Everything moves to the trash together
Deleting Multiple Items
- Select multiple items:
- Ctrl+Click for individual items
- Shift+Click for a range
- Press Delete or right-click and choose Delete
- All selected items are deleted together
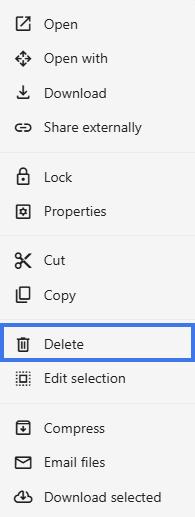
Impact of Deletion
- The file is no longer available in its folder
- Shared users lose access
- External share links stop working
Before You Delete
Before deleting, consider:
- Is anyone else still using this file?
- Are there active share links?
- Do you need to keep a copy first?
- Would archiving be a better option?
Managing Favorites
Mark frequently used folders as favorites for quicker access. Favorites appear in a separate section so you can return to important items without searching through folders every time.
Adding to Favorites
Right-Click Method
- Right-click the folder.
- Select Add to Favorites.

- The item is added to your favorites list.

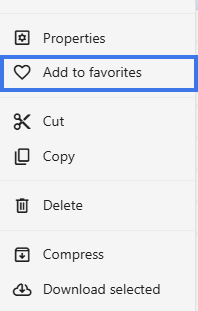
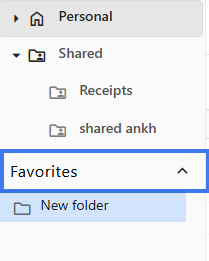
Viewing Favorites
- Open the file browser.
- Click Favorites in the navigation area.
- All your favorited items are listed there.
Removing from Favorites
- Right-click the favorited item.
- Select Delete.

- The item is removed from your favorites list.
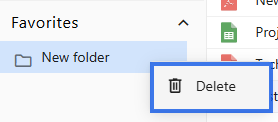
The folder itself is not changed. Only the favorite marker is removed.
What Can Be Favorited
Benefits of Favorites
- Faster access to important documents
- Less need to open multiple folders
- A simple personal organization system
- Easier access across devices when favorites sync with your workspace
Favorites Are Personal
- Only you see your favorites
- Marking something as a favorite does not affect other users
- Each user keeps their own favorites list
Use Cases
- Documents you open every day
- Current project folders
- Reference files you use often
- Templates you return to regularly
Tips
- Avoid adding too many favorites
- Review and clean up favorites from time to time
- Combine favorites with folders for better organization
Uploading Files
Upload documents from your computer to OfficeDocs for editing, sharing, and collaboration.
Upload Methods
- Open the File tab then click on New or +.

- Click the Upload button.

- Select files from your computer.

- Click Open to start the upload.
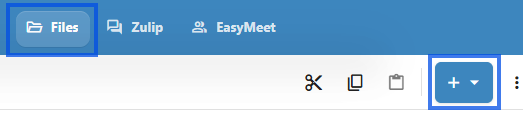
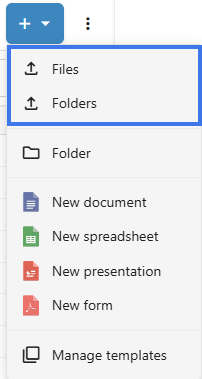
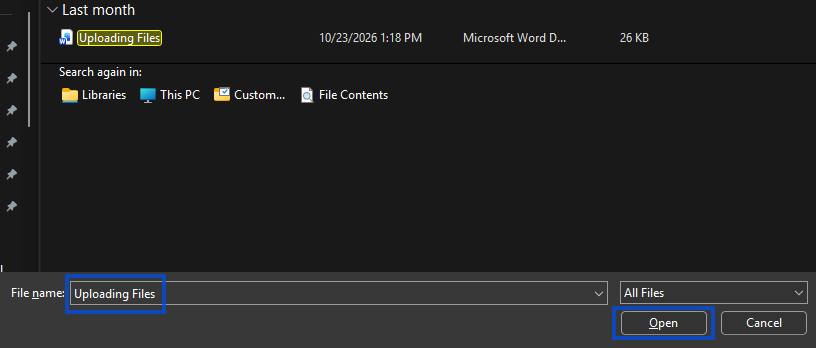
Drag and Drop
- Open the destination folder.
- Drag files from your computer.
- Drop them into the file browser.

- Files upload automatically.

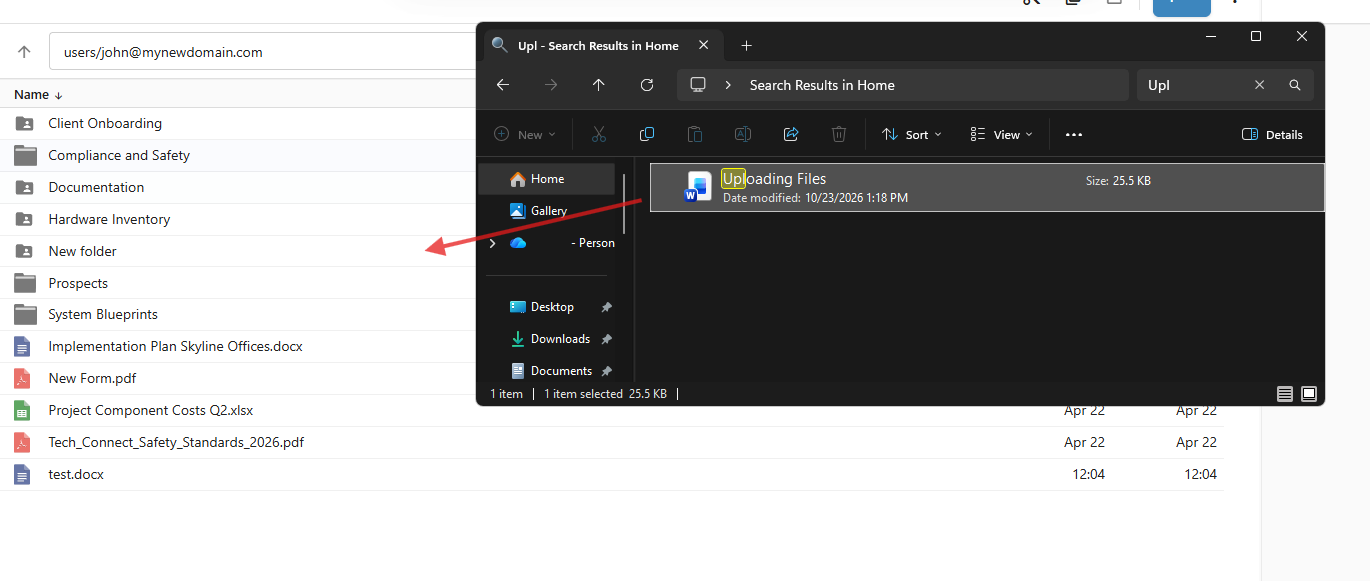
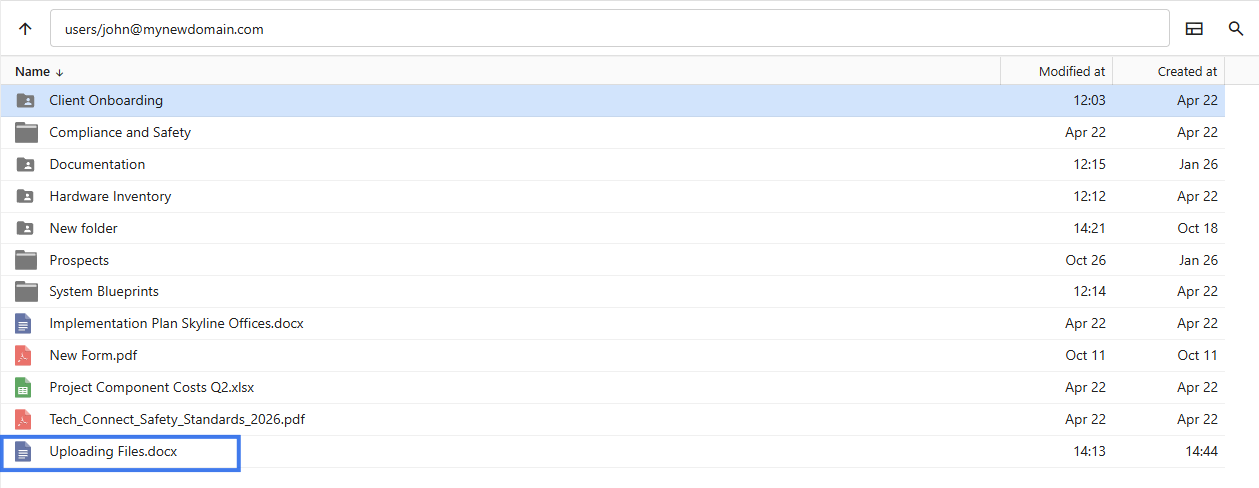
Multiple Files
- Select multiple files when uploading
- Drag multiple files at once if needed
- All selected files upload together
Upload Progress
- A progress bar shows the upload status
- Each file may show its own upload progress
- You can cancel an upload while it is still in progress
Supported Formats
Editable document types include:
-
Documents: .docx, .doc, .odt, .rtf, .txt
-
Spreadsheets: .xlsx, .xls, .ods, .csv
-
Presentations: .pptx, .ppt, .odp
-
PDF: .pdf
File Size Limits
- Check with your administrator if upload limits apply
- Large files may take longer to upload
- Compress very large files if needed before uploading
After Upload
- Files appear in the selected folder
- You can click a file to open and edit it
- You can share the file with others if needed
- Version history begins once the file is opened and saved in OfficeDocs
Troubleshooting
Upload Fails
- Check your internet connection
- Make sure the file is not too large
- Try uploading fewer files at the same time
File Won't Open After Upload
- Check that the file format is supported
- Try uploading the file again
- Make sure the file is not corrupted
- Some older Microsoft Office formats may be converted before editing
Viewing File Properties
View detailed information about a file, including its size, type, dates, owner, sharing status, and version details.
Opening File Properties
- Right-click the file.

- Select Properties.
- The properties panel opens.

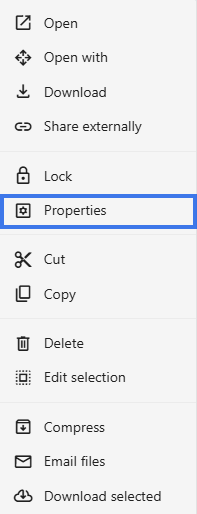
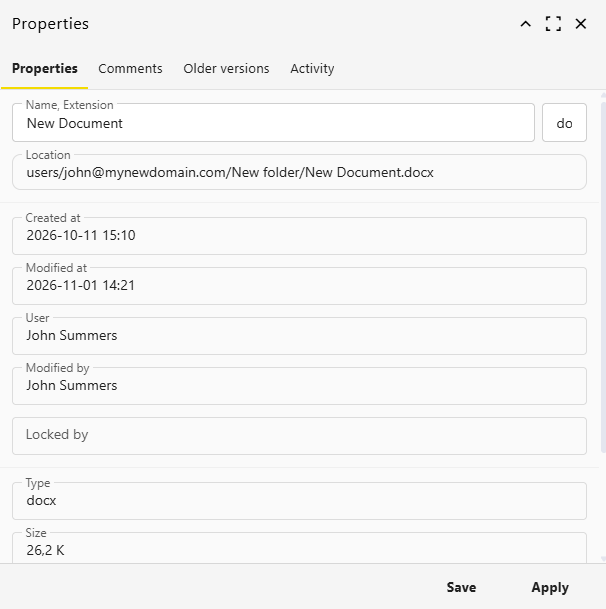
Basic Information
- Name — The file name
- Type — The file type, such as document, spreadsheet, or presentation
- Size — The file size shown in KB or MB
- Location — The folder path where the file is stored
Date Information
- Created — When the file was first created
- Modified — The last time the file was changed
- Accessed — The last time the file was opened

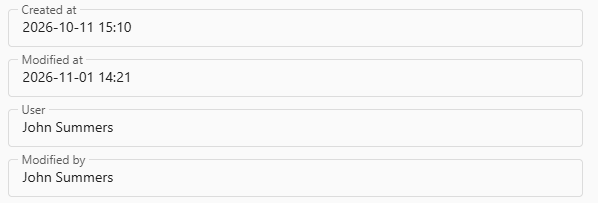
Version Information
- Number of saved versions
- Access to version history or older versions, if available

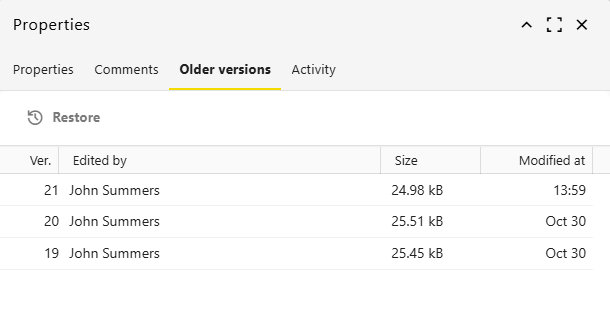
Using Properties
Check File Size
Useful before downloading, emailing, or sharing a file.

Verify Ownership
Confirm who controls the file and who originally created it.

Check Dates
Review when the file was created, last modified, or last opened.
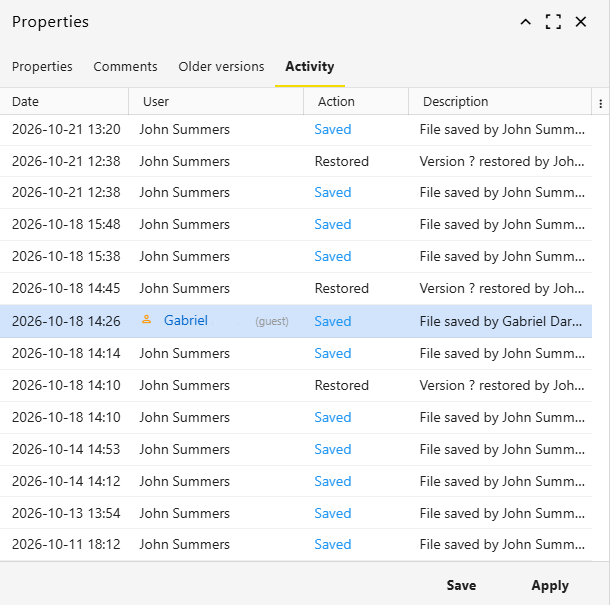
Editing Properties
Some properties may be editable, depending on your workspace:
- File name
- Content expiring date
Other properties, such as file size and system dates, are managed automatically.
Why File Properties Are Useful
- Help identify the correct file quickly
- Show whether a file is current or outdated
- Make it easier to confirm ownership before editing or sharing
- Let you review sharing and version details in one place
Tips
- Check properties before sharing a file externally
- Review the Modified date to make sure you are using the latest file
- Use properties to confirm the file location if you need to move or organize it
- Look at version details before restoring or comparing older content
Desktop Application
Desktop Application Introduction
OnlyOffice Desktop Editors provides a native desktop application for working with documents stored in OfficeDocs. It lets you edit files on your computer while staying connected to your cloud storage.
What is Desktop Editors?
Desktop Editors is a free office suite that runs directly on your computer. When connected to OfficeDocs, it allows you to:
- Edit documents directly from your OfficeDocs account
- Work offline when an internet connection is unavailable
- Access cloud files alongside local documents
- Use full editing tools in a native desktop application
Key Benefits
Native Performance
Desktop applications often feel faster and more responsive than browser-based editing.
Offline Access
You can continue working when you do not have an internet connection. Changes sync when you reconnect.
Familiar Interface
The desktop application uses an interface similar to the web editor, so it feels familiar if you already use OfficeDocs in your browser.
Local File Support
You can work with local files on your computer alongside cloud documents from OfficeDocs.
System Requirements
- Windows — Windows 7 or later
- macOS — macOS 10.12 or later
- Linux — Various distributions are supported
Included Editors
- Document Editor — Word processing for .docx and other text document formats
- Spreadsheet Editor — Spreadsheets such as .xlsx
- Presentation Editor — Presentations such as .pptx
- PDF Viewer — View and fill PDF forms
Getting Started
- Download and install Desktop Editors.
- Connect your OfficeDocs account.
- Browse and open your cloud files.
- Edit and save — changes sync automatically when connected.
Desktop vs Web
Both desktop and web editors provide access to the main editing tools. The best choice depends on how you prefer to work.
- Desktop — Better for offline work, local file access, and native app performance
- Web — No installation required and accessible from any supported browser
When Desktop Editors is Useful
- When you want to work without a browser open
- When you need access to local and cloud files in one place
- When you need to keep working during an internet interruption
- When you prefer a traditional desktop application experience
Things to Keep in Mind
- You may need to sign in and connect your OfficeDocs account before accessing cloud files
- Offline changes sync after the application reconnects
- Some collaboration features work best while connected to the internet
- Available options can vary slightly depending on your operating system and application version
Tips
- Use the desktop app if you often work with large files
- Reconnect to the internet regularly so changes can sync
- Confirm that you are editing the correct cloud file before saving
- Keep the desktop application updated for the best compatibility
Installing Desktop Editors
Download and install OnlyOffice Desktop Editors on your computer so you can work with OfficeDocs files locally.
Download
Download Desktop Editors from the official OnlyOffice website:
- Visit onlyoffice.com/desktop.aspx.
- Select your operating system.

- Click Download.

- Save the installer file to your computer.
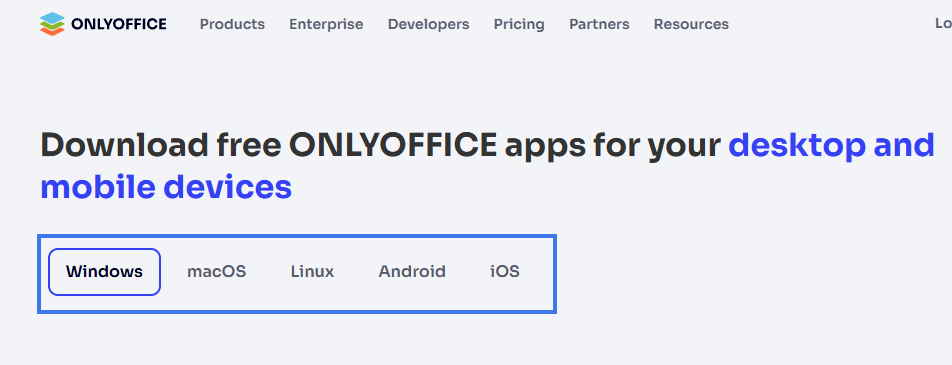
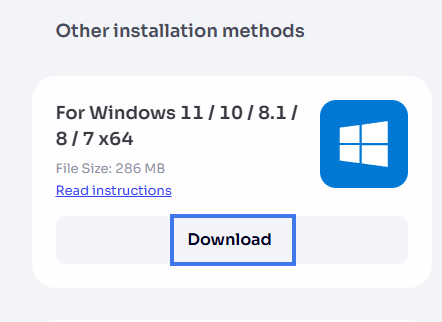
Windows Installation
- Run the downloaded .exe installer.
- Accept the license agreement.
- Choose the installation location, or keep the default.
- Click Install.
- Wait for the installation to finish.
- Click Finish.
macOS Installation
- Open the downloaded .dmg file.
- Drag the OnlyOffice icon into the Applications folder.
- Eject the disk image.
- Open OnlyOffice from Applications.
- If prompted, confirm that you want to open the application.
Linux Installation
Installation steps depend on your Linux distribution.
Debian/Ubuntu (.deb)
- Download the .deb package.
- Install the package using your package manager.
- If needed, install any missing dependencies.
Red Hat/Fedora (.rpm)
- Download the .rpm package.
- Install the package using your package manager.
Snap Package
- Open your terminal.
- Install the Snap package for Desktop Editors.
- Wait for the installation to complete.
Flatpak
- Open your terminal.
- Install the Flatpak package for Desktop Editors.
- Wait for the installation to complete.
First Launch
- Open OnlyOffice Desktop Editors.
- The application opens to the start screen.
- You can immediately create a new local document or open an existing one.


- To connect OfficeDocs, see Connect-to-your-account.
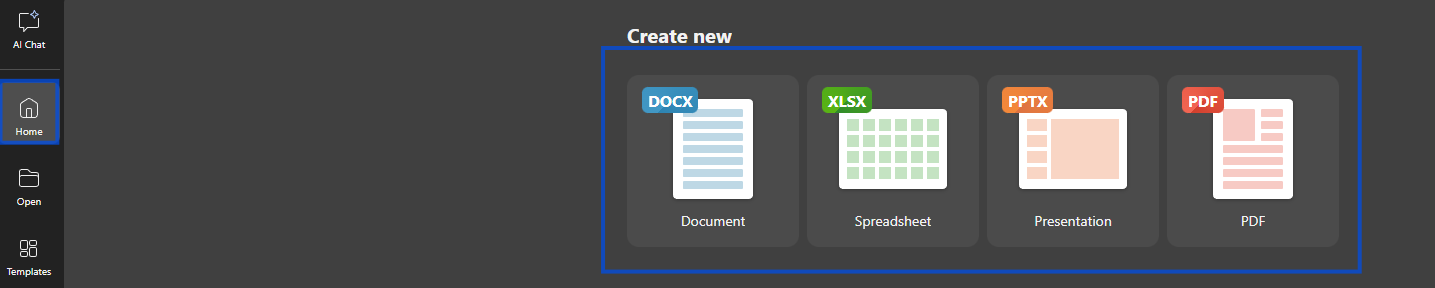
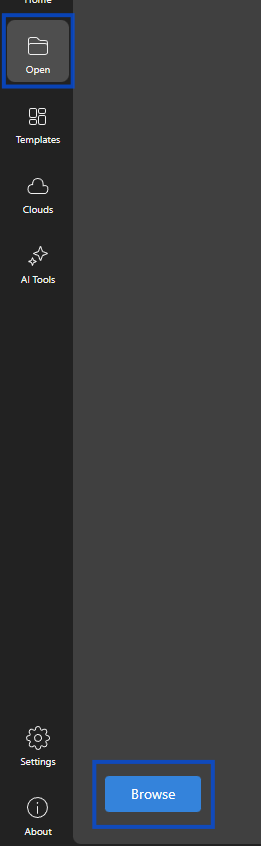
Updates
Desktop Editors checks for updates automatically. When an update is available:
- You will see a notification
- You can download and install the update
- You may need to restart the application to apply it
Uninstalling
Windows
Use Add or Remove Programs in Windows settings.
macOS
Drag the application from Applications to the Trash.
Linux
Use your package manager to remove the package.
Troubleshooting
Installation Fails
- Make sure you have administrator or root permissions
- Check that you have enough available disk space
- Try downloading the installer again
Application Won’t Start
- Restart your computer
- Try reinstalling the application
- Check that your system meets the application requirements
Connecting to Your Account
OnlyOffice Desktop Editors can connect directly to your OfficeDocs account, giving you access to your cloud documents from a desktop application.
Prerequisites
Before connecting your account, make sure you have:
- OnlyOffice Desktop Editors installed on your computer
- Your OfficeDocs account credentials
- An active internet connection
Adding Your Account
- Open OnlyOffice Desktop Editors.
- Go to the Clouds section or click the cloud icon.

- Select Connect for ONLYOFFICE.

- Enter your server URL then click Connect.

- Enter your username and password.

- After clicking Next, your PolarisMail account automatically opens.


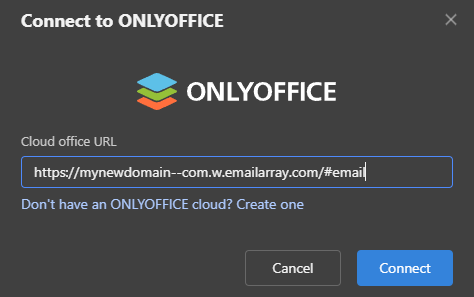
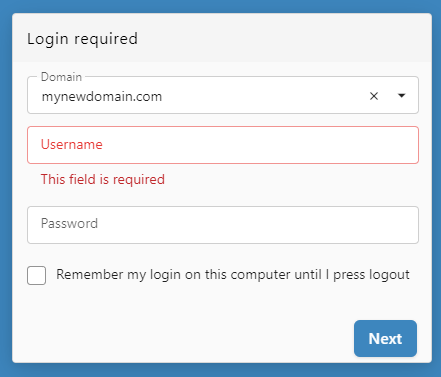
Server URL
Your server URL is the web address of your OfficeDocs installation. It may look similar to:
-
https://yourcompany.com
-
https://docs.yourcompany.com
If you are not sure which address to use, contact your administrator.
Two-Factor Authentication
If your account uses two-factor authentication:
- Enter your username and password as usual.
- Wait for the verification prompt to appear.
- Open your authenticator application.
- Enter the current verification code.
- Click Verify.
Authenticator Apps
Common authenticator apps include:
- Google Authenticator
- Microsoft Authenticator
- Authy (recommended)
- 1Password
Authentication
Depending on your organization’s setup:
- You may sign in with your usual account username and password
- You may be redirected to a login page in your browser or app window
- Two-factor authentication may be required before access is granted
After Connecting
Once your account is connected:
- Your cloud files appear in the file browser
- You can open, edit, and save documents from your account
- Changes sync with the server automatically
- You may be able to continue working with cached files when offline


Multiple Accounts
You can connect more than one account if needed:
- Click Add Account or Connect Another.
- Enter the second account’s server address and login details.
- Repeat the process for any additional accounts.
- Switch between accounts as needed from the cloud list.

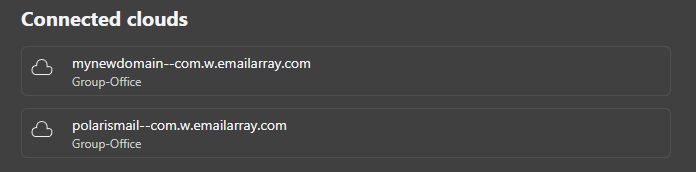
Disconnecting
- Open the cloud tab.
- Find the connected account you want to remove.
- Click the Three Dots then Logout or Remove from list.

- Confirm the action if prompted.
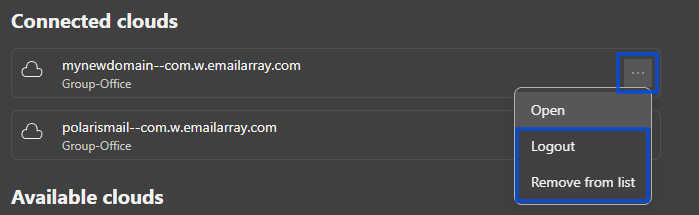
Local cached files may be removed depending on your setup.
Troubleshooting Connection
Cannot connect
- Verify that the server URL is correct
- Check that your internet connection is working
- Make sure your username, email, and password are entered correctly
- Try opening the server URL in a web browser first
Connection lost
- Check your internet connection
- Wait for the application to reconnect automatically
- Reopen the account if needed
- Unsaved local changes may remain available until syncing resumes
Authentication fails
- Verify your username or email and password
- Check whether your password has expired
- Complete any required two-factor authentication steps
- Contact your administrator if your account has access restrictions
Browsing Cloud Files
Access and manage your OfficeDocs files directly from Desktop Editors without opening a web browser. When your cloud account is connected, your files appear inside the Desktop Editors interface so you can browse, open, and work with them from one place.
Opening the File Browser
- Open OnlyOffice.
- In the left sidebar, click your connected OfficeDocs account.

- Select the File tab then download your files or folder.

- Open the file or folder from the file browser in OnlyOffice.


- Your file now appears in the Home tab ready for editing directly from the Desktop Editor.


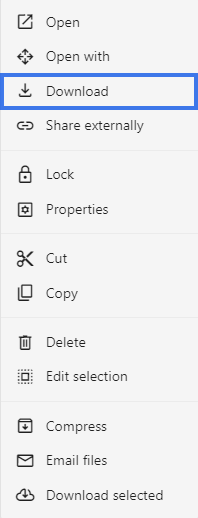
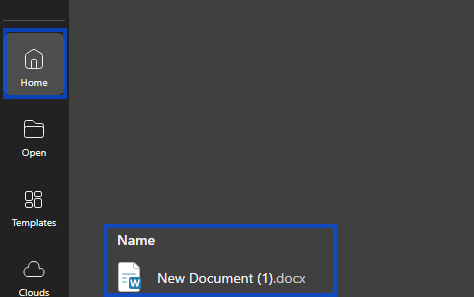
Navigation
Folders
- Double-click a folder to open it.
- Use the breadcrumb path to go back to a previous location.
- Use the back arrow to move up one level when needed.
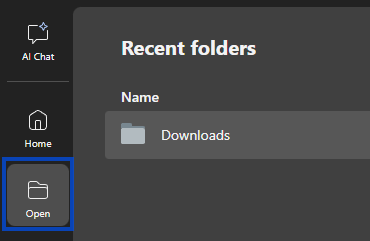
Opening Files
- Navigate to the file you want to open.

- Double-click the file.
- The file opens in the appropriate editor.
- Edit as usual, and your changes save back to the cloud.
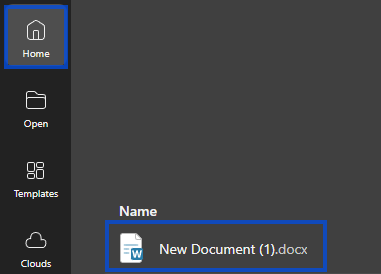
Search
- Use the search box to find files quickly.
- Search by file name or keyword when available.
- Results can appear as you type.
- Click a result to open it.

Sorting and View
- Sort files by name, date, size, or type.
- Switch between list view and grid view if available.
- In list view, click column headers to change the sort order.
Refresh
If files were changed elsewhere:
- Click the refresh button.
- Or press F5 if supported.
- The file list updates with the latest changes.
Local vs Cloud Files
Desktop Editors lets you work with both local files and connected cloud files. Local files stay on your computer, while cloud files are stored in your connected OfficeDocs workspace and can be opened from the cloud section in the sidebar.
Creating Documents from Desktop
Create new documents directly in your OfficeDocs cloud storage using Desktop Editors, so you can start working right away without opening a web browser.
Creating a New Cloud Document
- Open Desktop Editors.
- Open your connected OfficeDocs account.

- Go to the folder where you want to create the document.
- Click Create or the new document button.

- Select the document type you want to create.
- Enter a name for the document.
- Click Ok.


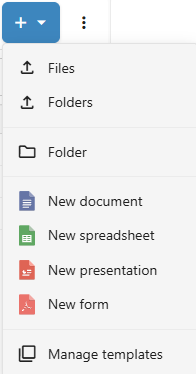
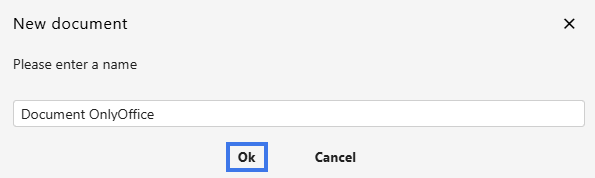
Document Types
- Document — A word processing file, typically saved as .docx
- Spreadsheet — A spreadsheet workbook, typically saved as .xlsx
- Presentation — A slide presentation, typically saved as .pptx
- Form — A fillable document form, typically saved as .pdf
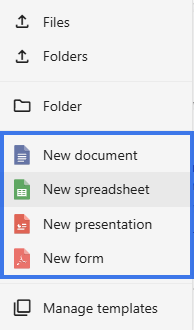
Creating from Template
- Click Templates.

- Browse the available templates.

- Select the template you want to use.

- The document opens with the template content already in place.

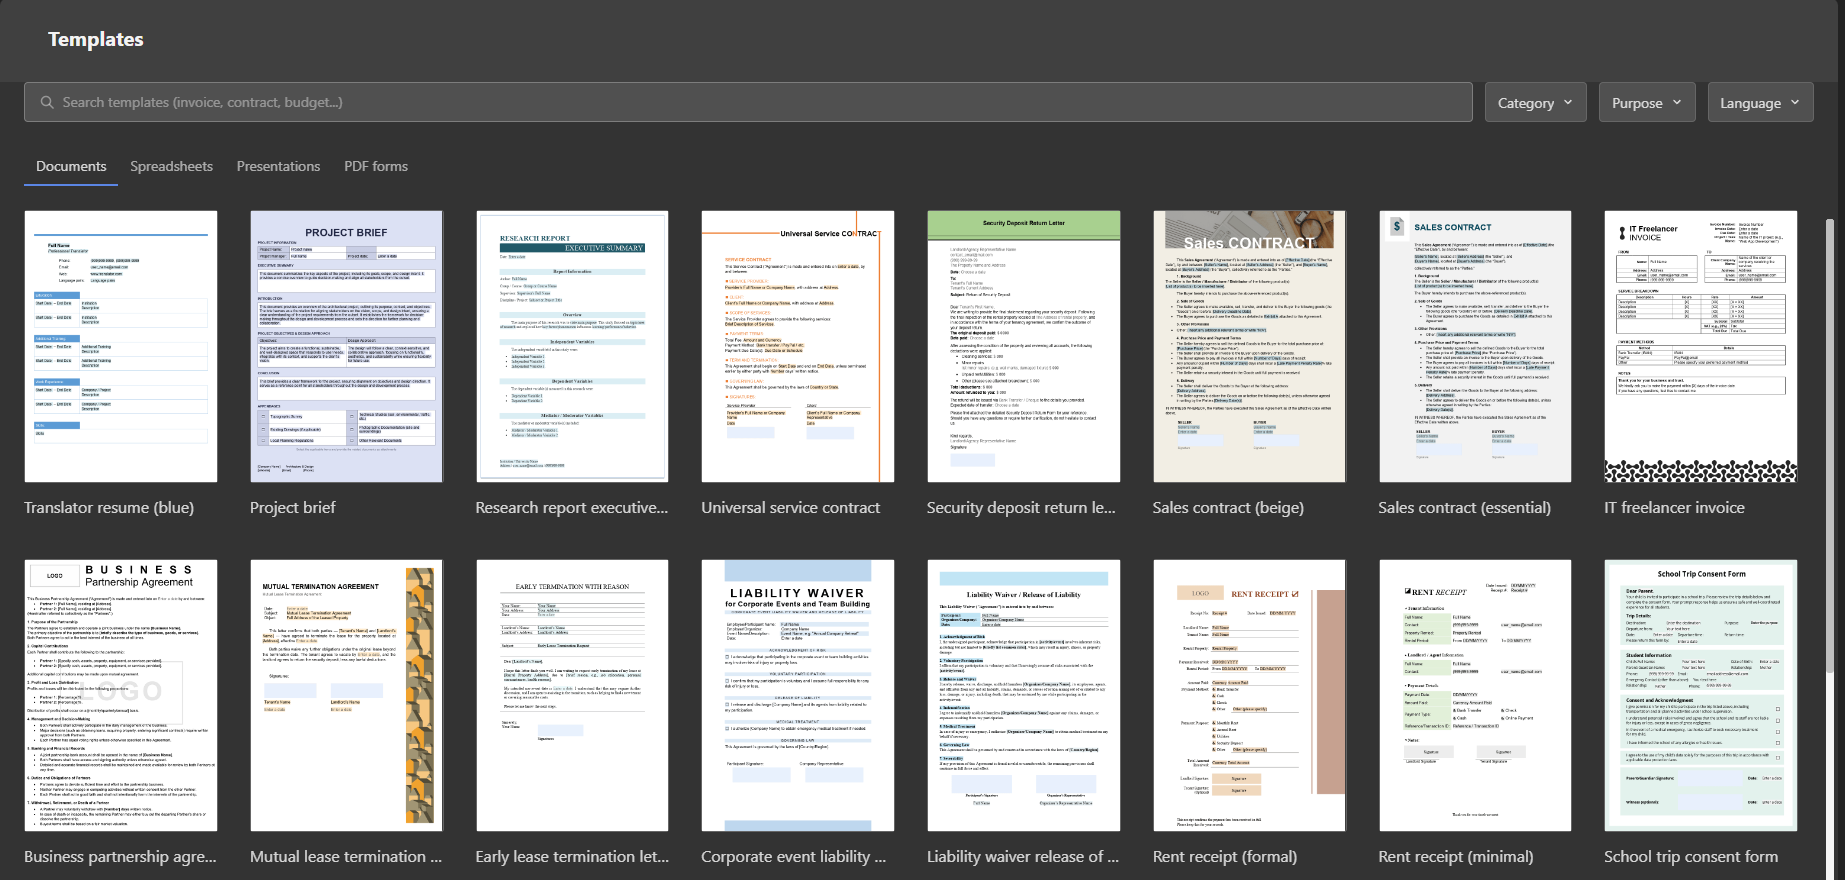
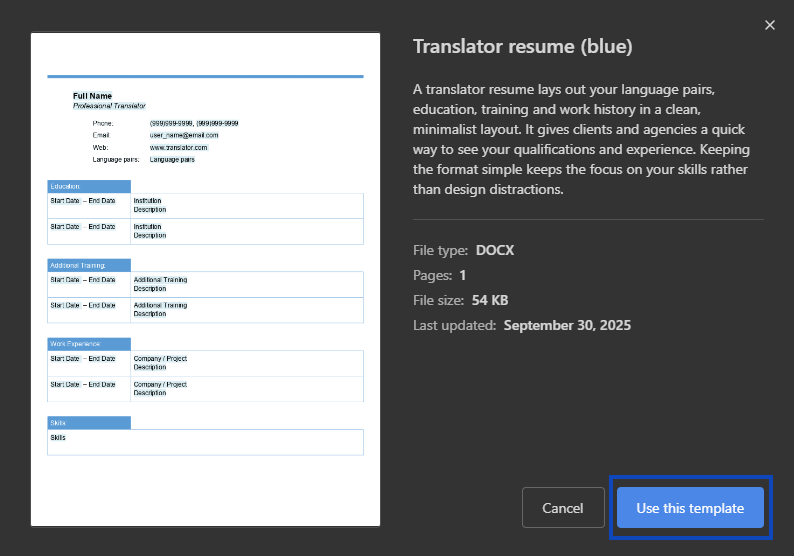
Creating Local Then Uploading
If you prefer, you can create the file locally first and upload it afterward:
- Click Create from the Desktop Editors Home screen.
- Create your document normally.

- Save it locally on your computer first.
- Upload it to OfficeDocs later using the web interface or drag-and-drop.

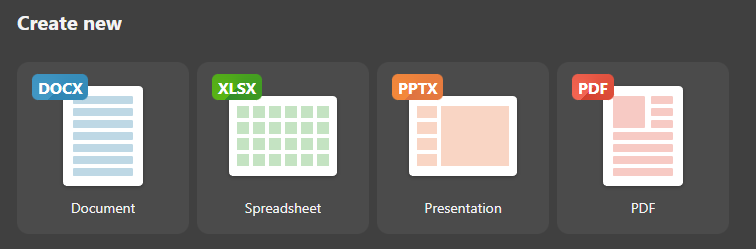
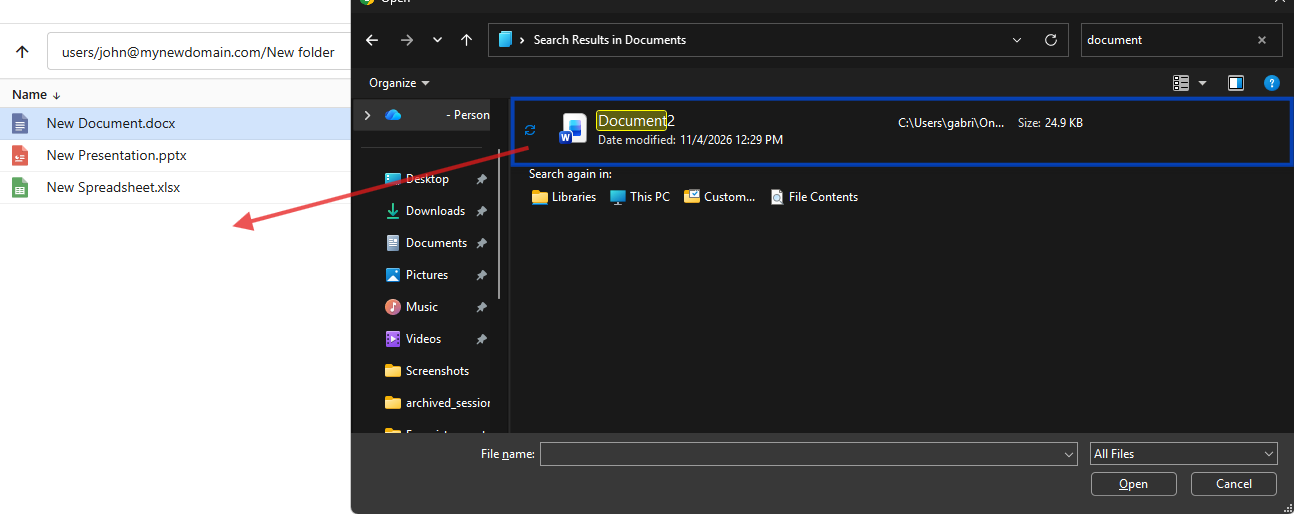
Document Naming (File Explorer)
- Use clear and descriptive names
- Avoid special characters that could cause issues
- Add a date or version number if it helps with organization
- Rename the document later if needed
After Creation
- The document opens in the editor
- You can begin adding content immediately
- Changes save to the cloud after the file is stored there
- You can share the document when it is ready
Tips
- Create documents directly in the folder where you plan to use them
- Use templates to save time on common file formats
- Name documents clearly so they are easier to find later
Sharing from Desktop
Accessing Share Options
From File Browser
- Open your connected OfficeDocs files in Desktop Editors.

- Go to the file you want to share.
- Right-click the file.
- Select Share externally.

- Create a link and Send it to the destinated user.


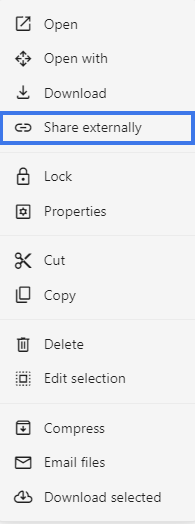
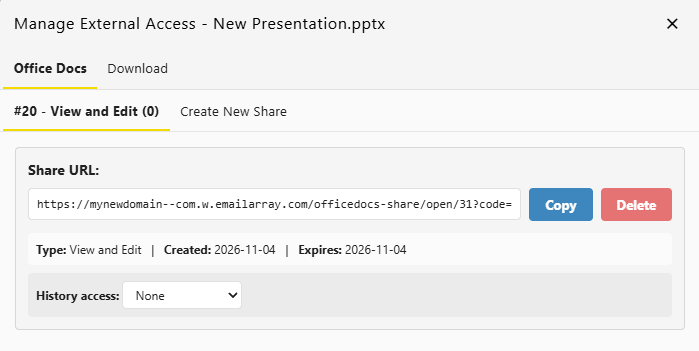
From the file explorer
- Right-Click the document you want to share.
- Click the Share button.

- Sharing window opens then share it.

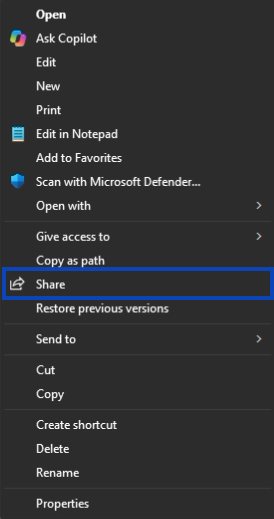
Creating Share Links
Generate links for external sharing:
- Right-Click the file.
- Look for the Share Externally section.

- Select the link type you want, such as view or edit.

- Create the link.
- Copy the link and send it to the recipient.

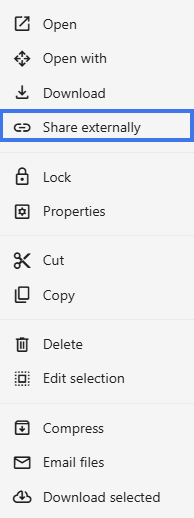
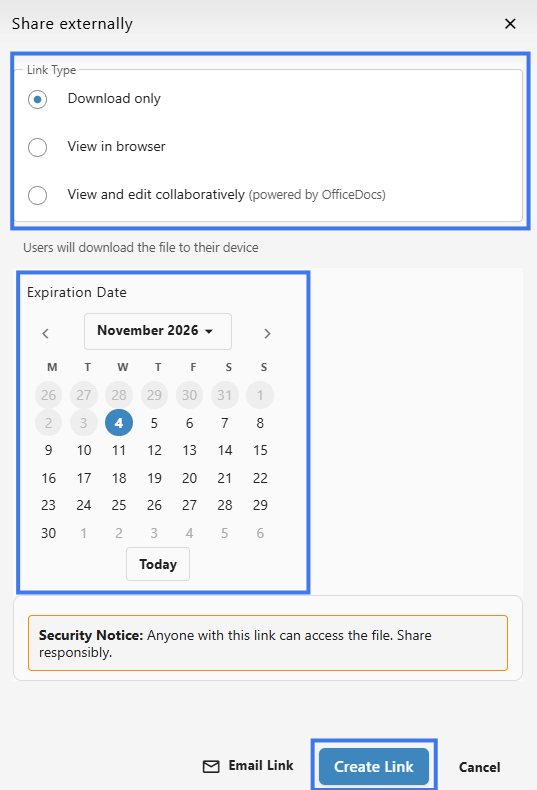
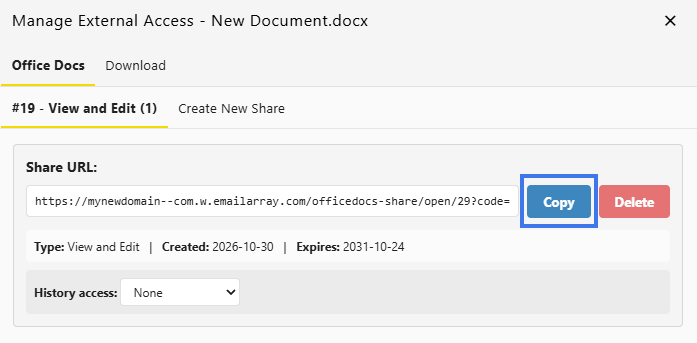
Permission Levels
- Download Only — The user can download a copy of the document without editing the original online
- View in browser — The user can open and read the document only
- View & Edit collaboratively — The user can make changes to the document
Managing Existing Shares
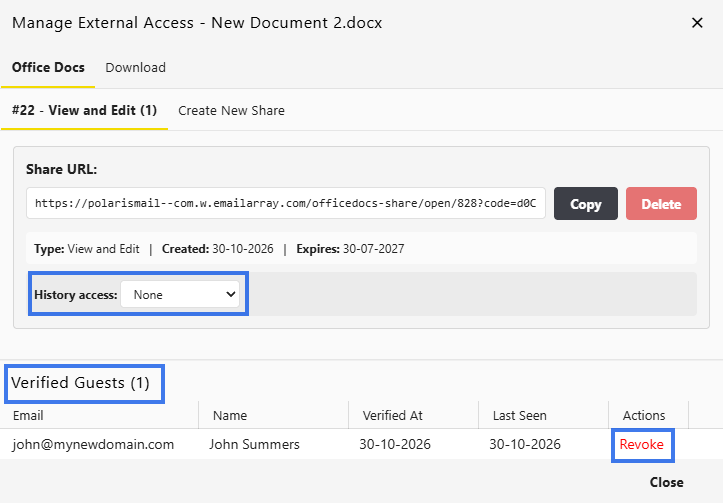
Email Notifications
- Users usually receive an email when a file is shared with them
- You may be able to include a message with your share
- External share links may need to be sent separately
Share Folders
- Go to the folder you want to share.
- Right-click the folder.
- Select Properties.

- Choose the folder Permissions then the + icon.

- Share it then click Add.

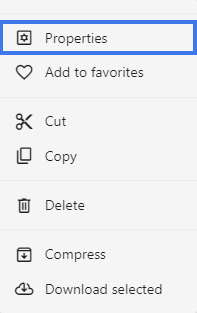
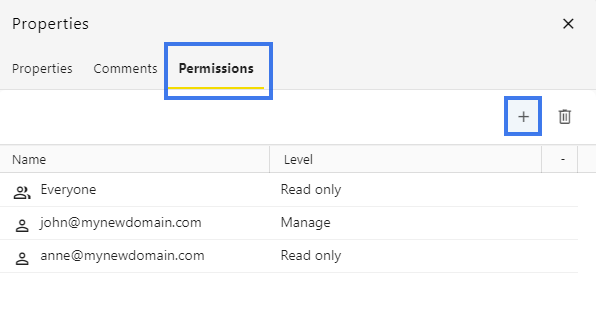
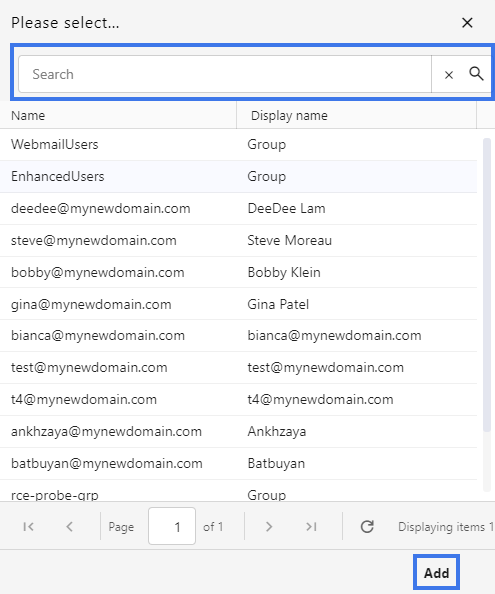
Sharing from Desktop Editors
Offline Editing
OnlyOffice Desktop Editors lets you continue working on documents even when you are not connected to the internet. Your changes are saved locally and sync automatically when your connection is restored.
How Offline Mode Works
- Open a document while you are online.
- The document is cached on your device for local access.
- Press Windows + R, type %temp%, then press Ok. The Temporary Files folder opens and displays your copied file..


- If your internet connection is interrupted, you can continue editing the cached version.
- Once you reconnect, your changes sync back to the cloud automatically.
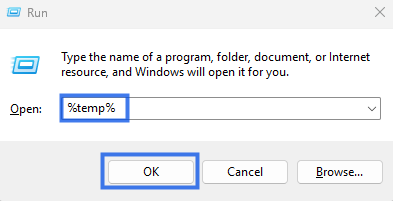
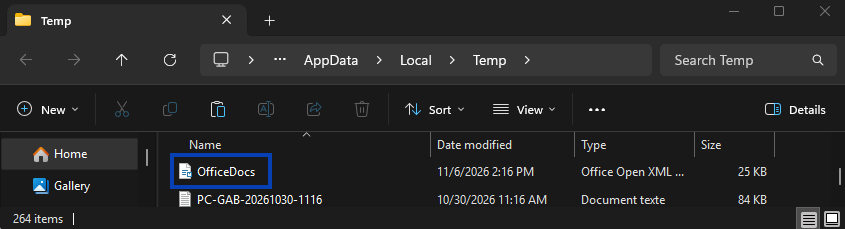
Working Offline
When you are offline, you can:
- Edit cached documents
- Make your usual content changes
- Save work locally on your device
- Create new documents to sync later
What’s Available Offline
You can typically access:
- Documents you opened recently
- Files prepared or cached for offline access
- Local files stored directly on your computer
Sync When Back Online
When your connection returns:
- The application detects that you are back online.
- Your pending changes begin uploading to the server.
- Any updates from the server download to your device.
- The document returns to a fully synchronized state.
Conflict Resolution
If someone else edited the same document while you were offline:
- Changes are merged automatically whenever possible
- You may be asked to review and resolve conflicts
- Version history helps preserve different document states if needed
Offline Indicators
The application may show offline activity with:
- An offline icon or status indicator
- A sync notice showing that changes are pending
- A warning message if sync cannot be completed yet
Preparing for Offline Work
- Open the documents you expect to need before going offline.
- Let the application cache them while you are still connected.
- For important work, confirm the files have opened successfully before disconnecting.
Limitations When Offline
While offline, some functions may be limited:
- Files that were not already cached may not be available
- Real-time collaboration is not available
- Version history may not be accessible
- Some cloud-based features may require an active connection
Best Practices
- Open important files before leaving your connection
- Save regularly while working offline
- Reconnect as soon as possible to sync your latest changes
- Check the sync status after reconnecting to confirm everything uploaded correctly
Mobile Application
Mobile Application Introduction
Access and manage your OfficeDocs files on the go with the OnlyOffice mobile application. The mobile app lets you view, edit, and organize documents from your phone or tablet, whether you are online or working with downloaded files offline.
What Is the Mobile App?
The OnlyOffice mobile app connects to your OfficeDocs account so you can work with your files from a mobile device.
With the mobile app, you can:
- View and edit documents from your phone or tablet
- Access files from anywhere with an internet connection
- Work offline with downloaded files
- Share documents with others
Key Features
Document Viewing
Open and read supported OfficeDocs files directly on your mobile device.
Mobile Editing
Make changes to documents, spreadsheets, presentations, and forms using a touch-friendly mobile interface.
File Management
Browse folders, organize files, and manage your cloud documents from the app.
Offline Access
Download files to your device so you can continue working when you do not have an internet connection. Changes sync when you reconnect.
Supported Devices
- iOS — iPhone and iPad running iOS 13.0 or later
- Android — Phones and tablets running Android 6.0 or later
What You Can Do
- Browse your OfficeDocs folders
- Open and view documents
- Edit text, numbers, slides, and forms
- Add comments and annotations
- Share files with others
- Upload photos and files from your device
- Download documents for offline use
Mobile vs Desktop/Web
The mobile app is designed for fast and convenient access while you are away from your computer.
Mobile use is ideal for:
For more advanced editing or larger tasks, the desktop or web version may be more comfortable.
Getting Started
- Download the mobile app from your device’s app store.

- Open the app on your phone or tablet.
- Connect your OfficeDocs account.

- Browse your folders and open your files.

- Start viewing, editing, or downloading documents as needed.
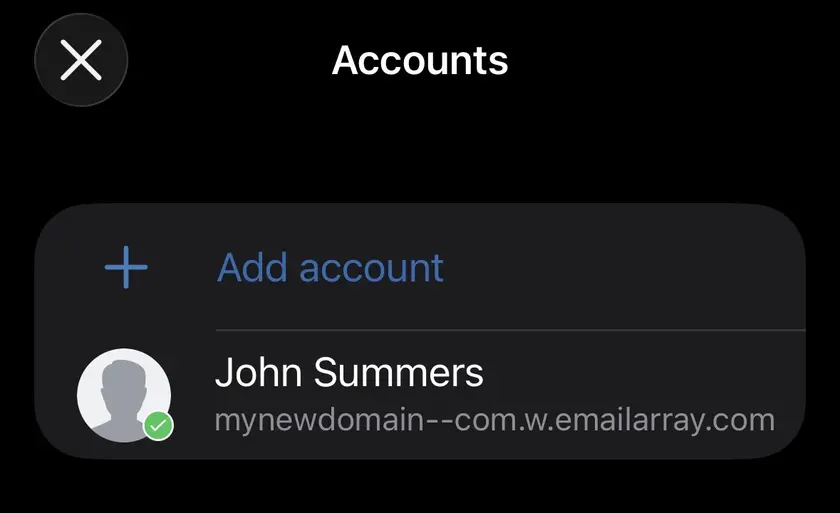
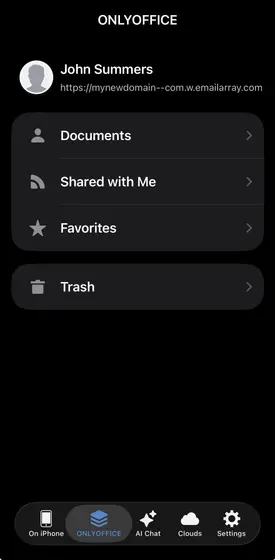
For detailed setup instructions, see the installation guide.
Installing the Mobile App
Download and install the ONLYOFFICE Documents app on your iPhone, iPad, or Android device so you can access and work with your OfficeDocs files on the go.
iOS Installation
- Open the App Store on your iPhone or iPad.
- Search for ONLYOFFICE Documents.
- Tap the ONLYOFFICE Documents app in the results.
- Tap Get to begin the download.
- Confirm with Face ID, Touch ID, or your Apple ID password if prompted.
- Wait for the app to download and install.
- Tap Open, or launch it later from your Home Screen.
Android Installation
- Open the Google Play Store.
- Search for ONLYOFFICE Documents.
- Tap the ONLYOFFICE Documents app in the results.
- Tap Install.
- Accept any requested permissions if prompted.
- Wait for the app to download and install.
- Tap Open, or find the app later in your app drawer.

First Launch
- Open the ONLYOFFICE Documents app.
- Review any welcome or introduction screens.
- Allow the permissions you want to use, such as storage or notifications.
- Continue to the app home screen.
- You’re then ready to connect your OfficeDocs account and start browsing files.
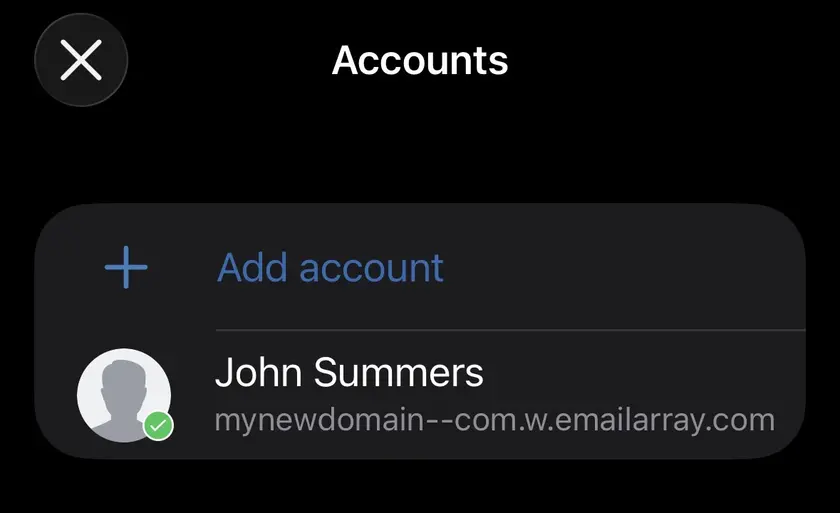
Permissions
The app may ask for permission to use certain features:
- Storage — Save files locally and open downloaded files
- Camera — Scan documents or add images, if needed
- Photos — Upload images or insert pictures from your device
- Notifications — Receive alerts about shared files, updates, or activity
Grant only the permissions you want to use. You can usually change them later in your device settings.
Updates
Keeping the app updated helps you get the latest fixes, performance improvements, and features. The official mobile help center also tracks current mobile app functionality and updates.
iOS
- The App Store shows when updates are available
- You can enable automatic updates in iPhone or iPad settings
- You can also update manually from the App Store
Android
- The Google Play Store notifies you when updates are available
- You can enable automatic updates in Play Store settings
- You can also update manually from the Google Play Store
Storage Space
Before installing, make sure your device has enough free space for:
- The app itself
- Cached documents
- Files you download for offline access
If you plan to keep many files offline, extra free space is recommended.
Uninstalling
If you no longer need the app, you can remove it at any time.
iOS
- Touch and hold the app icon.
- Tap Remove App.

- Confirm the deletion.

Android
- Touch and hold the app icon.
- Drag it to Uninstall, or tap the uninstall option.
- Confirm the deletion.
Troubleshooting
Can’t Find the App
- Search for ONLYOFFICE or ONLYOFFICE Documents
- Make sure your device meets the minimum supported version
- Check that your App Store or Play Store is working normally
Installation Fails
- Check available storage space
- Verify your internet connection
- Restart your device and try again
- Retry the download from the app store
Minimum Device Support
- iPhone / iPad — iOS 14.0 or later
- Android phones / tablets — Android 6.0 or later
Connecting Your Account
Connect the mobile app to your OfficeDocs account so you can access your cloud files from your phone or tablet.
Adding Your OfficeDocs Account
- Open the OnlyOffice Documents app.

- Open the ONLYOFFICE tab.

- Enter your OfficeDocs server address.

- Tap Continue.
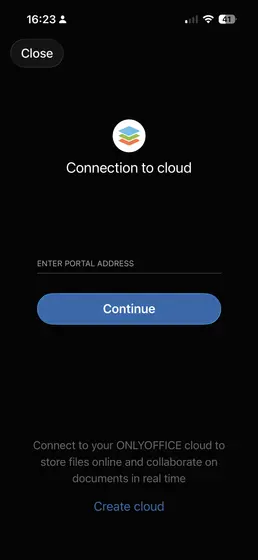
Signing In
- Enter your email address and password.
- Tap Sign In.

- Your account connects and your files appear in the app.
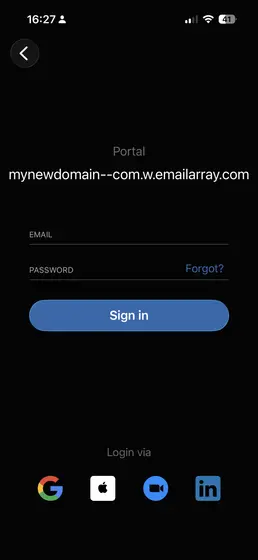
Two-Factor Authentication
If two-factor authentication is enabled on your account:
- Enter your username and password as usual.
- A verification code screen appears.

- Open your authenticator app.

- Enter the current 6-digit code.

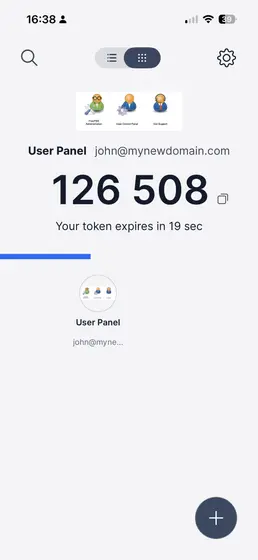
Server Address
Your OfficeDocs server address is usually:
- Provided by your administrator
- The same web address you use in your browser
- Written in a format similar to
https://your-officedocs-server.com
If you do not know the correct address, contact your administrator.
After Connecting
Once your account is connected:
- Your files and folders appear in the app
- You can tap folders to navigate
- You can tap files to open them
- You are ready to start working on your documents
Multiple Accounts
If you want to connect more than one account:
- Tap the account or profile icon.

- Select Add account.

- Enter the new account details.
- Switch between accounts from the profile menu.

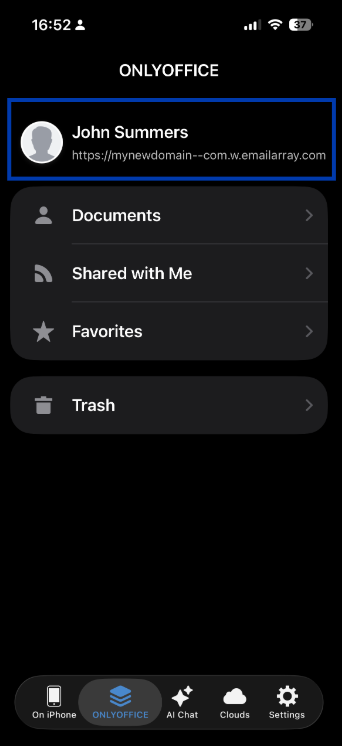
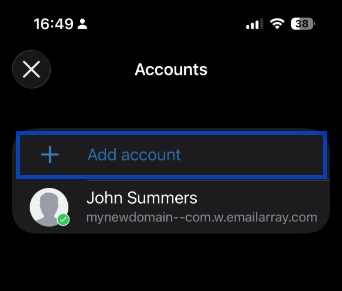

Staying Signed In
- The app remembers your account
- You usually do not need to sign in every time
- You can use device security such as a PIN or biometrics for extra protection
- Your session may expire from time to time, and you may be asked to sign in again
Disconnecting an Account
- Tap the account or profile icon.
- Touch and hold the account you want to remove.
- Tap Delete from device.

- Confirm the action.
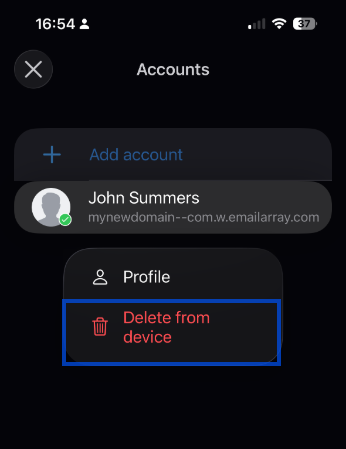
Your files remain safe in OfficeDocs. Only the mobile connection is removed.
Troubleshooting
Can’t Connect
- Verify that the server address is correct
- Check your internet connection
- Make sure your username and password are correct
- Try signing in through a web browser first
Invalid Certificate
- Your server may use a self-signed certificate
- Contact your administrator if you are unsure
- The app may give you an option to continue anyway
Browsing Files on Mobile
File Browser Overview
After connecting your account, your files and folders appear in a layout that is similar to the web version, making it easy to browse and manage your content from your phone or tablet.
Navigation
Opening Folders
- Tap a folder to open it
- Tap the back arrow to go up one level
- Use breadcrumbs, if shown, to jump back to parent folders
Main Sections
- My Documents — Your personal files
- Shared with Me — Files and folders shared by other users
- Favorites — Starred files for quick access
- Trash — Deleted files

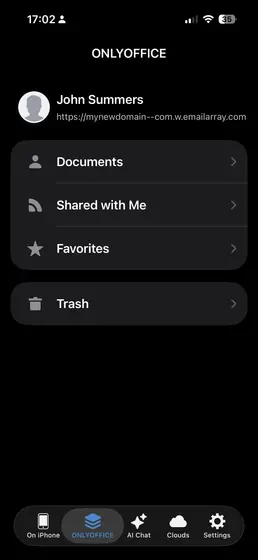
File List View
Each file entry typically shows:
- A file icon that indicates the file type
- The file name

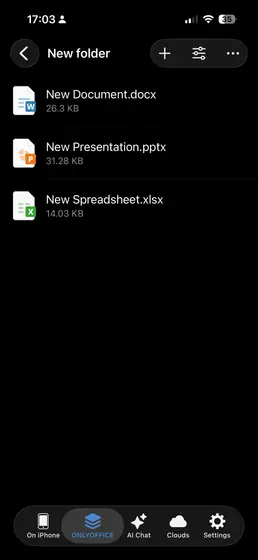
Searching Files
- Tap the search icon.
- Type your search term.
- Results appear as you type.
- Tap a result to open it.
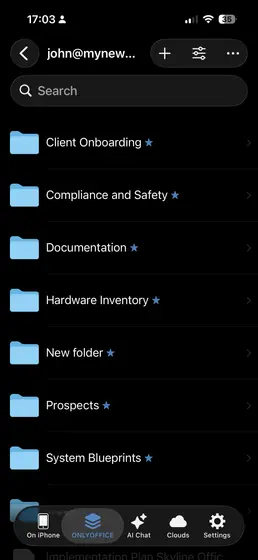
Sorting
- Tap the Filters option

- Sort by type and author

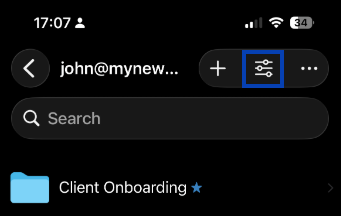
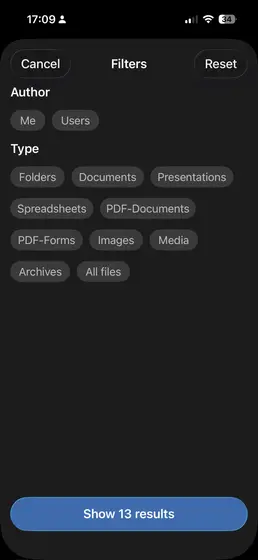
File Actions
Long-press a file to open the available file actions.
- Select — Choose the file so you can include it in multi-file actions.
- Preview — Open the file in view mode to quickly check its contents without starting full editing.
- Edit — Open the file in editing mode so you can make changes.
- Ask AI — Use the built-in AI tool to help with the file’s content, such as rewriting, summarizing, or generating text.
- Rename — Change the file name while keeping the same content and file type.
- Mark as Favorite — Add the file to your favorites for quicker access later.
- Download — Save a copy of the file to your mobile device for offline access or sharing outside the app.
- Export — Create a copy of the file in another format, depending on the available export options.
- Copy — Make a duplicate of the file so you can keep the original unchanged.
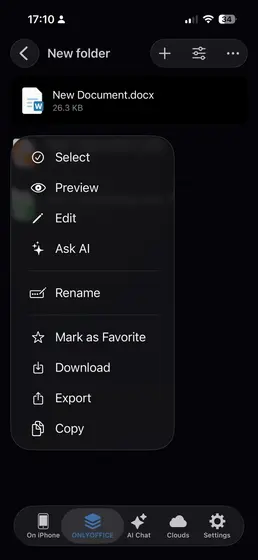
Selecting Multiple Files
- Long-press a file then click Select.

- Tap additional files to select them.

- Use the Select button in the top-left for bulk actions.

- Tap the action you want to perform or Cancel to exit selection mode.
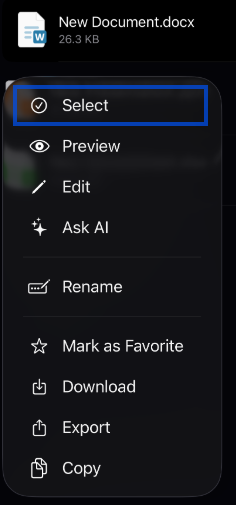
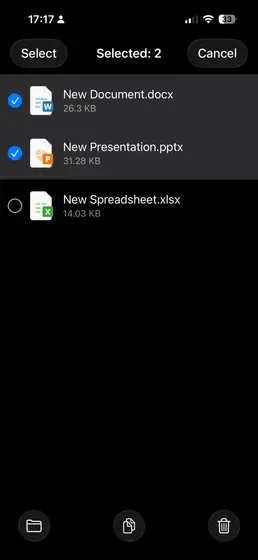
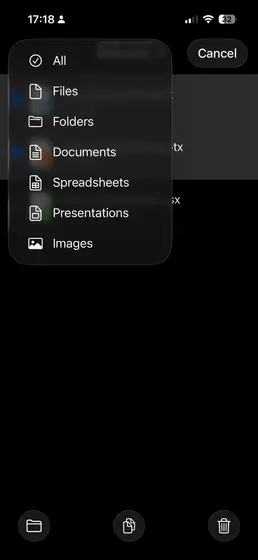
Refreshing
To update the file list:
- Pull down to refresh

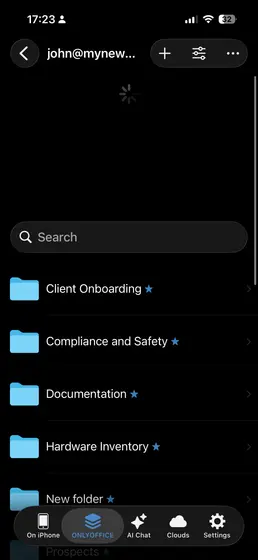
Creating Folders
- Navigate to the location where you want the folder. (Cloud or in OnlyOffice)
- Tap the create or add button.


- Select New Folder.

- Enter the folder name.

- Tap Create.
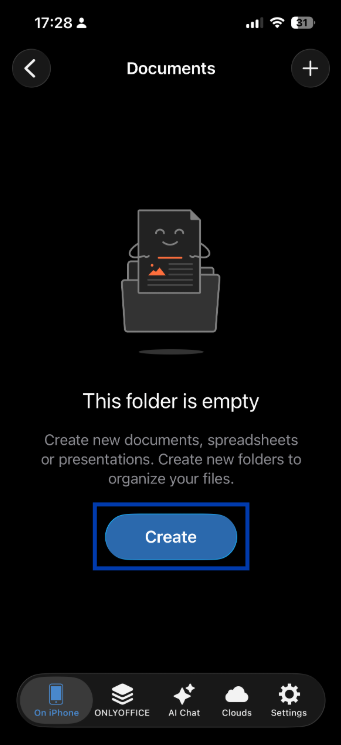
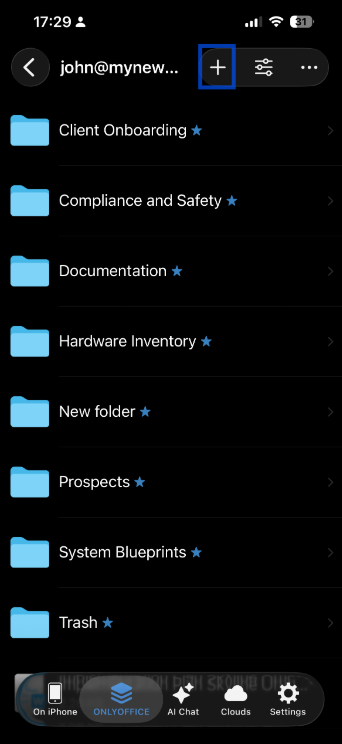
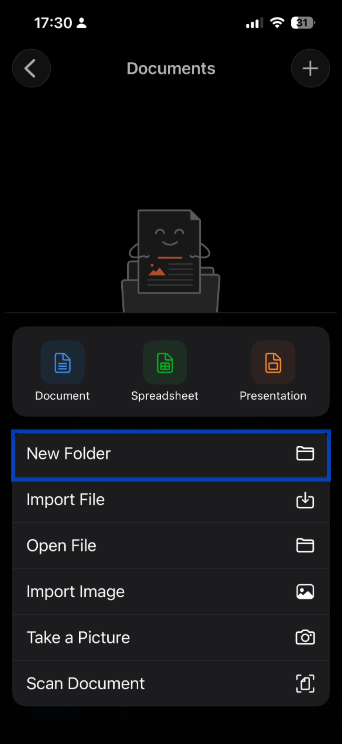
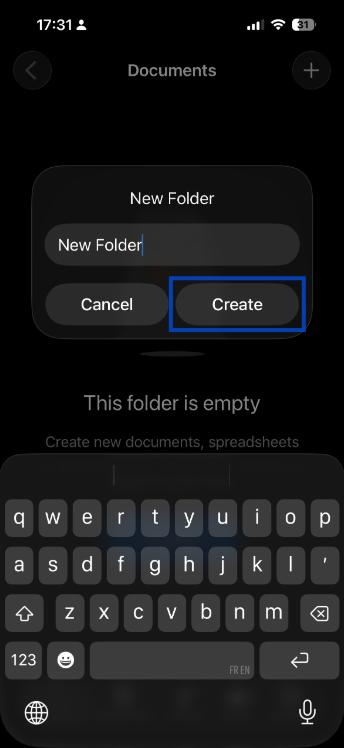
Uploading Files
- Tap the add or upload button.
- Select the import options.

- Choose files from your device storage or photos.

- Press the files to import.
- The files are added to the current folder.

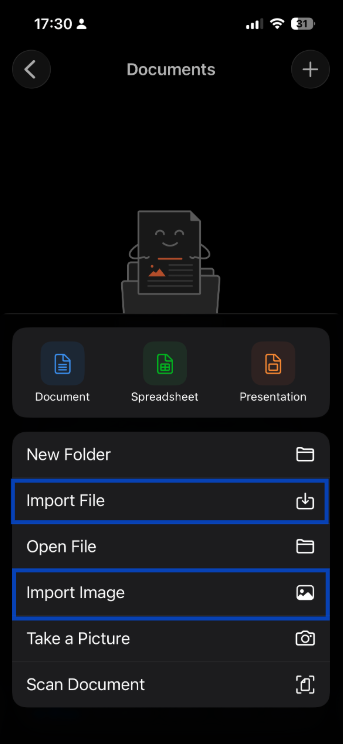
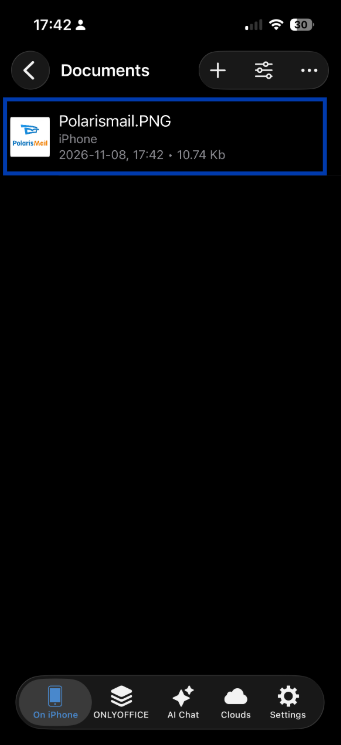
Tips
- Add important files to Favorites for faster access
- Download key files if you need offline access
- Keep folders organized to make mobile navigation easier
Viewing Documents on Mobile
Open and read documents, spreadsheets, presentations, and PDF files directly from your mobile device. The mobile app lets you quickly review content, navigate pages or slides, and switch to editing when you have permission.
Opening a Document
- Open the app and navigate to the file you want to view.
- Tap the file once.

- The document opens in the viewer.
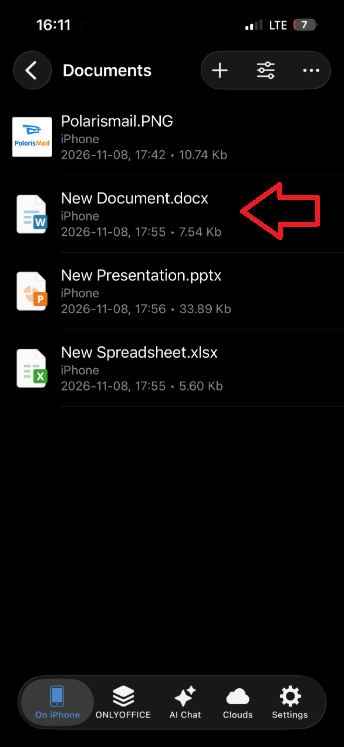
Document Viewing
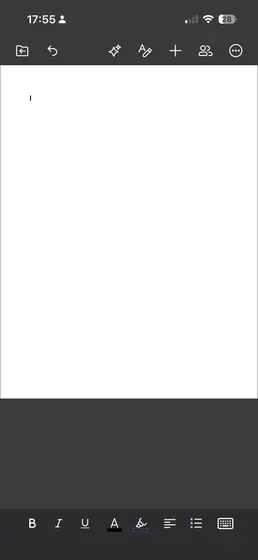
- Scroll up or down to read through pages
- Pinch to zoom in or out
- Double-tap to quickly zoom
- Swipe left or right for page navigation, if that option is enabled
- Tap the page indicator to jump to a specific page
- Use page thumbnails if they are available
- Use search to find specific text in the document
Spreadsheet Viewing
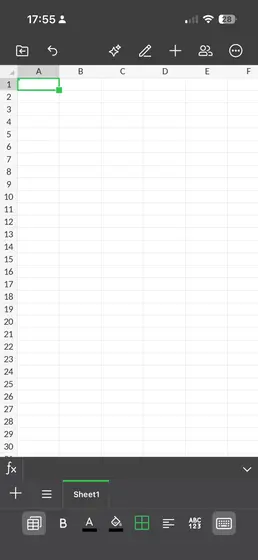
- Scroll horizontally and vertically to move through the sheet
- Pinch to zoom in or out
- Tap sheet tabs to switch between worksheets
Cell Viewing
- Tap a cell to view its contents
- Use the formula bar to see the full cell value
- Freeze panes can help keep large sheets easier to read
Presentation Viewing
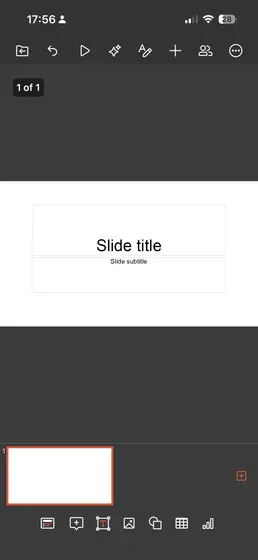
- Swipe left or right to move between slides
- Tap slide thumbnails to jump to a specific slide
- Pinch to zoom in on slide content
Slideshow Mode
- Tap the present or play button to start the slideshow
- Swipe or tap to move to the next slide
- Tap the screen to show presentation controls
- Exit using the back button or your device gesture
PDF Viewing
- Scroll through pages
- Pinch to zoom
- Use page thumbnails for navigation
- Search for text inside the PDF
Search Within Document
- Tap the 3-dots icon.

- Click on Find and Replace.

- The search bar open and you can enter the word or phrase you want to find

- Move through the results using the arrows
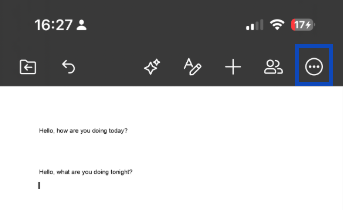
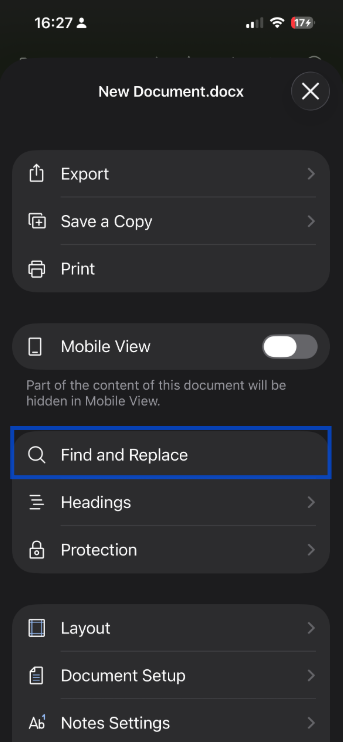
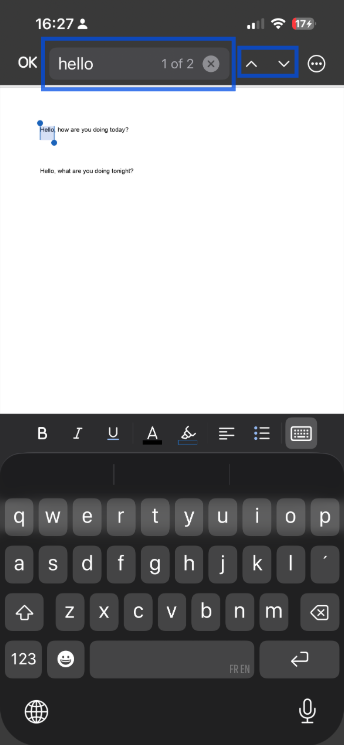
View Options
Depending on the document type, you may be able to:
- Show or hide formatting marks
- Switch between page view and continuous scroll
- Use dark mode or light mode
- Open the document in full-screen mode
Viewing Comments
- Comments may appear as markers in the document
- Tap a marker to read the comment
- Swipe through multiple comments if available
- Reply to comments if you have permission to do so
Switching to Edit Mode
- Tap the edit icon.

- The document switches from viewing mode to editing mode.
- Editing tools appear on the screen.

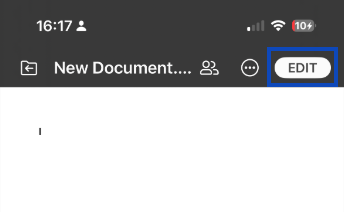
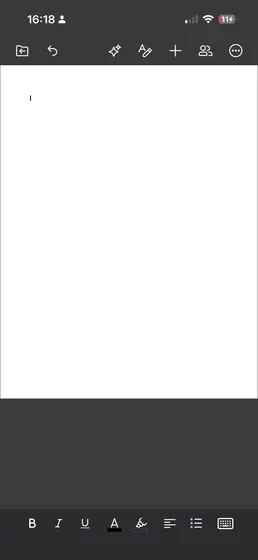
See Editing Documents for more details
Closing Documents
- Tap the back arrow
- Or use your device’s back gesture
- You are returned to the file browser
Tips
- Rotate your device for a wider view when reading large content
- Use zoom for detailed sections
- Download large files in advance for smoother viewing
- Use search to find specific content more quickly
Editing Documents on Mobile
Make changes to your documents, spreadsheets, and presentations directly from your mobile device.
Entering Edit Mode
- Open the file you want to edit.
- Tap the Edit icon.

- The editing toolbar appears.
- Tap in the document, cell, or slide area where you want to make changes.
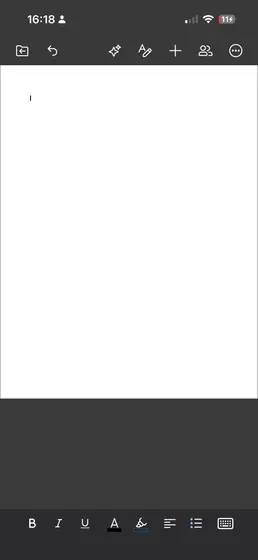
Editing Documents (Word)
Text Editing
- Tap to place the cursor where you want to type
- Use your on-screen keyboard to enter text
- Long-press text to select it, then drag the selection handles to adjust it
- Use the selection menu to Cut, Copy, or Paste
Formatting
- Apply Bold, Italic, or Underline
- Change font size and text style
- Adjust text alignment

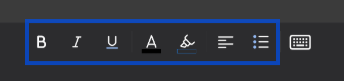
Inserting Content
- Insert images from your camera or photo gallery
- Add tables
- Insert links
- Add page breaks when needed

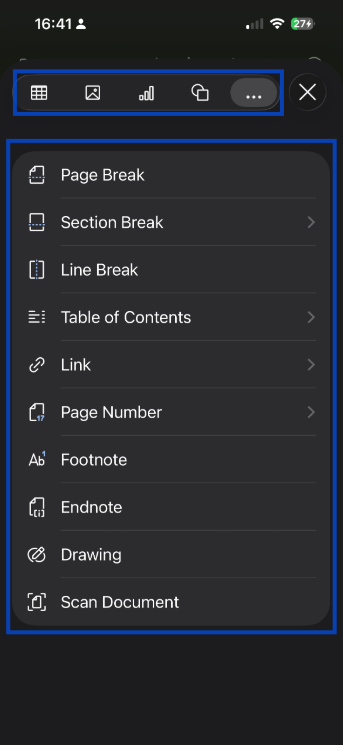
Editing Spreadsheets
Cell Editing
- Tap a cell to select it
- Type directly in the formula bar, or double-tap the cell to edit
- Enter numbers, text, or formulas
- Tap the checkmark to confirm your changes

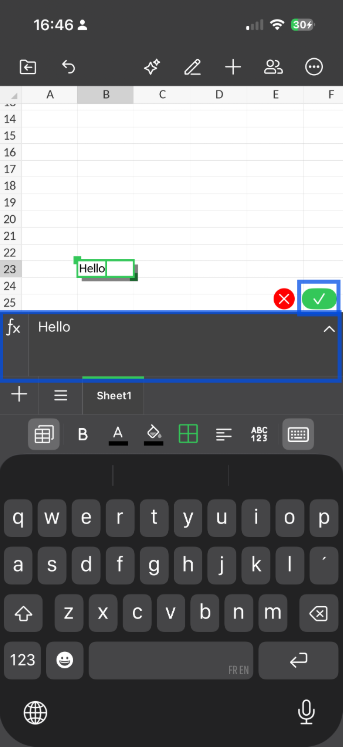
Cell Operations
- Copy and paste cells
- Fill cells by dragging the fill handle
- Insert or delete rows and columns
- Merge cells when needed

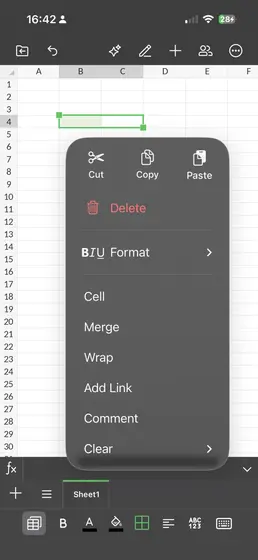
Formatting
- Apply number formats such as currency, percentage, and date formats
- Change cell colors and borders
- Adjust text alignment
- Use font options for cell content

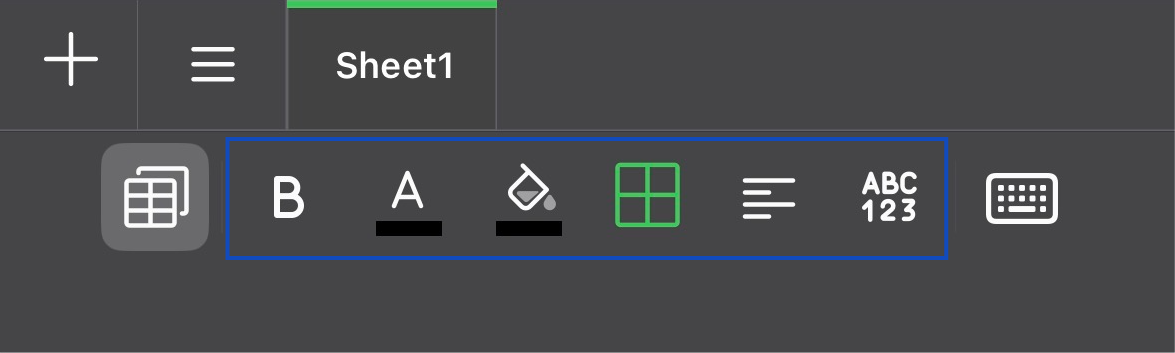
Editing Presentations
Slide Editing
- Tap text boxes to edit text
- Move objects by dragging them
- Resize objects using the handles
- Use the formatting toolbar to style slide content

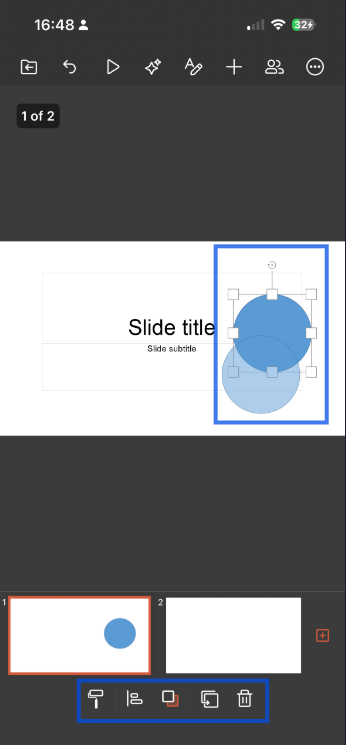
Slide Management
- Add new slides
- Duplicate slides
- Delete slides
- Reorder slides by dragging them in thumbnail view

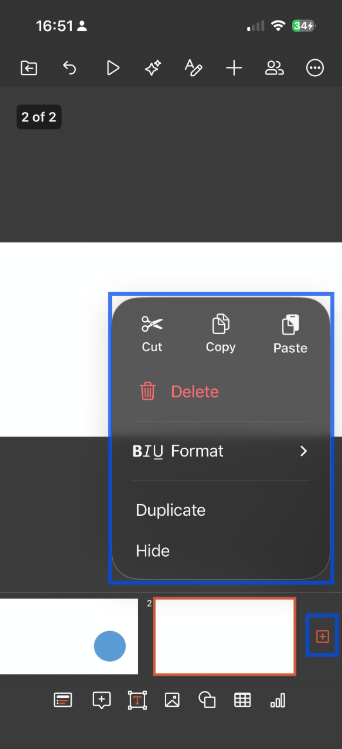
Saving Changes
- When you exit the file, you are prompted to save your changes or leave without saving.
- Changes save automatically to the cloud
- The save indicator shows the current sync status
- When you leave the file, your saved work remains available
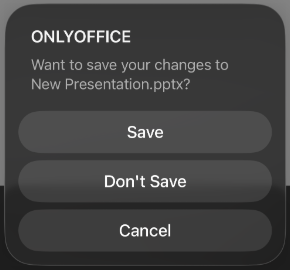
Undo and Redo
- Tap the undo arrow to reverse your last action
- Tap the redo arrow to restore an undone change
- Multiple levels of undo may be available while editing
Mobile Editing Tips
Use Landscape Mode
Rotate your device for more editing space, especially when working in spreadsheets.
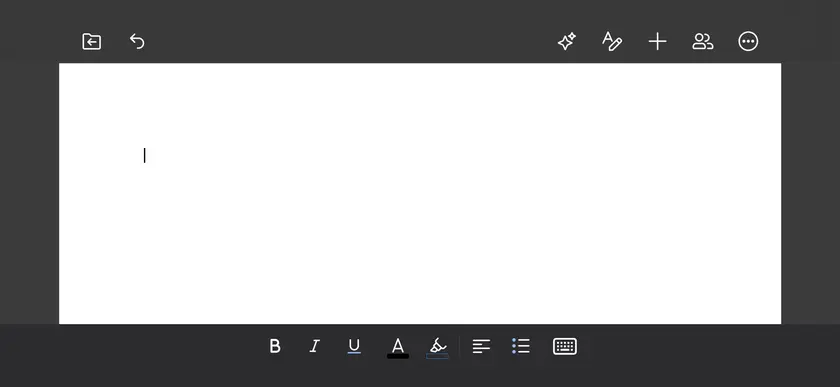
Zoom In
Pinch to zoom for more precise editing and selection.
External Keyboard
You can connect a Bluetooth keyboard for longer editing sessions.
Keep Edits Simple
Mobile editing works best for quick changes. For more advanced formatting or layout work, the desktop or web editor may be more comfortable.
Collaboration
- See when other users are editing in real time
- Changes from collaborators can appear while you work
- Add comments while editing when commenting is available
Exiting Edit Mode
- Tap the back arrow.

- You return to the file browser.
Limitations
Some advanced features may not be available on mobile, such as:
- More complex formatting options
- Macros and scripts
- Some chart types
- Advanced layout controls
For these features, use the web or desktop editor.
AI Features
AI Features Introduction
OfficeDocs includes AI-powered tools that help you write, edit, and work with documents more efficiently. These features use large language models to assist with a variety of writing and content tasks directly inside the editor.
Availability
AI features must be enabled by your administrator. If you do not see AI options in your editor, contact your administrator to confirm whether AI access is available for your account.
What AI Can Help With
- Text Summarization — Turn long text into shorter key points
- Grammar and Style — Improve clarity, tone, and writing quality
- Content Generation — Draft new content based on your request
- Translation — Translate text between languages
Accessing AI Features
- Open a document in the editor.
- Look for AI Tools tab.

- Select the text you want to work with, if needed.
- Choose the AI action you want to use.



How AI Features Work
- Select text or describe what you need.
- The AI processes your request.
- Suggestions or results appear for review.
- Decide whether to accept, change, or ignore the suggestion.
You remain in control at every step. AI provides suggestions, but you choose what to keep.
Privacy and Data
- Text sent to AI is processed according to your organization’s policies
- AI providers may vary depending on administrator configuration
- Your administrator can provide details about data handling
- Avoid sending sensitive information through AI tools unless you are sure it is allowed
Best Practices
Review AI Output
Always review AI-generated content before accepting it. AI can make mistakes or return results that need adjustment.
Provide Clear Input
More specific instructions usually produce better results. Clearly describe what you want the AI to do.
Use AI as Assistance
AI works best as a helper for drafting, refining, and speeding up tasks. It should support your work, not replace your own judgment.
Limitations
- AI may not always understand context correctly
- Generated content may still need editing
- Accuracy may be lower for complex or highly specialized topics
- AI features require an internet connection
Getting Started
You can begin exploring these AI tools:
- Text Summarization
- Grammar and Style
- Content Generation
- Translation