Internal Mailbox Migrations
Internal Migrations allow you to move or copy email data directly between mailboxes within your Admin Panel. This tool is specifically designed for local transfers and is the most efficient way to handle account changes without losing historical data.
When should you use Internal Migration?
-
Renaming a Mailbox: Since mailboxes cannot be renamed directly, you can create a new mailbox with the desired name and migrate the data from the old one.
-
Employee Offboarding: When a team member leaves, you can move their historical emails to a manager’s account or a shared archive profile.
-
Domain Rebranding: If you are moving from one domain to another and an alias isn't sufficient, you can copy data from
user@old-domain.comtouser@new-domain.comfor a clean, final setup.
How to Run an Internal Migration
- Go to the Admin Panel. Log in using your Admin username and password.
-
Click on Users in the main menu bar, then select Migrations from the sub-menu.
-
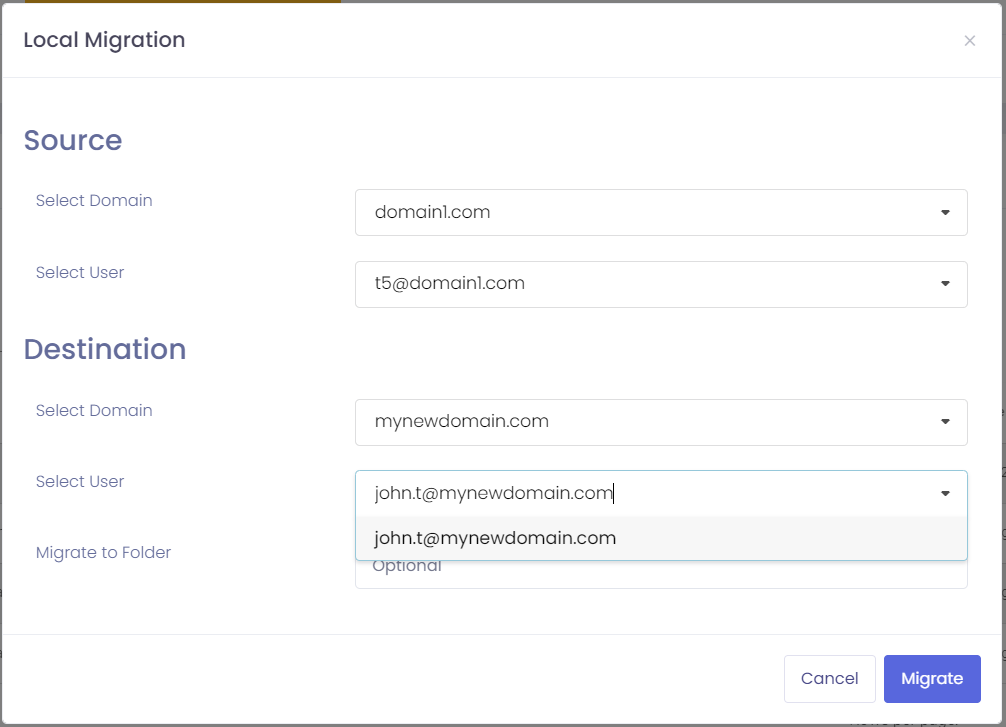
Click the New Migration button and fill in the details:

-
Configure the Source (Old Account):
-
Select Domain: Choose the domain associated with the original mailbox.
-
Select User: Choose the specific mailbox you want to copy data from.
-
-
Configure the Destination (New Account):
-
Select Domain: Choose the domain of the target mailbox.
-
Select User: Choose the mailbox that will receive the emails.
-
Migrate to Folder (Optional): If you want the migrated emails to go into a specific folder (e.g., "Archive_2024") rather than the main Inbox, type the folder name here.
-
-
Start the Process: Click the Migrate button.
Important Notes
-
Data Preservation: This process copies the data. The emails in the source mailbox will remain there until you choose to delete the account.
-
Internal Only: This tool is designed for "Local" moves within your administration. To bring in mail from an external service, please refer to our External Migration guide.
-
Unique Identities: Every mailbox and alias must be unique across your domain. If you are renaming a user, remember to delete or alias the old mailbox after the migration is successfully completed.
Managing Migration Tasks
Once a migration is started, you can monitor the progress from the Migrations dashboard:
-
Status: See if a migration is "Pending," "In Progress," or "Completed."
-
Sync Logic: The system will replicate the folder structure of the source mailbox into the destination mailbox automatically.