# Sharing Email Folders
Folder sharing allows you to give colleagues access to specific folders in your mailbox. You can grant "Read-only" access for viewing or "Full" access for those who need to manage and reply to messages on your behalf.
## How to Share a Folder
### Option 1: From the Webmail (Recommended)
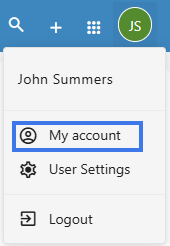
1. Go to the **[Webmail](https://wikidev.emailarray.com/books/1-configure-a-new-e-mail-address-getting-started/page/webmail-access).** Log in using your full **e-mail address** and your **current e-mail password.** Click on the **User** icon from the top right to activate the menu. Then click on **My account**
2. **Access Settings:** Click on the **User icon** in the top-right corner and select **My account**.
[](https://wikidev.emailarray.com/uploads/images/gallery/2026-06/hjNimage.png)
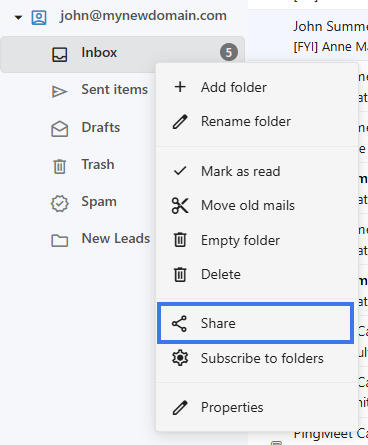
3. **Right-Click to Share:** In the folder list on the left-hand side, find the folder you wish to share and **right-click** on it.
4. **Open Share Settings:** Select **Share** from the context menu.
[](https://wikidev.emailarray.com/uploads/images/gallery/2026-06/KzQimage.png)
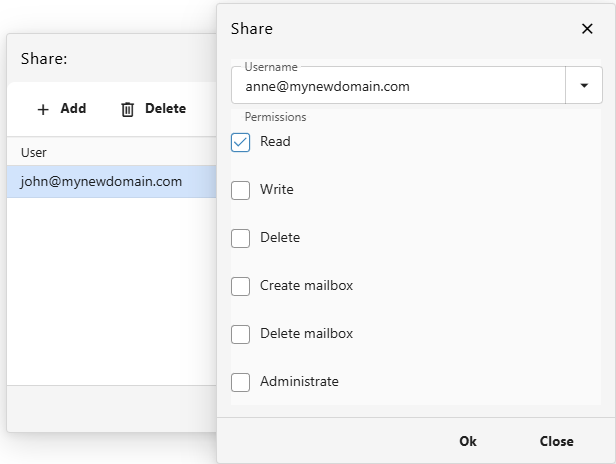
5. **Add a new User and sharing permissions:**
- Click the **Add** button.
- Select the user you wish to share with from the list.
- Choose the appropriate **Permissions** (see the guide below).
- Click on **Ok** button to save.
[](https://wikidev.emailarray.com/uploads/images/gallery/2026-06/ctSimage.png)
### Option 2: From the User Panel
1. Visit the **User Control Panel** ([https://cp.emailarray.com](https://cp.emailarray.com/)). Log in using your full email address and password.
2. Click on the **Folders** icon.
3. Click the **Edit (pencil) icon** next to the folder you want to share.
4. Click **New Share**, select the user and their permissions, and click **Share**.
---
## Managing or Removing Permissions
### From the User Panel
1. In the **User Control Panel**, click the **Folders** icon.
2. Click the **Edit (pencil) icon** next to the folder.
3. Click the **"-" (minus sign)** next to the user you wish to remove.
---
## Understanding Permissions
| **Level** | **What can they do?** |
| **Read-only** | Can see and read messages, but cannot move, delete, or mark them as read/unread. |
| **Read/Write** | Can read, move, and flag messages. |
| **Full** | Can read, write, delete, and manage the folder's contents entirely. |
**Don't Lock Yourself Out:** By default, your own account has "Full" permissions. **Do not remove your own permissions** from the list, or you will lose access to that folder and will need an administrator to restore it for you.