# Setup Email on Android (IMAP)
Remember that, if you have an Enhanced account, you can use ActiveSync, to not only sync e-mails, but also contacts and events.
### How to set up your email on an Android device
Here's the step by step for setting up an IMAP account on Android's native mail app.
- Press the device's **Menu** button.
- Tap **Settings**.
- Go to **Manage Accounts**
- Click on **Add account**.
- Click on **Email / Personal (IMAP)**
- **Username**: enter your full e-mail address
- If an account type is asked, choose **IMAP account**.
- **Password**: enter your email's password.
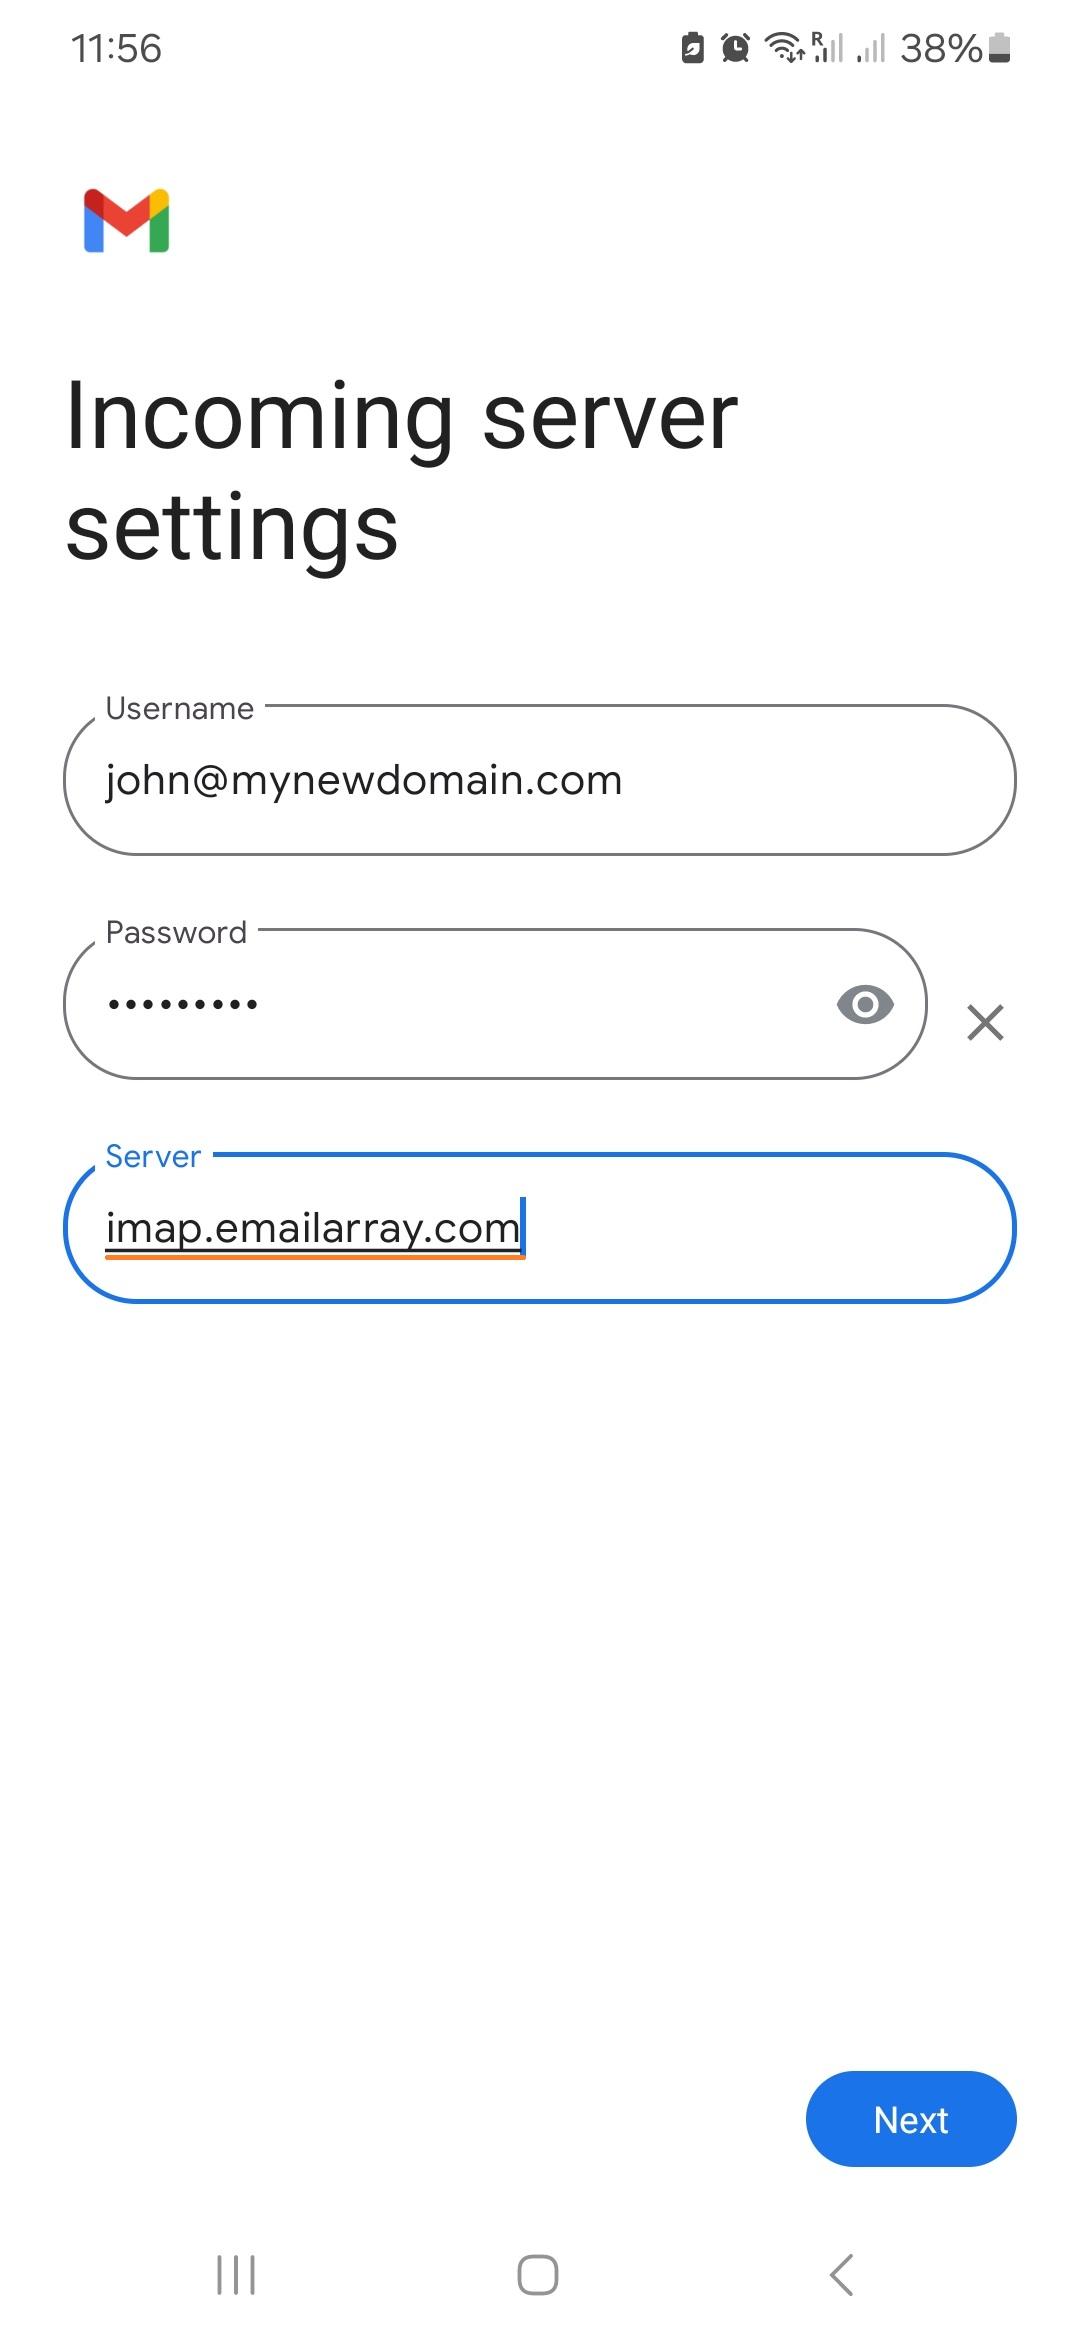
- **Incoming server settings**
- Username: your full email address
- Password: your email's password
- Server: `imap.emailarray.com` . Android will automatically use yourdomain.com as host and you need to change it.
- **Outgoing server settings**
- Require signin: **YES**
- Username: your full email address
- Password: your email's password
- SMTP server: `smtp.emailarray.com` . Android will automatically use yourdomain.com as host and you need to change it.
- Account options: Optionally, you can set up specific details such as interval for checking mail, if you want to be notified, etc.
- On the last page, Android gives you the option to change the *Account name* (will appear in your list) and *Your name* (will appear to recipients).
- Click on **Next** to finalize the procedure.
| Note that IMAP is preferred over POP. If you want to set up the account as POP, you have to set it up manually. IMAP is a protocol made to support several devices accessing one same account, with all folders synced at our server, which also guarantees that our backups will be executed. |
### Example Setup on Android Mail App
[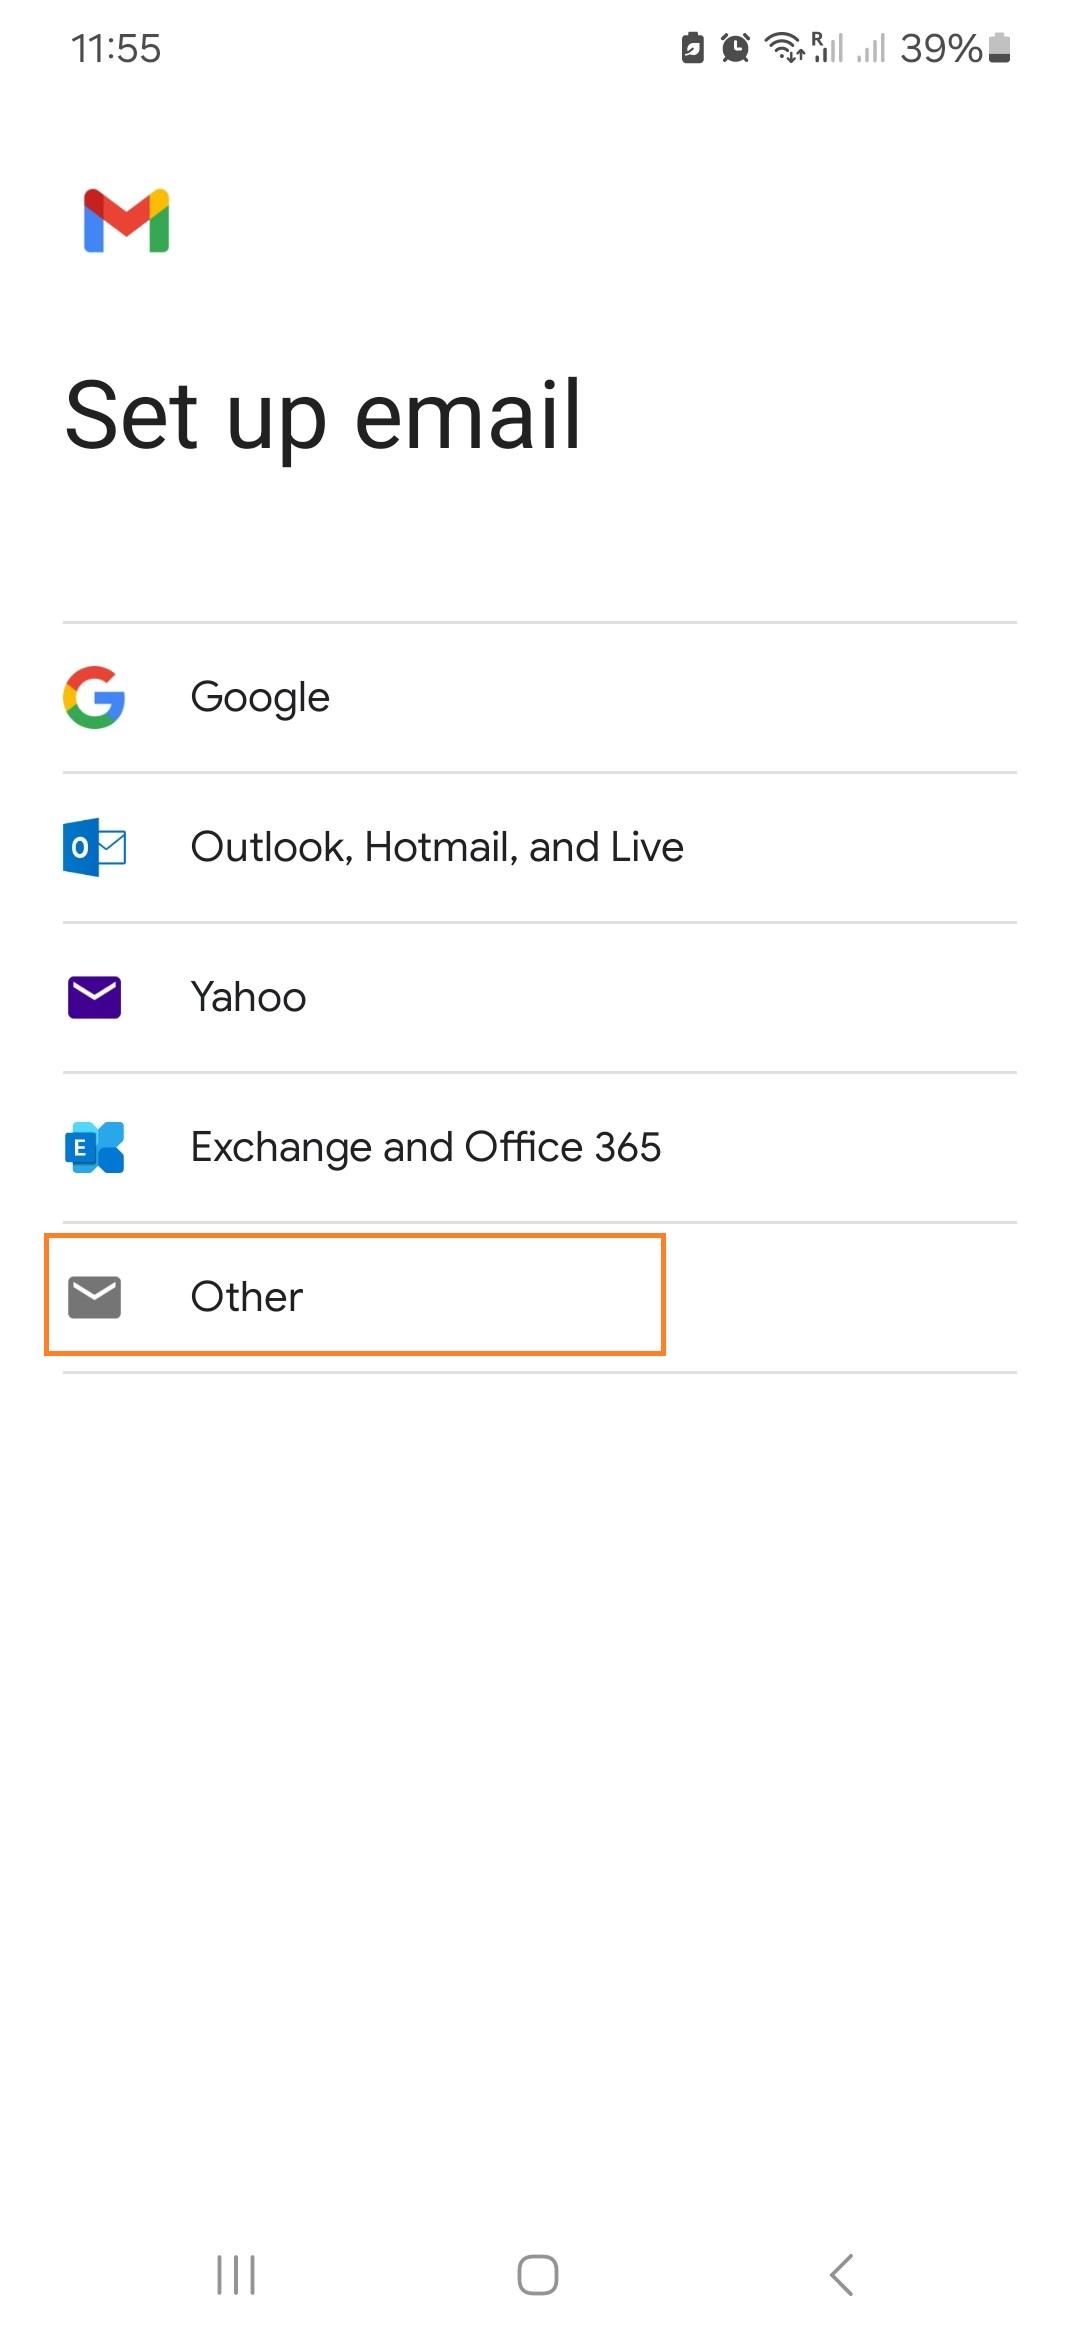](https://wikidev.emailarray.com/uploads/images/gallery/2025-06/android-email-setup-step-1.jpg)[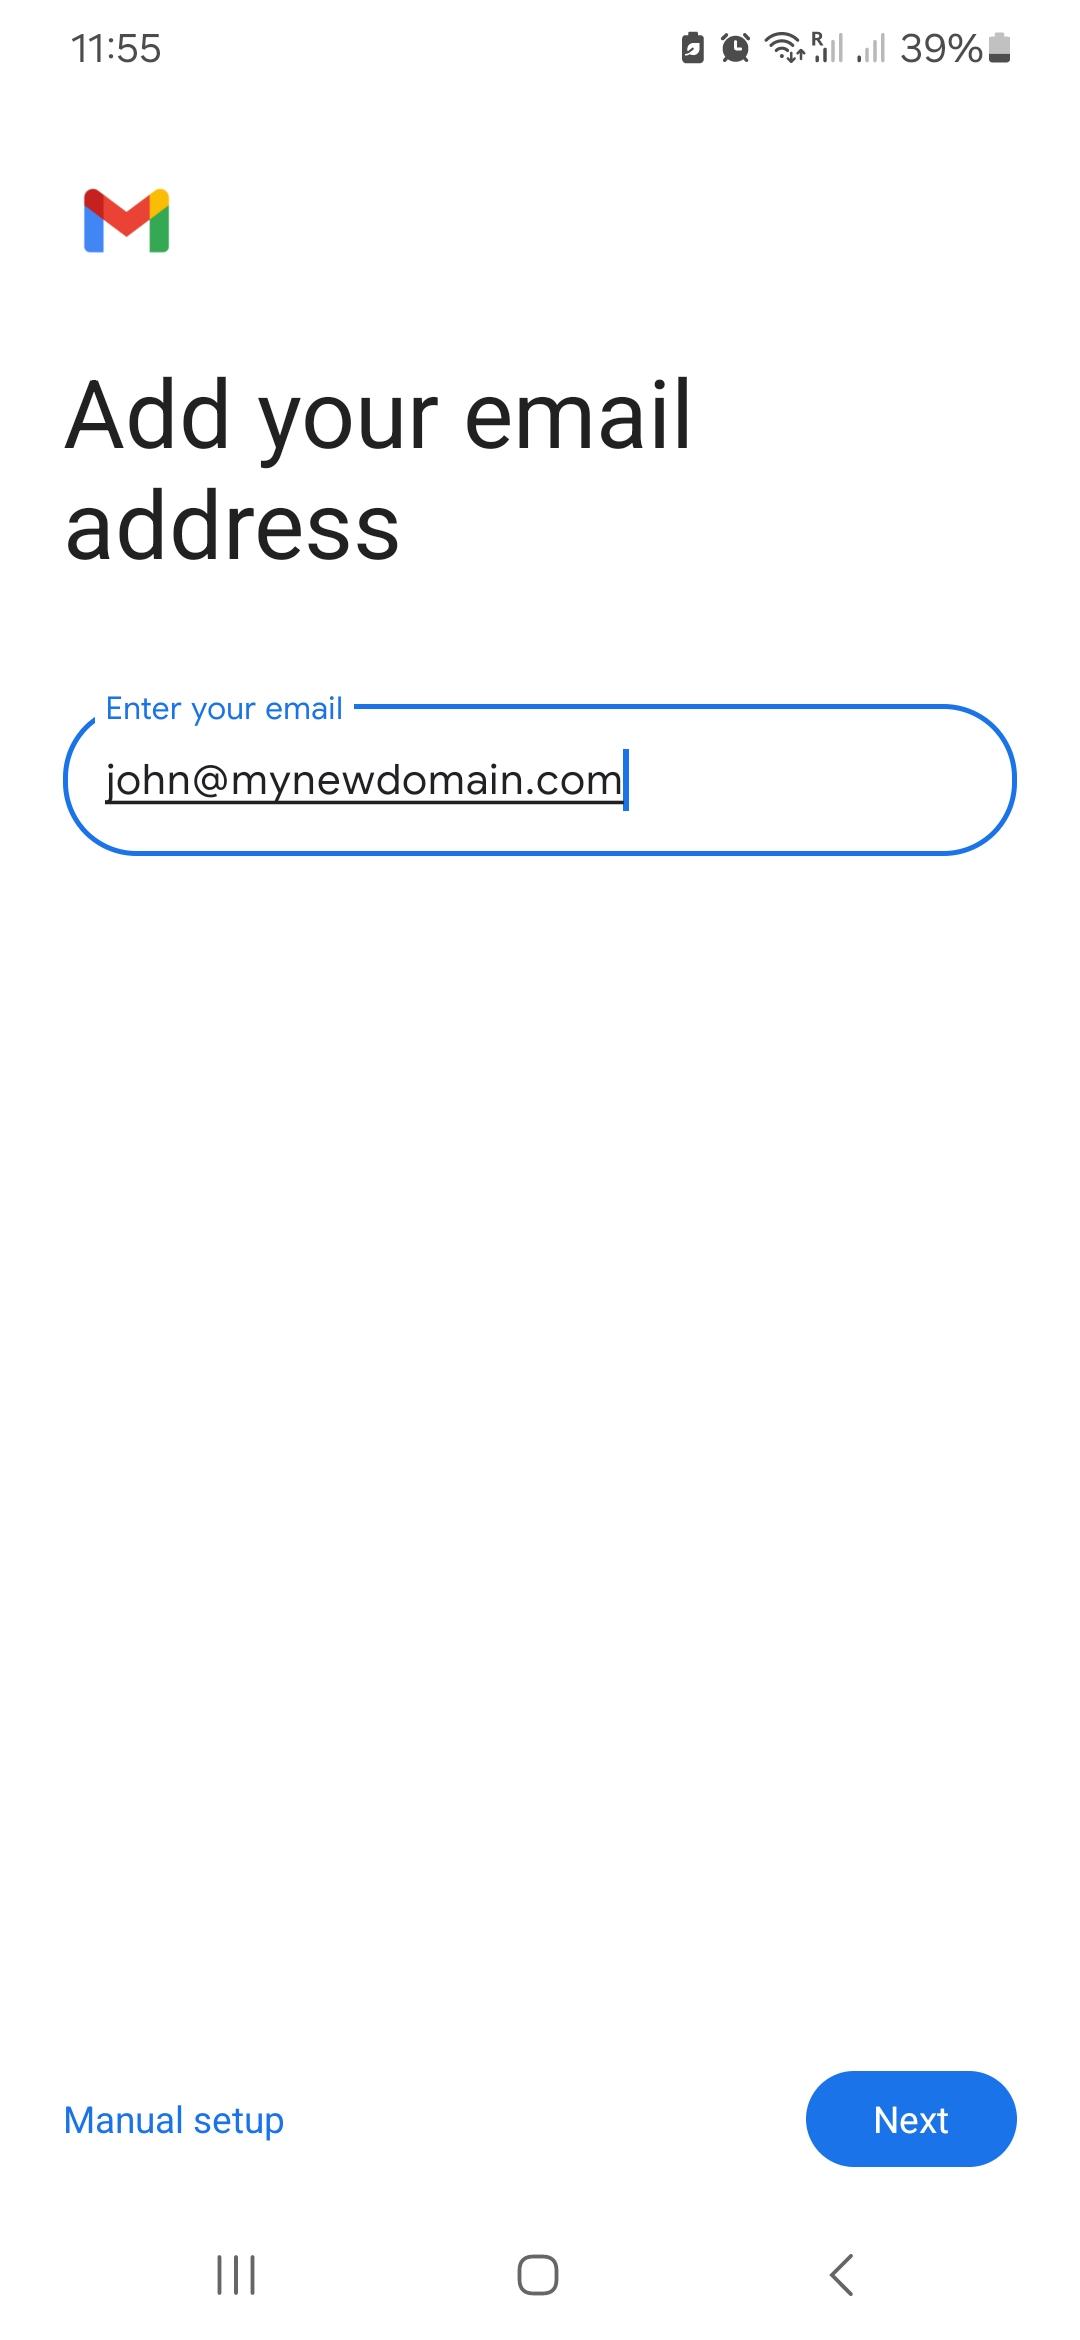](https://wikidev.emailarray.com/uploads/images/gallery/2025-06/android-email-setup-step-2.jpg)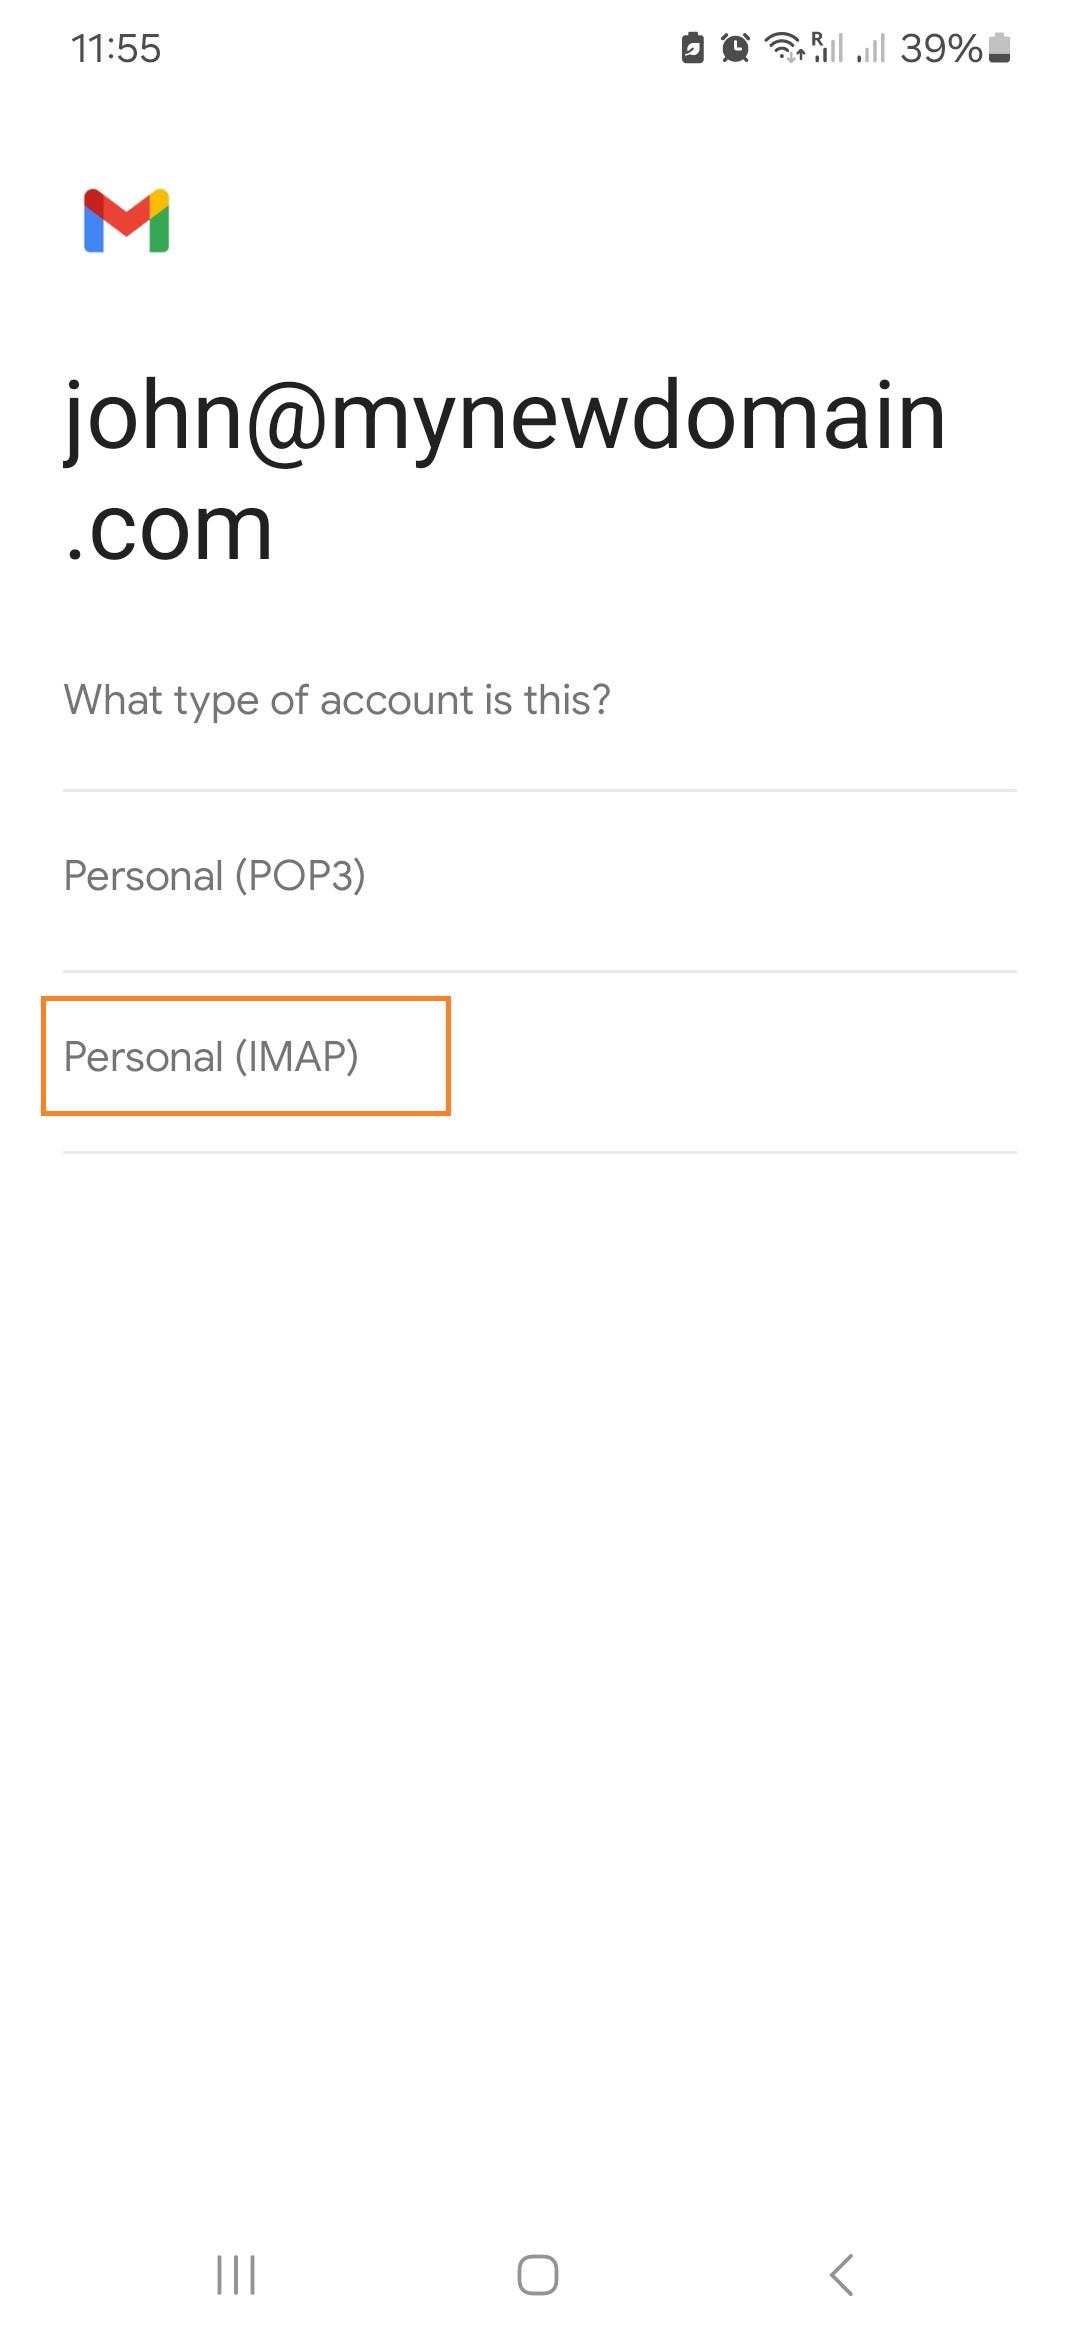[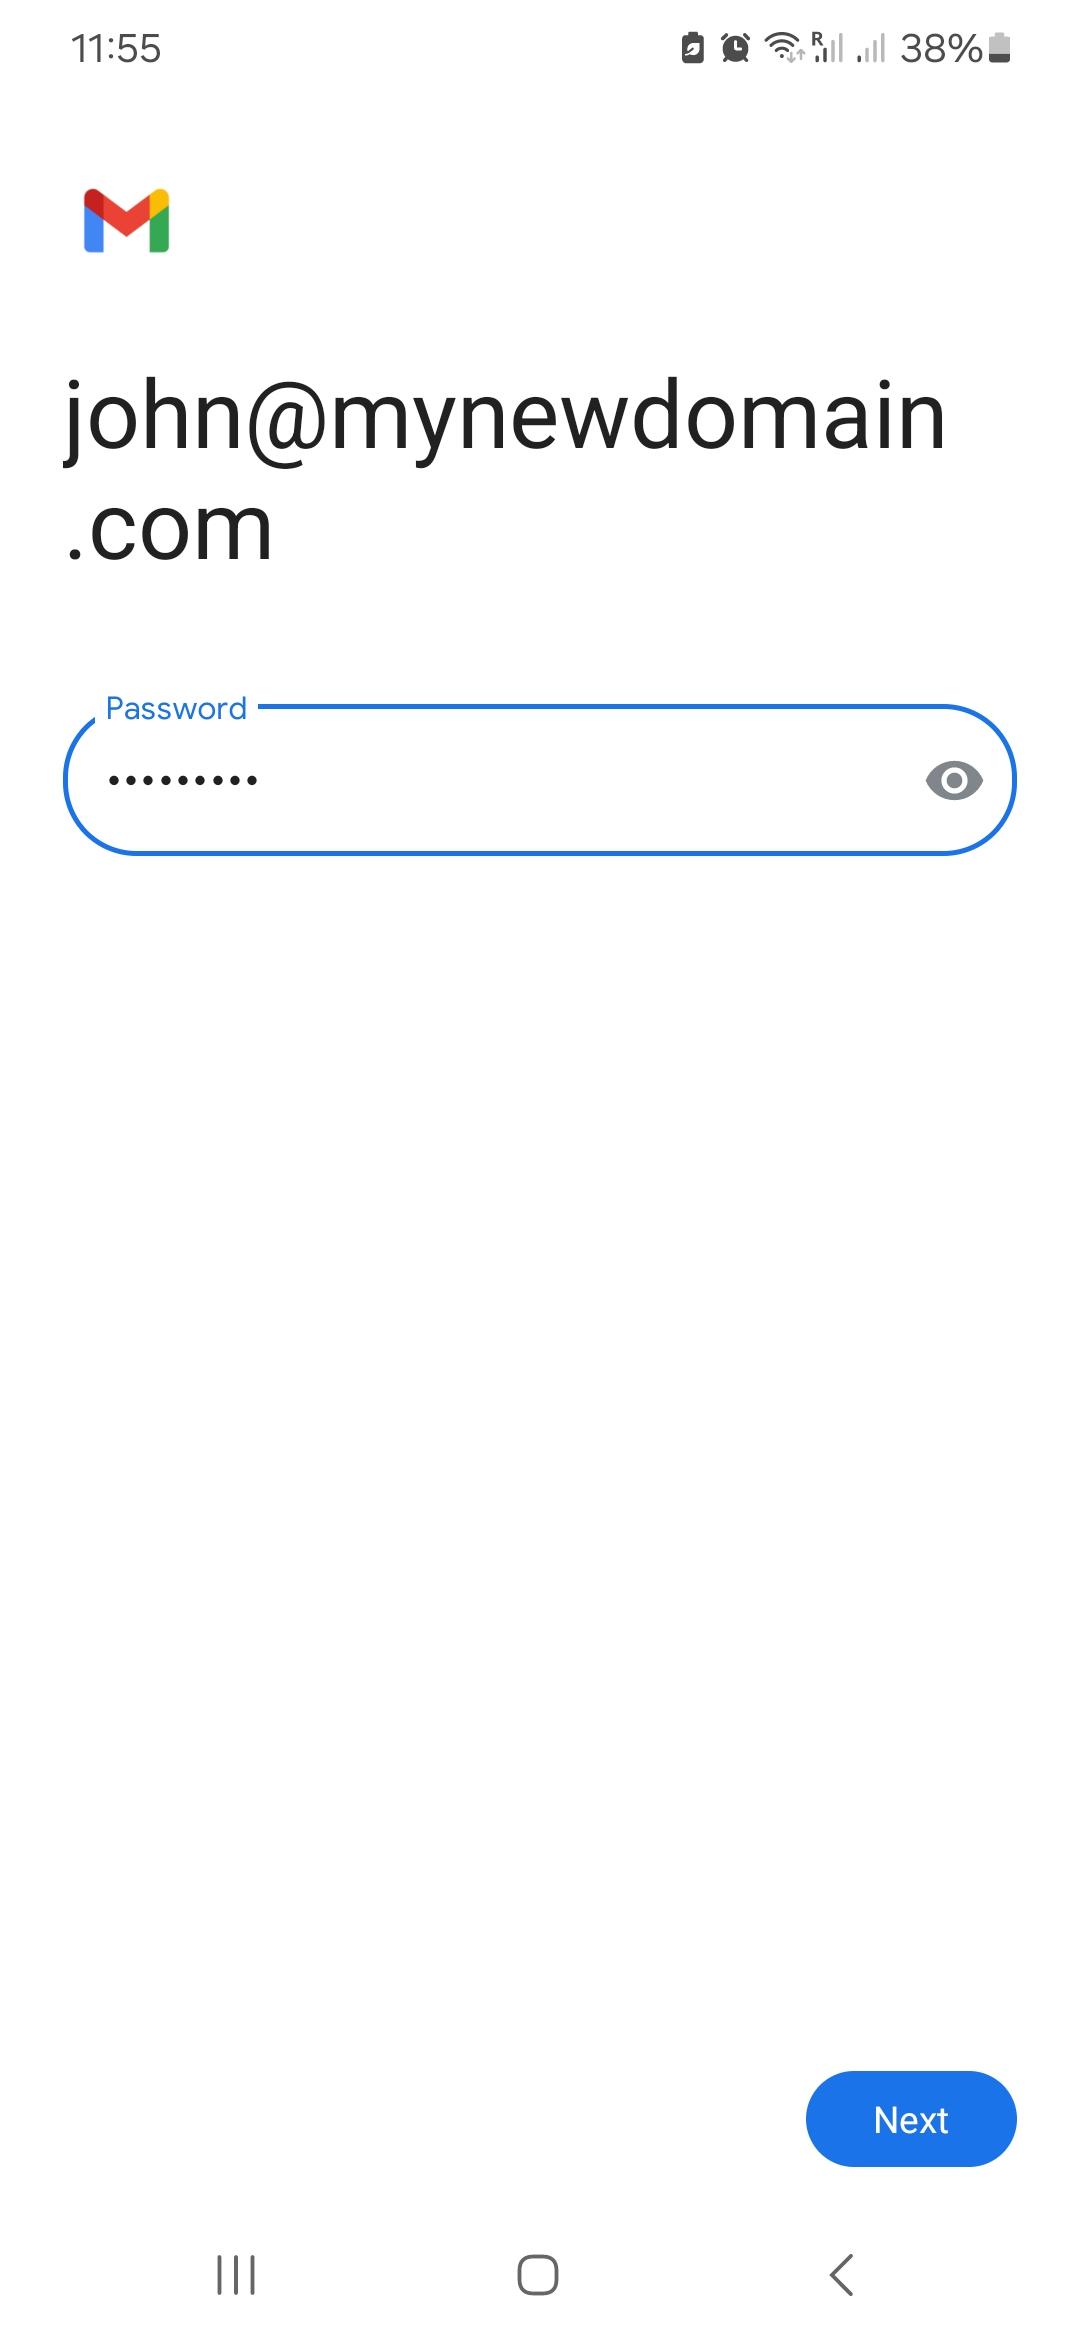](https://wikidev.emailarray.com/uploads/images/gallery/2025-06/android-email-setup-step-4.jpg)
[](https://wikidev.emailarray.com/uploads/images/gallery/2025-06/android-email-setup-step-5.jpg)[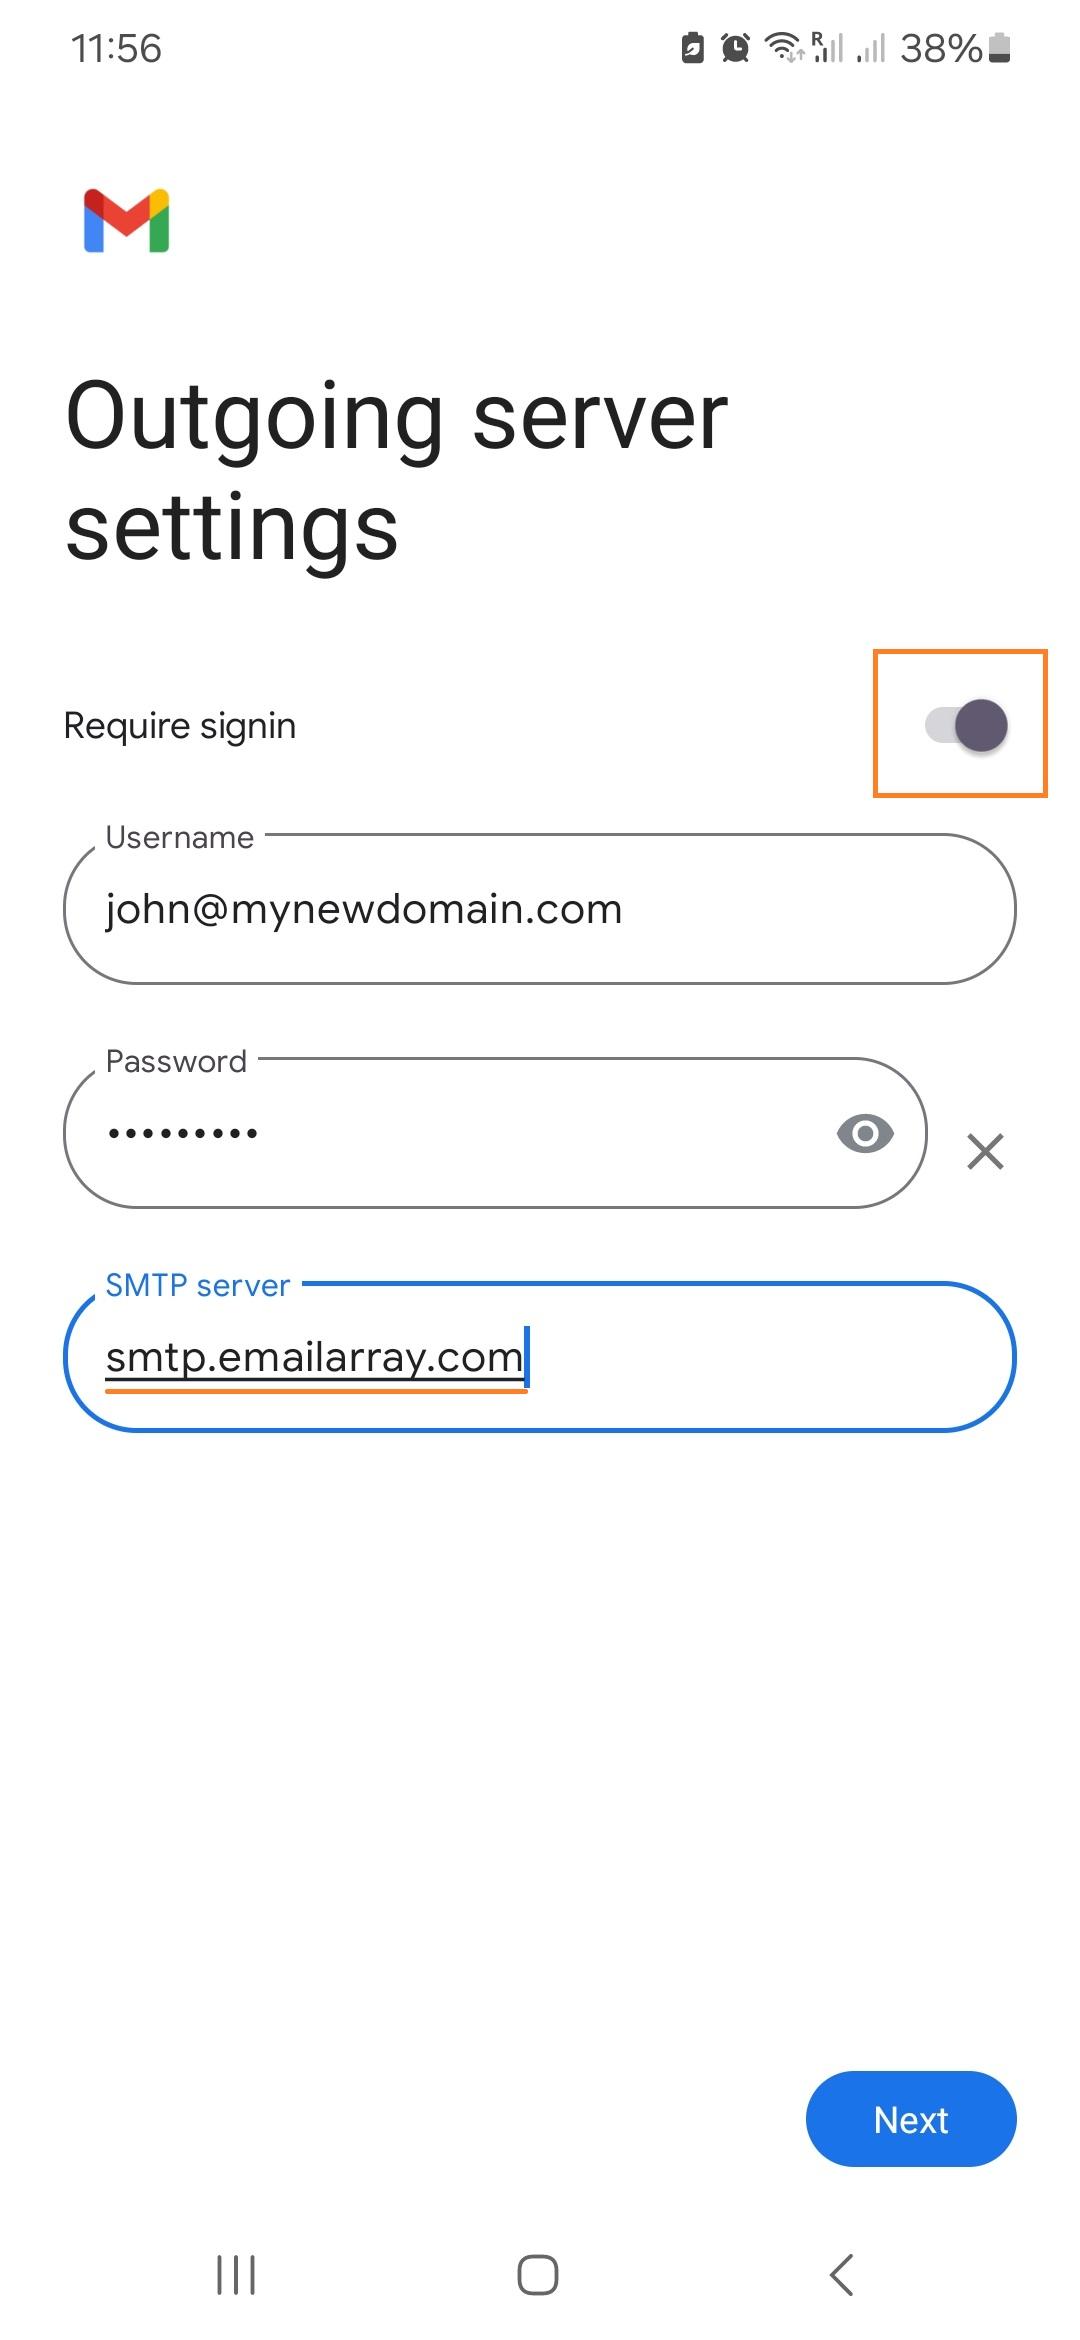](https://wikidev.emailarray.com/uploads/images/gallery/2025-06/android-email-setup-step-6.jpg)[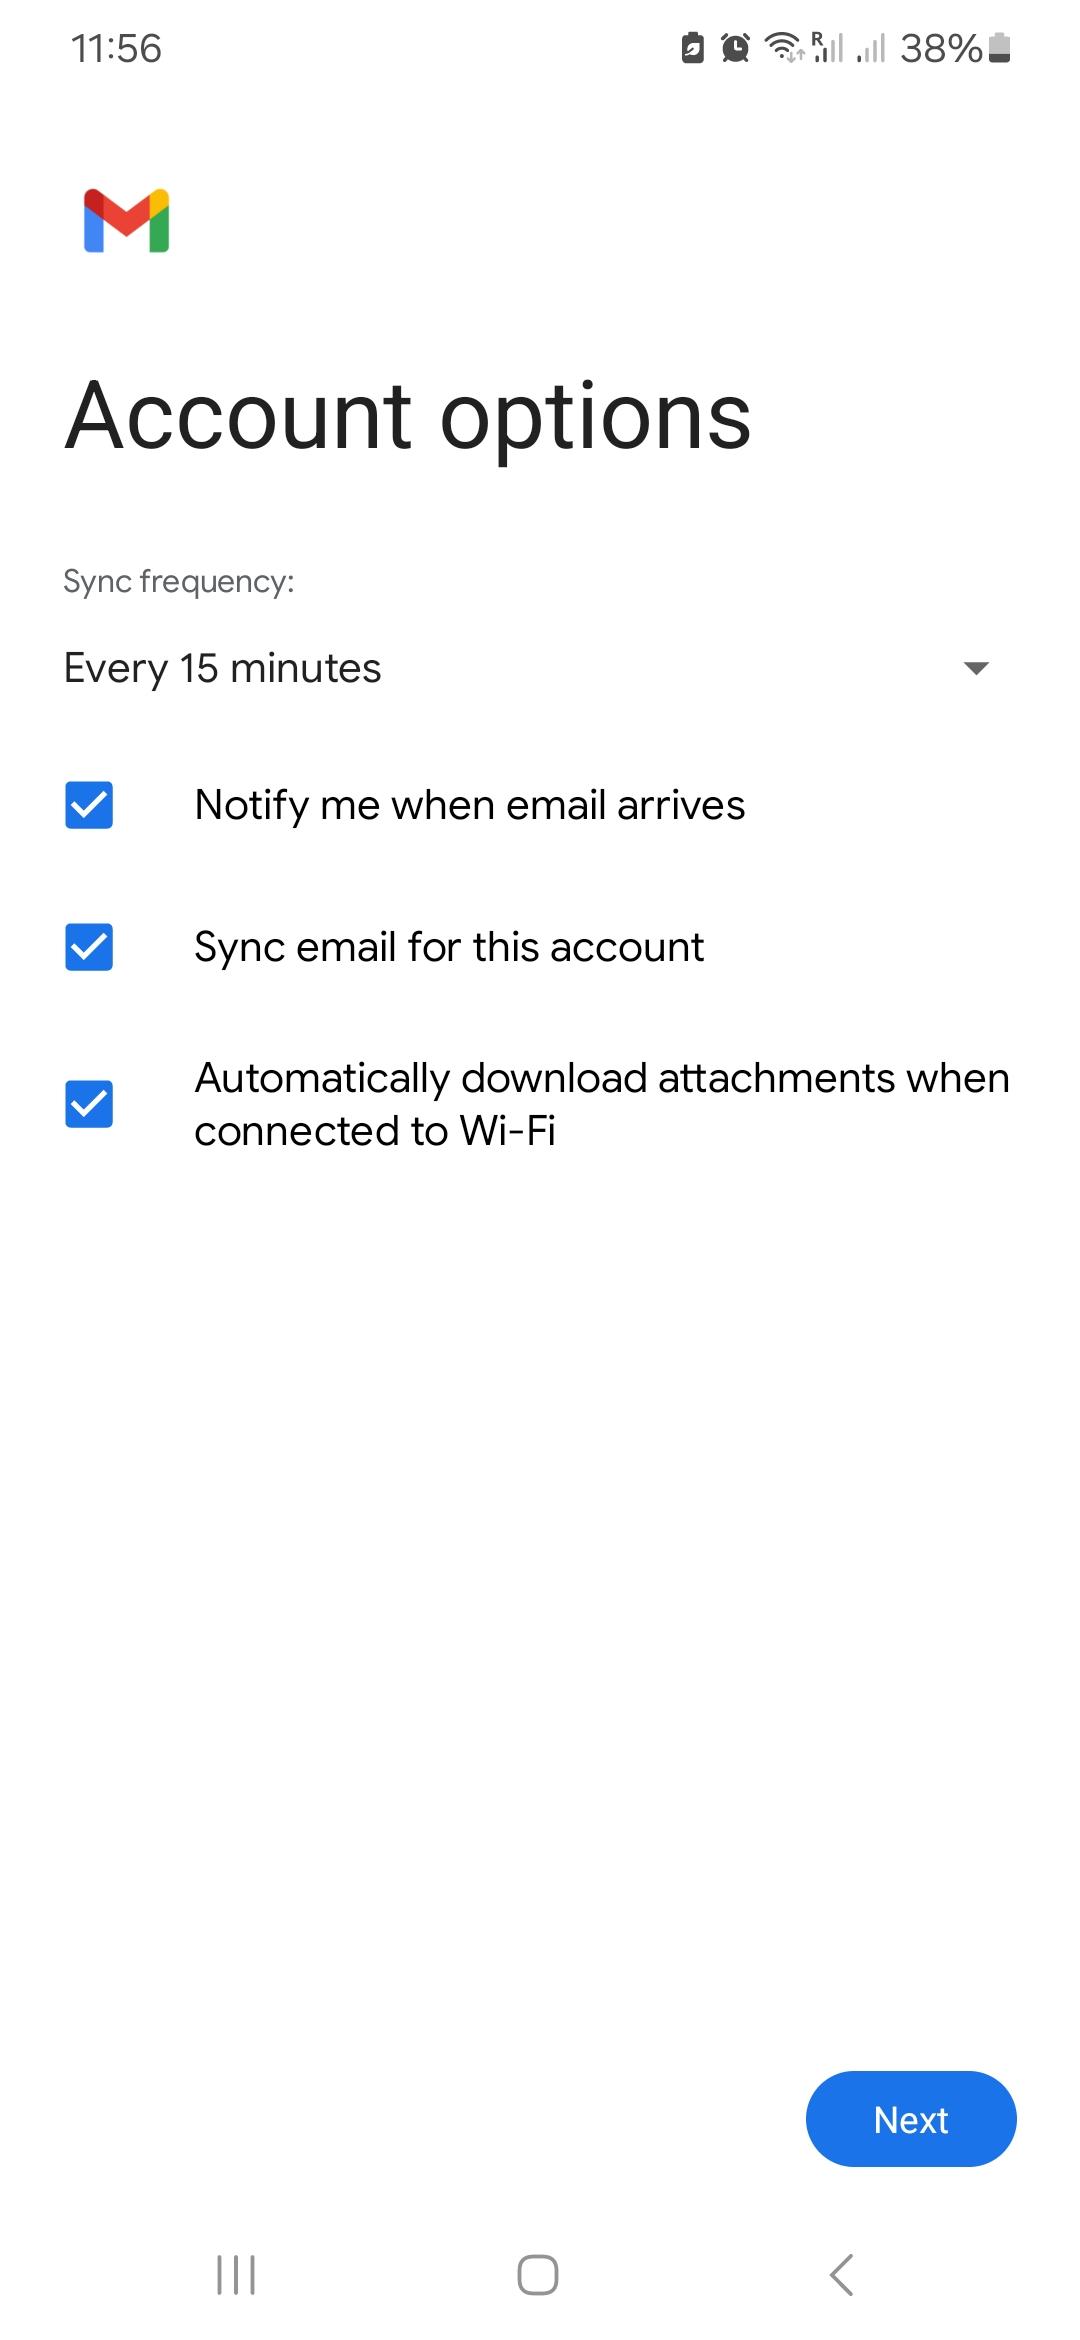](https://wikidev.emailarray.com/uploads/images/gallery/2025-06/android-email-setup-step-7.jpg)[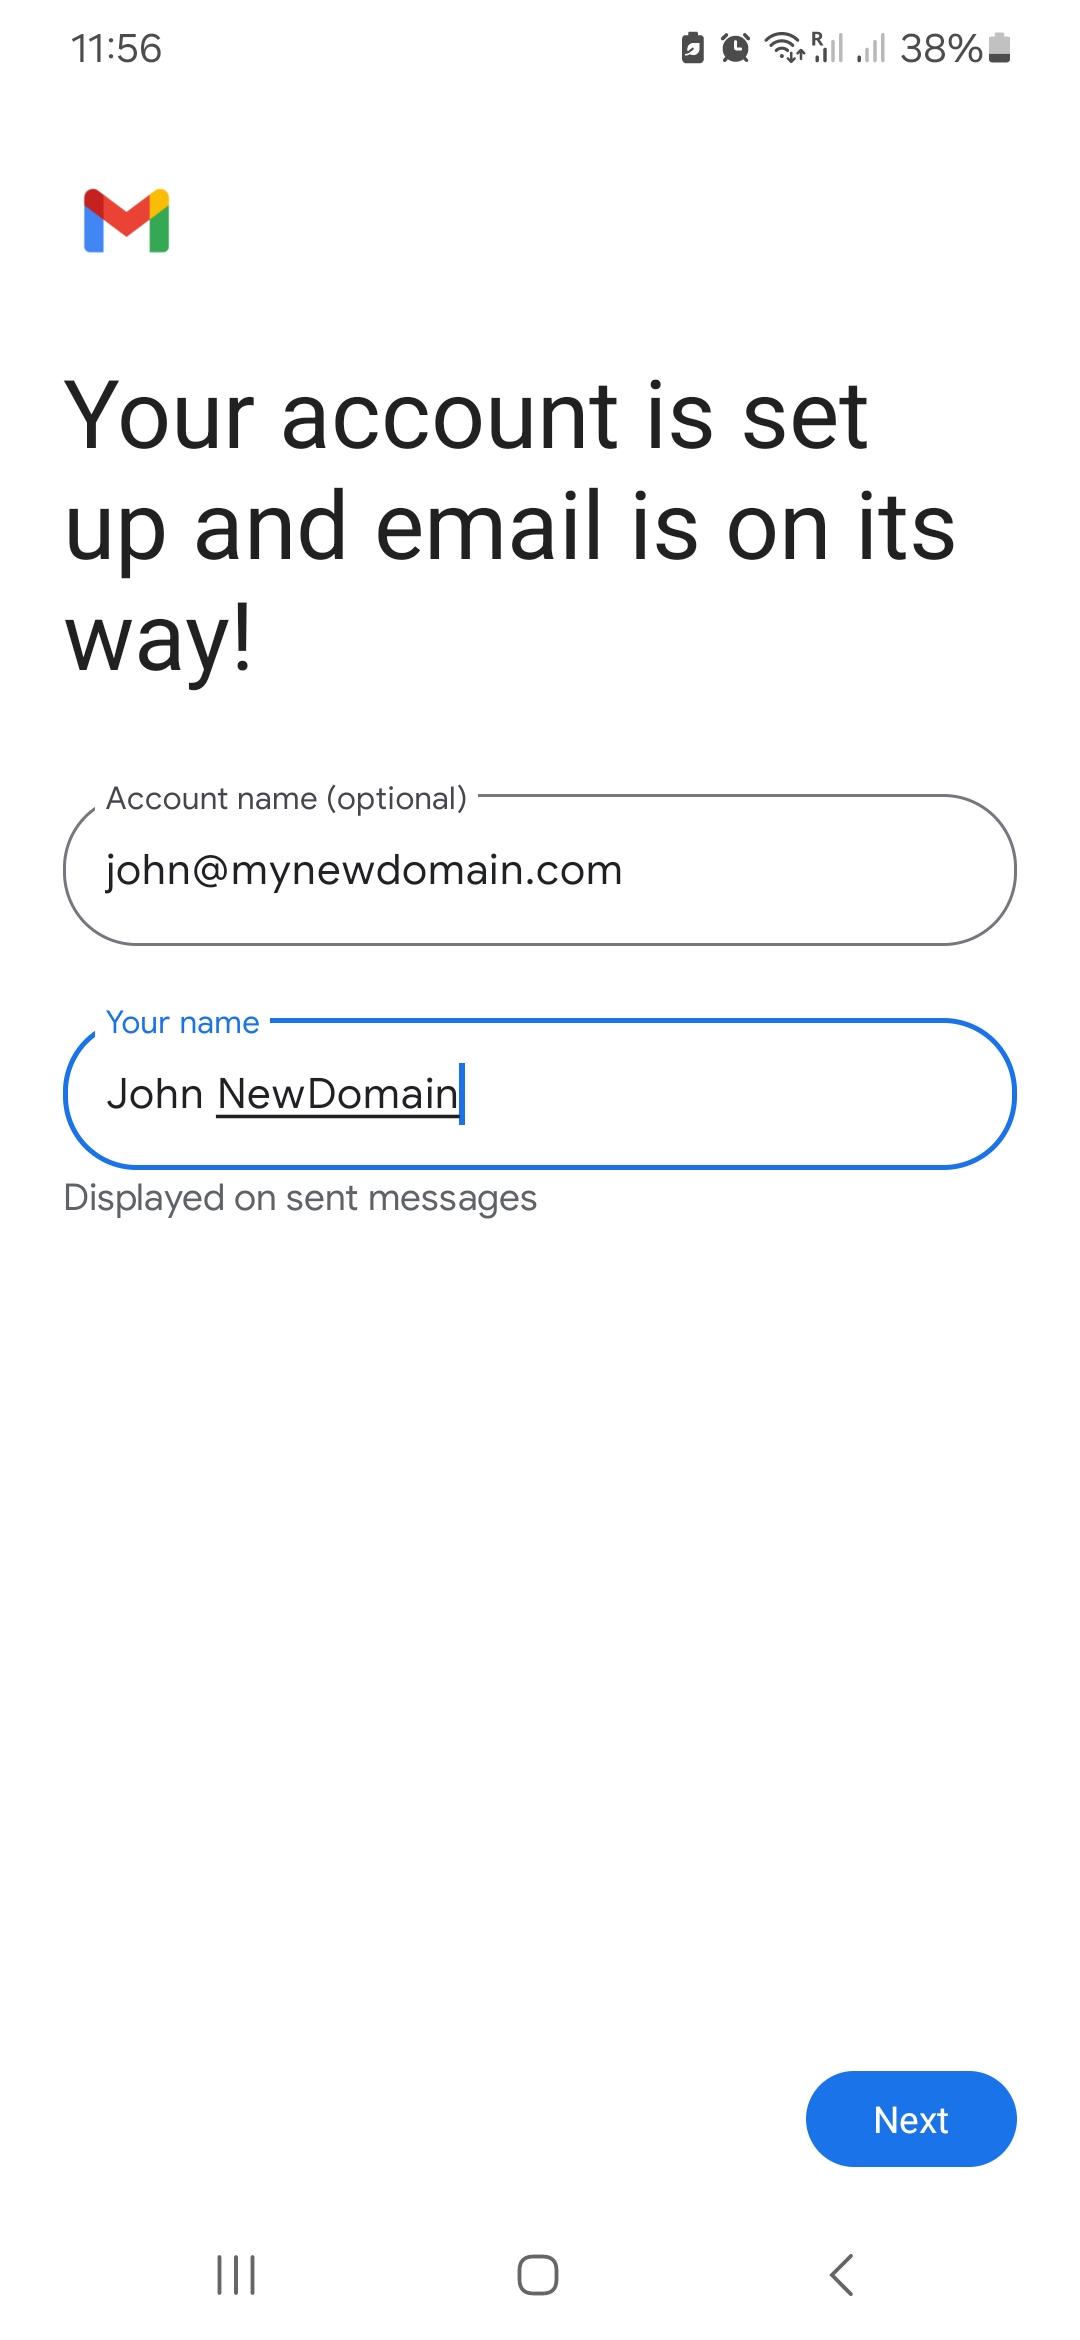](https://wikidev.emailarray.com/uploads/images/gallery/2025-06/android-email-setup-step-8.jpg)