**Note:** ActiveSync is a premium feature available for **Enhanced mailboxes**.
**Pro Tip:** If your configured [Autodiscover](https://wikidev.emailarray.com/books/1-configure-a-new-e-mail-address-getting-started/page/dns-configuration#bkmrk-5.-autodiscover-reco) in your domain’s DNS settings, you can often skip the manual server entry. Simply enter your email and password, and the device will find the correct server settings automatically.
#### Pre-requisites Before starting, ensure you have the following details ready: - **Your Full Email Address:** (e.g., john@mydomain.com). - **Your Password:** The same password you use for webmail. - You have added the [Autodiscover DNS record for your domain](https://wikidev.emailarray.com/books/1-configure-a-new-e-mail-address-getting-started/page/dns-configuration#bkmrk-5.-autodiscover-reco) to simplify the configuration. Otherwise, you can use the manual setup. #### Step 1: Add a New Account 1. Open the **Settings** app on your smartphone or tablet. 2. Navigate to **Mail** or **Accounts** and select **Add Account**. 3. From the list of account types, select **Exchange**, **Microsoft Exchange**, or **ActiveSync**. #### Step 2: Enter Account Details Simply enter your email and password, and the device will find the correct server settings automatically. Click on **Sign In** or **Finish**. #### Example setup on Android with Autodiscover:| [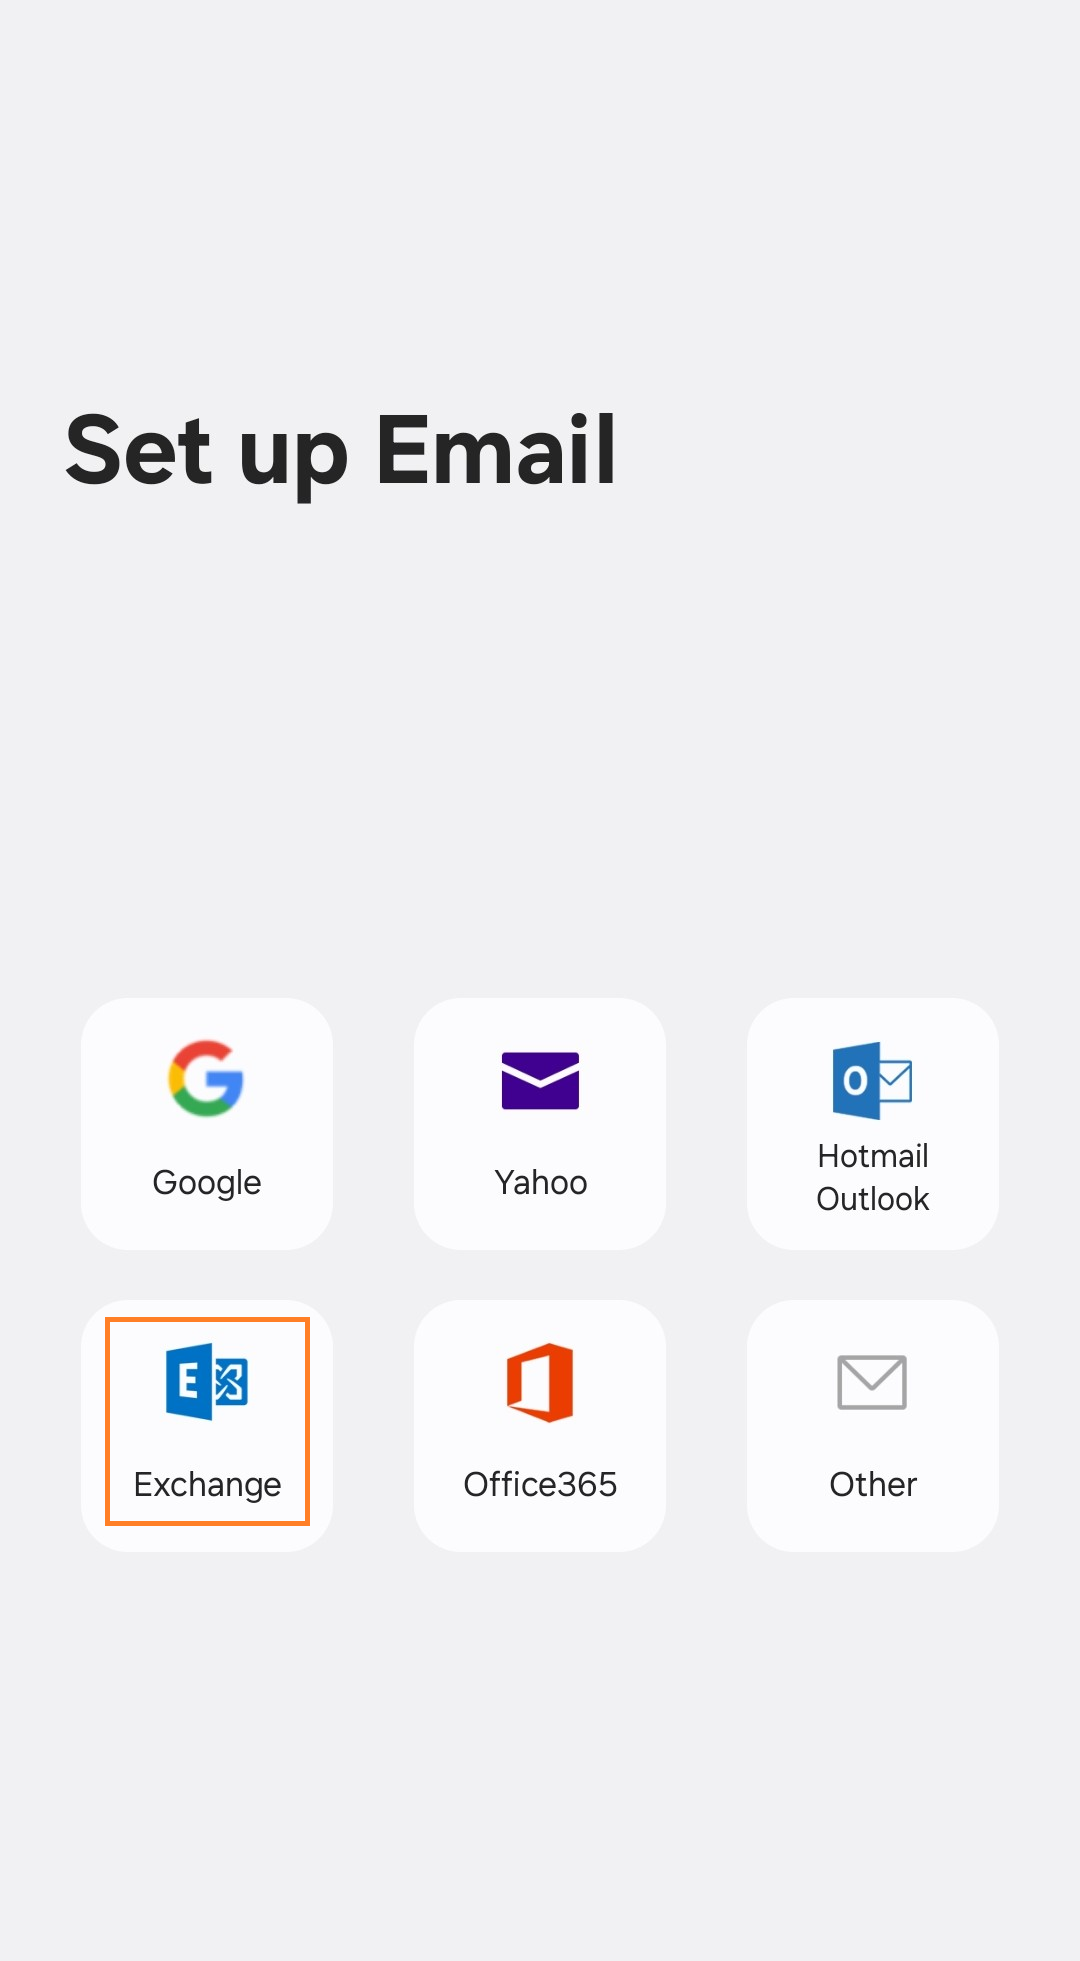](https://wikidev.emailarray.com/uploads/images/gallery/2026-01/activesync-eas-on-android-step-1.jpg) | [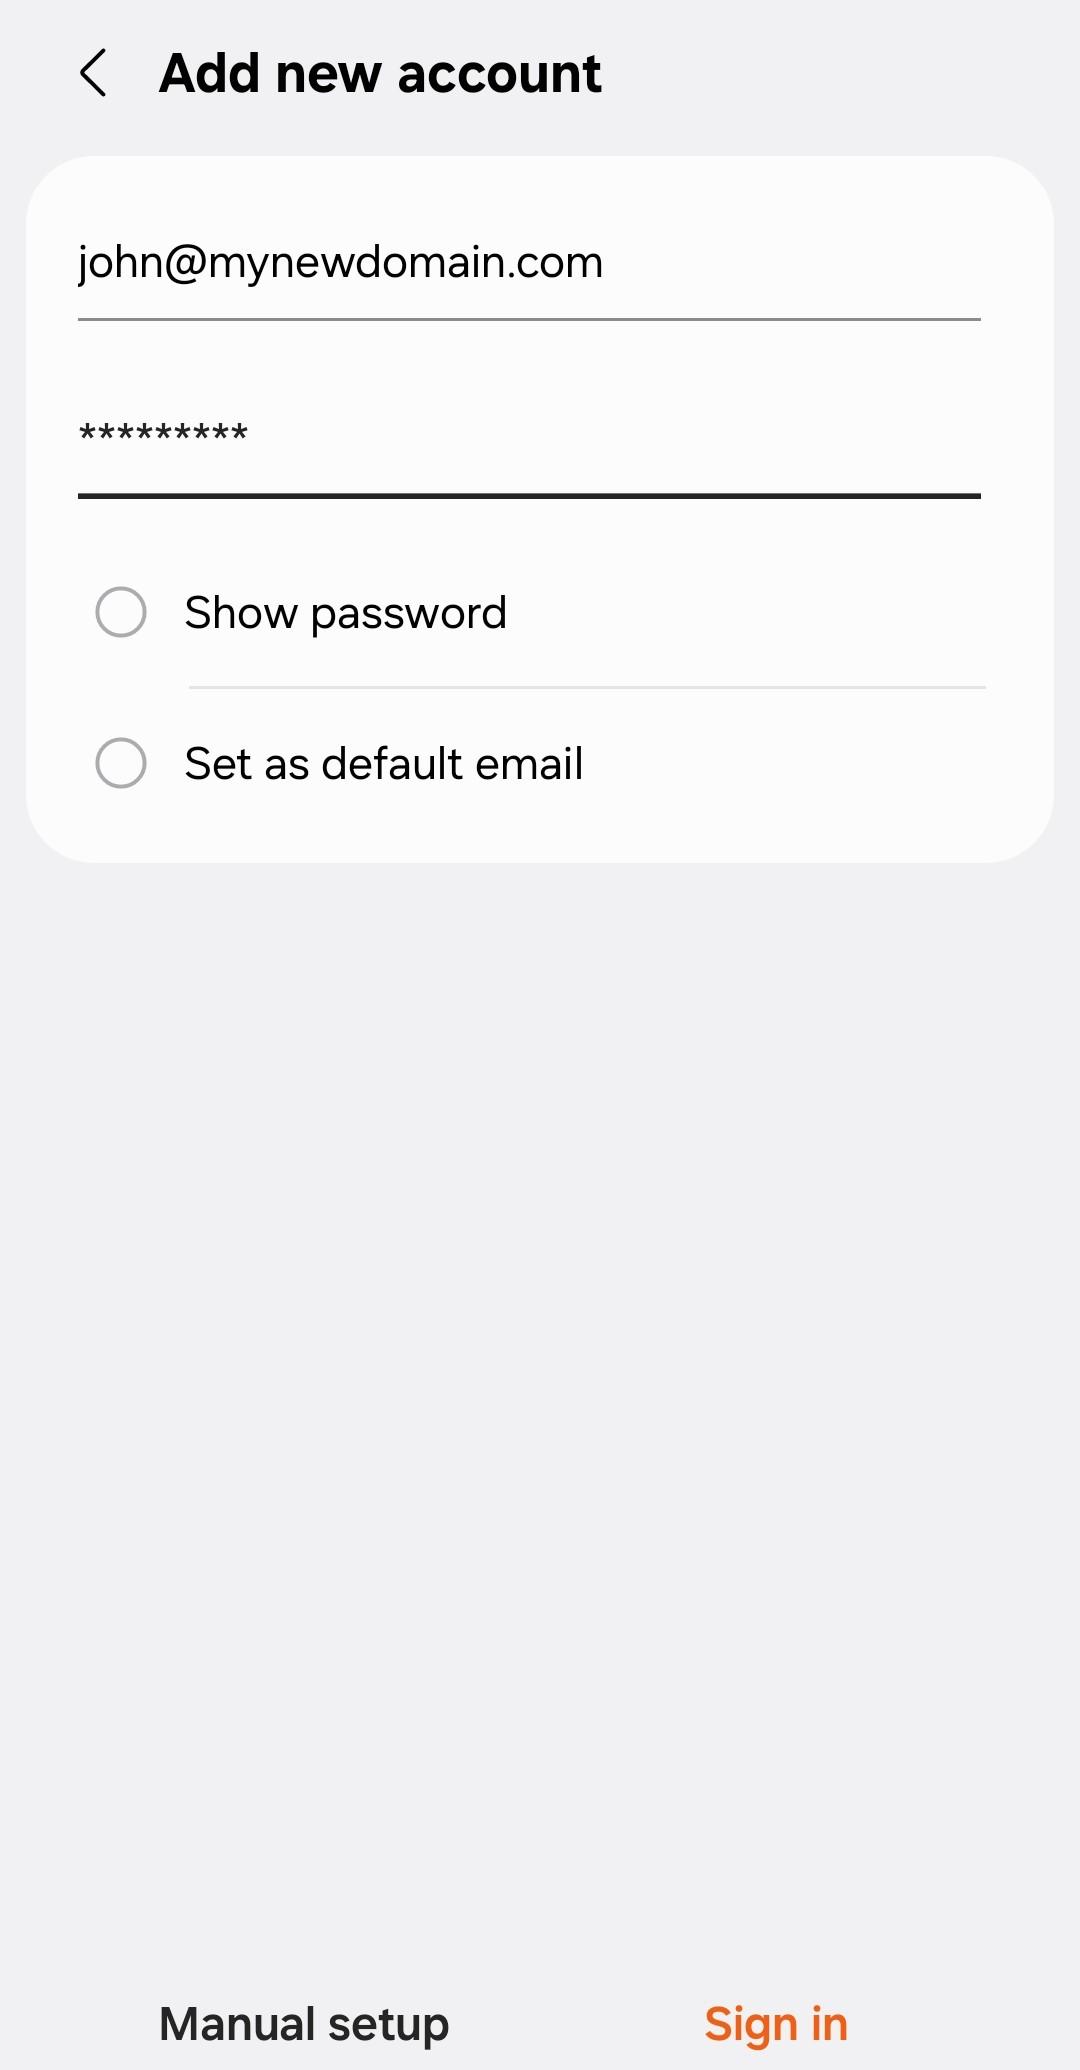](https://wikidev.emailarray.com/uploads/images/gallery/2026-01/activesync-eas-on-android-step-2.jpg) |
| [](https://wikidev.emailarray.com/uploads/images/gallery/2026-01/activesync-eas-on-android-step-1-choose-exchange-type.png) | [](https://wikidev.emailarray.com/uploads/images/gallery/2026-01/activesync-eas-on-android-step-2.jpg) | [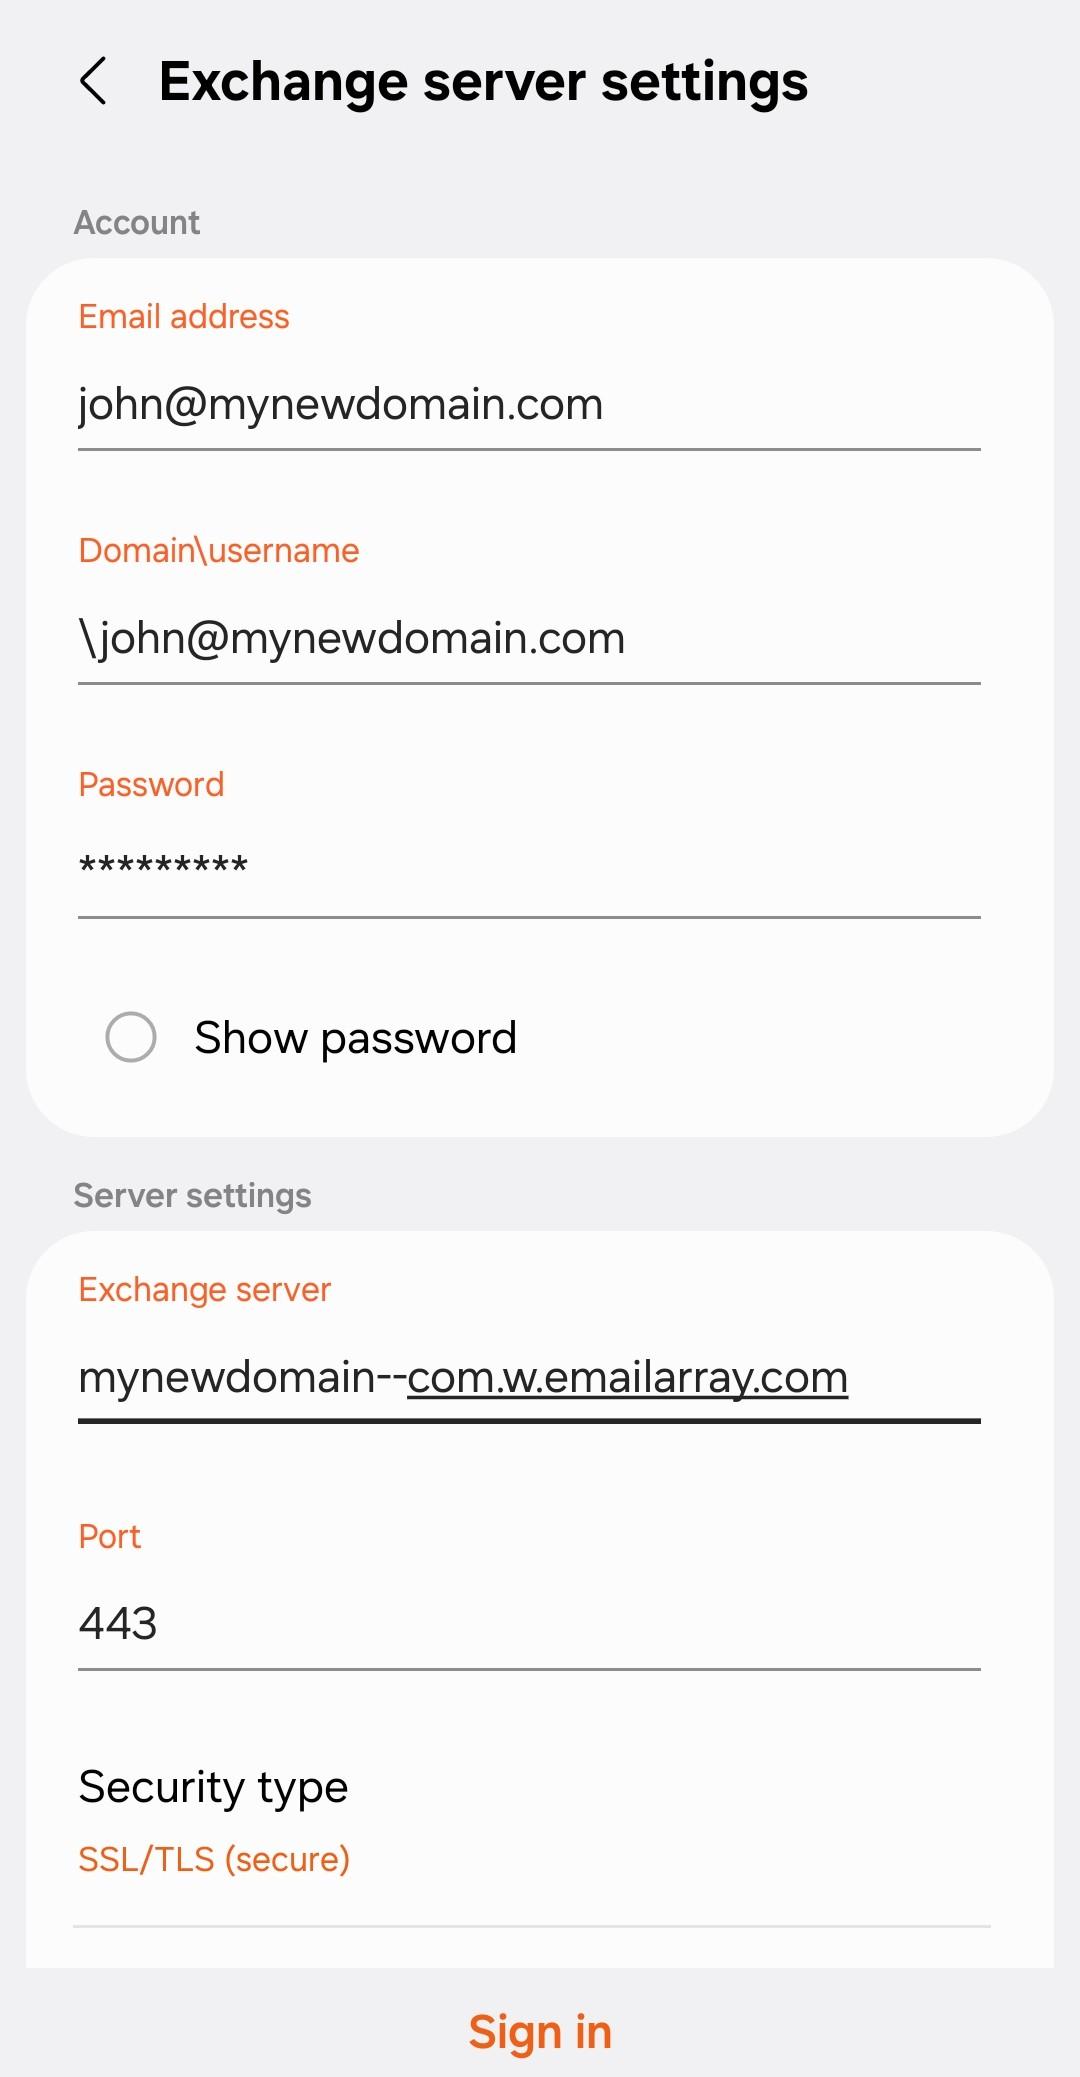](https://wikidev.emailarray.com/uploads/images/gallery/2026-01/activesync-eas-on-android-manual-setup.jpg) |