Setup IMAP or POP on other e-mail clients
These tutorials will help you add your mailbox as an IMAP or POP account in various e-mail clients, including Thunderbird, Outlook, Android and iOS. Most e-mail clients will require a manual setup.
If you are familiar with this setup, you can go to Servers and Ports wiki page.
For the SMTP settings, remember to always mark the option to "Require authentication" (sometimes referred to as "My server requires SMTP authentication").
Also note that IMAP is recommended rather than POP, as it´s a protocol made to support several devices accessing one same account, with all folders synced at our server, which also guarantees that our backups will be executed.
- Setup e-mail on Mozilla Thunderbird
- Setup e-mail on Outlook
- Setup IMAP e-mail on iOS
- Setup IMAP e-mail on Android
Setup e-mail on Mozilla Thunderbird
| You can ask your sysadmin to setup Autoconfig in your DNS to make the process of setting up Thunderbird much easier. |
Step 1
To open the setup window for a new email account, you have multiple options:
- Click on Tools -> Account Settings -> Account Actions -> Add Mail Account.
- If your menus on the top are hidden, click on the ALT key to show them, or access Account Settings by clicking on the radiator icon, on the top right of the interface, then Options -> Account Setting -> Account Actions -> Add Mail Account.
- Click the menu icon → New → Existing Mail Account.
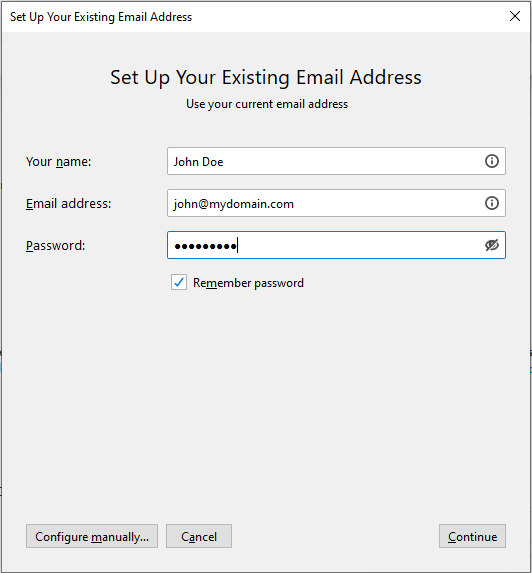
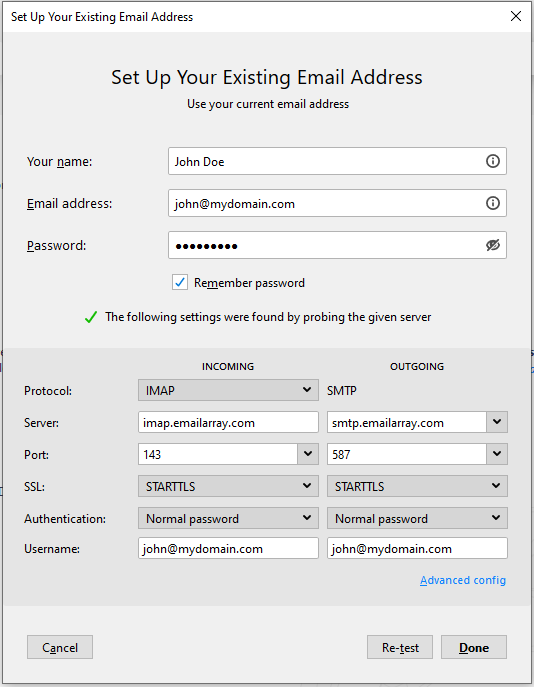
The Set Up Your Existing Email Address window will show.
Step 2
Enter the user's display name, full e-mail address and password:
Step 3
Click on Continue. Thunderbird will automatically find the proper server names if you have set the Autoconfig record in your DNS.
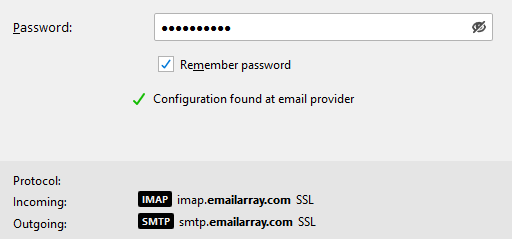
If Thunderbird doesn't automatically find the server names, please use the details from the Server & Ports page.
Step 4
Click on Done to finish the account setup. Wait for Thunderbird to synchronize the data.
| Note that Thunderbird will automatically setup the account as IMAP. If you want to set up the account as POP, you have to setup the account manually. IMAP is recommended, as it´s a protocol made to support several devices accessing one same account, with all folders synced at our server, which also guarantees that our backups will be executed. |
Setup e-mail on Outlook
Below, step by step tutorials according to the Outlook version used, which you can usually check when opening Outlook or in the Help menu/About. There's also a website with a generic Outlook setup which can be useful, so you can view screenshots.
Also notice that if this is the first time you open Outlook since its installation, a window will immediately pop up asking you to set up your email account. Click yes and proceed and follow our instructions starting with a section in which you start typing in your account data.
Finally, as per our tests, sent items and trash are automatically saved in IMAP folders, except in older Outlook 2003. Nonetheless, information about this is available for Sent Items and Trash, especially useful if your Outlook is not in English and you want to manually define folders used for these base folders. Notice that our Webmail automatically decodes the English default names (Sent, Trash, Drafts, Spam) so that it shows them in the language in which you accessed Webmail. In some cases, however, it might be required to change folder mappings in Webmail, if Outlook does not do this conversion automatically, besides mapping the localized names in your Outlook.
| Depending on the size of your mailbox and your Internet speed, Outlook might take from a few hours to a few days to synchronize the mailbox and build the local PST file. |
| Note that Outlook will automatically set up the account as IMAP. If you want to set up the account as POP, you have to set up the account manually. IMAP is recommended, as it´s a protocol made to support several devices accessing one same account, with all folders synced at our server, which also guarantees that our backups will be executed. |
Outlook 365
| Unfortunately, this version of Outlook doesn't support Autodiscover for IMAP accounts anymore. |
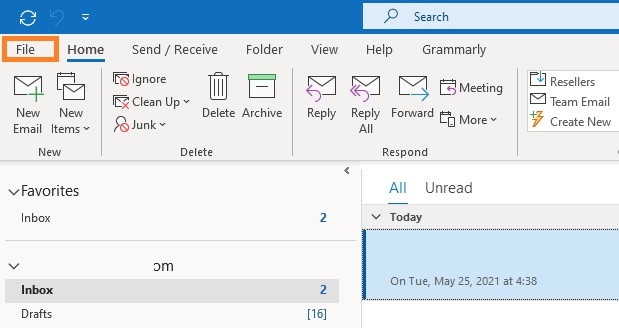
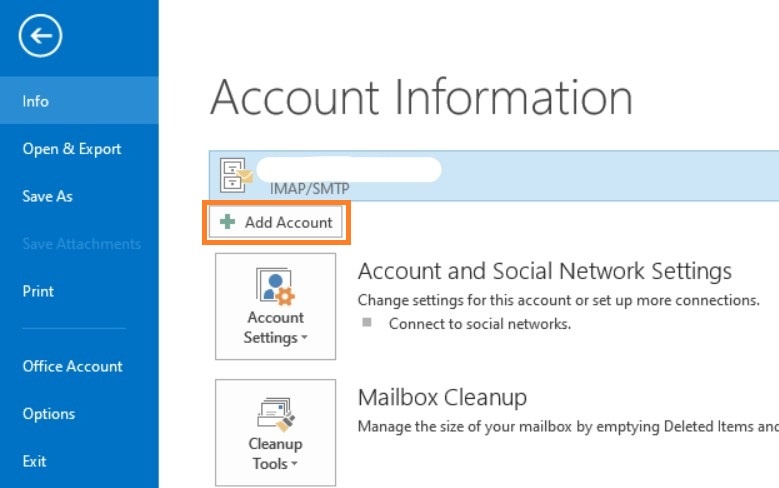
- Click on the File menu
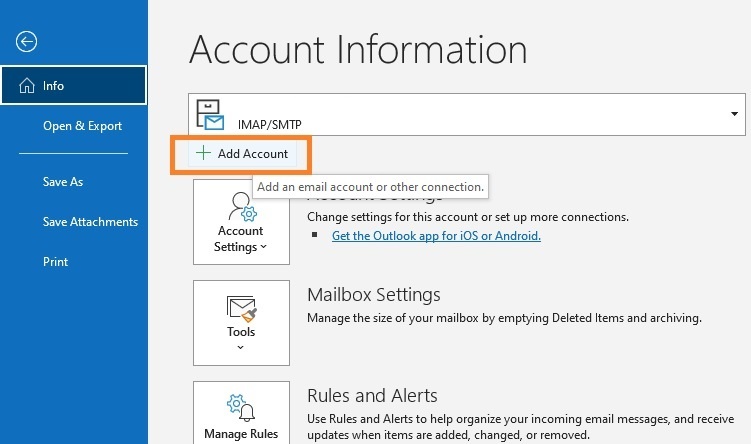
- Click on + Add Account
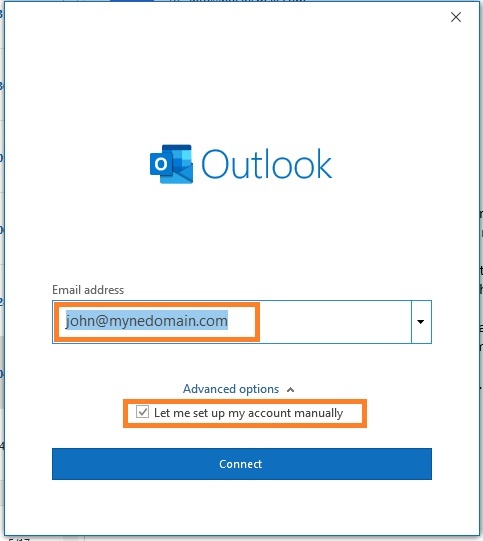
- Fill in your full email address and select the option Let me set up my account manually.
- Click on Next.
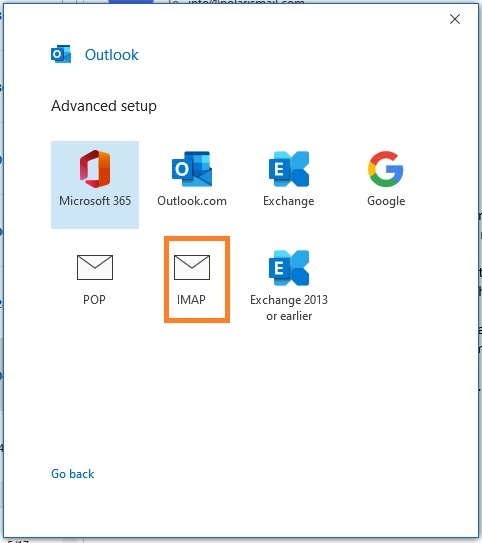
- Select IMAP from the list of account types.
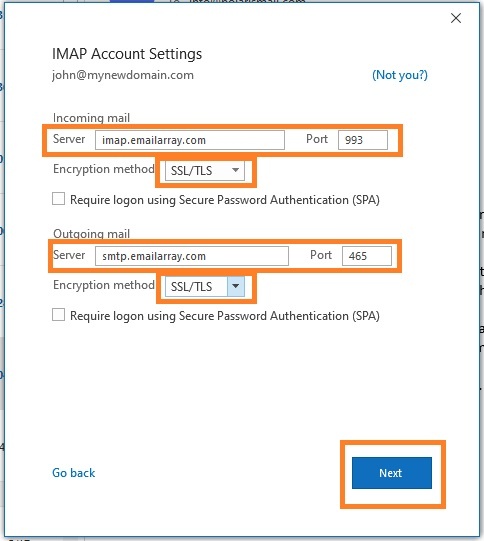
- Fill in server information from the Server & Ports page
- Click on Next
- Fill in your existing password for your email address and click on Connect
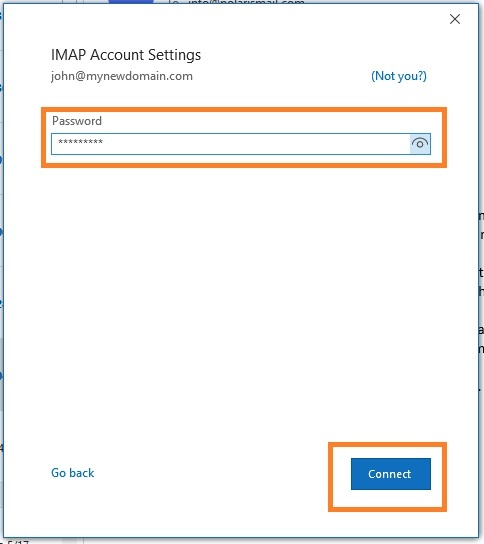
- The setup is completed. The message Account successfully added will show and Outlook will begin synchronizing the account.
Outlook 2013/2010:
- Click on the File menu
- Click on + Add Account
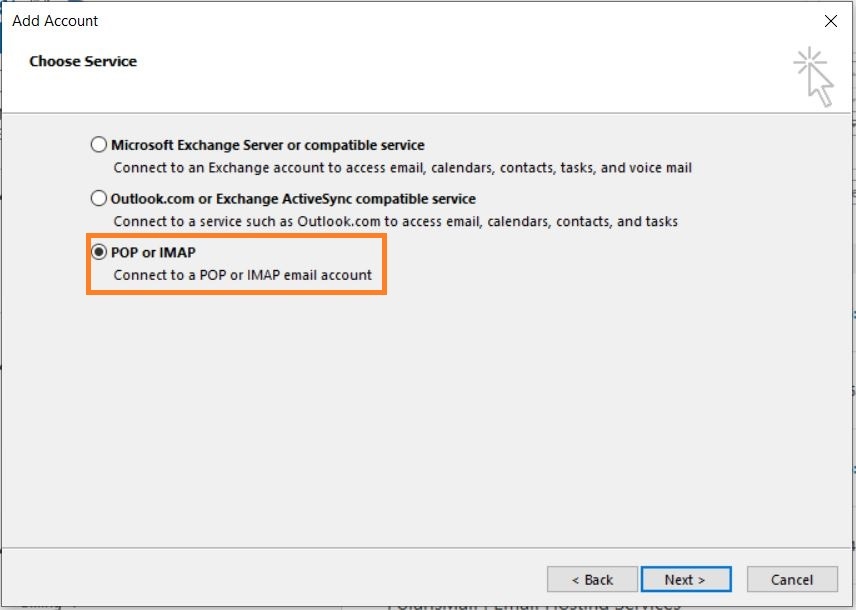
- Select POP or IMAP
- Option 1: this version of Outlook supports Autodiscover for IMAP accounts if you have setup Autodicover in your DNS.
- Type in your full name, e-mail address, and password and click on Next
- Click on Allow when asked about autodiscover.xml
- Click on Finish
- Option 2: If you don't have Autodicover
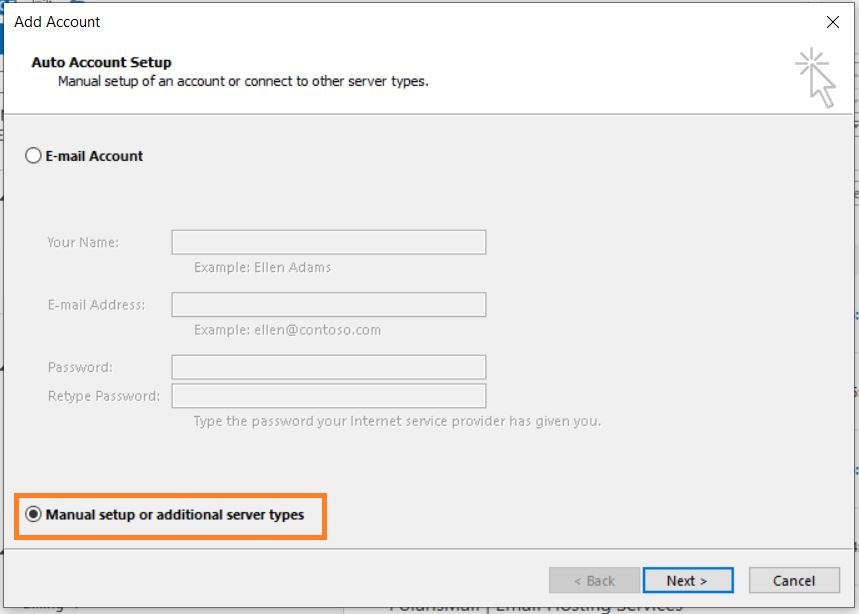
- select Manual setup and click on Next.
-
- Type in your full name, e-mail address, and password
- Fill in server information from the Server & Ports page

-
- Click on More Settings.
- Select My outgoing server (SMTP) requires authentication and Use same settings as my incoming mail server.

-
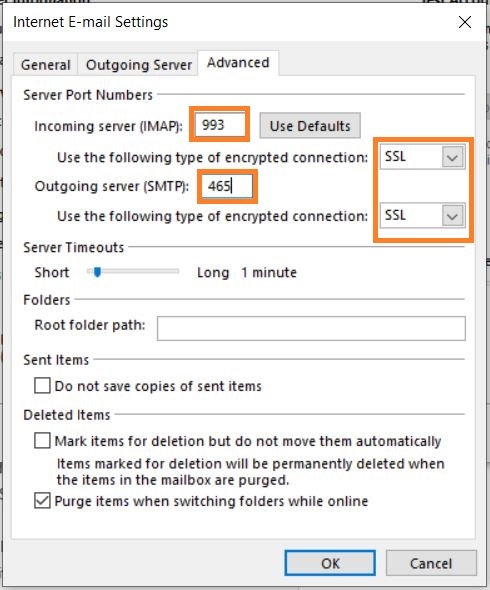
- Click on the Advanced tab
- Verify the ports are correct and SSL is selected.
-
- Click on OK. Click on Next to finish the setup.
| Depending on the size of your mailbox and your Internet speed, Outlook might take from a few hours to a few days to synchronize the mailbox and build the local PST file. |
Setup IMAP e-mail on iOS
| If you have an Enhanced mailbox, you can use ActiveSync, to not only sync e-mails, but also contacts and calendars. |
You can log in to the Webmail and download a profile to automatically setup the e-mail as IMAP. The profile will include calendars and contacts if you have an Enhanced mailbox.
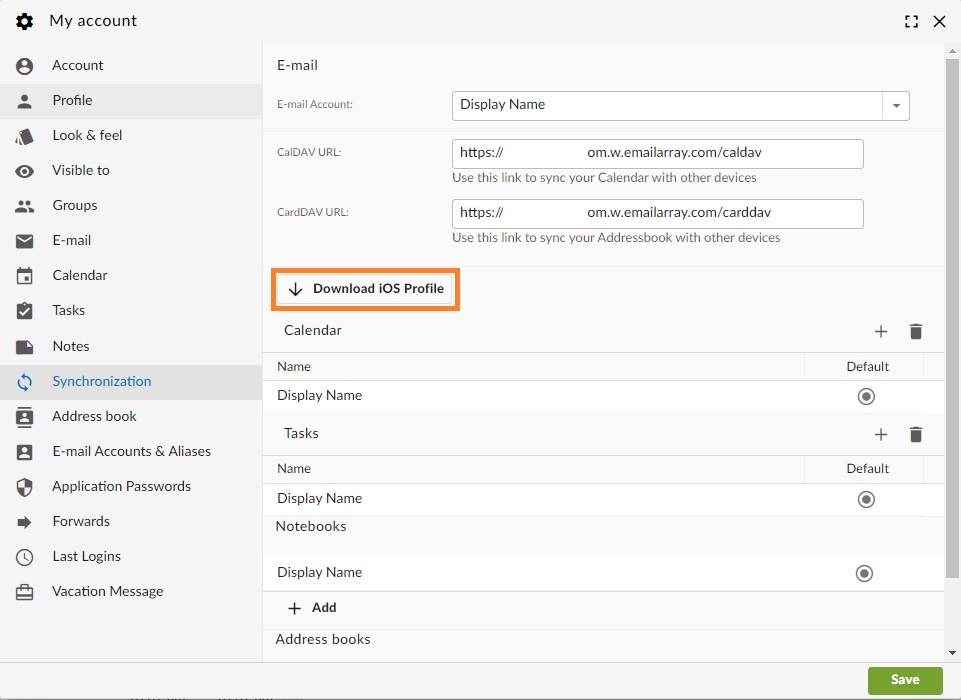
Here's the step by step for setting up an IMAP account on iOS.
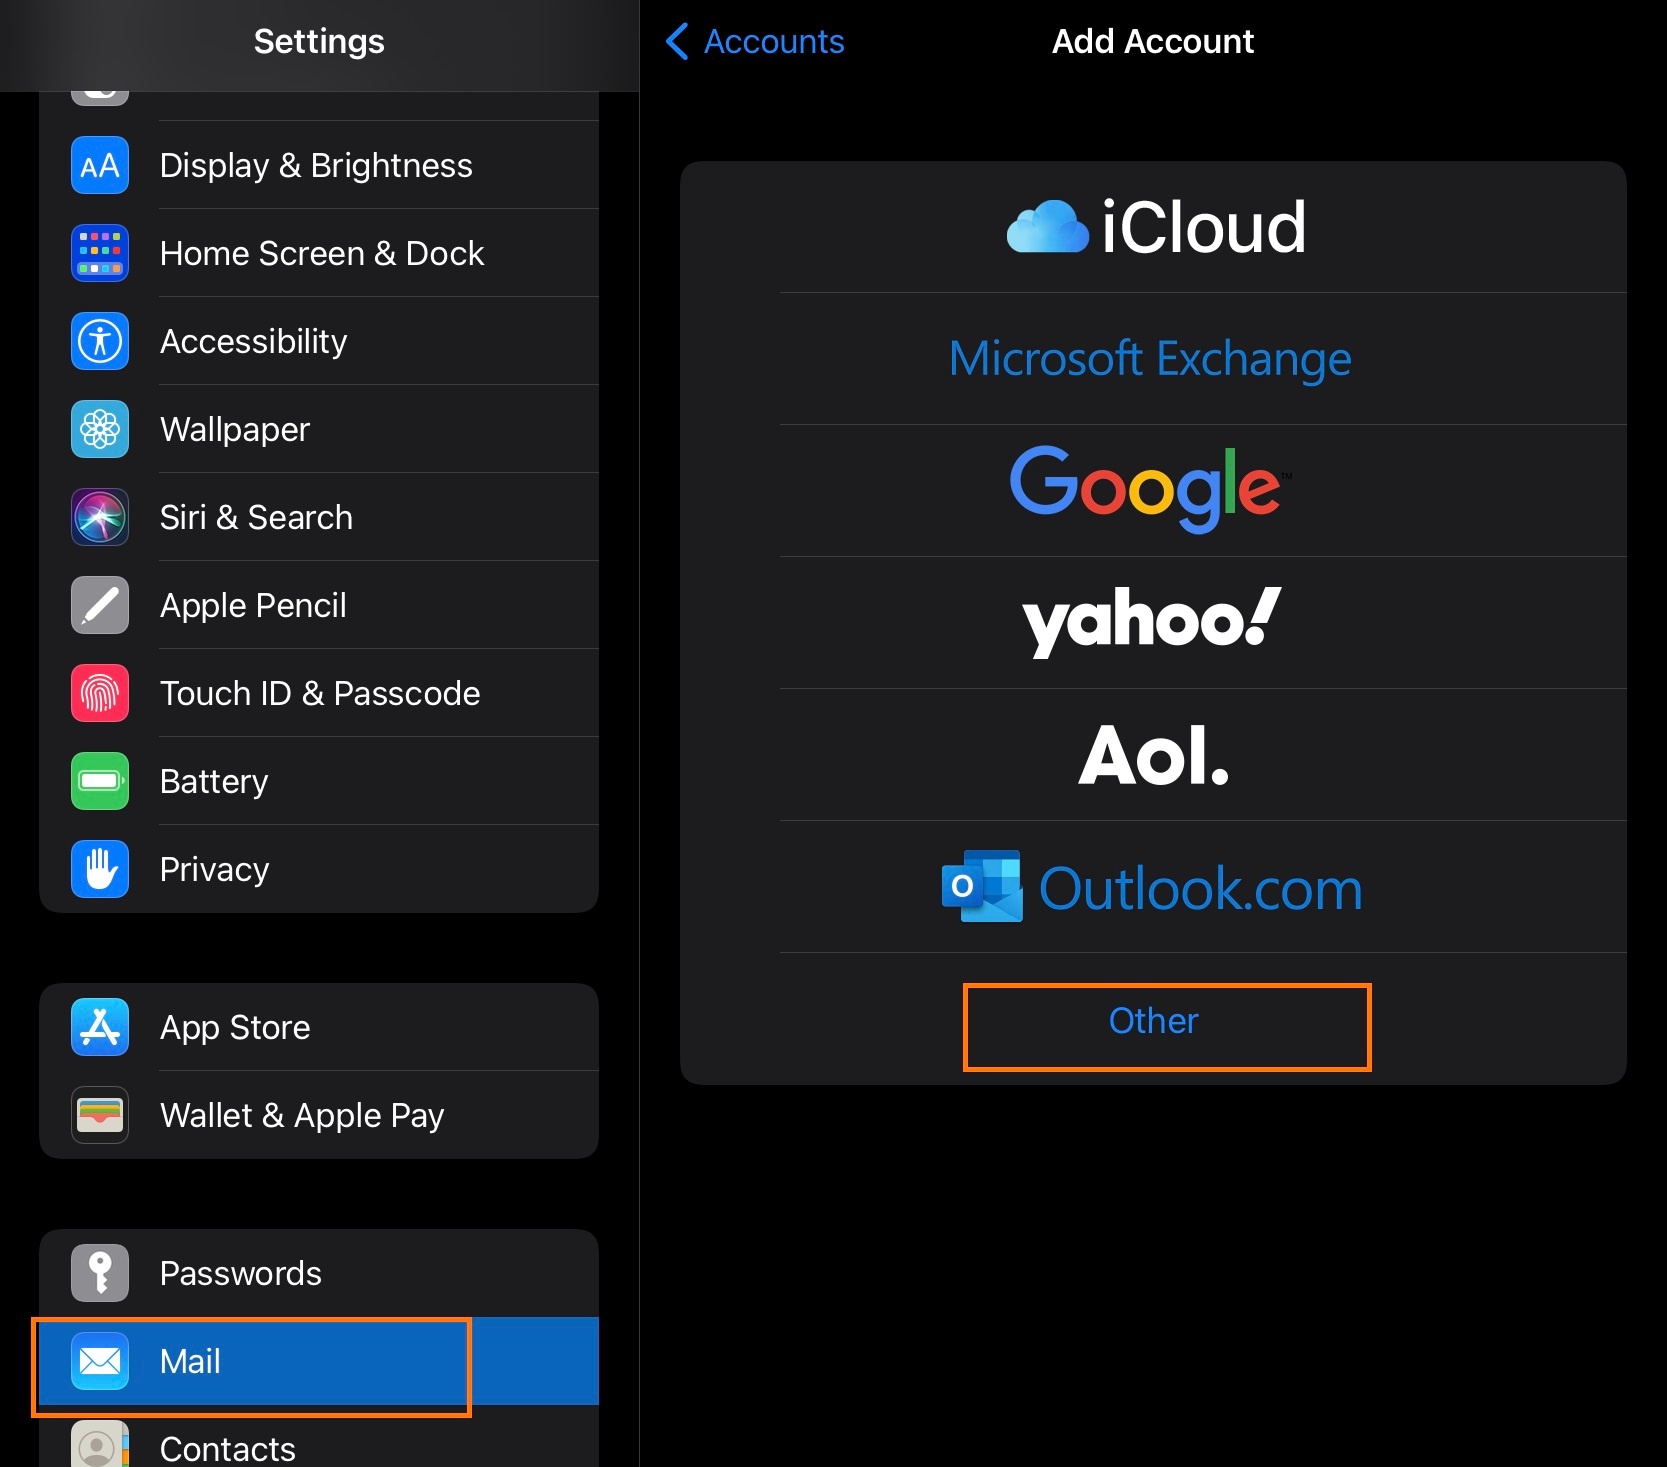
- Click on Settings
- Click on Mail, Contacts, Calendars
- Click on Add Account
- Click on Other
- Click on Add Mail Account
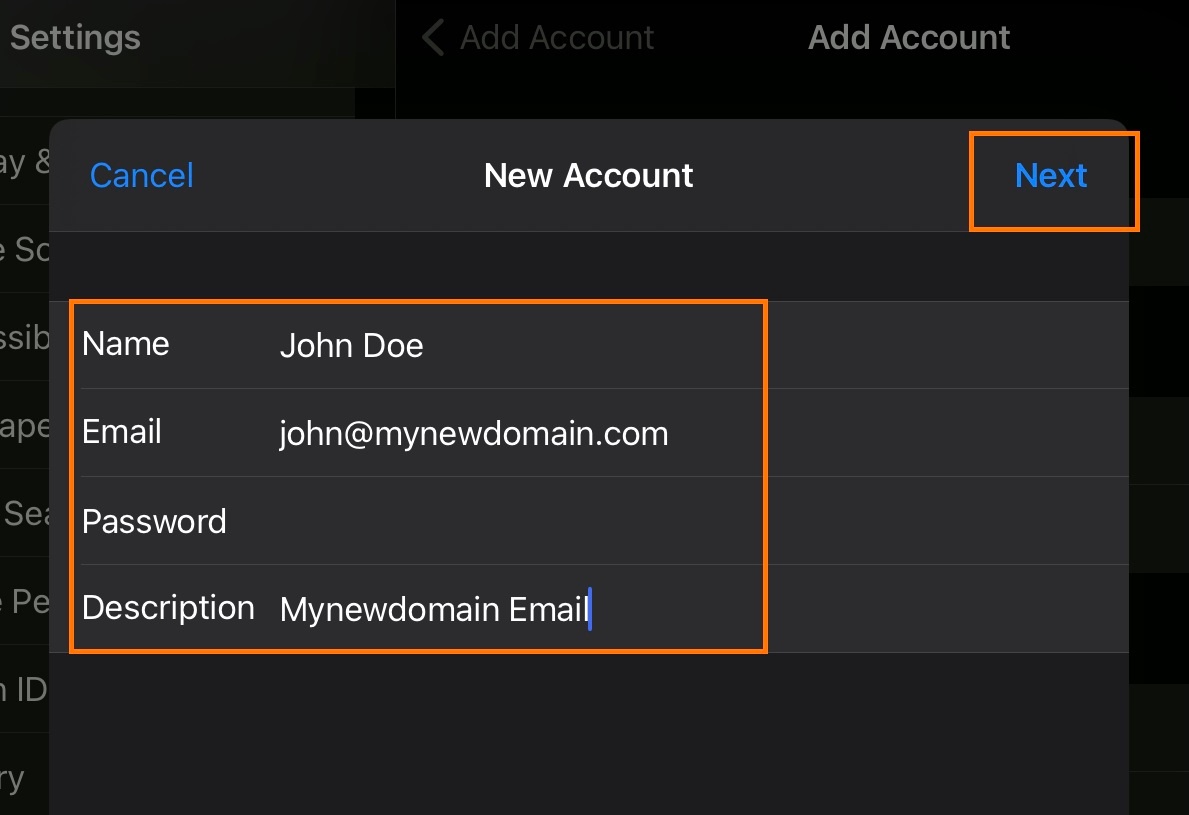
- Inform the following
- Name - The display name you want on your outgoing email
- Email - Your full email address
- Password - Your email password
- Description - A description for your account
- Click on Next
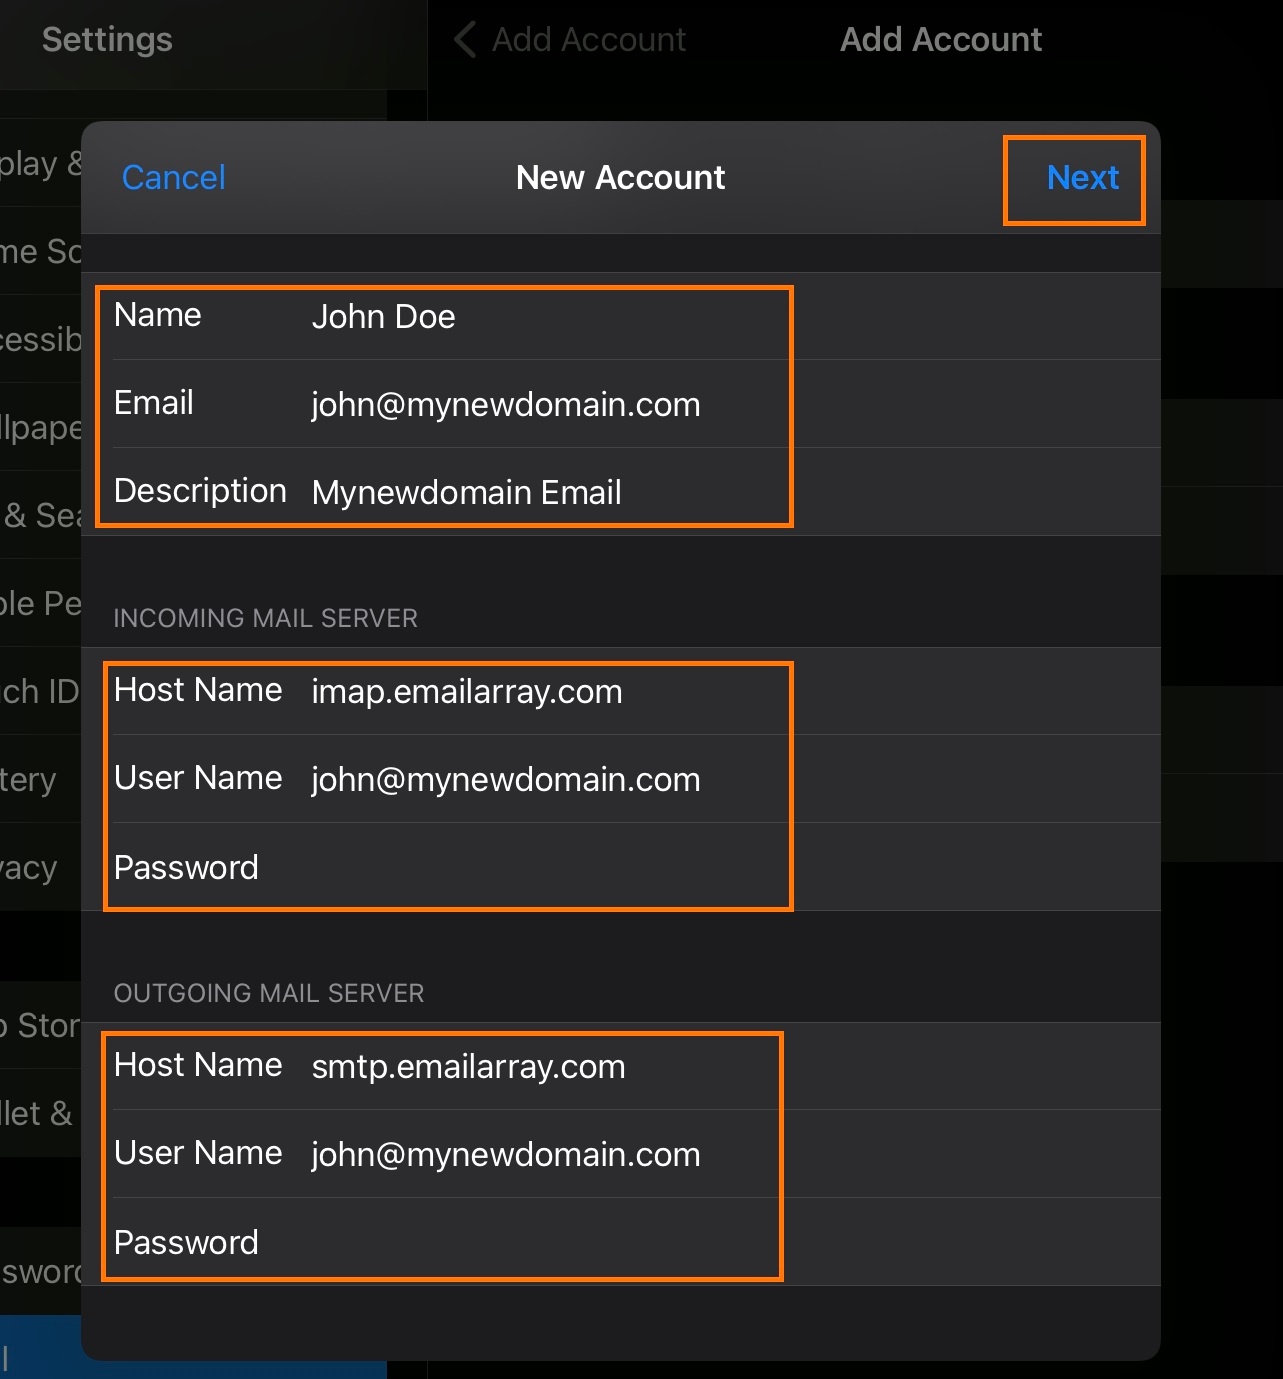
- IMAP is selected by default
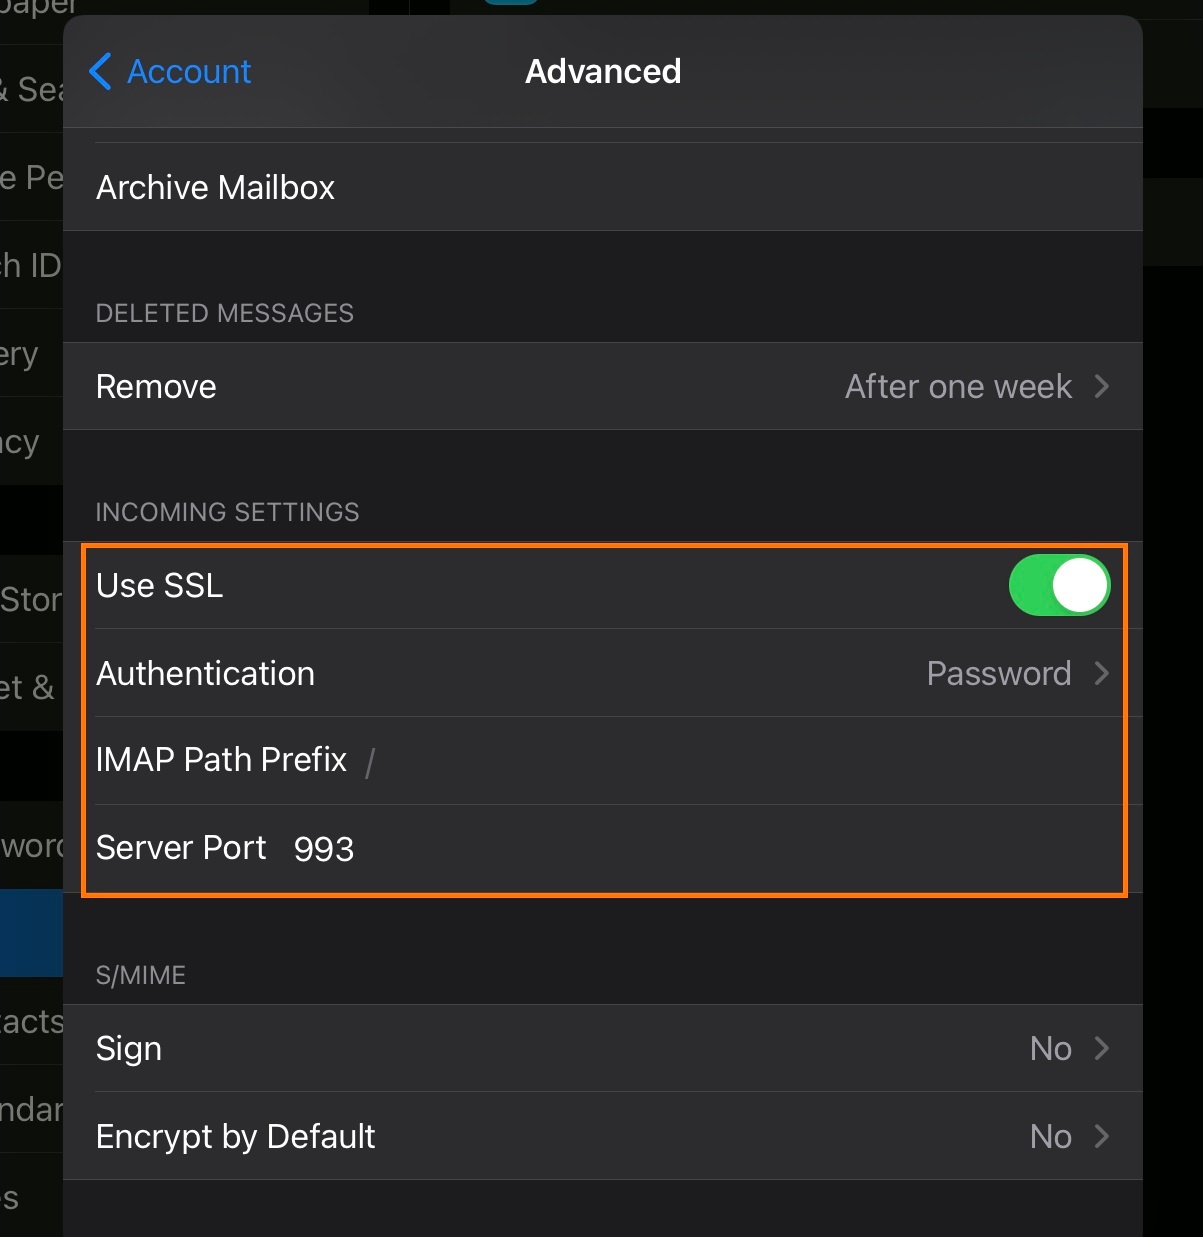
- Under Incoming Mail Server, enter as below:
- Host Name -
imap.emailarray.com - User Name - Your full e-mail address
- Password - Your password
- Host Name -
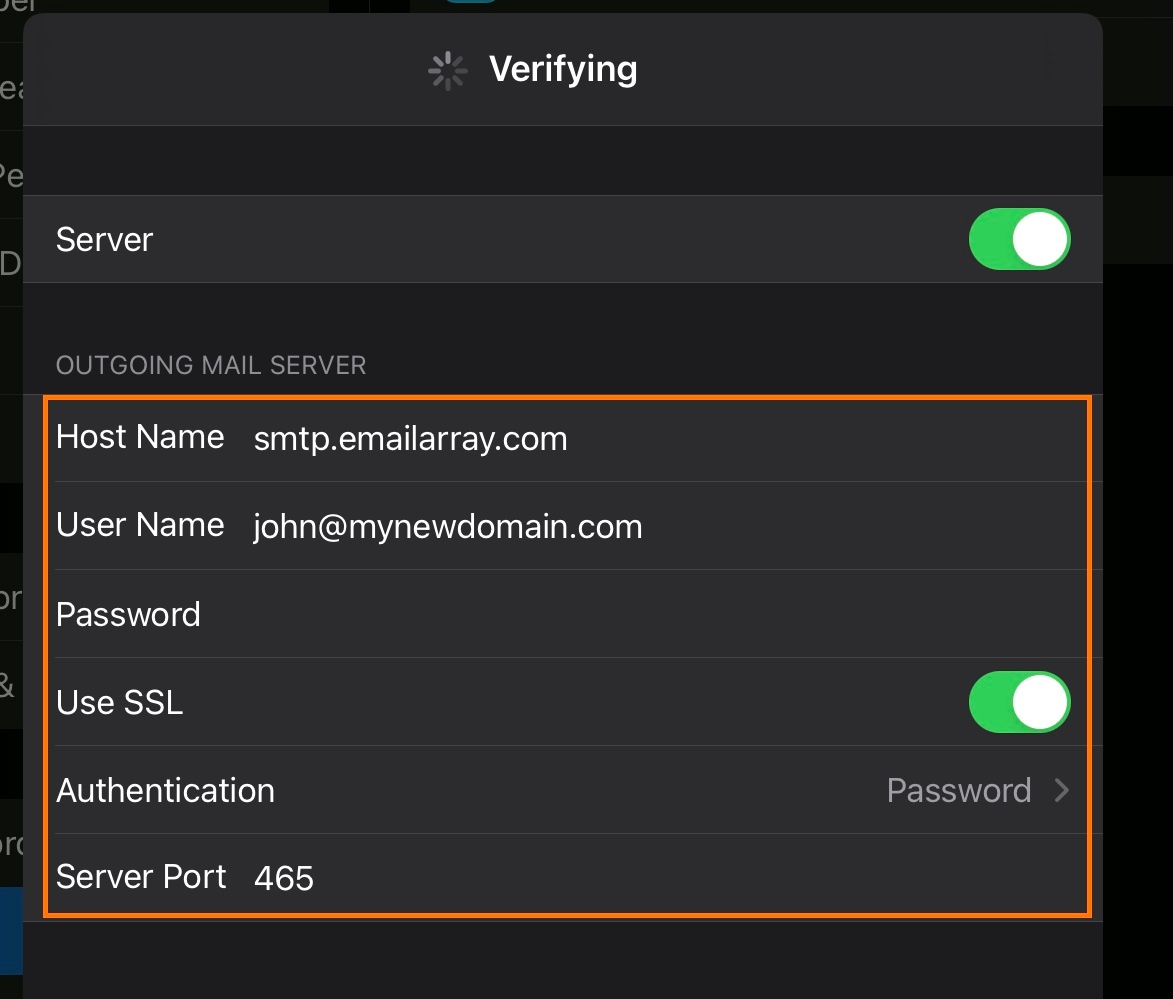
- Under Outgoing Mail Server, enter as below:
- Host Name -
smtp.emailarray.com - User Name - Your full e-mail address
- Password - Your password
- Host Name -
- Click on Next
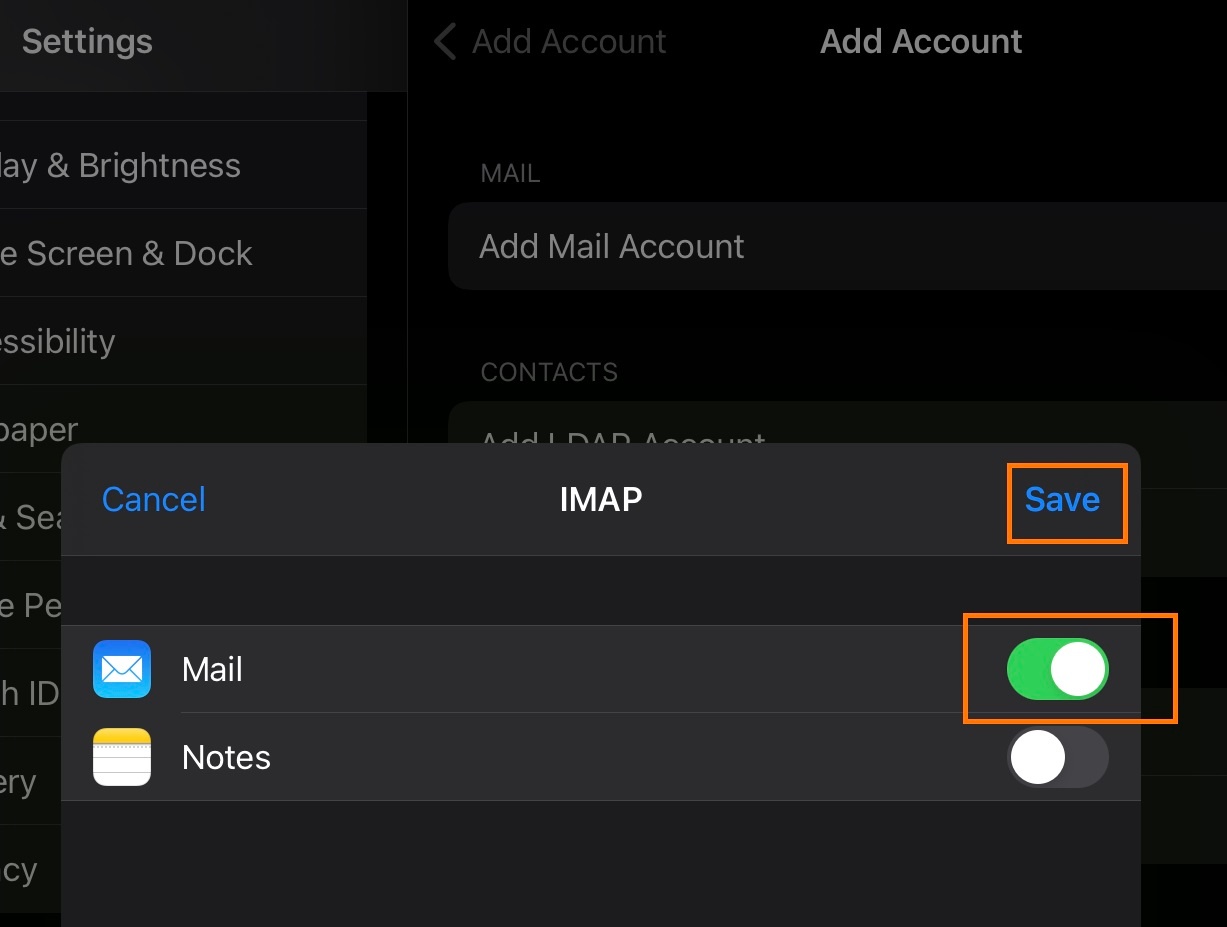
- Click on Save
Note that IMAP is preferred over POP. If you want to set up the account as POP, you have to set it up manually. IMAP is a protocol made to support several devices accessing one same account, with all folders synced at our server, which also guarantees that our backups will be executed.
Example setup for iOS:
 |
 |
 |
 |
 |
 |
Setup IMAP e-mail on Android
Remember that, if you have an Enhanced account, you can use ActiveSync, to not only sync e-mails, but also contacts and events.
How to set up your email on an Android device
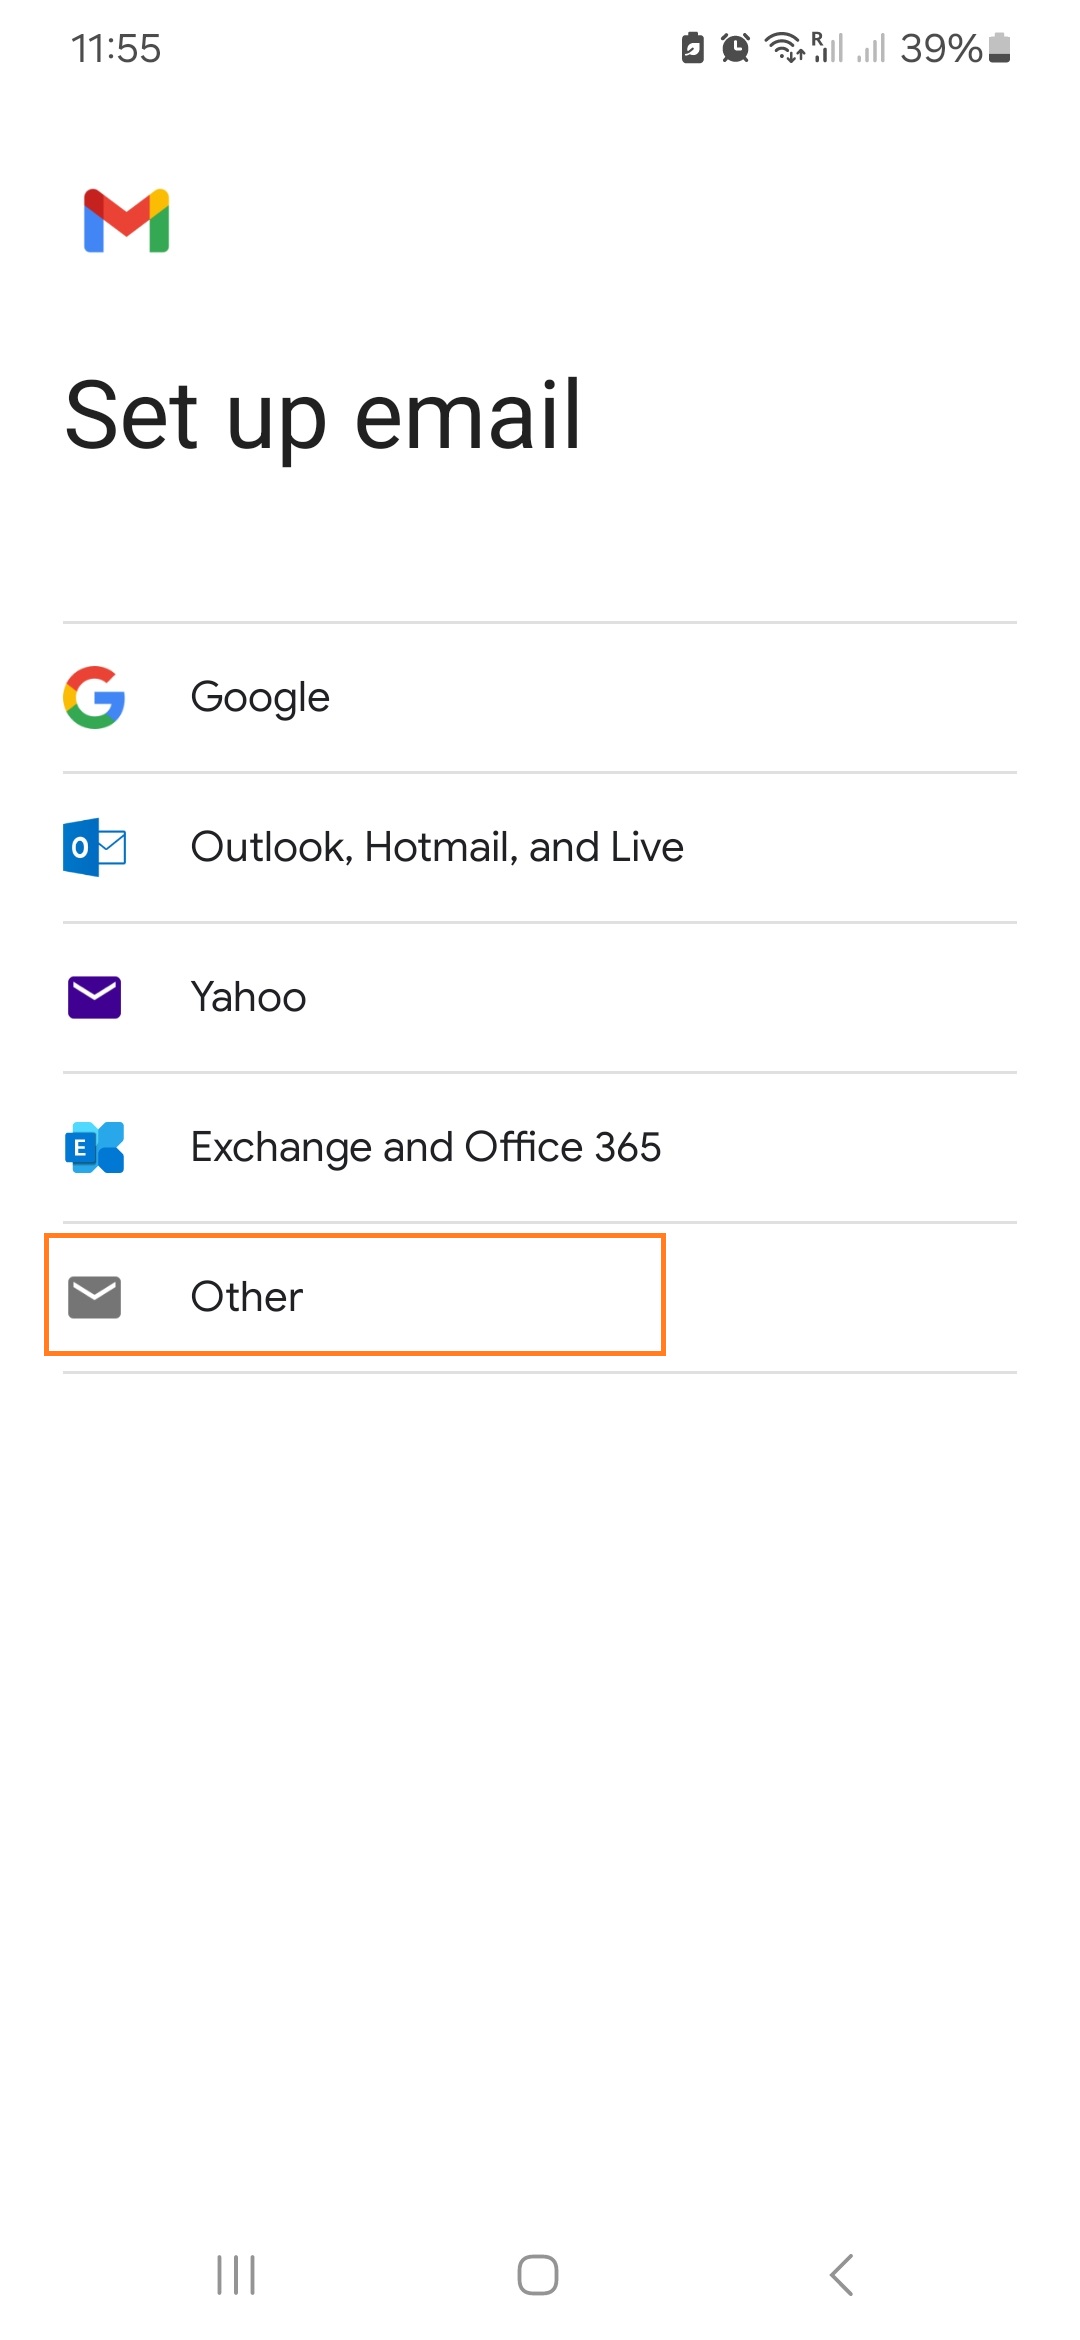
Here's the step by step for setting up an IMAP account on Android's native mail app.
- Press the device's Menu button.
- Tap Settings.
- Go to Manage Accounts
- Click on Add account.
- Click on Email / Personal (IMAP)
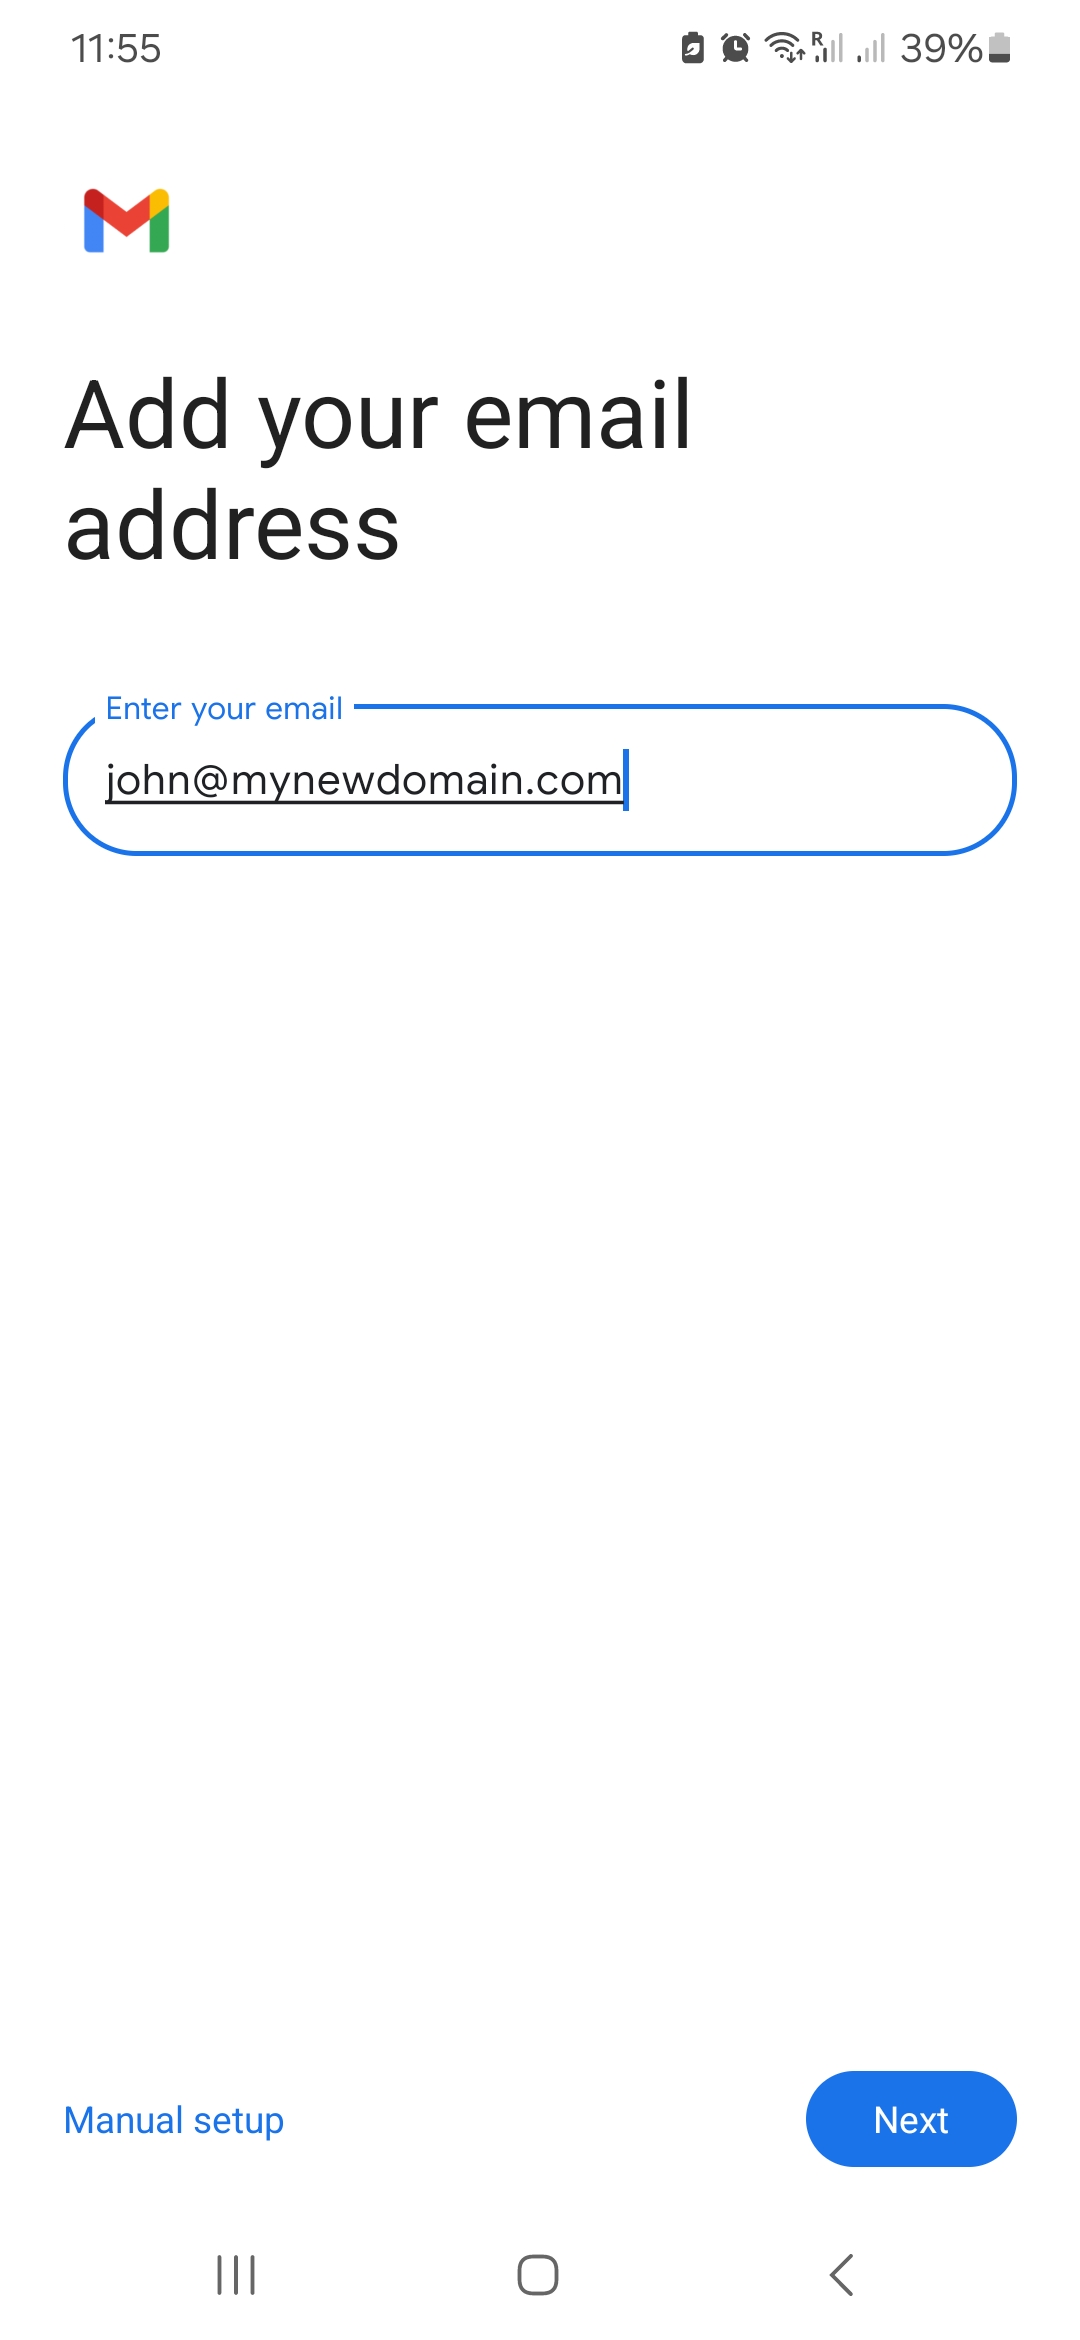
- Username: enter your full e-mail address
- If an account type is asked, choose IMAP account.
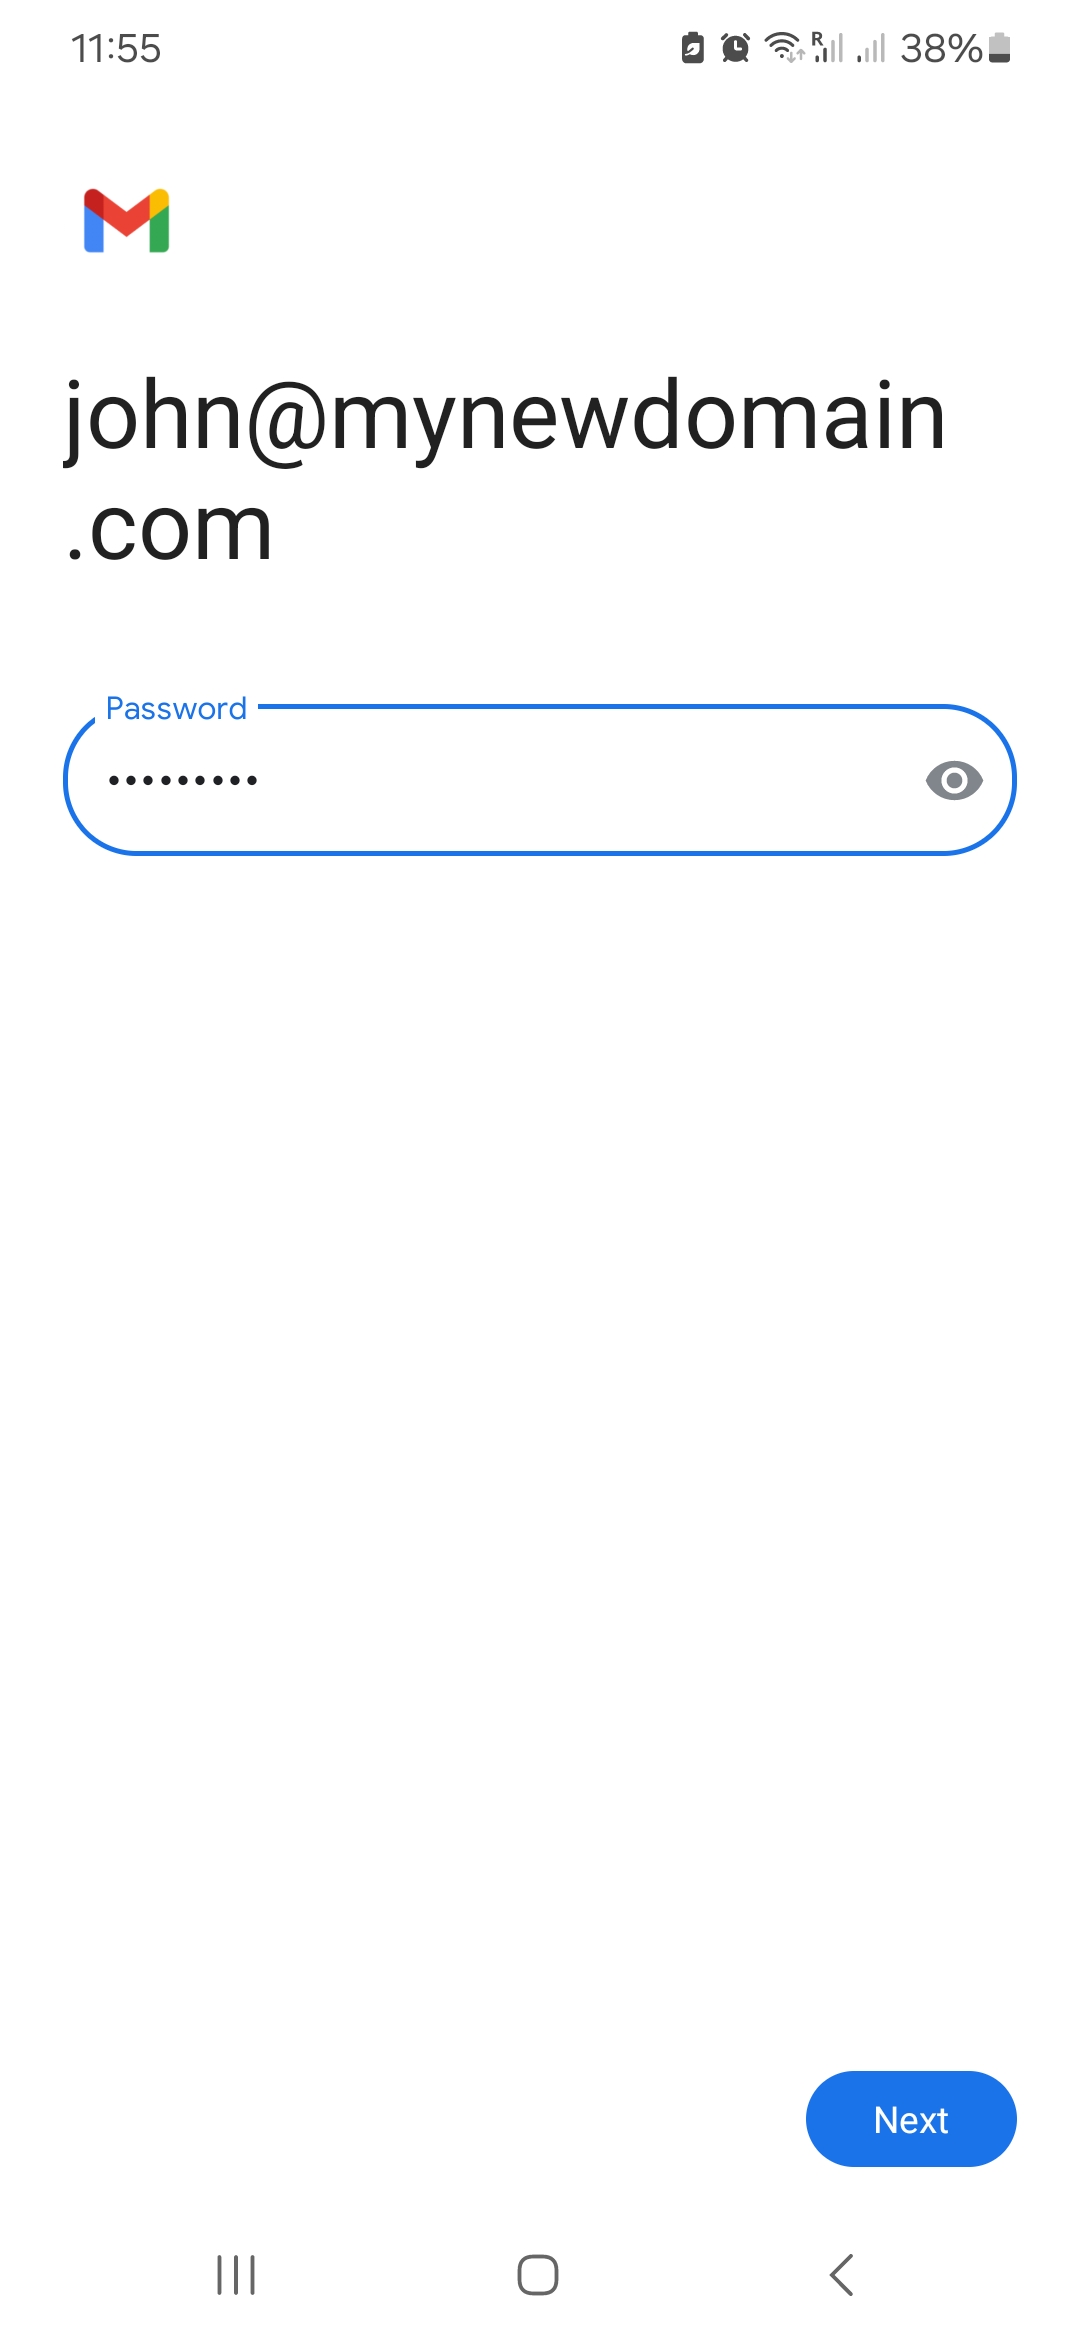
- Password: enter your email's password.
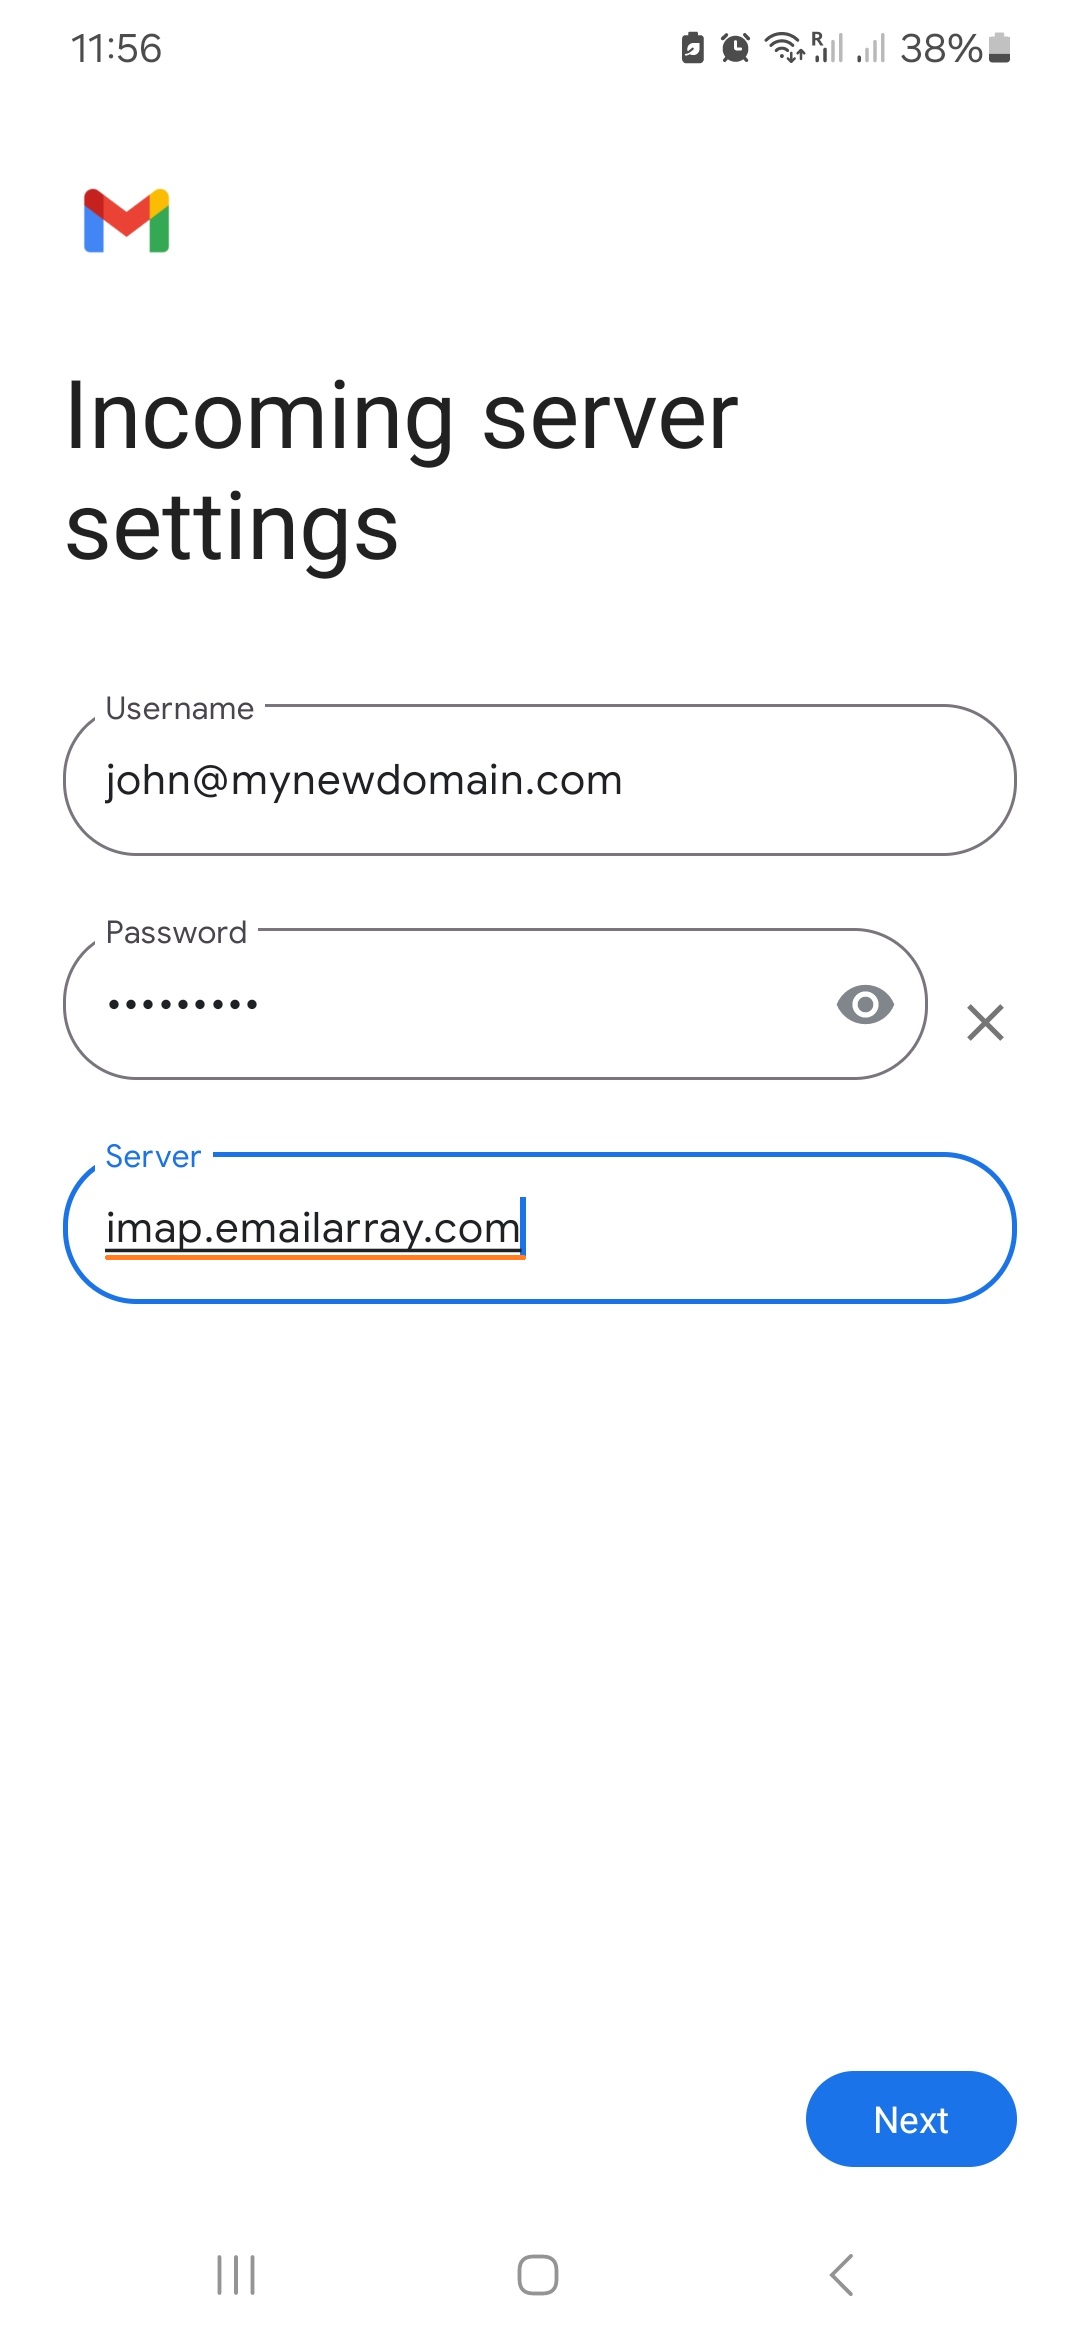
- Incoming server settings
- Username: your full email address
- Password: your email's password
- Server:
imap.emailarray.com. Android will automatically use yourdomain.com as host and you need to change it.
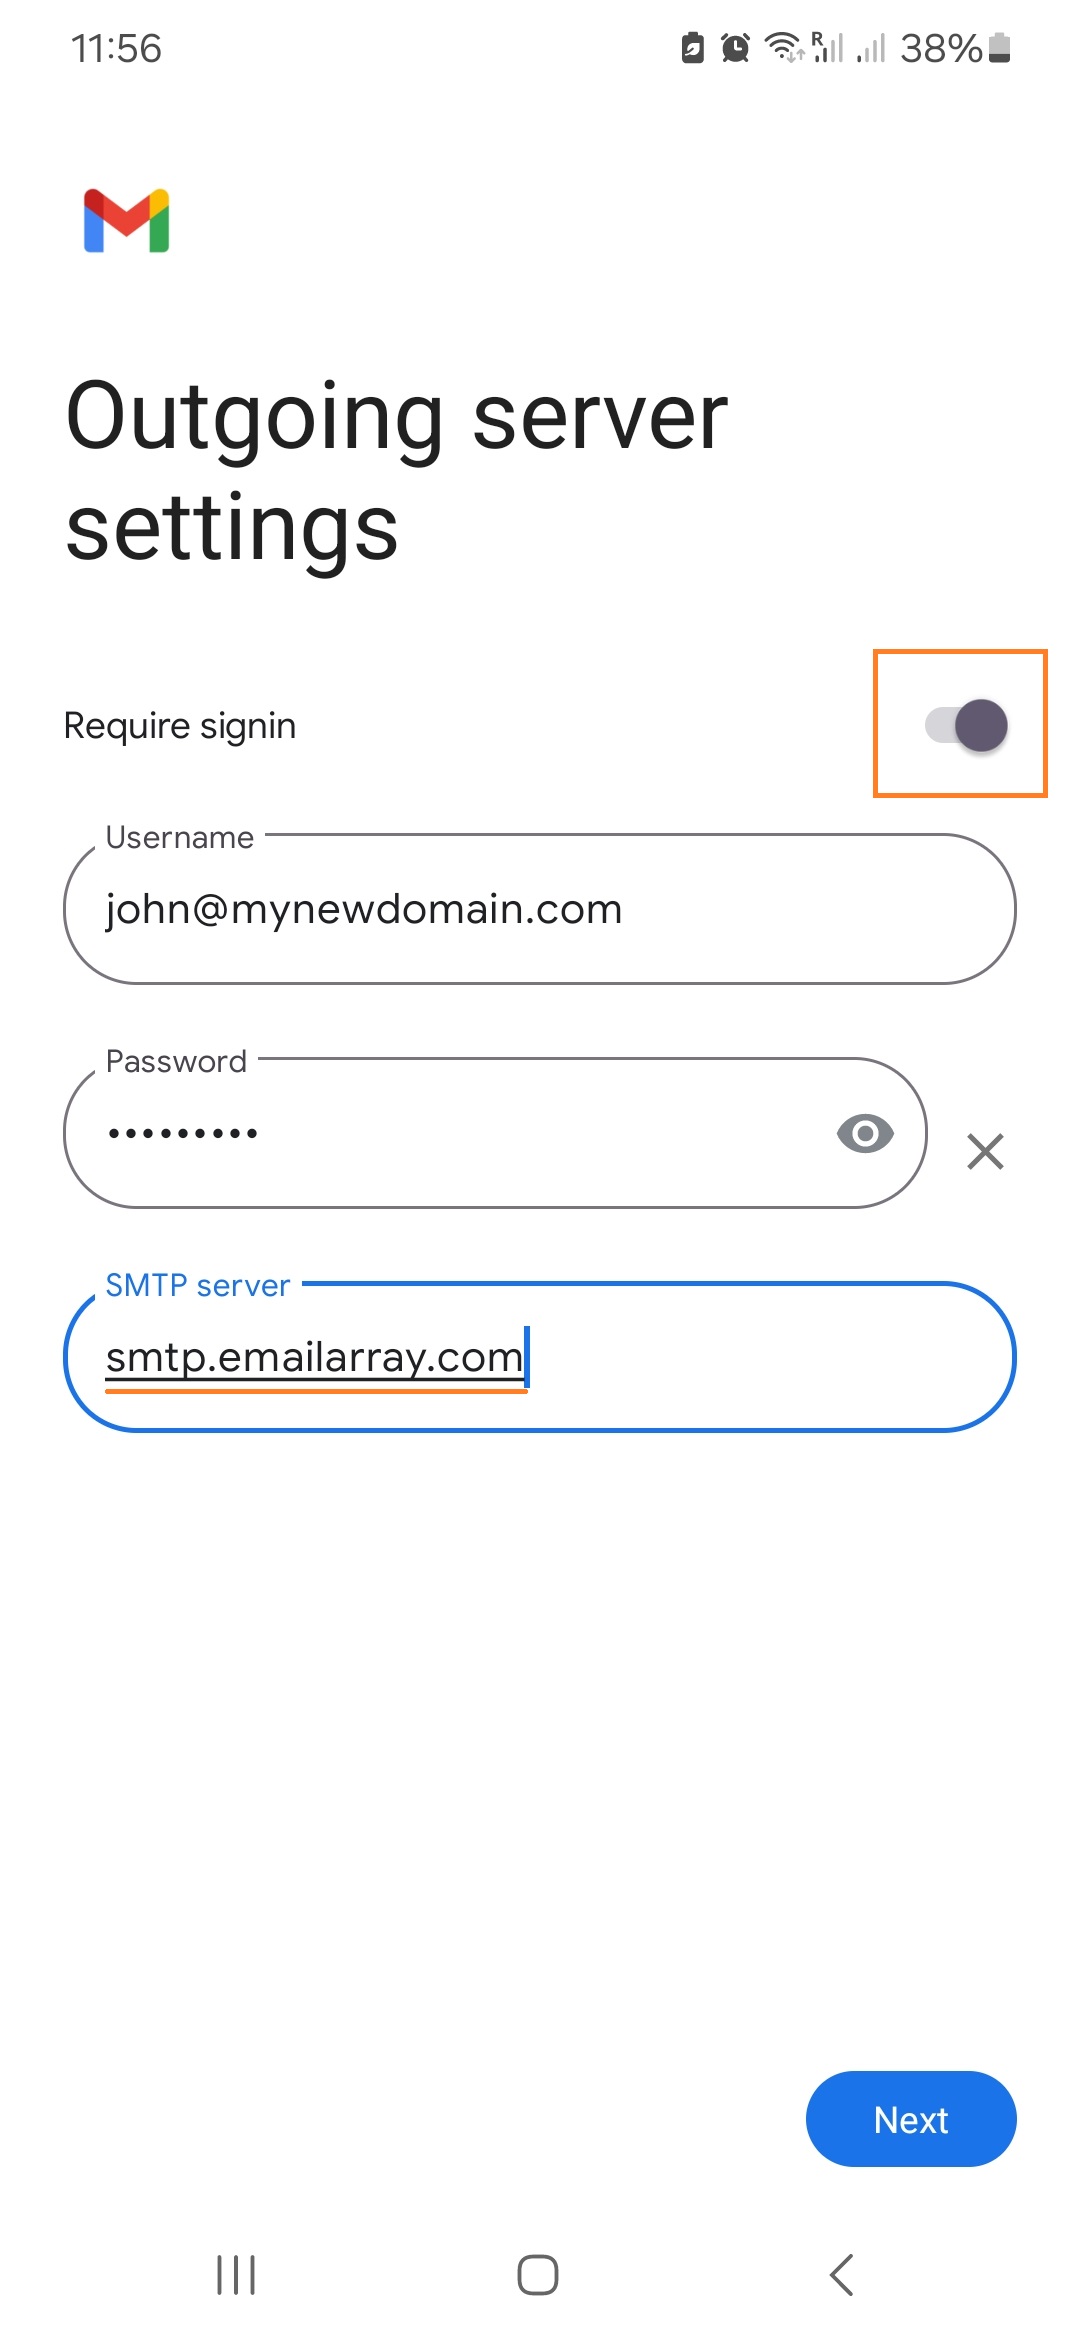
- Outgoing server settings
- Require signin: YES
- Username: your full email address
- Password: your email's password
- SMTP server:
smtp.emailarray.com. Android will automatically use yourdomain.com as host and you need to change it.
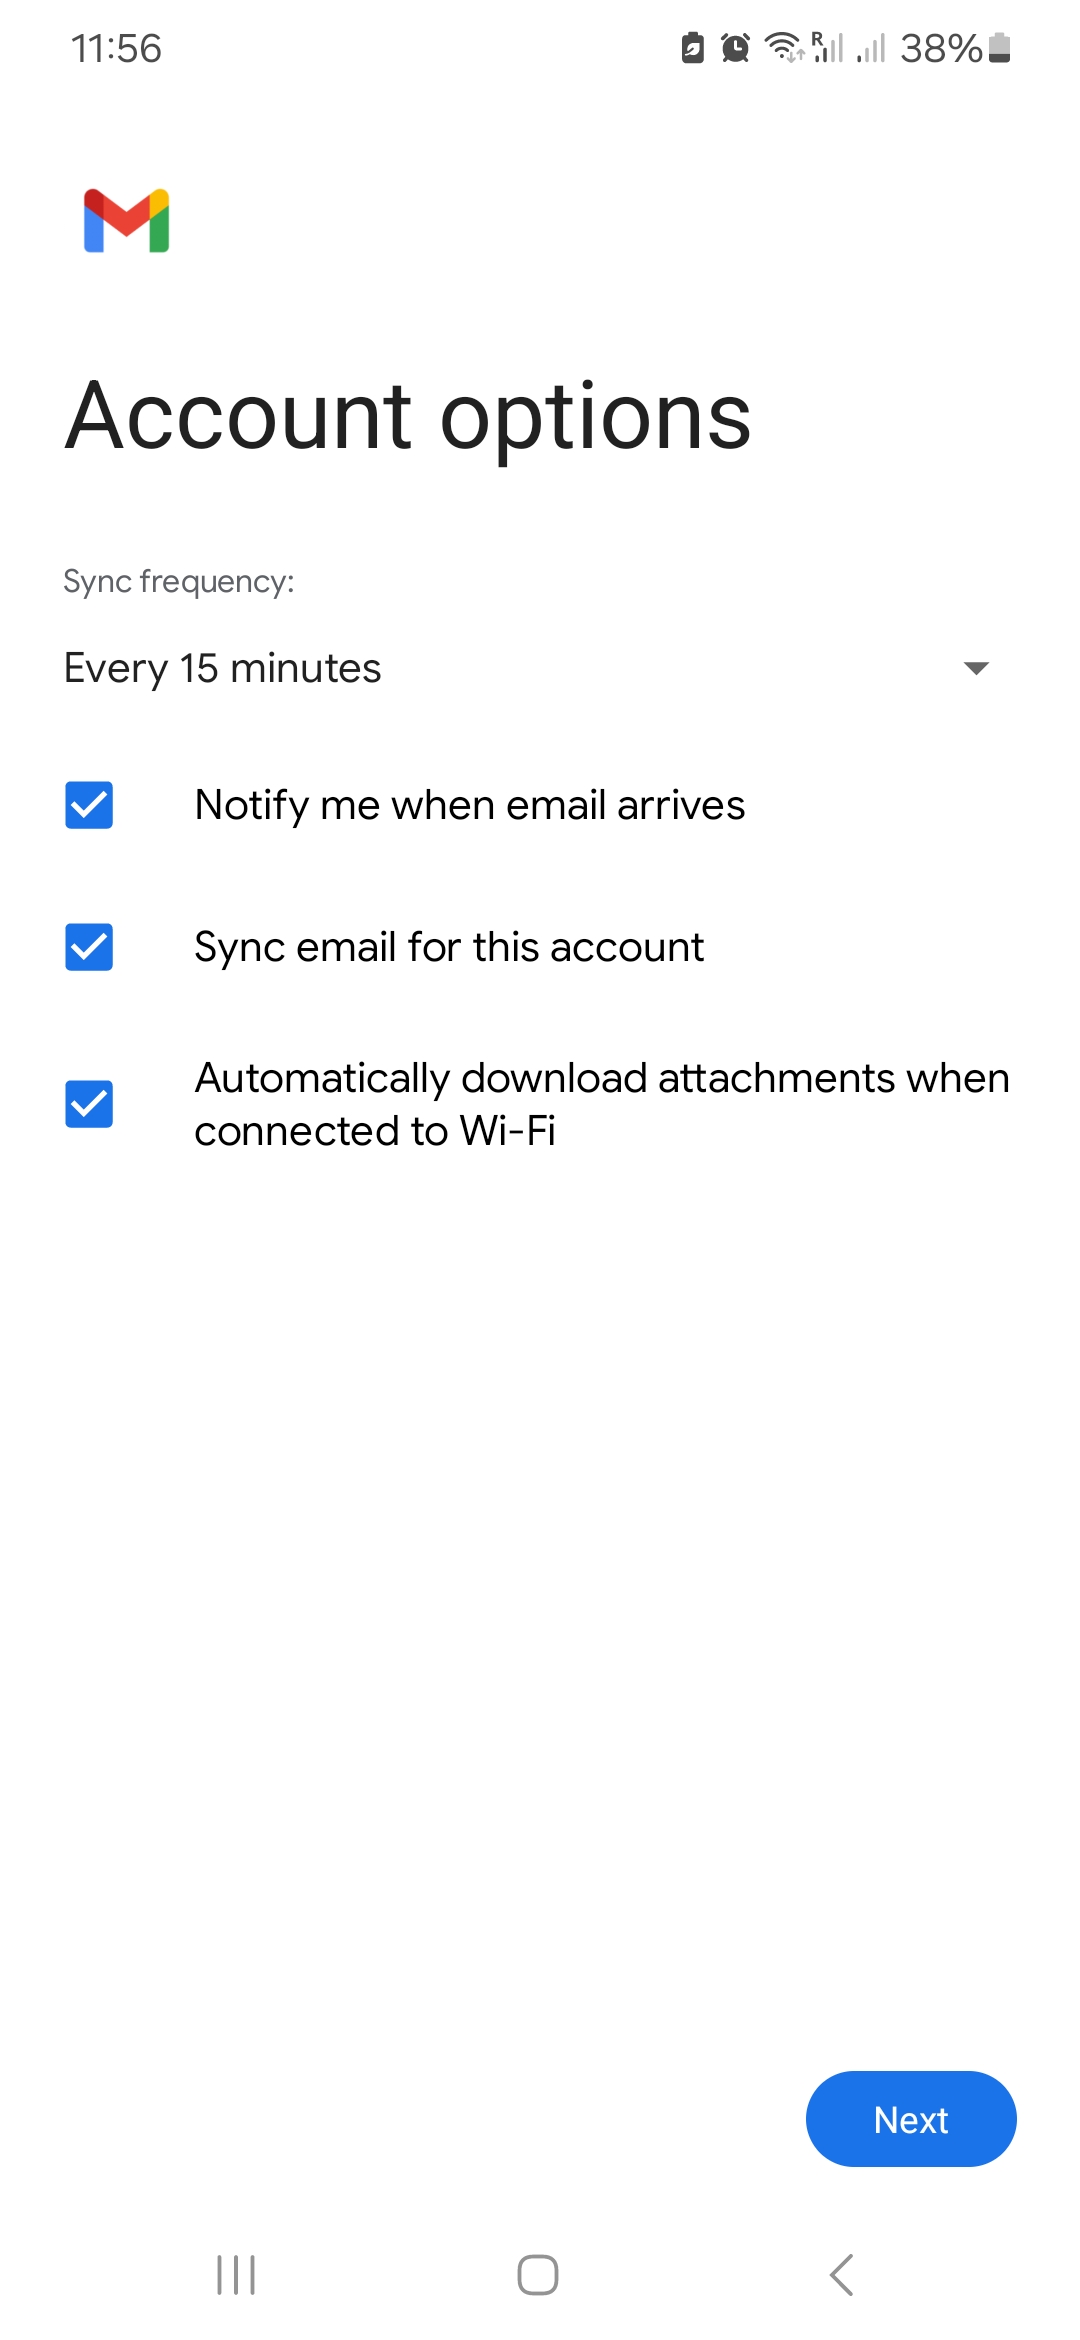
- Account options: Optionally, you can set up specific details such as interval for checking mail, if you want to be notified, etc.
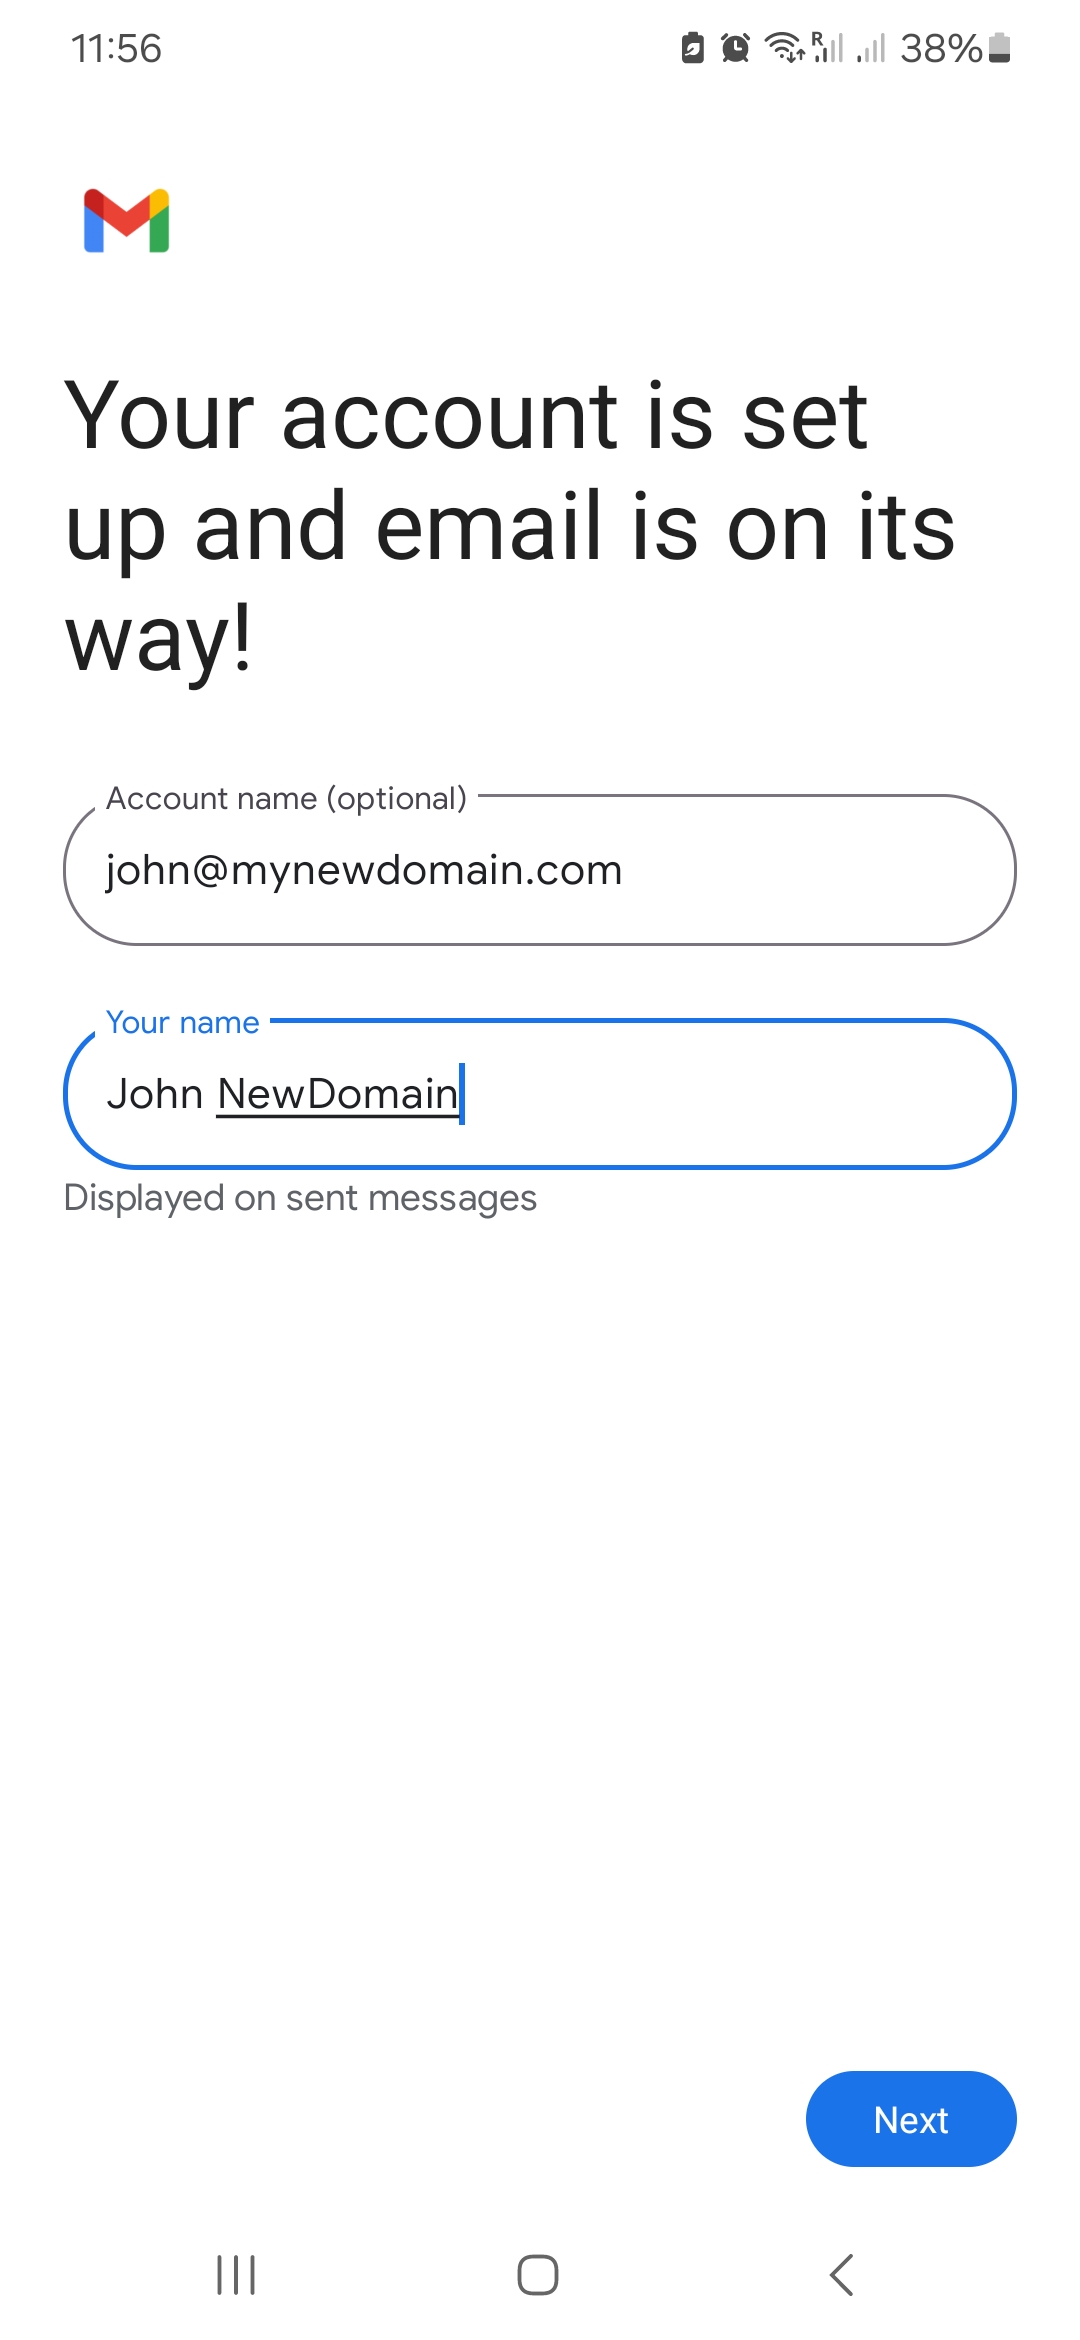
- On the last page, Android gives you the option to change the Account name (will appear in your list) and Your name (will appear to recipients).
- Click on Next to finalize the procedure.
| Note that IMAP is preferred over POP. If you want to set up the account as POP, you have to set it up manually. IMAP is a protocol made to support several devices accessing one same account, with all folders synced at our server, which also guarantees that our backups will be executed. |
Example Setup on Android Mail App